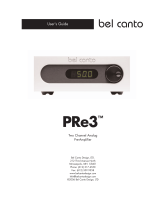
Bel Canto PRE2 User manual
- Category
- Audio amplifiers
- Type
- User manual
This manual is also suitable for

PRe2
™
PRe2P
™
Two Channel Analog
Pre-Amplifier
Bel Canto Design, LTD.
212 Third Avenue North
Minneapolis, MN 55401
Phone: (612) 317.4550
Fax: (612) 359.9358
www.belcantodesign.com
©2002-2004 Bel Canto Design, LTD
User's Guide

page 2© 2002-2004 bel canto design, Ltd. PRe2/P User’s Guide rev072004
Please take a moment to fill out your warranty regis-
tration sheet. Returning this registration validates
your warranty. This information will not be sold or
released outside Bel Canto. Your comments and sug-
gestions help us continue to improve upon our prod-
ucts and services.
Bel Canto products are automatically covered by a
90 day factory warranty. With no additional cost,
you have the option to extend your warranty by com-
pleting and returning the enclosed warranty registra-
tion form within 30 days of purchase, along with a
copy of the original sales receipt from an authorized
Bel Canto dealer. This will ensure prompt warranty
coverage. This warranty is only valid to the original
owner who has returned the warranty sheet along
with a copy of the original sales receipt, covering all
internal parts and workmanship. This warranty is
void if damage is due to abuse, neglect, or unautho-
rized modification. The cost associated with the
return of this unit is the sole responsibility of the
owner.
Bel Canto products are uniquely identified with a
serial number on the back panel of each unit. This
number is required to validate your warranty. Please
reference the serial number if service is required. If
you have any questions, comments, or if we can be
of service, please contact us Monday through Friday
9:00 a.m. - 5:00 p.m. CT/USA.
Warranty Information
TABLE OF CONTENTS
Unpacking . . . . . . . . . . . . . . . . . . . . . . . . . . . . . . . . . . . . . . . . . . . . . . . . . . . . 3
Power Connection . . . . . . . . . . . . . . . . . . . . . . . . . . . . . . . . . . . . . . . . . . . . . . 4
Initial Setup and Placement . . . . . . . . . . . . . . . . . . . . . . . . . . . . . . . . . . . . . . . . 4
Design Features . . . . . . . . . . . . . . . . . . . . . . . . . . . . . . . . . . . . . . . . . . . . . . . . 4
Conditioning . . . . . . . . . . . . . . . . . . . . . . . . . . . . . . . . . . . . . . . . . . . . . . . . . . .5
Front Panel & Remote Control . . . . . . . . . . . . . . . . . . . . . . . . . . . . . . . . . . . . . 5-7
Back Panel Configuration . . . . . . . . . . . . . . . . . . . . . . . . . . . . . . . . . . . . . . . . . .7
Setup and Options . . . . . . . . . . . . . . . . . . . . . . . . . . . . . . . . . . . . . . . . . . . . 8-10
Input Configuration . . . . . . . . . . . . . . . . . . . . . . . . . . . . . . . . . . . . . . . . . . . . . 8
Offset Configuration . . . . . . . . . . . . . . . . . . . . . . . . . . . . . . . . . . . . . . . . . . . . . 9
Specifications . . . . . . . . . . . . . . . . . . . . . . . . . . . . . . . . . . . . . . . . . . . . . . . . .10
Thank you for purchasing the Bel Canto Design PRe2. Your PRe2 is designed to maintain
very high value, setting the benchmark for design, quality and sonic performance while
maintaining our heritage of musicality and realism.
PRe2 & PRe2P
Two-Channel Analog
Pre-Amplifier
™

The power supply on the PRe2/P is pre-
set for the proper national voltage. The
power cable should have the correct
plug for your local power system. If you
believe this to not be true, please con-
tact your dealer immediately.
Warning!
Do not connect power to this
preamplifier yet!
This preamplifier, like any electrical com-
ponent, can be dangerous and cause
injury unless correct handling proce-
dures are observed and used. Before
powering this preamplifier it is neces-
sary to read and follow proper setup
and procedures.
page 3© 2002-2004 bel canto design, Ltd. PRe2/P User’s Guide rev072004
Unpacking your PRe2/P
Power Connection
PRe2/P box contents include the following:
1 (one) - PRe2/P Analog Preamplifier
1 (one) - PRe2/P User’s Guide
1 (one) - Power cord [6.6’ - 2 meters long]
1 (one) - Remote Control
1 (one) – Warranty Sheet
Carefully unpack each piece and check
for shipping damage. If there is any
damage, or if anything is missing,
please contact your dealer, distributor or
Bel Canto Design.
IMPORTANT: Save all packing
materials as the packing is spe-
cially designed to protect the unit during
transportation or shipping. If the packag-
ing becomes lost or damaged, please
contact your dealer, distributor or Bel
Canto before attempting to transport
your unit.

page 4© 2002-2004 bel canto design, Ltd. PRe2/P User’s Guide rev072004
Because the PRe2/P runs cool it can be
placed in many system locations without
compromise. We do not recommend
placing weights or other objects directly
on the PRe2/P. This may mar or scratch
the chassis finish. Do not use harsh
chemicals when cleaning the outside of
your PRe2/P.
Single Ended RCA and Balanced XLR
connectors are available. XLR jacks
allow balanced hookup using the stan-
dard North American pin configuration:
Pin 1 Ground
Pin 2 Input +
Pin 3 Input -
The Bel Canto PRe2/P represents a pow-
erful statement in high performance
audio control preamplifiers. Its superb
audio performance and transparency ren-
ders it a modern standard in control and
RIAA preamplifier design:
• All analog, low noise, low distortion
architecture for controlling up to seven
2-channel inputs including 1-balanced
input
• Fully balanced XLR outputs for optimum
interface to the power amplifier
• Programmable options for all inputs:
Function (stereo, disable), Name, Main
level, and Soft Mute level
• 4-layer PC board design for superior
signal routing, grounding and power
supply routing
• Latest generation of active audio
buffers, level controls and output drivers
provide superb measured and subjec-
tive audio quality
• Independent digital and analog trans-
formers and multi-stage power supplies
for precise power of sensitive analog cir-
cuitry
• Precision resistors and no capacitors in
the audio signal path
• Ultra low noise second stage regulation
for the analog amplifier sections
• Ultra-low noise active amplification for
RIAA Phono Stage (PRe2P)
• Front panel and remote selectable
Phono stage gain, resistive and capaci-
tive loading and Mono/Stereo opera-
tion (PRe2P)
• Digitally controlled analog
volume control for optimum signal archi-
tecture and no-compromise gain and
balance control
Placement and Initial Setup
Design Features
IMPORTANT: Make all connections before powering your unit.

page 5© 2002-2004 bel canto design, Ltd. PRe2/P User’s Guide rev072004
The PRe2/P’s sonic performance will
start to stabilize after 100 hours of con-
tinuous power up.
Volume Up:
Increases the output level in 0.5 Decibel
(dB) steps from 0 to 120.
Volume Down:
Decreases the output level.
Balance Left: (available from the
remote only)
Shifts balance left in 0.5dB steps. It is
also used to scroll left in the setup menu.
Conditioning
Front Panel and Remote Controls
HARD MUTES OUTPUT, DISABLES DISPLAY
VOLUME AND BALANCE CONTROLS
AND NAVIGATION FOR SETUP MENUS
TOGGLES DISPLAY ON/OFF
CYCLES THROUGH INPUTS
INPUT SELECTION
PRESS 7 TIMES TO
ACCESS SETUP MENUS
TOGGLES THROUGH
TAPE OUTPUT
SELECTION

page 6© 2002-2004 bel canto design, Ltd. PRe2/P User’s Guide rev072004
SOFT AND FULL MUTE
FUNCTIONS
PRESS ENTER AND HOLD TO ACCESS
SETUP MENU*
VOLUME CONTROL
AND UP/DOWN KEYS*
TAPE INPUT SELECT*
HARD MUTES OUTPUT, DISABLES
DISPLAY AND CONTROLS
MAIN INPUT SELECT*
*ALSO USED FOR NAVIGATING THE SETUP MENU
Balance Right: (available from the
remote only)
Shifts balance right in 0.5dB steps. It is
also used to scroll right in the setup
menu.
MUTE:
The PRe2/P starts up in Soft Mute. This
level is 40 units (20dB) below the dis-
played volume level. When MUTE is first
pressed it goes to the Soft state, pressing
MUTE again within 3 seconds will fully
MUTE the outputs.
ENTER:
This control button is pressed and held
on the front panel or pressed 7 times on
the remote to enter into the menu setting
functions described below. It is also used
to enter into specific modes within the
menu system.
MAIN:
Cycles through the main inputs. It is also
used to scroll to the left in the setup
menu.
LOOP: (available from the remote only)
This is used to cycle through the inputs.
INPUT:
On the remote the Numbered Buttons (1-
5) allow you to select between the 1st
five active inputs. From the remote, you
can cycle through inputs using the LOOP
button. From the front panel, you can
cycle through inputs by pressing the
MAIN button. When switching between
inputs, the PRe2/P will quickly ramp
down the volume, switch inputs, then
quickly ramp back up to the pro-
grammed volume setting.

page 7© 2002-2004 bel canto design, Ltd. PRe2/P User’s Guide rev072004
TAPE:
On both the remote and the front panel,
the TAPE button will cycle through the
input to be routed to the Tape Out jacks
and a Tape Out Off setting.
It is also used to scroll to the right in the
setup menu.
STANDBY:
When in STANDBY mode the red LED is
engaged, the display is off and the out-
puts are muted. The unit remains
warmed up and ready for use when
taken out of standby.
PRe2 Back Panel
PRe2P Back Panel

page 8© 2002-2004 bel canto design, Ltd. PRe2/P User’s Guide rev072004
PRe2/P MENU FUNCTIONS
A) INPUTS CONFIGURATION Menu
This menu is used to customize the input
options.
It is used to set:
1) Input Function
2) Input Name
3) Initial Volume level
4) Soft Mute level
1) The first level of this menu is used to set
the INPUT FUNCTION. The options are
Stereo or Disabled.
Change these settings by scrolling left or
right to the desired input and pressing
ENTER to change the setting. Use the
UP/DOWN keys to scroll through the set-
ting options. Disable unused inputs.
Press ENTER to exit this menu mode.
2) The second level of this menu is used
for changing the Name of a given input.
To change an input name press ENTER
and you will see an under-bar indicator
for each of the 8 characters that can be
used for naming the input. Scroll the indi-
cator left or right using the LEFT/RIGHT
keys and use the UP/DOWN keys to
scroll through capital and lower case let-
ter, numbers 0-9 and a SPACE.
You can use the SPACE to separate words
and numbers or to center short names like
CD. Press Enter to exit this menu mode.
3) The third menu level is used to set the
Initial Volume level.
Press ENTER and use the UP/DOWN
keys to set the default level when coming
out of STANDBY. Press ENTER to exit this
menu mode
.
4) The fourth menu level is used to set the
Soft Mute Level.
This is preset to -40 units or -20 dB. This is
generally a good soft mute level.
If you wish to change this for a given
input then press ENTER and use the
UP/DOWN keys to scroll to a different
setting.
Press Enter to exit this menu mode.
B) OFFSETS CONFIGURATION
Menu
This menu is used to set the 0dB gain
setting for the Pre2/P.
This is important for optimizing the gain
control range for systems with different
amplifier gain, input levels and loud-
speaker efficiencies.
For example: if you find that the volume
level is too loud even if the indicated vol-
ume is at or near 0 then you need to
increase the 0dB gain setting from the
default of 100 to 110, 120 or higher.
This will allow you to set the volume
level lower before reaching the 0 limit
on the display.
To change this setting, press ENTER and
use the UP/DOWN controls to set the
desired number.
Press ENTER to exit this menu mode.
PRe2/P Setup and Options

page 9© 2002-2004 bel canto design, Ltd. PRe2/P User’s Guide rev072004
C) SAVE CONFIG ? Menu
This is used to Save the Setup Changes
made in the menu system.
Be sure to use this to store the changes
when you are satisfied with your setup.
Use the UP/DOWN keys to toggle
between YES or NO and save the menu
settings.
Saving the settings will insure that your
changes are active even if power is
removed from the Pre2/P.
Press ENTER to save your configuration
and exit this menu mode.
D) ERASE CONFIG ? Menu
This is used to Restore the Factory
Default menu settings.
Use the UP/DOWN keys to toggle to
YES or NO.
Press ENTER to erase your configuration
and restore the factory settings.
Warning: This operation resets all of
your custom settings.
PRe2P Phono Stage Setup
A*) PRe2P Phono Configuration
Menu
This menu is used for setting up the
Phono Section of the PRe2P. It is the first
active menu only in the PRE2P and is not
used in the PRe2.
1) Mono/Stereo mode is set by pressing
ENTER and using the UP/DOWN button
to select the mode.
2) Resistive Input loading. This may be
adjusted by pressing ENTER and scroll-
ing through the loading options.
3) Capacitive Input loading may be set
the same way.
4) Gain is set between 40 dB at 1KHz
and 60 dB at 1 KHz. We suggest that
you use 60 dB for cartridges with out-
puts rated below 1-2 mV.
Press ENTER to exit each menu mode
and use the SAVE CONFIG ? menu to
save your setup.

page 10© 2002-2004 bel canto design, Ltd. PRe2/P User’s Guide rev072004
PRe2/P Line Stage Specifications:
Bandwidth • DC-200KHz
Volume setting for unity gain • 100 (factory default setting)
Signal to Noise Ratio @ 2 Volt RMS • >100 dB A weighted, 20Hz-20kHz
Distortion @ 2 Volt RMS/ 1kHz <0.003%
Input overload: 10 V RMS
Output Impedance: 50 Ohms
Input Impedance: 10K Ohms
Maximum Gain: 16dB
Maximum Output Level: 10 V RMS
PRe2P Phono Specifications:
Gain @1KHz • 40dB or 60 dB
Input Resistive Load • 47Kohms to 30 Ohms selectable in 16 steps
Input Capacitive Load • 150 pF to 950 pF selectable in 8 steps
RIAA Accuracy • +/-0.2 dB 20Hz to 20 KHz
Noise Ratio re: 5 mV in at 40 dB gain: >80dB A-weighted
Noise Ratio re: 0.5 mV in at 60 dB gain: >60dB A-weighted
Idle power draw • 21 Watts
Power Requirements • 110-120 VAC 50-60 Hz or 220-240 VAC 50-60 Hz
Dimensions • 17.5” W x 14.5” D x 4.5” H (445 mm x 368 mm x 114 mm)
Weight: 24lbs. (13 kg)
Specifications

page 11© 2002-2004 bel canto design, Ltd. PRe2/P User’s Guide rev072004

Bel Canto Design, LTD.
212 Third Avenue North
Minneapolis, MN 55401
Phone: (612) 317.4550
Fax: (612) 359.9358
www.belcantodesign.com
©2002-2004 Bel Canto Design, LTD
PRe2™ is a trademark of Bel Canto Design, LTD
-
 1
1
-
 2
2
-
 3
3
-
 4
4
-
 5
5
-
 6
6
-
 7
7
-
 8
8
-
 9
9
-
 10
10
-
 11
11
-
 12
12
Bel Canto PRE2 User manual
- Category
- Audio amplifiers
- Type
- User manual
- This manual is also suitable for
Ask a question and I''ll find the answer in the document
Finding information in a document is now easier with AI
Related papers
Other documents
-
Pro-Ject Audio Systems Phono Box RS Product information
-
 AAVIK C-300 User manual
-
Pro-Ject Audio Systems Phono Box DS+ Product information
-
Cyrus Pre2 DAC Owner's manual
-
Cyrus Pre2 DAC Qx Owner's manual
-
 AAVIK U-150 User manual
-
 Bel Canto Design PRe3TM User manual
-
Audiolab 8000CD User manual
-
Primare PRE35 DAC User guide
-
Audio Research Reference Phono 2 SE Owner's manual


