Page is loading ...

Note: The style of your item may vary from what is
pictured in the instruction sheet.
Remarque : Le modèle de votre article peut être
différent de celui qui est illustré dans le feuillet
d’instructions.
Note: El estilo de su artículo puede variar de la
ilustración en la hoja de instrucciones.
©2012 Simmons Juvenile Furniture, A Division of Children's Products, LLC
22893 - FEBRUARY 27, 2012
Lea todas las instrucciones antes de
ensamblar y usar. MANTENGA LAS
INSTRUCCIONES PARA SU USO FUTURO.
Lisez toutes les instructions avant l’assemblage et
l’utilisation. CONSERVEZ LES INSTRUCTIONS
POUR UN USAGE ULTERIEUR.
Read all instructions before assembly
and use. KEEP INSTRUCTIONS
FOR FUTURE USE.
Instrucciones de Ensamble
de su Cuna
Directives de Montage pour
votre Lit de Bébé
Assembly Instructions for
your Crib
ADULT ASSEMBLY
REQUIRED
Due to the presence of small parts during assembly,
keep out of reach of children until assembly is complete.
L’ASSEMBLAGE DOIT ETRE FAIT
PAR UN ADULTE
A cause de la presence de petites pieces, pendant l’assemblage gardez
hors de portee des enfants jusqu'a ce que celui-ci soit termine.
DEBE SER ENSAMBLADO
POR UN ADULTO
Debido a la presencia de piezas pequeñas durante el ensamblaje,
mantenga fuera del alcance de los niños hasta que complete el
ensamblaje.
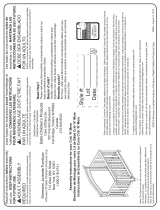
Style #:
Lot:
Date:
___________
___________
___________
Trademark is a registered trademark of
Children’s Products, LLC., New York, NY.
Customer Service:
Web Site: www.simmonskidsproducts.com
SIMMONS JUVENILE FURNITURE
A DIVISION OF CHILDREN’S PRODUCTS, LLC.
114 WEST 26TH STREET
NEW YORK, NY 10001
PHONE: 1-800-218-2741
TÉLÉPHONE: 1-800-218-2741
TELÉFONO: 1-800-218-2741
FAX: (920) 779-4216
Conforms to
ASTM F406-10b & F2710
Safety Standards
“Children's Products LLC is an authorized
licensee of Dreamwell, Ltd. a wholly-owned
subsidiary of Simmons Bedding Company.
SIMMONS KIDS® and the SIMMONS
S&GLOBE are registered trademarks of
Dreamwell, Ltd. ©2011 Dreamwell, Ltd.
All rights reserved”.
DISTRIBUTED IN CANADA/AU CANADA
LITTLE FOLKS
A DIVISION OF CHILDREN’S PRODUCTS, LLC.
CARE OF/SOINS DES:
501 FRANKLIN BOULEVARD
CAMBRIDGE, ONTARIO N1R8G9
1-800-218-2741

WARNING
Infants can suffocate
• In gaps between a mattress too small or too thick and side of crib.
• On soft bedding.
• NEVER add a mattress, pillow, comforter, or padding.
• Use ONLY the mattress provided by Simmons Kids Furniture
(which must be at least 37-1/4 inches (94.6cm) long by 23-3/8
inches (59.4 cm) wide and not more than 4 inches (10.2 cm) thick.
• Use a crib mattress that is no thicker than 10.2 cm and is of such a
size that, when it is pushed firmly against any side of the crib, it
does not leave a gap of more than 3 cm between the mattress and
any part of the sides of the crib.
•Never use plastic shipping bags or other plastic film as mattress
covers not sold and intended for that purpose. They can cause
suffocation.
Infants can suffocate if improperly fitted mattresses or improperly
fitted sheets are used. Use only Simmons Kids mattresses and
sheets.
To purchase properly fitting mattresses and sheets, call
1-800-218-2741, online at www.simmonskidsproducts.com or
contact your authorized Simmons Kids Furniture dealer.
• The crib, including side rails, must be fully erected prior to use.
Make sure latches are secured.
• DO NOT leave child in crib with side lowered. Be sure side is in
raised and locked position whenever child is in crib.
• Always provide the supervision necessary for the continued safety
of your child. When used for play, NEVER leave a child unattended.
•
Strings can cause strangulation! DO NOT place items with a string
around a child’s neck, such as hood strings or pacifier cords. DO
NOT suspend strings over a crib or attach strings to toys.
• To reduce the risk of SIDS,
pediatricians recommend healthy infants
be placed on their backs to sleep, unless otherwise advised by your
physician.
• DO NOT place this crib near a window or a patio door where a child
could reach the cord of a blind or curtain and be strangled.
• DO NOT use crib near objects that child could reach or pull into crib
and cause injury such as lamps, heaters, fireplaces, or ironing
boards.
• When child
is able to pull to a standing position, remove bumper
pads, large toys and other objects that could serve as steps for
climbing out.
• Discontinue use of crib when child is able to climb out or reaches
the height of 35 inches (90cm). The child should be placed in a
youth or regular bed.
• Replace teething rail if damaged, cracked, or loose.
•If refinishing, use a non-toxic finish specified for children’s products.
• DO NOT use a water mattress with this crib.
• To avoid injuries, do not allow children to climb or play on or under
the crib.
• Follow warnings on all products in a crib.
• Child can become entrapped and die when improvised netting or
covers are placed on top of product. Never add such items to confine
child in product.
WARNING
Failure to follow these warnings and the assembly instructions could
result in serious injury or death! Do not use this crib if you cannot
exactly follow the accompanying instructions.
WARNING
• Never use this product if there are any loose or missing fasteners,
loose joints, broken parts, or torn mesh/fabric. Check before assembly
and periodically during use. Contact Simmons Kids Furniture for
replacement parts. Never substitute parts.
• Choking hazard - Crib assembly hardware includes small parts. Keep
small parts away from children.
WARNING:
ANY MATTRESS USED IN
THIS CRIB MUST BE AT
LEAST 37-1/4 INCHES (94.6
CM) LONG BY 23-3/8
INCHES (59.1 CM) WIDE
AND WITH A THICKNESS
NOT EXCEEDING 4 INCHES
(10.2 CM) THICK.

THIS PAGE LISTS THE PARTS THAT ARE REQUIRED TO ASSEMBLE YOUR CRIB. PLEASE CONTACT CUSTOMER SERVICE AT 1-800-218-2741
BEFORE STARTING ASSEMBLY IF ANY PARTS ARE MISSING OR DAMAGED.
CETTE PAGE ÉNUMÈRE LES PIÈCES QUI SONT EXIGÉES POUR ASSEMBLER VOTRE HUCHE. SERVICE À LA CLIENTÈLE DE CONTACT À
1-800-218-2741 AVANT LA MISE EN MARCHE DE L'ASSEMBLÉE SI DES PIÈCES SONT ABSENTES OU ENDOMMAGÉES
ESTA PÁGINA ENUMERA LAS PIEZAS QUE SE REQUIEREN PARA MONTAR SU PESEBRE. POR FAVOR CONTACTO EL SERVICIO DE
ATENCIÓN AL CLIENTE EN 1-800-218-2741 ANTES DE ENCENDER A LA ASAMBLEA SI ALGUNAS PIEZAS SON QUE FALTA O DAÑADAS.
CRIB PARTS
PIÈCES DE LIT DE BÉBÉ
PIEZAS DE LA CUNA
#7 - (1) - Mattress
(1) - Matelas
(1) - Colchón
#3 - (2) - Side
(2) – Côté
(2) - Lado
#5 - (1) - Mattress Support Front Rail
(1) - Rail avant du support de matelas
(1) - Riel frontal de soporte para el colchón
#2 - (1) - Left End Assembly
(1) - Côté gauche de l’ensemble
(1) - Ensamblaje del extremo izquierdo
#4 - (1) - Mattress Support Back Rail
(1) - Rail arrière du support de matelas
(1) - Riel trasero de soporte para el colchón
#6 - (1) - Mattress Support Assembly
(1) - Support de matelas
(1) - Soporte del Colchón
#1 - (1) - Right End Assembly
(1) - Côté droit de l’ensemble
(1) - Ensamblaje del extremo derecho

#12 - (4) - 1/4-20 x 18mm Connector Nut
(4) - 1/4-20 X 18mm Écrou d'ancrage
(4) - Tuerca Conectora 1/4-20 X 18mm
#13 - (10) - 1/4-20 X 25mm Barrel Nuts
(10) - Manchons filetés 1/4-20 X 25mm
(10) - Tuerca Cilíndrica 1/4-20 X 25mm
#8 - (12) - 1/4-20 x 63mm Allen Head Bolt
(12) - Boulon Allen 1/4-20 x 63mm
(12) - Perno de Cabeza Allen de 1/4-20 x 63mm
#9 - (4) - 1/4-20 x 22mm Allen Head Bolt
(4) - Boulon Allen 1/4-20 x 22mm
(4) - Perno de Cabeza Allen de 1/4-20 x 22mm
#10 - (4) - 1/4-20 x 18mm Allen Head Bolt
(4) - Boulon Allen 1/4-20 x 18mm
(4) - Perno de Cabeza Allen de 1/4-20 x 18mm
#15 - (2) - Caster without Locking Brake
(2) - Roulette non blocable
(2) - Ruedita sin Freno de Bloqueo
#16 - (2) - Caster with Locking Brake
(2) - Roulette à blocage (avec levier de frein)
(2) - Ruedita con Freno de Bloqueo
#17 - (2) - 1/4-20 X 14mm Barrel Nuts
(2) - Manchons filetés 1/4-20 X 14mm
(2) - Tuerca Cilíndrica 1/4-20 X 14mm
M4 Ball End Allen Wrench (Provided)
Clé Allen M4 à tête sphérique (Fournie)
Llave Allen M4 con extremo circular (se Incluye)
Flat Head Screwdriver (Not Provided)
Tournevis à tête plate (Non prévu)
Destornillador de cabeza plana (No siempre)
TOOLS NEEDED FOR ASSEMBLY
OUTILS NÉCESSAIRES POUR L'ASSEMBLAGE
HERRAMIENTAS NECESARIAS PARA ENSAMBLAR
#11 - (4) - 10mm x 35mm Dowel
(4) - Goujon 10 mm x 35 mm
(4) - Tarugo de 10mm x 35mm
#14 - (2) - 4mm x 32mm Dowel
(2) - Goujon 4 mm x 32 mm
(2) - Tarugo de 4mm x 32mm

Note: Fasteners are shown full size
Remarque: Les dispositifs de fixation sont
Montrés en taille réelle
Nota: Los pernos se muestran en tamaño real
ÉT
P
STEP #2
APE N°2
ASO #2
The following tools and parts are required:
Outils et pièces nécessaires:
Se necesitan las siguientes
herramientas y piezas:
Part #5
Pièce No5
Pieza #5
M4 Ball End Allen Wrench (Provided)
Clé Allen M4 à tête sphérique (Fournie)
Llave Allen M4 con extremo circular (se Incluye)
Flat Head Screwdriver (Not Provided)
Tournevis à tête plate (Non prévu)
Destornillador de cabeza plana (No siempre)
Part #8
Pièce No8
Pieza #8
Part #17
Pièce No17
Pieza #17
#8 - (1) - 1/4-20 x 63mm Allen Head Bolt
(1) - Boulon Allen 1/4-20 x 63mm
(1) - Perno de Cabeza Allen de 1/4-20 x 63mm
From Step 1
De l’Etape 1
Del Paso 1
#17 - (1) - 1/4-20 X 14mm Barrel Nuts
(1) - Manchons filetés 1/4-20 X 14mm
(1) - Tuerca Cilíndrica 1/4-20 X 14mm
Part #14
Pièce No14
Pieza #14
From Step 1
De l’Etape 1
Del Paso 1
STEP #2
1. Attach mattress support front rail (Part #5) to crib
from Step #1 using (1) 1/4-20 x 63mm Bolt (Part #8), (1)
1/4-20 x 14mm Barrel Nut (Part #17), and (1) 4mm x
32mm Dowel (Part #14). Tighten bolt using Hex Wrench
Provided.
Note: Use a Flat head screw driver to help align the
barrel nut and bolt together.
#5 - (1) - Mattress Support Front Rail
(1) - Rail avant du support de matelas
(1) - Riel frontal de soporte para el colchón
#14 - (1) - 4mm x 32mm Dowel
(1) - Goujon 4 mm x 32 mm
(1) - Tarugo de 4mm x 32mm
ÉTAPE N°2
1. Fixer le rail avant du support de matelas (pièce N°5) au lit
de bébé monté lors de l’étape 1 à l'aide d' (1) boulon 1/4-20
x 63 mm (pièce N° 8), d’ (1) écrou à manchon 1/4 -20 x
14mm (pièce N°17) et d’ (1) goujon 4mm x 32mm (pièce
N°14). Serrer le boulon à l’aide de la clé hexagonale
fournie.
Remarque : Utiliser un tournevis à tête plate pour
aligner le boulon et l’écrou à manchon.
PASO #2
1. Fije el riel frontal de soporte para el colchón (Pieza #5) a
la cuna del Paso #1 utilizando (1) tarugo de 1/4-20 x 63mm
(Pieza #8), (1) mango de tuerca de 1/4-20 x 14mm (Pieza
#17) y (1) tarugo de 4mm x 32mm (Pieza #14). Apriete el
perno utilizando la llave hexagonal incluida.
Nota: Utilice un destornillador de cabeza plana para
alinear el mango de tuerca y el perno.

Note: Fasteners are shown full size
Remarque: Les dispositifs de fixation sont
Montrés en taille réelle
Nota: Los pernos se muestran en tamaño real
ÉT
P
STEP #4
APE N°4
ASO #4
The following tools and parts are required:
Outils et pièces nécessaires:
Se necesitan las siguientes
herramientas y piezas:
Part #8
Pièce No8
Pieza #8
M4 Ball End Allen Wrench (Provided)
Clé Allen M4 à tête sphérique (Fournie)
Llave Allen M4 con extremo circular (se Incluye)
Flat Head Screwdriver (Not Provided)
Tournevis à tête plate (Non prévu)
Destornillador de cabeza plana (No siempre)
From Step 3
De l’Etape 3
Del Paso 3
#13 - (4) - 1/4-20 X 25mm Barrel Nuts
(4) - Manchons filetés 1/4-20 X 25mm
(4) - Tuerca Cilíndrica 1/4-20 X 25mm
#8 - (4) - 1/4-20 x 63mm Allen Head Bolt
(4) - Boulon Allen 1/4-20 x 63mm
(4) - Perno de Cabeza Allen de 1/4-20 x 63mm
Part #3
Pièce No3
Pieza #3
Part #13
Pièce No13
Pieza #13
Part #13
Pièce No13
Pieza #13
Part #8
Pièce No8
Pieza #8
From Step 3
De l’Etape 3
Del Paso 3
LABELS
ÉTIQUETTES
ETIQUETAS
STEP #4
1. Attach Side (Part #3) to the front of the crib from Step
#3 using (4) 1/4-20 x 63mm Bolt (Part #8) and (1) 1/4-20
x 12mm Barrel Nut (Part #17). Tighten bolt using Hex
Wrench Provided. Be sure labels on side are to the
outside.
Note: Use a Flat head screw driver to help align the
barrel nut and bolt together.
#3 - (1) - Side
(1) – Côté
(1) - Lado
ÉTAPE N°4
1. Fixer le côté (pièce N°3) au lit de bébé tel que monté lors
de l’étape 3 à l'aide de (4) boulons 1/4-20 x 63 mm (pièce
N°8), d’ (1) écrou à manchon 1/4 -20 x 12mm (pièce N°17).
Serrer le boulon à l’aide de la clé hexagonale fournie.
S'assurer que les étiquettes latérales soient visibles de
l'extérieur.
Remarque : Utiliser un tournevis à tête plate pour aligner
le boulon et l’écrou à manchon.
PASO #4
1. Fije el costado (Pieza #3) al frente de la cuna del
Paso #3 utilizando (4) Pernos de 1/4-20 x 63mm (Pieza
#8) y (1) mango de tuerca de 1/4-20 x 12mm (Pieza
#17). Apriete el perno utilizando la llave hexagonal
incluida. Asegúrese de que las etiquetas del costado
estén hacia afuera.
Nota: Utilice un destornillador de cabeza plana para
alinear el mango de tuerca y el perno.

Note: Fasteners are shown full size
Remarque: Les dispositifs de fixation sont
Montrés en taille réelle
Nota: Los pernos se muestran en tamaño real
ÉT
P
STEP #5
APE N°5
ASO #5
The following tools and parts are required:
Outils et pièces nécessaires:
Se necesitan las siguientes
herramientas y piezas:
Part #9
Pièce No9
Pieza #9
M4 Ball End Allen Wrench (Provided)
Clé Allen M4 à tête sphérique (Fournie)
Llave Allen M4 con extremo circular (se Incluye)
From Step 4
De l’Etape 4
Del Paso 4
#6 - (1) - Mattress Support Assembly
(1) - Support de matelas
(1) - Soporte del Colchón
#9 - (4) - 1/4-20 x 22mm Allen Head Bolt
(4) - Boulon Allen 1/4-20 x 22mm
(4) - Perno de Cabeza Allen de 1/4-20 x 22mm
STEP #5
1. Attach Mattress Support Assembly (Part #6) to crib
from Step #4 using (4) 1/4-20 x 22mm Bolt (Part #9).
Tighten bolt using Hex Wrench Provided. Be sure
hinges are seated all the way down in the hinge pockets.
ÉTAPE N°5
1. Fixez l’ensemble support de matelas (pièce N°6) au
lit de bébé tel que monté lors de l’étape 4 à l’aide d' (1)
boulon 1 /4-20 x 22 mm (pièce N°9). Serrer le boulon à
l’aide de la clé hexagonale fournie. S’assurer que les
charnières soient bien enfoncées dans leurs cavités.
PASO #5
1. Fije el ensamblaje del soporte para el colchón (Pieza
#6) a la cuna del Paso #4 utilizando (4) Pernos de
1/4-20 x 22mm (Pieza #9). Apriete el perno utilizando la
llave hexagonal incluida. Asegúrese de que las
bisagras se asienten hasta abajo en sus espacios.

Note: Fasteners are shown full size
Remarque: Les dispositifs de fixation sont
Montrés en taille réelle
Nota: Los pernos se muestran en tamaño real
ÉT
P
STEP #6
APE N°6
ASO #6
The following tools and parts are required:
Outils et pièces nécessaires:
Se necesitan las siguientes
herramientas y piezas:
Part #8
Pièce No8
Pieza #8
M4 Ball End Allen Wrench (Provided)
Clé Allen M4 à tête sphérique (Fournie)
Llave Allen M4 con extremo circular (se Incluye)
Flat Head Screwdriver (Not Provided)
Tournevis à tête plate (Non prévu)
Destornillador de cabeza plana (No siempre)
#13 - (4) - 1/4-20 X 25mm Barrel Nuts
(4) - Manchons filetés 1/4-20 X 25mm
(4) - Tuerca Cilíndrica 1/4-20 X 25mm
#8 - (4) - 1/4-20 x 63mm Allen Head Bolt
(4) - Boulon Allen 1/4-20 x 63mm
(4) - Perno de Cabeza Allen de 1/4-20 x 63mm
From Step 5
De l’Etape 5
Del Paso 5
Part #13
Pièce No13
Pieza #13
Part #8
Pièce No8
Pieza #8
LABELS
ÉTIQUETTES
ETIQUETAS
STEP #6
1. Attach Side (Part #3) to the back side of crib from
Step #5 using (4) 1/4-20 x 63mm Bolt (Part #8) and (1)
1/4-20 x 12mm Barrel Nut (Part #17). Tighten bolt using
Hex Wrench Provided. Be sure labels on side are to the
outside.
Note: Use a Flat head screw driver to help align the
barrel nut and bolt together.
#3 - (1) - Side
(1) – Côté
(1) - Lado
ÉTAPE N°6
1. Fixer le côté (pièce N°3) au lit de bébé tel que monté
lors de l’étape 5 à l'aide de (4) boulons 1/4-20 x 63 mm
(pièce N° 8), d’ (1) écrou à manchon 1/4 -20 x 12mm
(pièce N°17). Serrer le boulon à l’aide de la clé
hexagonale fournie. S'assurer que les étiquettes
latérales soient visibles de l'extérieur.
Remarque : Utiliser un tournevis à tête plate pour
aligner le boulon et l’écrou à manchon.
PASO #6
1. Fije el costado (Pieza #3) a la parte posterior de la
cuna del Paso #5 utilizando (4) Pernos de 1/4-20 x
63mm (Pieza #8) y (1) mango de tuerca de 1/4-20 x
12mm (Pieza #17). Apriete el perno utilizando la llave
hexagonal incluida. Asegúrese de que las etiquetas del
costado estén hacia afuera.
Nota: Utilice un destornillador de cabeza plana para
alinear el mango de tuerca y el perno.

Note: Fasteners are shown full size
Remarque: Les dispositifs de fixation sont
Montrés en taille réelle
Nota: Los pernos se muestran en tamaño real
ÉT
P
STEP #7
APE N°7
ASO #7
The following tools and parts are required:
Outils et pièces nécessaires:
Se necesitan las siguientes
herramientas y piezas:
M4 Ball End Allen Wrench (Provided)
Clé Allen M4 à tête sphérique (Fournie)
Llave Allen M4 con extremo circular (se Incluye)
#12 - (4) - 1/4-20 x 18mm Connector Nut
(4) - 1/4-20 X 18mm Écrou d'ancrage
(4) - Tuerca Conectora 1/4-20 X 18mm
#10 - (4) - 1/4-20 x 18mm Allen Head Bolt
(4) - Boulon Allen 1/4-20 x 18mm
(4) - Perno de Cabeza Allen de 1/4-20 x 18mm
#15 - (2) - Caster without Locking Brake
(2) - Roulette non blocable
(2) - Ruedita sin Freno de Bloqueo
#16 - (2) - Caster with Locking Brake
(2) - Roulette à blocage (avec levier de frein)
(2) - Ruedita con Freno de Bloqueo
From Step 6
De l’Etape 6
Del Paso 6
Part #16
Pièce No16
Pieza #16
Part #10
Pièce No10
Pieza #10
Part #12
Pièce No12
Pieza #12
Part #15
Pièce No15
Pieza #15
Part #10
Pièce No10
Pieza #10
Part #12
Pièce No12
Pieza #12
STEP #7
1. Attach Caster with Locking Brake (Part #16) to the
front posts of crib from Step #6 using (2) 1/4-20 x 18mm
Bolt (Part #10) and (2) 1/4-20 x 18mm Connector Nut
(Part #12). Tighten using the hex wrenches provided.
2. Attach Caster without Locking Brake (Part #15) to the
back posts of crib from Step #6 using (2) 1/4-20 x 18mm
Bolt (Part #10) and (2) 1/4-20 x 18mm Connector Nut
(Part #12). Tighten using the hex wrenches provided.
ÉTAPE N°7
1. Fixer les roulettes équipées d’un frein d’immobilisation (pièce
N°16) aux poteaux avant du lit de bébé tel que monté lors de
l’étape 6 à l'aide de (2) boulons 1/4-20 x 18mm (pièce N° 10) et
de (2) écrous d’accouplement 1/4 -20 x 18mm (pièce N°12).
Serrer à l’aide des clés hexagonales fournies.
2. Fixer les roulettes équipées d’un frein d’immobilisation (pièce
N°15) aux poteaux arrière du lit de bébé tel que monté lors de
l’étape 6 à l'aide de (2) boulons 1/4-20 x 18mm (pièce N° 10) et
de (2) écrous d’accouplement 1/4 -20 x 18mm (pièce N°12).
Serrer à l’aide des clés hexagonales fournies.
PASO #7
1. Fije la ruedecilla con freno de bloqueo (Pieza #16) a las
patas frontales de la cuna del Paso #6 utilizando (2) Pernos de
1/4-20 x 18mm (Pieza #10) y (2) tuercas conectoras de 1/4-20 x
18mm (Pieza #12). Apriete utilizando las llaves hexagonales
incluidas.
2. Fije la ruedecilla sin freno de bloqueo (Pieza #15) a las patas
traseras de la cuna del Paso #6 utilizando (2) Pernos de 1/4-20
x 18mm (Pieza #10) y (2) tuercas conectoras de 1/4-20 x 18mm
(Pieza #12). Apriete utilizando las llaves hexagonales incluidas.

Note: Fasteners are shown full size
Remarque: Les dispositifs de fixation sont
Montrés en taille réelle
Nota: Los pernos se muestran en tamaño real
ÉT
P
STEP #8
APE N°8
ASO #8
The following tools and parts are required:
Outils et pièces nécessaires:
Se necesitan las siguientes
herramientas y piezas:
#7 - (1) - Mattress
(1) - Matelas
(1) - Colchón
From Step 7
De l’Etape 7
Del Paso 7
STEP #8
1. Insert Mattress into crib from Step #7.
ÉTAPE N°8
1. Installez le matelas dans le lit de bébé tel que monté
lors de l’étape 7.
PASO #8
1. Inserte el colchón en la cuna del Paso #7.
/