1
CFN-
T1 22GY
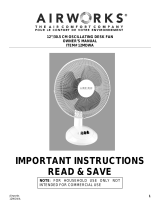
1 2" Tab le Fan

2
PLEASE READ AND SAVE THESE INSTRUCTION
Figure 1 illustrates parts of this fan. Upon removing fan from the package, checks to
make sure all parts are complete.
1. Attach fan
b
ase to fan
b
ody using 4 screws included.
2. Place fan
b
ase on firm stable surface such as a table o
r
counter top.
3. Discard the plastic sleeve from the shaft.
4. Secure the rear grille to the moto
r
housingwith the plastic nut. The handle should
be at the top. Turn clockwise to tighten.
5. Slide the
b
lade onto the shaft pin, pushingit on until it is firmlyin place.
6. Test
b
lade operation
by
rotating it with you
r
hand. There should
b
e no friction
with the other parts. If blade does not rotate freely, repeat steps 4-5.
7. Place
b
lade cap on shaft pin and turn counterclockwise until tight.
ASSEMBLY
Retaining
Pin
SPECIFICATIONS

3
8. Ensure latches on either side of the rear grille are open. Place front an
d
rea
r
grille
together and close the side latches. If they do not fit securely together, repeat the
procedure.
OPERATING INSTRUCTIONS
Place the fan on a safe flat surface where it cannot fall or be pulled by the cord. Plug
fan into a 220-240V 50-60Hz outlet and follow the operating instructions:
This fan is equipped with three fan speeds to allow for optimal air comfort.
0- Pressing this
b
utton will power the fan OFF.
1- Pressing this
b
utton will power the fan ON at LO
W
speed setting.
2- Pressing this
b
utton will power the fan ON at MODERATE spee
d
setting.
3- Pressing this
b
utton will power the fan ON at HIGH spee
d
setting.
This fan has two functions which will allow you to better customize your preferred
air comfort as well as improve the air circulation in the room:
OSCILLATION: To activate the oscillation function for widespread breeze distribution,
simply press the oscillation knob down (located on top of the fan’s motor house). To turn
off the oscillation function for a targeted breeze setting, pull the oscillation pin up.
Controlling the oscillation can be done while the fan is operating.
TILT: To tilt the fan head so that the breeze is targeted at an angle, steady the base of the
fan with one hand and grip the motor housing with another, carefully tilt the head of the
fan until it reaches the desired angle. Be careful as to not tilt the head back further than it
is intended to go, doing so will damage the unit.
CAUTION: TO PREVENT ELECTRICAL SHOCK, MATCH WIDE BLADE OF
PLUG TO WIDE SLOT, FULLY INSERT.
CLEANING INSTRUCTIONS
1. Always disconnect the cor
d
from the electrical outlet when cleaning you
r
fan.
2. Light accumulated dust may
b
e removed
by
usinga soft cloth to wipe awaythe dust
at the back grille of the fan.
3. Wipe the exterior surfaces of the fan occasionallywith a damp cloth (not dripping wet)
and dry thoroughly with a soft dry cloth before operating the fan.
4. Do not use harsh cleaners o
r
materials to clean this unit, doingso will cause damages
to it.
OPERATING INSTRUCTIONS
CLEANING INSTRUCTIONS

4
1. Follow cleaninginstructions 1-4 above. Make sure to disassemble and clean fan
before storing.
2. Retain the original packaging to store you
r
fan.
3. Always store in a dry place.
4. Neve
r
store while still plugge
d
in.
5. Neve
r
wrap cor
d
tightly aroun
d
the fan o
r
put any stress on the cor
d
where it enters
the fan as it could cause the cord to fray or break.
This appliance is not intended for use by persons (including children) with reduced
physical, sensory or mental capabilities, or lack of experience and knowledge, unless they
have been given supervision or instruction concerning use of the appliance by a person
responsible for their safety.
Children should be supervised to ensure that they do not play with the appliance.
If the supply cord is damaged, it must be replaced by the manufacturer, its service
agent or similarly qualified persons in order to avoid a hazard.
T

0
/


