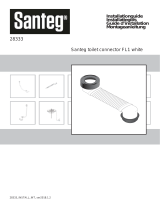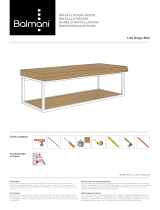
Installation guide Installatiegids Guide d’installation Montageanleitung
___________________________________________________________________ Disclaimer __________________________________________________________________
If you install the product in a way that differs from this manual, this will void all guarantees. Before installation check that the product meets all your requirements and is not damaged. By
proceeding with installation, you accept the condition of the product.
___________________________________________________________________ Disclaimer __________________________________________________________________
Indien u het product plaatst op een manier die afwijkt van deze handleiding, vervalt alle garantie. Controleer voor plaatsing of het product aan al uw eisen voldoet en niet beschadigd is.
Indien u overgaat tot plaatsing, aanvaardt u de staat waarin het product zich bevindt.
___________________________________________________________ Clause de non-responsabilité _________________________________________________________
Si vous installez le produit d’une manière différente de celle présentée dans ce manuel, toutes les garanties seront invalidées. Contrôlez avant le placement si le produit répond à toutes
vos exigences et n’est pas endommagé. En procédant au placement, vous acceptez l’état dans lequel se trouve le produit.
______________________________________________________________ Haftungsausschluss ______________________________________________________________
Wenn Sie das Produkt nicht genau nach den Angaben in dieser Montageanleitung einbauen, verfällt die Garantie. Überprüfen Sie vor dem Einbau des Produkts, ob sämtliche
Voraussetzungen erfüllt sind und das Produkt nicht beschädigt ist. Sobald Sie mit der Montage beginnen, sehen Sie, in welchem Zustand sich das Produkt befindet.
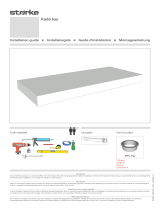
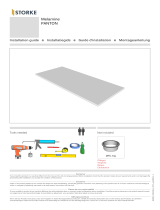
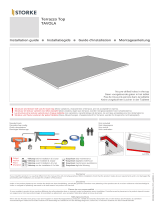
Wastafel - Lavabo - Washbasin - Washtisch
Single base - Double base
84543_INSTALL_INT_ver2020.1.2
Tools needed
IMPORTANT

Installation
Installatie
installation
Installation
check !
3
4
1 2
Protect against damage.
Beschermen tegen beschadiging.
Protéger contre les dommages.
Zum schutz vor Beschädigungen.
(not included)
(niet inbegrepen)
(non inclus)
(nicht enthalten)
Check for damage before starting installation.
Controleer op schade vóór montage.
Contrôler si le produit n’est pas endommagé avant montage.
Prüfen sie das produkt auf Beschädigungen
vor der installation.

Installation
Installatie
installation
Installation
56
60 Ø 35
Center basin
Center waskom
Centre du lavabo
Mittel von Waschbecken
Ø 35
Center basin
Center waskom
Centre du lavabo
Mittel von Waschbecken
Ø 35 Ø 35
Center basin
Center waskom
Centre du lavabo
Mittel von Waschbecken
60 Ø 35
X = 1/4 Y
Ø 35
X
Y
Drill the faucet hole - Kraangat boren - Percer le trou de robinet - Bohren Sie das Loch für den wasserhahn
Number wash basins = number taps - Aantal kranen = aantal waskommen - Nombres de lavabo = nombre de robinets
- Anzahl Washbecken = Anzahl Wasserhähne
1 wash basin / 2 taps - 1 waskom / 2 kranen - 1 lavabo / 2 robinets - 1 Waschbecken /2 Wasserhähne
EN Drill the faucet holes with appropriate tools. Under no circumstance use the hammer function of the drill.
For details, see the manual of the tool.
NL Boor de kraangaten met aangepast gereedschap. Gebruik onder geen beding de klopboorstand van de
boormachine. Raadpleeg de handleiding van het gereedschap voor details.
FR Percez les trous de robinet avec des outils sur mesure. N’utilisez en aucun cas la fonction à impulsions de
la perceuse. Pour plus de détails, reportez-vous au manuel de l’outil.
DE Bohren Sie die Löcher für die Armatur mit einem geeigneten Bohraufsatz. Verwenden Sie jedoch auf
keinen Fall die Schlagbohrfunktion! Einzelheiten zur Verwendung finden Sie in der Anleitung der Bohrmaschine.

Installation
Installatie
installation
Installation
15A16A
10A11A
12A
14A
+/- 3 mm
+/- 3 mm
It is important to use an acid-
free silicone to avoid stains
Het is belangrijk om een zu-
urvrije silicone te gebruiken om
vlekken te vermijden
Il est important d’utiliser un
silicone sans acide pour éviter
les taches
Es ist wichtig, ein säurefreies
Silikon zu verwenden, um
Flecken zu vermeiden
EN
NL
FR
DU
7A
9A
8A
13A

Installation
Installatie
installation
Installation
Please refer to the manuals of the top, washbasin, faucet
and siphon for further steps in the installation.
Raadpleeg de handleidingen van de tablet, waskom, kraan
en sifon voor verdere stappen in de installatie.
Veuillez vous référer aux manuels de la tablette, le lavabo,
robinet et siphon pour les autres étapes de l’installation.
Beachten Sie den Handbüchern zu Tablette, Waschbecken,
Wasserhahn und Siphon für weitere Schritte in der
Installation.
Check for leaks
Lektest
Teste de fuite
Dichtheitsprüfung
7B8B
14B15B
9B
13B
10B
11B
12B
Please refer to the manual of the
wall bracket,
Raadpleeg de handleiding van
de muurbeugel.
Veuillez vous référer au manuel
de support mural.
Beachten Sie den Handbüch zu
Wandhalterung.
It is important to use an acid-
free silicone to avoid stains
Het is belangrijk om een zu-
urvrije silicone te gebruiken om
vlekken te vermijden
Il est important d’utiliser un
silicone sans acide pour éviter
les taches
Es ist wichtig, ein säurefreies
Silikon zu verwenden, um
Flecken zu vermeiden
EN
NL
FR
DU
/


