SUNSLICE ESK350 User manual

Type
User manual

SUNSLICE ESK350 is a microinverter designed to convert direct current (DC) electricity produced by solar panels into alternating current (AC) electricity that can be used in homes or businesses. It is compatible with solar modules and can be installed on flat ground, walls, or fences. The ESK350 comes with a variety of mounting brackets and accessories to ensure a secure and stable installation. It features an intuitive LED indicator that displays the operating status of the device, making it easy to monitor its performance.

SUNSLICE ESK350 is a microinverter designed to convert direct current (DC) electricity produced by solar panels into alternating current (AC) electricity that can be used in homes or businesses. It is compatible with solar modules and can be installed on flat ground, walls, or fences. The ESK350 comes with a variety of mounting brackets and accessories to ensure a secure and stable installation. It features an intuitive LED indicator that displays the operating status of the device, making it easy to monitor its performance.

Quick Installation Guide
TSOL - ESK350/400 - U
Before the Installation
Check the products and accessories:
Microinverter * 1 pcs AC End Cable * 1 pcs Protection Cap * 1 pcs
Bracket A1 * 1 pcs
Bracket A2 * 1 pcs Bracket B * 2 pcs Bracket C1 * 1 pcs
Bracket C2 * 2 pcs
M8*12 Screw * 8 pcs
Spring Washer * 8 pcs M8*50 Screw * 6 pcs
M8*60 Screw * 1 pcs
Washer * 1 pcs
Nut * 1 pcs
Clevis * 2 pcs
(optional)
Wire Rope * 4 pcs
(optional)
Instructions for each part:
Microinverter M350 / M400
Bracket A1 / A2
Bracket B
Tips: The length screws
of bracket A1 are on
the different side than
the length screws of
bracket A2.
The numbers of the
length screws on the
bracket A1 are the
same as those on the
bracket A2.
Bracket C1 / C2
Tip: There are four clevis holes on the bracket C2.
Instructions of installation
Step 1: Adjust the length of Bracket A1 and A2
1) Take out the bracket A1 and put it beside the solar module. Unscrew the
length screw a and b. Adjust the length and make the distance of two module
fasteners longer than the solar module. Tighten the length screw a and b.
Tips: While unscrewing the length screw, DO NOT unscrew it excessively. This
may cause the drop out of length screw and affect the next installations.
2) Unscrew the length screw c and d of bracket A1 . Adjust the length and make
it the same length between the two parts of bracket A1. Then tighten the length
screw c and d.
3) Take out the bracket A2 and put it beside the bracket A1. Unscrew the length
screw c and d. Adjust the length and make it the same as the bracket A1. Tighten
the length screw c and d.
4) Unscrew the length screw a and b of bracket A2 . Adjust the length and make
it the same length between the two parts of bracket A2. Then tighten the length
screw a and b.
Step 2: Connect Bracket B to Bracket A1/A2
1) Take out Bracket B and screw accessories , connect bracket B to bracket
A1.
Tips: Make sure the length screws of bracket B are on the same side as the length
screws of bracket A.
Tips: DO NOT adjust the length screw e and f in this step.
Use the M8*12 screws and spring washers to fix the hinges of bracket A1 and B.
2) Repeat the previous step with bracket A2 and B.
Step 3: Connect Bracket C1/C2 to Bracket A1/A2/B
Take out Bracket C1/C2 and screws . Connect bracket C2 to bracket A1/A2
and connect Bracket C1 to bracket B.
Tips: Make sure the length screws of bracket A1/A2 are facing the outside.
Tips: While connecting bracket C2 to bracket A1/A2, use the outside mounting
holes as recommended.
Tips: If this ESK-U is used on the flat ground or walls, make the mounting holes
of bracket C2 in a vertical direction. If this ESK-U is used on the fences, make the
mounting holes of bracket C2 in a horizontal direction.
Step 4: Fix the microinverter to the bracket
Take out Microinverter and screw accessories , fix the microinverter to
microinverter mounting hole of bracket A1.
Tips: Make the light of microinverter and the screw in the downside direction.
Tips: There are three microinverter mounting holes on the bracket A1. The middle
hole is used for M350 and M400.
Step 5: Fix bracket to the right location
1) While install ESK-U on the flat ground, use ground nails to fix the bracket C2
or put weights (Brick, Stone, Sand bag etc.) on the bracket C2.
2) While install ESK-U on the wall, use expansion screws to fix the bracket C2 on
the wall.
3) While install ESK-U on the fences, take out clevis and install these two
clevises on the bracket C2.
Hang the bracket on the fences. Using the wire rope to fix the bracket to the fences
through the mounting holes.
Tips: If the ESK-U is hanged outside the balcony, solar module should be installed
and connected first before fix the bracket on the fences. The installation sequence
should be Step 6 → Step 7 → Step 8 → Step 5.
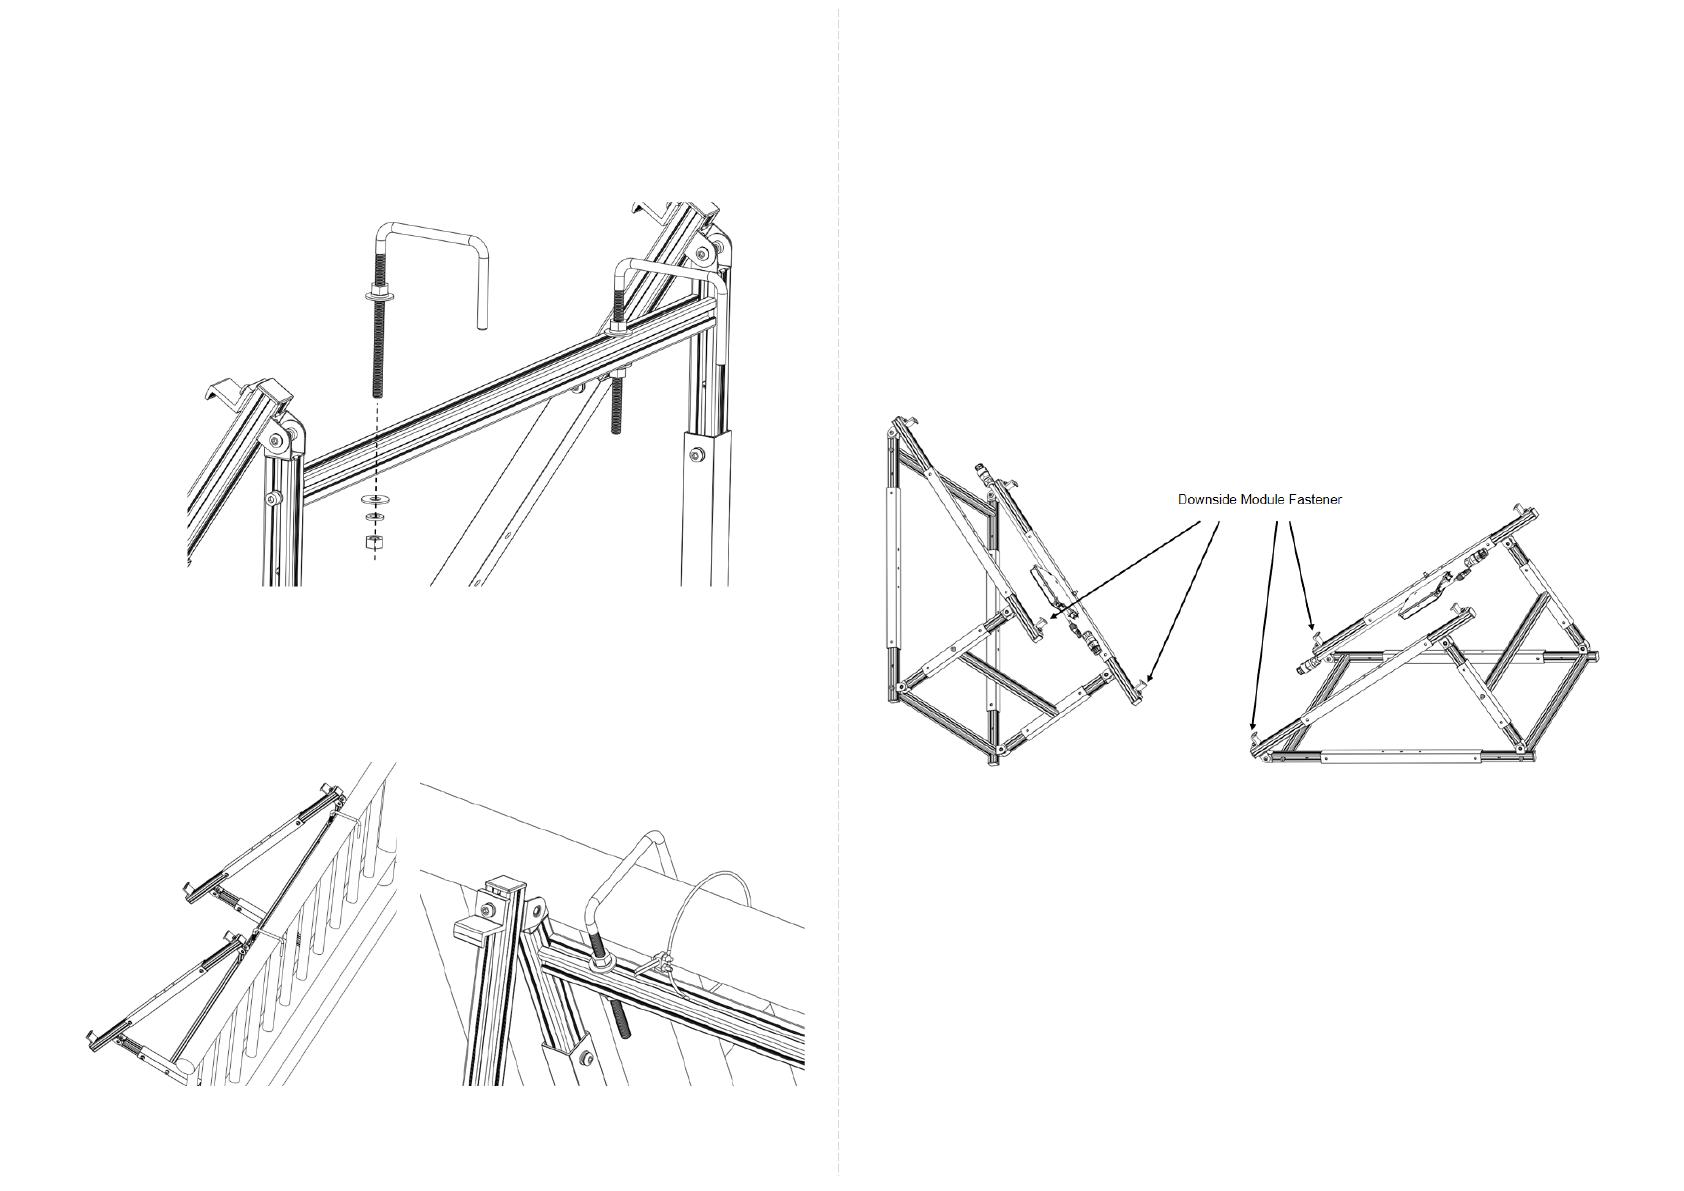
Step 6: Install the solar module
1) Unscrew two downside module fasteners on bracket A1 and A2.
Tips: While unscrewing the module fastener, DO NOT unscrew it excessively. This
may cause the drop out of module fastener and affect the next installations.
2) Put the solar module on the bracket.
3) Unscrew the upside module fasteners and adjust their positions. Tighten the
four module fasteners to fix the solar module on the bracket.
Step 7: Adjust the angle of the solar module
Unscrew the length screw e and f. Adjust the angle of solar module as needed.
Tighten the length screws.
Tips: DO NOT adjust length screw e and f at the same time.
Step 8: Connect the Microinverter
1) Connect the DC connector of the solar module to the microinverter.
2) Take out the protection cap and connect it to the short AC cable of
microinverter.
3) Take out the AC end cable and connect the AC connector to the long AC cable
of microinverter.
Step 9: Start the system
Insert the AC plug to socket and the system will start producing power a few
minutes later.
  • Page 1 1
  • Page 2 2
  • Page 3 3
  • Page 4 4
  • Page 5 5
  • Page 6 6
  • Page 7 7
  • Page 8 8
  • Page 9 9

SUNSLICE ESK350 User manual

Type
User manual

SUNSLICE ESK350 is a microinverter designed to convert direct current (DC) electricity produced by solar panels into alternating current (AC) electricity that can be used in homes or businesses. It is compatible with solar modules and can be installed on flat ground, walls, or fences. The ESK350 comes with a variety of mounting brackets and accessories to ensure a secure and stable installation. It features an intuitive LED indicator that displays the operating status of the device, making it easy to monitor its performance.

Ask a question and I''ll find the answer in the document

Finding information in a document is now easier with AI