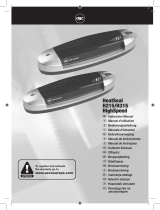
A4 Premium

Geha A4 Premium Owner's manual

  • Hello! I am an AI chatbot trained to assist you with the Geha A4 Premium Owner's manual. I’ve already reviewed the document and can help you find the information you need or explain it in simple terms. Just ask your questions, and providing more details will help me assist you more effectively!
Anleitung
Manual
LAMINATOR
A4 Premium
Manual_A4_Premium:Layout 1 21.07.10 16:01 Seite 1
www.geha.de
Manual_A4_Premium:Layout 1 21.07.10 16:01 Seite 2
3
D
GB
I
E
F
NL
UAE
RUS
S
GR
TR
RO
PL
CN
4
8
12
16
20
24
28
32
36
40
44
48
52
56
Wählen Sie Ihre Sprache.
Select your language.
Manual_A4_Premium:Layout 1 21.07.10 16:01 Seite 3
8
INTRODUCTION
Congratulations on purchasing this laminator. With it you can create a water and air-tight
seal to cover your favourite photos, letters, documents and other thin objects up to A4-size.
Please observe the information given in these operating instructions and keep them in a
safe place for future reference.
IMPORTANT SAFETY NOTES
1. Carefully read these operating instructions in full.
2. Be careful not to touch hot surfaces.
3. Never immerse the power cable, plug, etc. in water or any other liquids. Otherwise,
there is a risk of electric shock.
4. Be particularly careful if the device is used by children or if children are close by when
the machine is in use.
5. Unplug the device when it is not required and before cleaning it. Let the appliance cool
down before cleaning it.
6. Do not use the appliance if the power cable or plug are damaged, the appliance appears
to be malfunctioning or is damaged in any way.
7. There is a risk of injury if accessories not recommended or supplied by the
manufacturer are used.
8. Do not use the appliance outdoors.
9. Only use the appliance for the purpose for which it is intended.
10. Do not laminate anything that contains metal or conductive material.
11. The appliance should be connected as directly as possible to an easily accessible
socket.
12. Keep the power cable short to prevent an untidy cable from becoming a trip hazard.
If you use an extension lead, make sure that:
a) The electrical rated output given for the extension lead at least corresponds
to the rated output of the appliance.
b) The extension lead is not hanging over the side of the table or cabinet so that
people cannot pull on it or trip over it.
Manual_A4_Premium:Layout 1 21.07.10 16:01 Seite 8
9
CONSTRUCTION AND FUNCTION
1 ‘Ready’ light
2 ‘Power’ light
3 Limitless temperature selection (temperature switch)
4 ON/OFF switch
5 Insertion slot for laminating pouches
6 Anti-blocking system (ABS) lever
OPERATING THE LAMINATOR
- We advise against laminating photos you have developed yourself.
- Photos must be dry before being laminated.
- Do not laminate any thick or heavy documents as these might get stuck in the laminator.
- The laminator permanently connects the laminating film with the item being laminated.
The laminating film cannot be removed later.
- We advise against laminating collector items which you might want to later remove
from the laminating film. It is not permitted to laminate coins and thicker objects with
this appliance.
Manual_A4_Premium:Layout 1 21.07.10 16:01 Seite 9
10
1. Select the desired setting using the temperature switch.
2. Switch on the appliance by pressing the ON/OFF switch.
3. a) If you have selected hot lamination (75–150 mic.), the device is operational
as soon as the green LED lights up. The laminator requires about 3–5 minutes
to warm up.
b) If you have selected cold lamination (Cold), the green ‘Ready’ LED lights up as
soon as the appliance has been switched on. If you want to cold-laminate when
the laminator is hot, turn the temperature switch to ‘Cold’ and wait about half
an hour until the appliance has cooled down.
4. Centre the item to be laminated inside the laminating pouch (thickness of 75–150 µm).
Make sure that the document or picture is as close as possible to the sealed edge.
The use of a carrier is not required for this laminator.
5. Guide the sealed edge of the laminating pouch into the middle of the insertion slot
keeping it as straight as possible.
6. Remove the laminated item from the back of the appliance after lamination.
7. Certain types of paper are not laminated uniformly and seem slightly dull or cloudy.
In such cases you can improve the quality of the lamination by putting the laminated
document through the laminator a second time.
8. If the item being laminated has jammed in the machine, push back the ABS lever
and pull the item out manually.
CLEANING AND CARE
- Keep you hands and the power cable away from hot parts during and after lamination.
Let the appliance completely cool down before cleaning it.
- Never immerse the appliance in water.
- Only use a soft cloth to clean the appliance.
- Never clean the appliance with abrasive powder, scrapers or wire combs.
- Never open the appliance yourself. Otherwise, there is a risk of fire and electric shock.
There are no parts in the appliance that can be maintained by the user. Repairs must
always be carried out by trained specialists.
Manual_A4_Premium:Layout 1 21.07.10 16:01 Seite 10
11
TECHNICAL DATA
Voltage: 220-240V, 50/60Hz
Current: 1,8 A
Power consumption: max. 400W
Film thickness: 75-150 micrometres
Max. document size: A4
Warm-up time: approx. 3–5 minutes
Lamination speed: approx. 350mm/min.
Max. document thickness: 0,6mm
Weight: 2,76 kg
Laminating rollers: 4
DISPOSAL
The symbol with the crossed-out rubbish bin means that electrical
appliances may not be disposed of in normal household waste.
Please take this appliance to an approved collection station for
environmentally friendly disposal.
GUARANTEE
Your appliance comes with a 24-month guarantee.
Make sure you keep the sales receipt and original packaging.
If you encounter any problems with your appliance, please contact your dealer.
Manual_A4_Premium:Layout 1 21.07.10 16:01 Seite 11
60
www.geha.de
08.2010 86096169 Irrtümer vorbehalten
Geha GmbH
Alte Heeresstraße 25 - 27
D-59929 Brilon
Germany
Manual_A4_Premium:Layout 1 21.07.10 16:02 Seite 60
/