Page is loading ...

1
EN
CONTENTS
Introduction .............................................................. 1
Product Overview .................................................... 2
Front View ........................................................... 2
Back View ........................................................... 2
LCD Display ........................................................ 3
Safety and Maintenance .......................................... 3
Safety Precautions .............................................. 3
Caring for this Product ........................................ 3
Getting Started ......................................................... 3
Unpacking the product ........................................ 3
Batteries .............................................................. 3
About the Radio Reception ..................................... 4
Checking Reception Status ................................ 4
Enabling / Disabling Radio Reception ................ 5
Backlight ................................................................... 5
Clock and Calendar ................................................. 5
Setting the Clock and Calendar .......................... 6
Alarm Function ......................................................... 7
Setting and Activating the Alarm ........................ 7
Snooze Function / Deactivating the Alarm ......... 8
Resetting the Unit .................................................... 8
Warnings ................................................................... 8
Caution ...................................................................... 9
Troubleshooting ..................................................... 10
Specifications ......................................................... 11
About Oregon Scientific ........................................ 11
EC-Declaration of Conformity ............................... 11
INTRODUCTION
Thank you for selecting the Oregon Scientific™ Desktop
Dual-band Radio Controlled Clock with Melody Alarm
and Backlight RM926 as your product of choice. This
device is designed to give you many years of reliable
service, including the following conveniences:
• Radio-controlled calendar clock*
• 2-minute dual polyphonic melody alarm with 8-minute
snooze function
• User-selectable month-day or day-month calendar
• Day-of-the-week selection in 5 languages
• State-of-the-art backlight technology
* Automatically synchronizes the current time and date
when it is brought within range of the DCF-77 radio signal
generated from Frankfurt, Germany (Continental Central
Europe) or MSF-60 radio signal from Rugby (the U.K.).
In addition to providing step-by-step instructions for this
product, this manual contains important safety and care
information. Read the manual thoroughly, and keep it in
a safe place in case you need to refer to it.
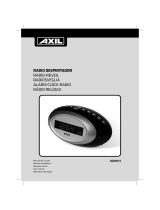
Desktop Dual-band Radio Controlled
Clock with Melody Alarm and Backlight
Model: RM926
User Manual
RM926(EN4) 2/3/05, 11:21 AM1

2
EN
PRODUCT OVERVIEW
FRONT VIEW
1. SNOOZE / LIGHT button
• Enables snooze function when alarms go off
• Quick exit from settings (MODE and ALARM)
• Activates LCD backlight for 5 seconds
2. LCD Display
3.
and buttons
•Increases or decreases the value of a clock or
alarm setting
• Activates or deactivates radio signal reception
4. ALARM ON/OFF
button
• Activates or deactivates alarms
1
2
3
4
5
6
1
2
3
5. MODE button
• Toggles display modes and confirms entry in clock
setting mode
6. ALARM button
•Displays and sets time for the 2 alarms
• Repeat daily alarm(s)
BACK VIEW
1. Battery compartment
• Accommodates two UM-4 or “AAA” size batteries
2. EU / UK switch
• Switch to receive DCR-77 radio signal (Europe) or
MSF-60 (U.K.)
3. RESET hole
• Resets unit by returning all settings to factory
default values
RM926(EN4) 2/3/05, 11:21 AM2

3
EN
LCD DISPLAY
1. Low battery indicator
2. Clock time
3. Radio reception signal indicator
4. Month-day / Day-month calendar
5. Time-zone offset
6. Dual alarms
SAFTY AND CARE INSTRUCTIONS
SAFTY PRECAUTIONS
Please observe the following safety precautions when
setting up and using this product.
• LCD panel – The LCD panel is made of glass and
may break if the unit is dropped or impacted.
• Heat sources – Keep the product away from heat
sources such as radiators, stoves, heaters, and other
heat-generating products.
•Water and moisture – Do not use the product in or
near water or in high moisture areas such as a
bathroom.
CARING FOR THIS PRODUCT
To ensure you receive the maximum benefits from using
this product, please observe the following guidelines.
•Cleaning –Use a damp cloth. Do not clean with liquid
cleaning agents, benzene, thinner, or aerosols.
• Repair – Do not attempt to repair the product or
modify the circuitry by yourself. Contact the retailer or
a qualified repairman if the product requires servicing.
Only use replacement parts that are recommended
by the manufacturer.
• Do not scratch hard objects against the LCD display
as this may cause damage.
GETTING STARTED
UNPACKING THE PRODUCT
When you unpack your radio-controlled clock, make
sure to keep all the packing materials in a safe place, in
case you need to later transport or return it for servicing.
BATTERIES
2 pieces of UM-4 or “AAA” batteries are supplied with the
product. To load the batteries:
1. Insert the batteries according to the + and – polarities
shown.
2. Press RESET.
1
5
6
2
3
4
RM926(EN4) 2/3/05, 11:21 AM3

4
EN
After installing the batteries, the full LCD display segment
will activate for about 1 second, and then show the clock,
date and reception signal indicator.
Replace the batteries whenever the low battery icon
is displayed, when the LCD is dim or does not illuminate
when the power is on. Replace both batteries at the
same time – it is dangerous to mix old and new batteries.
NOTE It is recommended that alkaline batteries be used
for this product to improve the functionality of this product
and extend battery life.
NOTE Contact your local waste disposal authority for
instructions on how to dispose of used batteries. Used
batteries can be harmful to the environment, and should
not be thrown out with household trash.
ABOUT RADIO RECEPTION
The product is designed to automatically synchronize its
calendar clock once it is brought within range of the
DCF77 radio signal from Frankfurt, Germany (Continental
Europe) or MSF-60 from Rugby, England (U.K.).
Pull down the battery compartment cover and slide the
EU / UK switch to the appropriate area that you wish the
unit to receive the radio signal.
Upon battery installation, the RM926 will start scanning
for a radio signal.
will blink according to the quality of
the signal received. Generally, complete reception
generally takes about 2 to 10 minutes, depending on the
strength of the radio signal. The clock automatically
searches for a radio signal at 1:00, 2:00, 3:00, 9:00,
15:00 and 21:00 daily.
CHECKING RECEPTION STATUS
When reception is complete,
will stop blinking. The
strength of the reception for the last full hour will be
indicated. If the unit has successfully received a radio
signal, the time and date will automatically adjust to the
current time and date.
If reception is not successful, you will need to set the
clock manually. Initiating a search can be done at any
time. To initiate a search, press and hold
for about 3
seconds. When the RM926 is within range, its radio-
control mechanism will override all manual settings.
RM926(EN4) 2/3/05, 11:21 AM4

5
EN
ENABLING / DISABLING RADIO RECEPTION
If you wish to deactivate reception for reasons such as
traveling outside the reception area (e.g. Asia, Africa or
Americas), you may disable the reception. Subsequently,
on return, you can enable it again.
1. To manually disable radio reception, press and hold
for more than 3 seconds until disappears.
2. To enable radio reception, press and hold
for more
than 3 seconds.
appears blinking and the unit will
search for the radio signal automatically.
BACKLIGHT
During normal clock display mode, press SNOOZE /
LIGHT to enable the unit’s backlight. The backlight is
turned on for 5 seconds and if any other buttons are
pressed during that time, it will remain on before
automatically turning off 5 seconds after the last button
is pressed.
CLOCK AND CALENDAR
The upper line of the unit’s LCD displays the clock hour
/ minutes / seconds, AM/PM (for 12-hour display), as well
as weekday, time-zone offset and language. The lower
line displays the radio reception signal, calendar (date-
month or month-date), and dual alarm 1 and alarm 2
times.
RADIO RECEPTION DESCRIPTION
Strong
Weak
No reception
No icon Radio reception is disabled
and no reception will be
initiated until it is enabled again
The unit displays different levels of reception that depends
on signal strength.
NOTE Providing that the radio frequency function is
active, the clock will automatically scan for a radio signal.
Reception can vary, and the clock may require several
scanning attempts before a signal is successfully
received.
NOTE Reception can be affected by a number of factors.
For best reception, place the device away from metal
objects and electrical appliances. Other causes for signal
interference include electrical transmission towers, steel
reinforced construction, and metal siding. Reception is
ideal when placed near a window.
RM926(EN4) 2/3/05, 11:21 AM5

6
EN
Press MODE to toggle between 3 clock displays:
Hour-Minute-Second (local time)
Day-Month (of local time)
Hour-Minute-Day of the Week (local time)
Day-Month (of local time)
Hour-Minute-Time zone offset
Day-Month (of local time)
SETTING THE CLOCK AND CALENDAR
Before you can manually set the clock and calendar, you
must specify the current time-zone you live in and the
time format (12- or 24-hour).
1. Press and hold MODE for 2 seconds to enter clock
setting mode. The time-zone offset hour digits will
blink. The default value of the offset hour is “00”.
When an offset hour has been set (e.g. +1), the time
displayed will be the radio clock time plus 1 hour.
2. Press
or to adjust the value (press and hold to
adjust in fast increments) and press MODE to confirm.
The next clock setting, 12- or 24-hour display format
will blink. Press
or and press MODE to confirm
selection.
3. Repeat step 2 to adjust the remaining settings in the
following order: Hour, Minute, Year, Month-day /
Day-month format, Month, Day and Day-of-the-week
language (English, German, French, Italian and
Spanish) respectively.
RM926(EN4) 2/3/05, 11:21 AM6

7
EN
HOW TO S
NOTE Time-zone hour offset can be adjusted +/- 23
hours. The Zone time is the current clock time based on
the radio reception signal, and local time is equal to the
Zone time plus the Hour Offset.
ALARM FUNCTION
The unit is equipped with dual 2-minute alarms and
with 8-minute snooze function. For each alarm you
may select from 5 polyphonic melodies (Circus, Carnival,
Turkish, Jazz and Entertainer) plus a beeping alarm.
SETTING AND ACTIVATING THE ALARM
1. From any clock display mode, press ALARM to view
the alarm time on the lower line of the LCD. The
Month-day / Day-month calendar mode changes to
alarm display mode. “– : – –“ appears to indicate that
no alarm time has been set.
2. Press
to show the alarm time “6:00” (default
setting) and
. Press and hold ALARM for 2
seconds until the alarm hour value blinks.
3. Use
or to adjust the each of the settings in the
following order: hour, minute, melody, and alarm
volume level (Lo / Hi), pressing ALARM each time to
confirm and go to the next setting.
RM926(EN4) 2/3/05, 11:21 AM7

8
EN
4. To set alarm 2, repeat steps 2-3.
5. Once alarm 1 and alarm 2 have been set,
and
both appear on the LCD. Press ALARM to
toggle between
and to view the alarm times
in clock display mode.
SNOOZE FUNCTION / DEACTIVATING THE
ALARM
1. When the alarm sounds (
or will blink), press
SNOOZE/LIGHT to stop the alarm and activate the
8-minute snooze function. The alarm will sound
again after 8 minutes.
2. Press and hold SNOOZE/LIGHT for 2 seconds or
press ALARM to mute the snooze function. The
alarm will automatically be set to sound again at the
same time after 24 hours. The snooze function can
also be disabled by entering any setting mode, if the
second alarm sounds, or pressing . In alarm display
mode, pressing activates / deactivates the alarm
function when the respective alarm 1 or alarm 2 is
selected.
RESETTING THE UNIT
You may need to occasionally reset the unit, for example,
if you are travelling to different time-zones, if fresh
batteries have been installed, or if the clock stops
responding. To reset the unit at any time, pull down the
battery compartment cover and insert a blunt stylus into
the RESET hole to reset all values to the unit’s original
factory settings.
WARNINGS
To ensure you use your product correctly and safely,
read these warnings and the entire user manual before
using the product. The warnings given here provide
important safety information and should be observed at
all times.
• Do not attempt to repair the product yourself. Contact
the retailer or our customer service department if it
requires servicing.
• Take precautions when handling all battery types.
They can cause injuries, burns, or property damage
as a result of contact with conducting materials, heat,
corrosive materials or explosives. Remove the
batteries before storing the product for long periods
of time.
• The product is a precision instrument. Never attempt
to take this device apart. There is a serious danger of
powerful electric shocks.
• Do not immerse the device in water.
RM926(EN4) 2/3/05, 11:21 AM8

9
EN
• Do not, under any circumstances, touch the exposed
electronic circuitry of the device as there is a danger
of electric shock should it become exposed.
• Take special care when handling a damaged LCD
display, as the liquid crystals can be harmful to your
health.
• Do not use or store the device in locations that may
adversely affect the product such as rain, snow,
desert, and magnetic fields.
• Do not use this device in aircrafts or hospitals. The
use of radio frequency products can cause
malfunctions in the control devices of other equipment.
• Do not subject the product to impact or shock.
• Check all major functions when the device is unused
for a long period of time. This is to ensure its full
operation. Maintain a regular internal testing and
cleaning of your device.
•When disposing of this product, do so in accordance
with your local waste disposal regulations.
CAUTION
• The contents of this manual is subject to change
without further notice.
• Due to printing limitations, the displays shown in this
manual may differ from the actual display.
•The manufacturer and its suppliers hold no
responsibility to you or any other person for any
damage expenses, lost profits, or any other claim
that may result in using this product.
• The contents of this manual may not be reproduced
without the permission of the manufacturer.
RM926(EN4) 2/3/05, 11:21 AM9

10
EN
TROUBLESHOOTING
Use this troubleshooting guide to help you remedy any difficulties you may be experiencing while using the product.
Should any problem persist after you have checked these symptoms, consult your nearest Oregon Scientific dealer.
PROBLEM SYMPTOM CHECK THIS REMEDY
Clock time not No radio signal Electromagnetic interference or Place the unit far away from PCs,
correctly set. reception. objects are barring reception. phones, and other electronic
Orientation or placement of unit is not equipment and near a windowsill.
optimum or out of range for receiving Wait for at least 24 hours.
radio signal.
No alarm. Alarm does Alarm is disabled. Turn on the alarm setting.
not sound.
LCD is dim or Battery may be
appears on the LCD. Install new batteries.
does not running low on
illuminate. power.
Operation not Certain functions Device requires reset. Reset the unit with a blunt stylus
normal. do not perform pressed against the RESET hole.
correctly.
RM926(EN4) 2/3/05, 11:21 AM10

11
EN
Radio reception DCF-77 radio signal from Frankfurt,
Germany (Continental Europe)
MSF-60 radio signal from Rugby,
England (U.K.).
Clock display 24-hour display with HH:MM:SS
(DCF-77 version)
12-hour AM/FM display with
HH:MM:SS (MSF-60 version)
Calendar DD/MM or MM/DD in 5 languages
(E, D, F, I, S)
Alarm 2-minute, dual alarm times
Size 107 x 85 x 47 mm (H x W x D)
Weight 161 g without battery
Power 2 pc. UM-4 (AAA) size batteries
SPECIFICATIONS
ABOUT OREGON SCIENTIFIC
Visit our website (www.oregonscientific.com) to learn
more about Oregon Scientific products such as digital
cameras; MP3 players; children's electronic learning
products and games; projection clocks; health and fitness
gear; weather stations; and digital and conference
phones. The website also includes contact information
for our customer care department in case you need to
reach us, as well as frequently asked questions and
customer downloads.
We hope you will find all the information you need on our
website. However if you're in the U.S. and would like to
contact the Oregon Scientific customer care department
directly, please visit:
www2.oregonscientific.com/service/
support OR call 949-608-2848. For international enquiries,
please visit
http://www2.oregonscientific.com/about/
international/default.asp.
EC-DECLARATION OF CONFORMITY
Hereby, Oregon Scientific, declares that this Desktop
Dual-band Radio Controlled Clock with Melody Alarm
and Backlight model RM926 is in compliance with the
essential requirements and other relevant provisions of
Directive 1999/5/EC. A copy of the signed and dated
Declaration of Conformity is available on request via our
Oregon Scientific Customer Service.
COUNTRIES RTTE APPROVAL COMPLIED
All EC countries, Switzerland and Norway
NCH
RM926(EN4) 2/3/05, 11:21 AM11
/