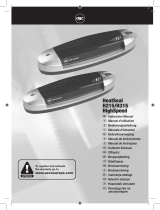
Olympia A 340 Combo Owner's manual

Category
Laminators
Type
Owner's manual

This manual is also suitable for

23
[ENGLISH]
06.2011

24
1 Important Safety Information .............................................................. 25
1.1 Safety information, laminator ................................................... 25
1.2 Safety information, trimmer ...................................................... 26
2 Exemption From Liability .................................................................... 27
3 Intended Use ...................................................................................... 27
4 Operating Elements............................................................................ 28
4.1 Function switch and indicator elements ................................... 29
4.2 Cutting head............................................................................. 29
5 Starting Up.......................................................................................... 30
6 Operation............................................................................................ 31
6.1 Laminator ................................................................................. 31
6.1.1 Hot laminating .............................................................. 31
6.1.2 Cold laminating ............................................................ 32
6.1.3 Clearing jammed lamination foil................................... 33
6.2 Trimmer .................................................................................... 34
6.2.1 Selecting the type of cut............................................... 34
6.2.2 Cutting material............................................................ 35
6.2.3 Changing the cutting head........................................... 36
7 Cleaning & Maintenance .................................................................... 37
7.1 Cleaning the exterior of the device........................................... 37
7.2 Cleaning the transport rollers................................................... 37
8 Troubleshooting.................................................................................. 38
9 Technical Data.................................................................................... 39
10 Disposal.............................................................................................. 40
11 Warranty ............................................................................................. 40

A 240 Combo / A 340 Combo
Laminator with Trimmer
Operating Instructions
25
1 Important Safety Information
Please observe the following to ensure the device is used safely and
functions reliably:
Ɣ Read this manual thoroughly and observe the instructions and
information in it when operating the device.
Ɣ Keep this operating manual in a safe place for future reference.
Ɣ Before starting to use the device, set it down on a level, stable working
base.
1.1 Safety information, laminator
Ɣ Prevent damage to the power plug and power cable. Never twist the
power cable. Do not operate the unit if the power cable or power plug is
damaged.
Ɣ Do not use the device in the vicinity of hot surfaces or in damp
environments and protect it from direct sunlight and dusty conditions.
Ɣ Disconnect the power plug before starting to clean the unit. Never use
any solvents or aggressive cleaning agents.
Ɣ Metallic objects cannot be laminated.
Ɣ Children must not be allowed in the vicinity of the device when it is
ready to operate.
Ɣ Disconnect the power plug when the device is not in use.
Ɣ Always switch the unit off immediately if it emits a strong smell or it is
not in operation.
Ɣ Never touch the power plug with wet hands.
Ɣ Ensure that the On/Off switch is in the OFF position before connecting
the laminator to the mains power supply.
Ɣ Only insert lamination foil intended for the device, refer to Chapter
“Technical Data”. Using lamination foil which is too large could lead to
the unit jamming.
Ɣ Do not laminate heat sensitive materials, such as thermal paper, in the
unit.
Ɣ Lamination of moist documents produces poor results.
Ɣ Do not use lamination foil intended for cold lamination for hot lamination.
This could damage the device, lamination foil and document.
Ɣ Never cut lamination foil to size. The resulting cut edges could cause
the lamination foil to jam.
Ɣ Keep loose clothing, ties, jewellery, long hair and other loose objects
away from the laminator infeed slot. Risk of injury!
Ɣ The unit may only be used in dry, indoor rooms.

26
1.2 Safety information, trimmer
Ɣ Do not take hold of the device near the cutting head when moving it or
packing it away. The blades in the cutting head are sharp. Risk of injury!
Ɣ Use both hands to operate the device.
Ɣ Keep loose clothing, ties, jewellery, long hair and other loose objects
away from the trimmer. Risk of injury!
Ɣ The device is only intended for cutting paper, card, photo paper and
lamination foil.
Ɣ Before cutting, remove any staples or paper clips from the document.
Ɣ The blades must be neither greased nor ground.
Ɣ Do not use the device if the cutting head or cutting head housing is
damaged.
Ɣ The device must not be used if the knife protection is not installed
properly.
Ɣ Be careful not to cut your fingers when replacing cutting head. Avoid
contact with the knife blades at all times.
Ɣ Keep the device out of the reach of children.
Ɣ Children and minors may only use the device under the supervision of
an adult.
Ɣ The device is not intended to cut fingernails.

27
2 Exemption From Liability
We cannot guarantee that the information which relates to the technical
properties of the product or to the product itself contained in this document is
correct. The product and, where applicable, its accessories, described in this
document are subject to constant improvement and further development.
For this reason, we reserve the right to modify components, accessories,
technical specifications and related documentation of the product described
herein at any time without notice.
3 Intended Use
This laminator with trimmer may only be used for:
Ɣ lamination using hot lamination foil and cold lamination foil with
lamination foil thicknesses of 80, 100 and 125 mic
6
, whereby the
total thickness of the document to be laminated (photos, pictures, cards,
paper, etc.) may be maximally 0.6 mm.
Ɣ cutting paper, card, photo paper and lamination foil with a maximum
size of A3, whereby the material to be cut must not be thicker than
Ɣ 3 sheets (80 g/m
2
) for a straight cut,
Ɣ 3 sheets (80 g/m
2
) for a wave cut,
Ɣ 3 sheets (80 g/m
2
) for a perforation cut.
Any other use is considered unintended use. Unauthorised modifications or
reconstructions are not permitted.
6
mic or micron = abbreviation of the word micrometer (m). 1 micrometer is one thousandth
of a millimetre. Examples: 80 m = 0.08 mm. 100 m = 0.1 mm. 125 m = 0.125 mm.

28
4 Operating Elements
1 Cutting head
2 Guide rail
3 Pressing rail with finger protection
4 Function switch (temperature control)
5 Indicator elements (LEDs)
6 Laminator infeed
7 Visual positioning aids in cm (lines, angles, scale)
8 ON / OFF switch
9 Anti-blocking slider (for clearing jams)
1
23
4
5
67
9
8
1
3
8
9
10
10
&
RUQHUURXQGHU
7KH
I
XQFWLRQ
I
RUURXQGLQJR
II
WKHFRUQHUVLVORFDWHGRQWKH
U
HYHUVHVLGHRIWKHGHYLFHV
29
4.1 Function switch and indicator elements
1
Function switch position
for lamination foil with a thickness of 100 or 125 mic
7
2
Function switch position
for lamination foil with a thickness of 60 or 80 mic
2
3
Function switch position
for cold lamination
4
POWER indicator
5
READY indicator
4.2 Cutting head
1
Setting lock
2
Rotating
knob to
set the type of cut
7
mic =
abbreviation of the wor
d micromete
r (
m). 1 micrometer is one thousandth of a
millimetre
.
1
2
3
4
5
2
1
1
3
1
3
30
5 Starting Up
Place the device on a stable, level surface.
Ensure that the On/Off switch is in the OFF position before connecting
the laminator to the mains power supply.
Attention: Check that the voltage specifications of the device
correspond to that of your power supply network (220 - 240 V, 50 Hz).
Insert the power plug in an easily accessible, standard
power socket.
The POWER indicator lights up blue.
Safety
note: The power socket must be in the immediate vicinity of
the device and easily accessible. Th
is
enables you to disconnect the
device from the power supply quickly in an emergency.
POWER
POWER
30
31
6 Operation
6.1 Laminator
The laminator can complete hot and cold lamination:
Ɣ In the case of hot lamination, the lamination foil is adhered together.
Ɣ In the case of cold lamination, the lamination foil is pressed together.
Select the lamination method according to the material to be laminated.
Note: Only cold lamination should be used for thermopaper and
ultrasonic images!
6.1.1 Hot laminating
Use the function switch, a sliding switch, to select the lamination foil
thickness you want to process and the laminator automatically activates the
temperature level associated with the corresponding thickness:
Ɣ 60 or 80 mic
8
Ɣ
100 or 125 mic
3
1. Set the function switch, located at the top of the device on the right-hand
side, to the lamination foil thickness being used. The laminator heats up
to the required temperature automatically. The READY indicator flashes
orange during the warm-up phase.
2.
The drive motor for the transport rollers starts up.
3. The correct operating temperature is reached after about 5 minutes and
the READY indicator lights up green.
4. Insert the document to be laminated in the lamination foil so that there is
a margin of approx. 3 - 5 mm to the edge of the foil on all sides.
Note: Only use hot lamination foil for hot laminating.
5. Guide the laminating foil containing the document to be laminated in the
laminator infeed with the closed side first. The laminating process occurs
automatically.
Note: To prevent the lamination foil from creasing, never feed the
open side of the lamination foil first in the laminator infeed. When
inserting the lamination foil, observe the instructions on the infeed slot.
8
mic or micron = abbreviation of the word micrometer (m). 1 micrometer is one thousandth
of a millimetre. Examples: 60 m = 0.06 mm. 80 m = 0.08 mm. 100 m = 0.1 mm. 125 m
= 0.125 mm.
1 Connect the power cable to an easily accessible, standard electrical
socket.
Caution: Check that the voltage specifications of the unit correspond
to that of your power supply network (220 - 240 V, 50 Hz).
2 Use the on/off switch on the right of the appliance to switch on:
"+27", the red display lamp shows.
3 The drive motor for the transport rollers starts up. The correct operating
temperature is reached after about 3-5 minutes and the green display
lamp shows.
4 Insert the document to be laminated in the pouches so that there is a
margin of approx. 3 - 5 mm to the edge of the foil on all sides.
Caution: Only use foil intended for hot laminating.
5 Insert the foil containing the document in the laminator's insertion slot.
Insert the ready closed side of the pouch first.
Note: To prevent the laminating foil from creasing, never insert the
open end of the foil pocket in the insertion slot of the laminator first. When
inserting the foil, observe the instructions on the insertion slot. The laminat-
ing process occurs automatically.
31
32
Caution: The lamination foil is very hot and soft when ejected
following lamination. Therefore, handle the laminated document with
due care!
Note: To flatten and smoothen the laminated product, place a book or
similar heavy, flat object on it.
6. When you have completed the laminating process, set the function
switch, located at the top of the device on the right-hand side, to COLD
and remove the power plug from the power socket. Let the device cool
down before packing it away, for example.
Caution: The device is very hot directly after laminating! Risk of
injury!
6.1.2 Cold laminating
Attention: If you have just finished using the laminator for hot
laminating, you must let the laminator cool down. It takes about 30
minutes to cool down sufficiently.
1. Set the function switch, located at the top of the device on the right-hand
side, to COLD.
Note: Only use cold lamination foil for cold laminating.
2. Remove the protective foil from the lamination foil.
3. Insert the document to be laminated in the lamination foil so that there is
a margin of approx. 3 - 5 mm to the edge of the foil on all sides.
4.
Guide the laminating foil containing the document to be laminated in the
laminator infeed with the closed side first. The laminating process occurs
automatically.
Note: To prevent the lamination foil from creasing, never feed the
open side of the lamination foil first in the laminator infeed. When
inserting the lamination foil, observe the instructions on the infeed slot.
:KHQ\RXKDYHFRPSOHWHGWKHODPLQDWLQJWXUQWKHIXQFWLRQVZLWFKWRWKH
ULJKWLQWKHCOLDSRVLWLRQDQGUHPRYHWKHPDLQVSOXJIURPWKHZDOOVRFNHW
/HWWKHGHYLFHFRROGRZQEHIRUHSDFNLQJLWDZD\IRUH[DPSOH
7XUQWKHIXQFWLRQVZLWFKWRWKHULJKWLQWKHCOLDSRVLWLRQ

33
6.1.3 Clearing jammed lamination foil
The device is equipped with an ABS switch (anti-blocking sliding switch) to
clear foil jams quickly.
Proceed as follows if the lamination foil jams:
1. Switch the device off: Set the On/Off switch to OFF.
2. Slide the ABS switch fully to the left.
3. Hold the laminator firmly and pull the lamination foil together with the
document to be laminated out of the laminator's infeed.
4. Slide the ABS switch fully to the right.
5. Clean the transport rollers of any deposits and residual adhesive by
inserting a folded piece of paper in the laminator infeed, refer to Chapter
"Cleaning the transport rollers".
Note: If foil jams occur repeatedly or jammed foil cannot be removed
from the laminator, please contact our hotline (refer to Guarantee).
33
34
6.2 Trimmer
The trimmer can be used to cut paper, card, photo paper and lamination foil
to size.
6.2.1 Selecting the type of cut
The trimmer is equipped to complete three types of cut:
Ɣ straight cut,
Ɣ wave cut,
Ɣ perforation cut.
Note: The blades are accommodated in protective housing.
Select the type of cut you require, see Fig. 1:
1. Pull the setting lock on the cutting head upwards to the OPEN position.
2. Turn the rotating knob for the cut until the symbol related to the required
cut is at the top.
3. Press the setting lock on the cutting head downwards to the LOCK
position.
Fig. 1
(similar to figure)

35
6.2.2 Cutting material
1. Place the device on a stable, level surface with the cutting head facing
up.
2. Slide the cutting head to one side of the guide rail
3. Slide the material to be cut under the transparent pressing rail at the
required position. Align a straight edge of the material with the
positioning aids (ruler, grid, degree angular scale).
Note: Observe the permissible quantity of material which may be cut,
refer to Chapter “Intended Use” or “Technical Data”.
4. Hold the material to be cut firmly with one hand so that it cannot slip
when cut. Otherwise, the cut may be inaccurate.
5. To complete the cut, press the cutting head down and slide it along the
guide rail to the other side, refer to Fig. 2.
Note: To prevent a faulty cutting edge, do not run the cutting head
back again but remove the cut material directly after completing the
cut.
Fig. 2
36
6.2.3 Changing the cutting head
When the blades in the cutting head are damaged or worn, the cutting head
must be replaced.
Note: Only the entire cutting head can be replaced. To obtain a new
cutting head, please telephone our hotline.
1. Turn the red rotating knob located at the end of the guide rail 90º
clockwise or counterclockwise and pull the guide rail
from the device.
2. Replace
the old cutting head with a new one
3. Slide the guide rail back in the device and turn the red rotating knob 90º
back clockwise or counterclockwise.
Fig. 3
37
7 Cleaning & Maintenance
7.1 Cleaning the exterior of the device
Attention: Before cleaning the device with a damp cloth, disconnect
the power plug!
Clean the housing using a cloth moistened with clean water with a little mild
soap applied.
Note: Never use solvents or aggressive cleaning agents.
7.2 Cleaning the transport rollers
Deposits and residual adhesive on the transport rollers can influence the
results of the laminating process. Therefore, clean the transport rollers at
regular intervals:
1. Set the function switch to 100/125 mic.
2. Wait until the READY indicator lights up continuously.
3. Insert a piece of folded paper in the laminator infeed.
4. Repeat the process with a new piece of paper until there are no more
deposits or residual adhesive to be seen on the paper.
'HSRVLWVDQGUHVLGXDODGKHVLYHRQWKHWUDQVSRUWUROOHUVFDQLQÀXHQFHWKH
UHVXOWVRIWKHODPLQDWLQJSURFHVV7KHUHIRUHWKHWUDQVSRUWUROOHUVPXVWEH
FOHDQHGSHULRGLFDOO\DIWHUXVH
7RGRWKLVLQVHUWDIROGHGSLHFHRISDSHULQWKHLQVHUWLRQVORW5HVLGXDO
DGKHVLYHLVUHPRYHGDQGWDNHQXSE\WKHSDSHUZKHQHMHFWHG5HSHDWWKH
SURFHVVVHYHUDOWLPHV
'LVFRQQHFWWKHSRZHUSOXJEHIRUHVWDUWLQJWRFOHDQWKHXQLWZLWKDGDPS
FORWK,IQHFHVVDU\WKHKRXVLQJFDQEHFOHDQHGXVLQJDFORWKPRLVWHQHG
ZLWKFOHDQZDWHUZLWKDOLWWOHPLOGVRDSDSSOLHG1HYHUXVHDQ\VROYHQWVRU
DJJUHVVLYHFOHDQLQJDJHQWV

38
8 Troubleshooting
Problem Diagnosis & Cause Solution
The power plug is not
plugged into the power
socket properly.
Connect the power plug in
the power socket properly.
The On/Off witch is set to
OFF.
Set the On/Off switch to ON.
POWER indicator
does not light up
The POWER indicator is
defective.
Contact our Hotline.
Laminated foil is
not completely
transparent
The laminating temperature
was too low.
Ensure that you allow the
device sufficient time to heat
up when using thicker
lamination foil.
Laminate the same foil again
to improve the lamination
result.
The lamination foil was
inserted askew in the
laminator infeed.
Foil jam
The lamination foil is too
large.
Refer to Chapter "Clearing
jammed lamination foil".
Refer to Chapter “Cleaning
the transport rollers”.
Insert the lamination foil in
the laminator infeed straight
and with the closed side first.
Only use lamination foil of the
specified sizes, refer to
Chapter "Technical Data".
The device no
longer works after
a longer period in
operation or stops
during operation
Is the surface of the device
hot? If so, the device's
overheating protection has
probably switched the
laminator off automatically.
Wait for approx. 30 minutes
and try to laminate again. If
the device does not work,
contact our Hotline.
The transport
rollers do not run
Is the power plug connected
to the power socket?
Is the On/Off switch is set to
ON?
If the problem continues,
contact our Hotline.
If the problem cannot be solved, contact our Hotline; refer to Chapter
“Guarantee”.
38
39
9 Technical Data
A 245 Combo
Hot and cold laminator
Maximum laminating width: 240 mm
For lamination foil
thicknesses:
60, 80, 100 and 125 mic
9
Laminating speed: 300 mm per minute
Warm-up phase: 5 minutes
Indicator elements:
POWER LED (blue)
READY LED (orange)
Lamination foils contained in
scope of delivery:
3 pieces A5
3 pieces A6
Special features: ABS switch (for clearing jams)
No blistering
Automatic shutdown on overheating
Trimmer
Special features: Reel trimmers with 3 selectable types of cut
and setting lock
Visual positioning aids in cm
(lines, angles, scale)
Selectable types of cut: Straight cut
Wave cut
Perforation cut
Maximum size: A4
Maximum cutting capacity: Straight cut: 5 sheets of paper, (80 g/m
2
)
Wave cut: 2 sheets of paper (80 g/m
2
)
Perforation: 2 sheets of paper (80 g/m
2
)
revlis-kcalB:ruoloC
Dimensions (W x D x H): 410 x 160 x 80 mm
gk13.1:thgieW
zH 05 ,V 032 :ylppus rewoP
Rated input power: Max. 265 W, 1.2 A
Conformity of the equipment to the EU directives is confirmed
by the CE symbol.
9
mic or micron = abbreviation of the word micrometer (
m). 1 micrometer is one thousandth
of a millimetre. Examples: 80
m = 0.08 mm. 100
m = 0.1 mm. 125
m = 0.125 mm.
obmoC 043 AobmoC 042 A
Hot and cold laminator
Trimmer
A3
6
39
40
10 Disposal
This symbol (crossed out waste bin) indicates that the product
must be returned to an authorised recycling centre or separate
collection point when it has reached the end of its service life.
The symbol only applies to states within the EEA
10
.
11 Warranty
In the case of a defect, please return the device together with the receipt and
original packing material to the point-of-sale.
Version dated 01.12.2010
10
EEA = European Economic Area, which is comprised of the member states of the EU plus
Norway, Iceland and Liechtenstein.
220 - 240 V, 50 Hz 220 - 240 V, 50 Hz
150
Diese Bedienungsanleitung dient der Information.
Ihr Inhalt ist nicht Vertragsgegenstand.
Alle angegebenen Daten sind lediglich Nominalwerte. Die beschriebenen
Ausstattungen und Optionen können je nach den länderspezischen
Anforderungen unterschiedlich sein. Wir behalten uns inhaltliche und
technische Änderungen vor.
Konformitätserklärung
Für die komplette Konformitätserklärung nutzen Sie bitte den kostenlosen Download von
unserer Website www.olympia-vertrieb.de
.
Declaration of
conformity
To view the complete Declaration of Conformity, please refer to the free download available
on our website www.olympia-vertrieb.de
.
Déclaration de
conformité
Vous pouvez télécharger gratuitement la déclaration de conformité intégrale depuis notre
site Internet www.olympia-vertrieb.de
.
Dichiarazione
di conformità
Per la dichiarazione di conformità completa si prega di usufruire del download gratuito dal
nostro sito web www.olympia-vertrieb.de
.
Declaración de
conformidad
Puede descargar gratis la declaración de conformidad completa en nuestra Web
www.olympia-vertrieb.de
.
Verklaring van
overeenstemming
Voor de complete verklaring van overeenstemming gebruikt u alstublieft de kosteloze download van
onze website www.olympia-vertrieb.de
.
Declaração de conformidade
Para consultar a declaração de conformidade completa, sff utilize o download gratuito da
nossa página de Internet www.olympia-vertrieb.de
.
Prohlašeni o shod
Chcete-li ziskat
kompletni prohlašeni o shod
, pak Y\XåLMWH bezplatne VWDåHQL na naši webove
strance www.olympia-vertrieb.de
.
  • Page 1 1
  • Page 2 2
  • Page 3 3
  • Page 4 4
  • Page 5 5
  • Page 6 6
  • Page 7 7
  • Page 8 8
  • Page 9 9
  • Page 10 10
  • Page 11 11
  • Page 12 12
  • Page 13 13
  • Page 14 14
  • Page 15 15
  • Page 16 16
  • Page 17 17
  • Page 18 18
  • Page 19 19
  • Page 20 20
  • Page 21 21
  • Page 22 22
  • Page 23 23
  • Page 24 24
  • Page 25 25
  • Page 26 26
  • Page 27 27
  • Page 28 28
  • Page 29 29
  • Page 30 30
  • Page 31 31
  • Page 32 32
  • Page 33 33
  • Page 34 34
  • Page 35 35
  • Page 36 36
  • Page 37 37
  • Page 38 38
  • Page 39 39
  • Page 40 40
  • Page 41 41
  • Page 42 42
  • Page 43 43
  • Page 44 44
  • Page 45 45
  • Page 46 46
  • Page 47 47
  • Page 48 48
  • Page 49 49
  • Page 50 50
  • Page 51 51
  • Page 52 52
  • Page 53 53
  • Page 54 54
  • Page 55 55
  • Page 56 56
  • Page 57 57
  • Page 58 58
  • Page 59 59
  • Page 60 60
  • Page 61 61
  • Page 62 62
  • Page 63 63
  • Page 64 64
  • Page 65 65
  • Page 66 66
  • Page 67 67
  • Page 68 68
  • Page 69 69
  • Page 70 70
  • Page 71 71
  • Page 72 72
  • Page 73 73
  • Page 74 74
  • Page 75 75

Olympia A 340 Combo Owner's manual

Category
Laminators
Type
Owner's manual
This manual is also suitable for

Ask a question and I''ll find the answer in the document

Finding information in a document is now easier with AI