Aeg-Electrolux F54861M User manual

Category
Dishwashers
Type
User manual

The Aeg-Electrolux F54861M dishwasher offers a range of features to make dishwashing easier and more efficient. With its water softener, adjustable settings, and multiple functions, this dishwasher can adapt to your specific needs. Choose from various washing programs to tackle different types of loads, and use the delay start option to run the dishwasher at a time that suits you. The multitab function simplifies detergent usage, while the rinse aid indicator reminds you when to refill.

The Aeg-Electrolux F54861M dishwasher offers a range of features to make dishwashing easier and more efficient. With its water softener, adjustable settings, and multiple functions, this dishwasher can adapt to your specific needs. Choose from various washing programs to tackle different types of loads, and use the delay start option to run the dishwasher at a time that suits you. The multitab function simplifies detergent usage, while the rinse aid indicator reminds you when to refill.

FAVORIT 54861
User manual Dishwasher
Thank you for choosing one of our high-quality products.
To ensure optimal and regular performance of your appliance please read this
instruction manual carefully. It will enable you to navigate all processes perfectly
and most efficiently. To refer to this manual any time you need to, we recommend
you to keep it in a safe place. And please pass it to any future owner of the appliance.
We wish you much joy with your new appliance.
Contents
Operating instructions 3
Safety information 3
Correct use 3
General safety 3
Child safety 3
Installation 4
Product description 4
Control panel 5
Programme selection buttons 6
Delay start button 6
Digital display 6
Function buttons 6
Setting mode 6
Use of the appliance 7
Setting the water softener 7
Manual adjustment 8
Electronic adjustment 8
Use of dishwasher salt 8
Use of detergent and rinse aid 9
Use of detergent 9
Use of rinse aid 10
Adjusting the rinse aid dosage 10
Multitab function 10
Loading cutlery and dishes 11
Helpful hints and tips 11
Lower basket 12
Cutlery basket 13
Upper basket 13
Adjustment of the height of the upper
basket 14
Washing programmes 14
Setting and starting a washing programme
15
Cancelling a washing programme 16
Interrupting a washing programme 16
Setting and starting a washing programme
with delay start 16
End of the washing programme 17
Standby mode 17
Removing the load 17
Care and cleaning 17
Cleaning the filters 17
External cleaning 18
Frost precautions 19
What to do if… 19
Technical data 20
Installation instructions 21
Installation 21
Fitting under a counter 21
Do these steps to remove the appliance
worktop: 21
Adjusting the level of the appliance 22
Water connection 22
Water inlet hose 22
Water drain hose 23
Electrical connection 24
Environment concerns 24
Subject to change without notice
2
Contents
Operating instructions
Safety information
For your safety and correct operation of the appliance, read this manual carefully before
installation and use. Always keep these instructions with the appliance even if you move
or sell it. Users must fully know the operation and safety features of the appliance.
Correct use
The appliance is designed exclusively for domestic use.
Only use the appliance to clean household utensils that are applicable for dishwashers.
Do not put solvents in the appliance. Risk of explosion.
Put the knives and all items with sharp points in the cutlery basket with their points
down. If not, put in a horizontal position in the upper basket.
Use only branded products for dishwashers (detergent, salt, rinse aid).
If you open the door while the appliance is in operation, hot steam can escape. Risk of
skin burns.
Do not remove dishes from the dishwasher before the end of the washing programme.
When the washing programme is completed, disconnect the mains plug from the mains
socket and close the water tap.
Only an authorised service engineer can repair this appliance. Use only original spare
parts.
Do not do repairs yourself to prevent injury and damage to the appliance. Always contact
your local Service Force Centre.
General safety
Persons (including children) with reduced physical sensory, mental capabilities or lack
of experience and knowledge must not use the appliance. They must have supervision
or instruction for the operation of the appliance by a person responsible for their safety.
Obey the safety instructions from the manufacturer of the dishwasher detergent to
prevent burns to eyes, mouth and throat.
Do not drink the water from the dishwasher. Detergent residues can stay in your appli-
ance.
Always close the door when you do not use the appliance to prevent injury and not to
stumble over the open door.
Do not sit or stand on the open door.
Child safety
Only adults can use this appliance. Children must get supervision to make sure that they
do not play with the appliance.
Keep all the packaging away from children. There is a risk of suffocation.
Keep all detergents in a safe area. Do not let children touch the detergents.
Keep children away from the appliance when the door is open.
Safety information
3
Installation
Make sure that the appliance is not damaged because of transport. Do not connect a
damaged appliance. If necessary, contact the supplier.
Remove all packaging before first use.
A qualified and competent person must do the electrical installation.
A qualified and competent person must do the plumbing installation.
Do not change the specifications or modify this product. Risk of injury and damage to
the appliance.
Do not use the appliance:
if the mains cable or water hoses are damaged,
if the control panel, worktop or plinth area are damaged, that you can get access to
the inner side of the appliance.
Contact your local Service Force Centre.
Do not drill into the sides of the appliance to prevent damage to hydraulic and electrical
components.
WARNING!
Carefully obey the instructions for electrical and water connections.
Product description
1 Upper basket
2 Water hardness dial
3 Salt container
4 Detergent dispenser
5 Rinse aid dispenser
4
Product description
6 Rating plate
7 Filters
8 Lower spray arm
9 Upper spray arm
10 Worktop
Control panel
1
2
3
4
5
6
A
B
C
D
E
1 On/off button
2 Programme selection buttons
3 Delay start button
4 Indicator lights
5 Digital display
6 Function buttons
Indicator lights
MULTITAB Comes on when you activate the multitab function. Refer to 'Multitab
function'.
Salt
1)
Comes on when it is necessary to fill the salt container. Refer to 'Use of
dishwasher salt'.
After you fill the container, the salt indicator light can continue to stay
on for some hours. This does not have an unwanted effect on the op-
eration of the appliance.
Control panel
5
Indicator lights
Rinse aid
1)
Comes on when it is necessary to fill the rinse aid container. Refer to
'Use of rinse aid'.
1) When the salt and/or rinse aid containers are empty, the related indicator lights do not come on while a washing
programme operates.
Programme selection buttons
With these buttons you can select the washing programme. Press a programme button,
the related indicator light comes on. Refer to 'Washing programmes' chapter for more data
about the washing programmes.
Delay start button
Use the delay start button to delay the start of the washing programme with an interval
between 1 and 19 hours. Refer to the chapter 'Setting and starting a washing programme'.
Digital display
The display shows:
the set level of the water softener.
Remaining time to the end of the programme.
Activation/deactivation of the rinse aid dispenser (only with multitab function on).
End of the washing programme. The display shows a zero.
Number of hours in delay start.
•Fault codes.
Function buttons
Use the function buttons for these operations:
To set the water softener. Refer to the chapter 'Setting the water softener'.
To cancel the washing programme in progress or a delay start in progress. Refer to the
chapter 'Setting and starting a washing programme'.
To activate/deactivate the multitab function. Refer to the chapter 'Multitab function'.
To deactivate/activate the rinse aid dispenser, when multitab function is active. Refer to
the chapter 'Multitab function'.
Setting mode
The appliance must be in setting mode for these operations:
To set a washing programme.
To set the water softener level.
To deactivate/activate the rinse aid dispenser.
Press the on/off button. The appliance is in setting mode when:
All the programme indicator lights come on.
Press the on/off button. The appliance is not in setting mode when:
Only one programme indicator light comes on
A washing programme is set. It is necessary to cancel the programme to go back to the
setting mode. Refer to the chapter 'Setting and starting a washing programme".
6
Control panel
Use of the appliance
Refer to the following instructions for each step of procedure:
1. Make a check if the water softener level is correct for the water hardness in your area.
If necessary set the water softener.
2. Fill the salt container with dishwasher salt.
3. Fill the rinse aid dispenser with rinse aid.
4. Load cutlery and dishes into the dishwasher.
5. Set the correct washing programme for the type of load and soil.
6. Fill the detergent dispenser with the correct quantity of detergent.
7. Start the washing programme.
If you use combi detergent tablets ('3 in 1', '4 in 1', '5 in 1', etc.), refer to the chapter 'Multitab
function'.
Setting the water softener
The water softener removes minerals and salts from the water supply. Minerals and salts
can have bad effect on the operation of the appliance.
Water hardness is measured in equivalent scales:
German degrees (dH°).
French degrees (°TH).
mmol/l (millimol per litre - international unit for the hardness of water).
•Clarke.
Adjust the water softener to the water hardness in your area. If necessary, contact your
local water authority.
Water hardness Water hardness setting
°dH °TH mmol/l Clarke manually electronically
51 - 70 91 - 125 9,1 - 12,5 64 - 88 2 10
43 - 50 76 - 90 7,6 - 9,0 53 - 63 2 9
37 - 42 65 - 75 6,5 - 7,5 46 - 52 2 8
29 - 36 51 - 64 5,1 - 6,4 36 - 45 2 7
23 - 28 40 - 50 4,0 - 5,0 28 - 35 2 6
19 - 22 33 - 39 3,3 - 3,9 23 - 27 2 5
15 - 18 26 - 32 2,6 - 3,2 18 - 22 1 4
11 - 14 19 - 25 1,9 - 2,5 13 - 17 1 3
4 - 10 7 - 18 0,7 - 1,8 5 - 12 1 2
< 4 < 7 < 0,7 < 5
1
1)
1
1)
1) No use of salt required.
You must set the water softener manually and electronically.
Use of the appliance
7
Manual adjustment
The appliance is set at the factory at position 2.
1. Open the door.
2. Remove the lower basket.
3. Turn the water hardness dial to position 1
or 2 (refer to the chart).
4. Install the lower basket.
5. Close the door.
Electronic adjustment
The water softener is set at the factory at level 5.
1. Switch on the appliance.
2. Make sure that the appliance is in setting mode.
3. Press and hold function buttons B and C until the indicator lights of function buttons
A, B and C start to flash.
4. Release function buttons B and C.
5. Press function button A.
The indicator lights for function buttons B and C go off.
The indicator light for function button A continues to flash.
The digital display shows the current level.
Example: digital display shows
= level 5.
6. Press the function button A one time to increase the water softener level by one step.
7. Press the on/off button to save the operation.
Use of dishwasher salt
CAUTION!
Only use dishwashers salt. Types of salt that are not applicable for dishwashers cause dam-
age to the water softener.
CAUTION!
Grains of salt and salty water on the bottom of the appliance can cause corrosion. Fill the
appliance with salt before you start a washing programme to prevent corrosion.
Do these steps to fill the salt container:
1. Turn the cap anticlockwise to open the salt container.
2. Fill the salt container with 1 litre of water (only the first operation).
8
Use of dishwasher salt
3. Use the funnel to fill the salt container
with salt.
4. Remove the salt around the opening of
the salt container.
5. Turn the cap clockwise to close the salt
container.
It is normal that water overflows from the salt
container when you fill it with salt.
When you set electronically the water soft-
ener to level 1, the salt indicator light does not
stay on.
Use of detergent and rinse aid
20
30
M
A
X
1
2
3
4
+
-
7
Use of detergent
Do not use more than the correct quantity of detergent.
Follow the detergent manufacturer recommendations for dosage and storage. You can find
this data on the detergent packaging.
Do these steps to fill the detergent dispenser:
1.
Press the release button ( 2 ) to open the detergent dispenser lid ( 7 ).
2.
Put the detergent in the dispenser ( 1 ). Follow the dosage recommended by the man-
ufacturer.
3. If the washing programme has a prewash phase, put a small quantity of detergent on
the inner part of the appliance door.
4.
If you use detergent tablets, put the detergent tablet in the detergent dispenser ( 1 ).
5. Close the detergent dispenser. Press the lid until it locks into position.
Different brands of detergent dissolve in different times. Some detergent tablets do not
have the best cleaning results during short washing programmes. Use long washing pro-
grammes when you use detergent tablets to fully remove the detergent.
Use of detergent and rinse aid
9
Use of rinse aid
Rinse aid makes it possible to dry the dishes without streaks and stains.
Rinse aid is automatically added during the last rinsing phase.
Do these steps to fill the rinse aid dispenser:
1.
Press the release button ( 6 ) to open the rinse aid dispenser lid ( 5 ).
2.
Fill the rinse aid dispenser ( 3 ) with rinse aid. The mark 'max.' shows the maximum level.
3. Remove the spilled rinse aid with an absorbent cloth to prevent too much foam during
the washing programme.
4. Close the rinse aid dispenser. Press the lid until it locks into position.
Adjusting the rinse aid dosage
The rinse aid is set at the factory at position 3.
You can set the rinse aid dosage between position 1 (lowest dosage) and position 4 (highest
dosage).
Turn the rinse aid dial ( 4 ) to increase or decrease the dosage.
Multitab function
The multitab function is for combi detergent tablets.
These tablets contain agents such as detergent, rinse aid and dishwasher salt. Some types
of tablets can contain other agents.
Do a check if these tablets are applicable for the local water hardness. Refer to the in-
structions from the manufacturer.
When you set the multitab function, it stays on until you deactivate it.
The multitab function stops automatically the flow of rinse aid and salt. The rinse aid
indicator light and salt indicator light are deactivated.
The programme duration can increase if you use the multitab function.
Activate or deactivate the multitab function before the start of a washing programme.
You cannot activate or deactivate the multitab function when the programme operates.
Cancel the washing programme, then set the programme again.
To activate the multitab function:
Press and hold the two multitab buttons (function buttons D and E). The multitab indi-
cator light comes on.
To deactivate the multitab function:
Press and hold the two multitab buttons (function buttons D and E). The multitab indi-
cator light goes off.
Do these steps if the drying results are not satisfactory:
1. Fill the rinse aid dispenser with rinse aid.
2. Activate the rinse aid dispenser.
3. Set the rinse aid dosage to position 2.
You can only activate or deactivate the rinse aid dispenser when the multitab function
is activated.
To activate/deactivate the rinse aid dispenser:
10
Multitab function
1. Switch on the appliance.
2. Make sure that the appliance is in setting mode.
3. Press and hold function buttons B and C.
The indicator lights for function buttons A, B, and C start to flash.
4. Release function buttons B and C.
5. Press function button B.
The indicator lights for function buttons A and C go off.
The indicator light for function button B continues to flash.
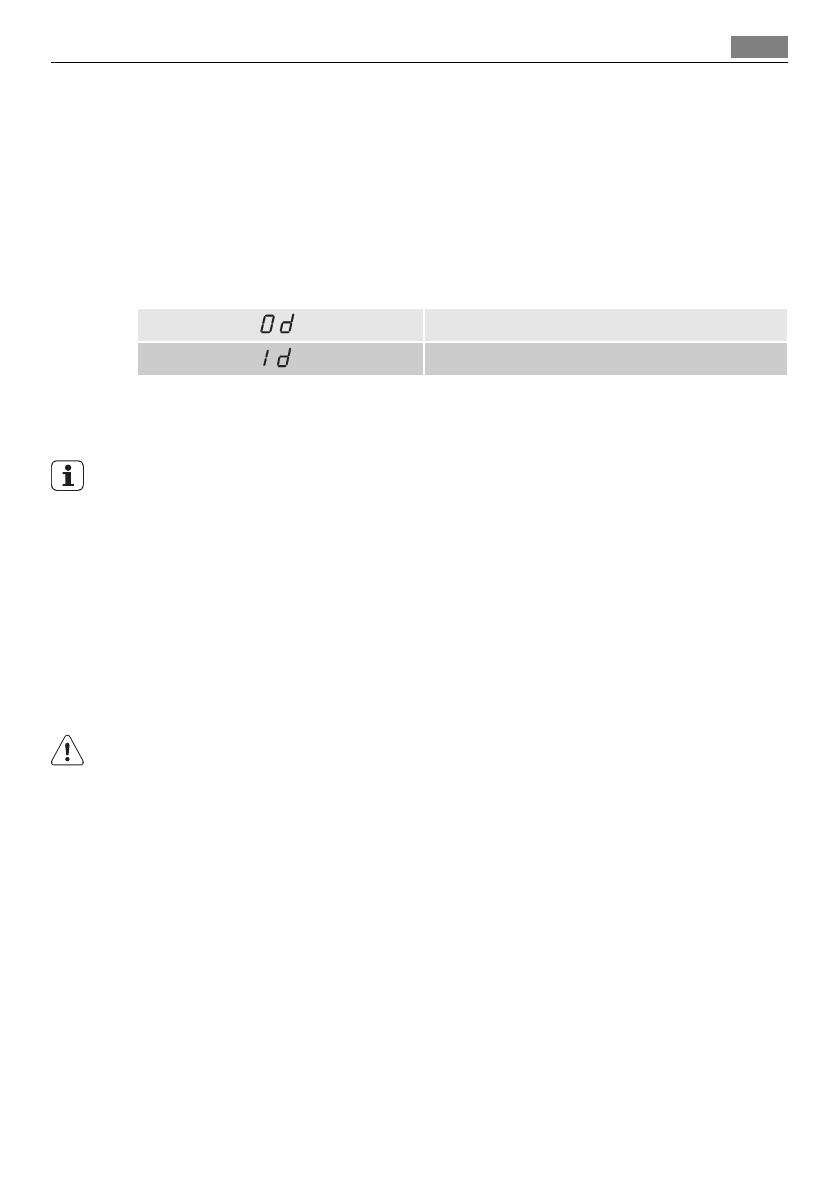
The digital display shows the setting.
Rinse aid dispenser deactivated
Rinse aid dispenser activated
6. Press function button B again.
The digital display shows the new setting.
7. Switch off the appliance to save the operation.
To use normal detergent again:
1. Deactivate the multitab function.
2. Fill the salt container and rinse aid dispenser.
3. Adjust the water hardness setting to the highest level.
4. Do a washing programme without dishes.
5. Adjust the water softener to the water hardness in your area.
6. Adjust the rinse aid dosage.
Loading cutlery and dishes
Helpful hints and tips
CAUTION!
Only use the appliance for household utensils that are applicable for dishwashers.
Do not use the appliance to clean objects that can absorb water (sponges, household cloths,
etc.).
Before you load cutlery and dishes, do these steps:
Remove all food remainings and debris.
Make burnt, remaining food in pans soft.
While you load cutlery and dishes, do these steps:
Load hollow items (e.g. cups, glasses and pans) with the opening down.
Make sure that water does not collect in the container or in a deep base.
Make sure that cutlery and dishes do not lie inside one another.
Make sure that cutlery and dishes do not cover other cutlery and dishes.
Make sure that glasses do not touch other glasses.
Put small objects in the cutlery basket.
Plastic items and pans with non-stick coatings can keep water droplets. Plastic items do
not dry as well as porcelain and steel items.
Put light items in the upper basket. Make sure that the items do not move.
Loading cutlery and dishes
11
CAUTION!
Make sure that the spray arms can move freely before you start a washing programme.
WARNING!
Always close the door after you load or unload the appliance. An open door can be dan-
gerous.
Lower basket
Put saucepans, lids, plates, salad bowls and cutlery
in the lower basket.
Arrange service dishes and large lids around the
edge of the basket.
The rows of prongs in the lower basket can be flat
to load pots, pans and bowls.
12
Loading cutlery and dishes
Cutlery basket
WARNING!
Do not put long-bladed knives in a vertical position. Arrange long and sharp cutlery hori-
zontally in the upper basket. Be careful with sharp items.
Put forks and spoons with the handles down.
Put knives with the handles up.
Mix spoons with other cutlery to prevent them to bond together.
Use the cutlery grids.
If the dimensions of the cutlery prevent use of the
cutlery grids, you can fold them out.
You can open the cutlery basket to remove the
cutlery more easily. Do these steps to remove the
cutlery.
1. Put the cutlery basket on a table or work
surface.
2. Open the handle.
3. Remove the cutlery.
Hold the two parts of the handle tightly when
you move the cutlery basket.
Upper basket
The upper basket is for plates (maximum 24 cm in
diameter), saucers, salad bowls, cups, glasses, pots
and lids.
Arrange the items to let water touch all surfaces.
Loading cutlery and dishes
13
For longer items fold the cup racks up.
Adjustment of the height of the upper basket
If you put large plates in the lower basket, first move the upper basket to a upper position.
Maximum height of the dishes in:
the upper basket the lower basket
Upper position 20 cm 31 cm
Lower position 24 cm 27 cm
Do these steps to move the upper basket to the upper position:
1. Pull the basket out until it stops.
2. Carefully lift the two sides until the mech-
anism is engaged and the basket is stable.
Do these steps to move the upper basket to
the lower position:
1. Pull the basket out until it stops.
2. Carefully lift the two sides upwards.
3. Hold the mechanism and let it fall back
down slowly.
CAUTION!
Do not lift or lower the basket on one side
only.
If the basket is in the upper position, do not put cups on the cup racks.
Washing programmes
Washing programmes
Programme Degree of soil Type of load Programme description
AUTO 45°-70°
1)
Any Crockery, cutlery,
pots and pans
Prewash
Main wash up to 45°C or 70°C
1 or 2 intermediate rinses
Final rinse
Drying
14
Washing programmes
Programme Degree of soil Type of load Programme description
30 MIN 60°
2)
Normal or light
soil
Crockery and cutlery Main wash up to 60°C
Final rinse
INTENSIV CARE 70° Heavy soil Crockery, cutlery,
pots and pans
Prewash
Main wash up to 70°C
1 intermediate rinse
Final rinse
Drying
ECO 50°
3)
Normal soil Crockery and cutlery Prewash
Main wash up to 50°C
1 intermediate rinse
Final rinse
Drying
Any Partial load (to be
completed later in the
day).
1 cold rinse (to prevent food
scraps to bond).
Detergent is not necessary with
this programme.
1) During the Auto programme, the soil level of the dishes is given by how cloudy the water is. The programme
duration and consumptions can change. This depends if the appliance is fully or not and on the level of soil on
the dishes. The appliance adjusts automatically the temperature of the water during the main wash.
2) This is the perfect daily programme to clean a not fully load. Ideal for a family of 4 persons who only want to
load breakfast and dinner crockery and cutlery.
3) Test programme for test institutes. Please refer to separate leaflet supplied, for test data.
Consumption values
Programme
1)
Energy (in kWh) Water (in litres)
AUTO 45°-70° 0,8 - 1,3 10 - 19
30 MIN 60° 0,8 8
INTENSIV CARE 70° 1,3 - 1,5 14 - 15
ECO 50° 0,8 - 0,9 12 - 13
0,1 3,5
1) The digital display shows the programme duration.
The pressure and temperature of the water, the variations of power supply and the quantity
of dishes can change these values.
Setting and starting a washing programme
Set the washing programme with the door ajar. The washing programme only starts after
you close the door. Until then it is possible to modify the settings.
Do these steps to set and start a washing programme:
1. Switch on the appliance.
2. Make sure that the appliance is in setting mode.
3. Press one of the programme buttons. Refer to the chapter 'Washing programmes'.
The programme indicator light comes on.
Setting and starting a washing programme
15
All other programme indicator lights go off.
The digital display shows in flashing the programme duration.
4. Close the door.
The washing programme starts automatically.
You can select the washing programme and delay start also with the door closed. When
you press a programme button you have only 3 seconds to select a different washing
programme or a delay start. After these 3 seconds, the selected programme starts auto-
matically.
When the washing programme operates, you cannot change the programme. Cancel the
washing programme.
WARNING!
Only interrupt or cancel a washing programme if necessary.
CAUTION!
Open the door carefully. Hot steam can come free.
Cancelling a washing programme
1. Press and hold function buttons B and C until all the programme lights come on.
2. Release function buttons B and C to cancel the washing programme.
At this time you can do these steps:
1. Switch off the appliance.
2. Set a new washing programme .
Fill the detergent dispenser with detergent before you set a new washing programme.
Interrupting a washing programme
Open the door.
The programme stops.
Close the door.
The programme continues from the point of interruption.
Setting and starting a washing programme with delay start
1. Press the on/off button.
2. Set a washing programme.
3. Press the delay start button until the display shows on flashing the necessary delay
start of the washing programme.
The delay start indicator light comes on.
4. Close the door.
The number on the display comes on with fixed light.
The countdown of the delay start starts.
The countdown of the delay start decreases with steps of 1 hour.
When the countdown is completed, the washing programme starts automatically.
Do not open the door during the countdown to prevent interruption of the countdown.
When you close the door again, the countdown continues from the point of interruption.
16
Setting and starting a washing programme
Cancelling a delay start:
1. Press and hold function buttons B and C until all the programme lights come on.
When you cancel a delay start, you also cancel the washing programme.
2. Set a new washing programme.
End of the washing programme
The appliance stops automatically.
The display shows 0.
1. Switch off the appliance.
2. Open the door.
3. For better drying results, keep the door ajar for some minutes before you remove the
dishes.
Let the dishes cool down before you remove them from the appliance. Hot dishes are easily
damaged.
Standby mode
If you do not switch off the appliance at the end of the washing programme, the appliance
automatically goes into standby mode. The standby mode decreases energy consumption.
Three minutes after the end of the programme, all indicator lights go off and the digital
display shows one horizontal bar.
Press one of the buttons (not the on/off button), to go back to end-of-programme mode.
Removing the load
First remove items from the lower basket, then from the upper basket.
There can be water on the sides and door of the appliance. Stainless steel becomes cool
more quickly than the dishes.
Care and cleaning
WARNING!
Switch the appliance off before you clean the filters.
Cleaning the filters
CAUTION!
Do not use the appliance without the filters. Make sure that the installation of the filters
is correct. Incorrect installation will cause unsatisfactory washing results and damage to
the appliance.
If necessary, clean the filters. Dirty filters decrease the washing results.
The dishwasher has three filters:
1. coarse filter (A)
2. microfilter (B)
Care and cleaning
17
3. flat filter (C)
Do these steps to clean the filters:
1. Open the door.
2. Remove the lower basket.
3. To unlock the filter system, turn the
handle on the microfilter (B) approxi-
mately 1/4 anticlockwise.
4. Remove the filter system.
5. Hold the coarse filter (A) by the handle
with the hole.
6. Remove the coarse filter (A) from the
microfilter (B).
7. Remove the flat filter (C) from the bot-
tom of the appliance.
8. Clean the filters below running water.
9. Put the flat filter (C) in the bottom of the
appliance.
10. Put the coarse filter (A) in the microfilter
(B) and push the filters together.
11. Put the filter system in position.
12. To lock the filter system, turn the handle
on the microfilter (B) clockwise until it
lock in position.
13. Install the lower basket.
14. Close the door.
Do not remove the spray arms.
If the holes in the spray arms become clogged, remove remaining parts of soil with a cocktail
stick.
External cleaning
Clean the external surfaces of the appliance and control panel with a damp soft cloth. Only
use neutral detergents. Do not use abrasive products, scouring pads or solvents (acetone,
trichloroethylene etc...).
A
B
C
18
Care and cleaning
Frost precautions
CAUTION!
Do not install the appliance where the temperature is below 0 °C. The manufacturer is not
responsible for damage because of frost.
If not possible, empty the appliance and close the door. Disconnect the water inlet hose
and remove water from the water inlet hose.
What to do if…
The appliance does not start or stops during operation.
If there is a fault, first try to find a solution to the problem yourself. If you cannot find a
solution to the problem yourself, contact the Service Force Centre.
CAUTION!
Switch off the appliance before you do the below suggested corrective actions.
Fault code and malfunction Possible cause and solution
digital display shows
The dishwasher does not fill with
water
The water tap is blocked or furred with limescale.
Clean the water tap.
The water tap is closed.
Open the water tap.
The filter in the water inlet hose is blocked.
Clean the filter.
The connection of the water inlet hose is not correct. The
hose can be kinked or squashed.
Make sure that the connection is correct.
digital display shows
The dishwasher will not drain
There is a blockage in the sink spigot.
Clean the sink spigot.
The connection of the water drain hose is not correct. The
hose can be kinked or squashed.
Make sure that the connection is correct.
digital display shows
The anti-flood device operates
Close the water tap and contact your local Service Force
Centre.
The programme does not start The appliance door is not closed.
Close the door.
Mains plug is not connected in.
Put in the mains.
The fuse has blown out in the household fuse box.
Replace the fuse.
Delay start is set.
Cancel the delay start to start the programme immedi-
ately.
What to do if…
19
After the check, switch on the appliance. The programme continues from the point of
interruption. If the malfunction shows again, contact your Service Force Centre.
If the display shows a fault code, not described in the chart, contact your Service Force
Centre.
These data are necessary to help you quickly and correctly:
Model (Mod.)
Product number (PNC)
Serial number (S.N.)
For these data, refer to the rating plate.
Write the necessary data here:
Model description : ..........
Product number : ..........
Serial number : ..........
The cleaning results are not satisfactory
The dishes are not clean The selected washing programme is not applicable for the type
of load and soil.
The baskets are loaded incorrectly so that water cannot reach all
surfaces.
Spray arms do not turn freely because of incorrect arrangement
of the load.
The filters are dirty or not correctly installed.
The quantity of detergent is too little or missing.
Limescales particles on the
dishes
The salt container is empty.
The water softener is adjusted on a wrong level.
The salt container cap is not closed correctly.
The dishes are wet and dull No rinse aid has been used.
The rinse aid dispenser is empty.
There are streaks, milky spots
or a bluish coating on glasses
and dishes
Decrease the rinse aid dosage.
Dry water drop signs on
glasses and dishes
Increase rinse aid dosage.
The detergent can be the cause.
Technical data
Dimensions Width cm 44,6
Height cm 85
Depth cm 62
Electrical connection - Voltage
- Overall power - Fuse
Information on the electrical connection is given on the rating
plate on the inner edge of the dishwasher door.
Water supply pressure Minimum 0,5 bar (0,05 MPa)
Maximum 8 bar (0,8 MPa)
Capacity Place settings 9
20
Technical data
  • Page 1 1
  • Page 2 2
  • Page 3 3
  • Page 4 4
  • Page 5 5
  • Page 6 6
  • Page 7 7
  • Page 8 8
  • Page 9 9
  • Page 10 10
  • Page 11 11
  • Page 12 12
  • Page 13 13
  • Page 14 14
  • Page 15 15
  • Page 16 16
  • Page 17 17
  • Page 18 18
  • Page 19 19
  • Page 20 20
  • Page 21 21
  • Page 22 22
  • Page 23 23
  • Page 24 24
  • Page 25 25
  • Page 26 26
  • Page 27 27
  • Page 28 28

Aeg-Electrolux F54861M User manual

Category
Dishwashers
Type
User manual

The Aeg-Electrolux F54861M dishwasher offers a range of features to make dishwashing easier and more efficient. With its water softener, adjustable settings, and multiple functions, this dishwasher can adapt to your specific needs. Choose from various washing programs to tackle different types of loads, and use the delay start option to run the dishwasher at a time that suits you. The multitab function simplifies detergent usage, while the rinse aid indicator reminds you when to refill.

Ask a question and I''ll find the answer in the document

Finding information in a document is now easier with AI