Page is loading ...

For Top-Mount Use Only
Tools Needed
For Under-Mount Installation please refer to page 14
-1-
Haveaquestion? DON'T GO BACK TO THE STORE, WE CAN HELP, just call 1-800-626-3525, 8 a.m. to 5 p.m. EST Monday-Friday,
Disclaimer: Undermount Application must useamodified sink base and solid surface countertop material.
Work Station Models:
The countertop must be flat. This sink will not install to countertops with integral drip edges.
Undermount sinks have 3 installation options. A forward cut will obstruct the use of work station
accessories. See page 14 for more information.
*Your countertop thickness cannot exceed 1-1/2" (38 mm).
*Your countertop cannot overhang the cabinet face more than 1-1/2" (38 mm).
*Your countertop must be fully supported by the cabinet.
*Proper installation requiresacoordinated effort including advanced dialog between the
designer (or customer), the cabinet maker, the countertop fabricator and the sink installer
during the design and installation phase.
FOR EXPERIENCED AND PROFESSIONAL INSTALLATION ONLY
This installation project is designed for an advanced skill level.
IMPORTANT!
*BEFORE INSTALLING THE SINK, INSPECT IT FOR DAMAGE. DO NOT INSTALL A DAMAGED UNIT.
CAUTION:
Risk of personal injury. Metal surfaces are sharp and can cause severe cuts. Please use gloves and
handle sink with care.
* These instructions provide2different installation methods: new countertop installation and replacement.
Follow the instructions that apply to your installatio
n method.
* Inspect the drain and supply lines; replace if necessary.
* Remember it is your responsibility to follow all local plumbing and building codes.
The warranty will be voided if these installation instructions are not followed.
Silicone Sealant
Tape Measure
Safety Glasses
Painter's Tape
Felt-tip Marker
Laminate Jigsaw Blade
Scissors Saw
Sandpaper
Utility Knife
Level
Flat Screwdriver
Square
Hand Saw
Foam-Brush
Waterproof Wood Glue
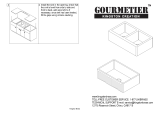
210 mm
mm 582
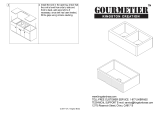
Retrofit Apron Front Farm Sink
With Dual Mount Capability
Installation Instructions

For Top-Mount Use Only
-2-
YES NO
Is your countertop flat?
The countertop must be flat to assure a
proper installation.
Please Note
– Countertops witha“No Drip”
edge will not work with this sink application.
Before You Start
Please complete this check list.
This sheet is designed to assist you in making an informed decision on the selection of your retrofit
apron front farm sink. Please answer the following questions to determine whether your current
kitchen cabinet can use this style of sink.
Is your sink base cabinet 36 wide?"
1)
2)
YES NO
YES NO
Does your cabinet have false drawer fronts?3)
(Can be one or two false drawer front)
No Drip
Edge
Flat Edge
Measure the face frame from the left to the
right on your sink base to determine the width.
Haveaquestion? DON'T GO BACK TO THE STORE, WE CAN HELP, just call 1-800-626-3525, 8 a.m. to 5 p.m. EST Monday-Friday,
Retrofit Apron Front Farm Sink
With Dual Mount Capability
Installation Instructions

-3-
Measure the distance from the top of the door
rail to the top of the cabinet.
5)
Add 1-1/2 to the measurement to account
for the countertop height.
"
–a7 Flat Front sink can be
used for an 8 opening by furring out the
½"
"½"
gap (furring strip not included).
7- = Flat apron Front½"
8 = Curved Apron Front"
Please Note
If you have answered yes to these questions,you can choose one of the
Apron front farm sinks for your kitchen.
YES NO
Is the dimension between the cabinet
stiles 33 ?"
4)
This measurement is the open space from left to right
when the false drawer front is removed.
Typically, this distance can be measured from the inside
of the cabinet without removing the false drawer fronts.
Total
The total will tell you which sink to choose.
Typically this distance can be measured from
the inside of the cabinet.
Haveaquestion? DON'T GO BACK TO THE STORE, WE CAN HELP, just call 1-800-626-3525, 8 a.m. to 5 p.m. EST Monday-Friday,
Stiles
For Top-Mount Use Only
Retrofit Apron Front Farm Sink
With Dual Mount Capability
Installation Instructions

-4-
- Please remove the false fronts (two small or
one large panel) please be careful not to damage
the cabinet front.
- Apply painter's tape to the cabinet front, this will
help prevent damaging the surface when cutting
out the drawer fronts.
- If the cabinet hasacenter support (if you have two
smaller false fronts you will haveacenter support)
please remove it at this time. Cut along the bottom
even with the drawer opening making sure you
do not cut into the cabinet.
- Please remove the top rail, being careful not to
cut into the cabinet stiles.
1. Prepare the Cabinet-Replacement of an Existing Sink
2. Preparing Your Countertop
- Put the painter's tape at the centerline of the cabinet
from the backsplash to the front edge of the countertop.
- Put the painter's tape across the front edge of the
countertop along the entire width of the sink base
cabinet.
- Mark the centerline of the cabinet onto the painter's
tape.
If you haveaNew Countertop Installation please
refer to page 9.
Centerline
Haveaquestion? DON'T GO BACK TO THE STORE, WE CAN HELP, just call 1-800-626-3525, 8 a.m. to 5 p.m. EST Monday-Friday,
For Top-Mount Use Only
Retrofit Apron Front Farm Sink
With Dual Mount Capability
Installation Instructions

-5-
- Cut out the paper template along the top mount
marked line.
- Cut out the diamond on the template; this will help
you line up the centerline; it should be in the center
of the diamond.
- Please put painter's tape to all exposed outside
edges prior to securing the template in place.
This will help prevent chipping when cutting.
- Put the template on the countertop. Line up the
template with the lines marked on the painter's
tape over the pre-existing hole.
- Mark the2notches from the template 1-15/16"
from the edge of the countertop.
- Tape the template in place.
- Trace the template on the applied painter's tape.
- Trace the notches at the front of the template.
- Remove the template
- Put painter's tape to the front of the countertop
to prevent chipping the laminate when cutting.
- Extend the marked lines down the front of the
countertop onto the painter's tape.
3. Trace the Template
Haveaquestion? DON'T GO BACK TO THE STORE, WE CAN HELP, just call 1-800-626-3525, 8 a.m. to 5 p.m. EST Monday-Friday,
For Top-Mount Use Only
Retrofit Apron Front Farm Sink
With Dual Mount Capability
Installation Instructions

-6-
4. Cut the Countertop
1. Cut inside line
Do not cut beyond marked line!
2. Cut away from cutout, flush with cabinet face.
3. Cut to intersect
with previous cut.
Please use sand paper to smooth all cut edges.
IMPORTANT! To avoid damage to the cabinet
surfaces, cut the countertop in the order of the
steps below.
To prevent chipping the laminate, put painter's
tape to the edge of the countertop before cutting.
If your existing sink hole is set back close
to the backsplash you will need to adjust the
depth of the notch.This will allow you to slide the
sink back further to getatight fit.
TIP:
Note:
TIP: Make sure your equipment is in good
working order and your blades are sharp
to ensureasmooth installation and
straight cuts.
TIP:
- Lower the sink carefully into the countertop opening to make
sure it fits, do not force it. The fit will be tight. If the opening is
too small please recheck your dimensions.
1. Using the laminate saw blade cut the countertop along
the inside marked line.
2. Carefully cut away from the cutout to the end of the marked
line. Be careful not to damage the cabinet face.
Repeat this step on
the other side.
3. Carefully cut the marked notch out, cut in from the edge
of the countertop and intersect it with the marked notch.
Be careful not to damage the cabinet face.
Repeat this step on the other side.
4. Very Important-Spreadagenerous amount of waterproof
wood glue on both notches to seal the newly exposed wood.
This will help to make this area water resistant and keep
water from penetrating into the wood and swelling the
underlayment. Please wipe away any excess glue.
Please wipe away any excess glue.
Please allow the wood glue to dry completely.
TIP:
Haveaquestion? DON'T GO BACK TO THE STORE, WE CAN HELP, just call 1-800-626-3525, 8 a.m. to 5 p.m. EST Monday-Friday,
For Top-Mount Use Only
Retrofit Apron Front Farm Sink
With Dual Mount Capability
Installation Instructions

-7-
- To protect the cabinet finish, temporarily apply
painter's tape around the cabinet cutout.
- Applyabead of silicone around the cutout.
- Carefully lower the sink into the cabinet.
- Be sure to wipe away any excess silicone sealant.
5. Install the Sink
- Slide three clips into either side of the back rail of the sink.
- Slide two clips into each side rail of the sink.
- Evenly space the clips.
- Assemble the screws into theUchannel fasteners as shown.
6. Install the clips from under the cabinet.
NOTE: Screws are designed to insert into the channel
fasteners with backward threading, so that when mounting
they will turn inacounter-clockwise direction.
-Locate the fasteners in the position as shown.
- Hand tighten each fastener onto the channel so that the clamp
“teeth” point in the same direction as theUchannel. To install
U channel fasteners in channel bar: SlideUchannel fasteners
in channel bar from either open end and /or slots in channel.
PlaceUchannel fasteners equally spaced and with one
at each end of channel bar, hand tighten channel fasteners,
starting at the center and working toward sides.
Position the fasteners claw under the top edge as shown.
Locate the fastener in position as shown.
Caution: Improper tightening of channel fasteners could
result in improper installation or cause damage to sink.
Re-check sinks position on countertop.
Tighten all channel fasteners an additional quarter turn
withaflat head screwdriver.
Tool
IMPORTANT! DO NOT OVERTIGHTEN.
Haveaquestion? DON'T GO BACK TO THE STORE, WE CAN HELP, just call 1-800-626-3525, 8 a.m. to 5 p.m. EST Monday-Friday,
A.
B.
C.
D.
For Top-Mount Use Only
Retrofit Apron Front Farm Sink
With Dual Mount Capability
Installation Instructions

-8-
7. Finishing the Installation
- Apply silicone sealant around the edge of the sink, be sure
to completely cover the notched area where the countertop
meets the apron front sink.
- Wipe away excess before it dries.
- Install the faucet and drain per manufacturer's installation
instructions.
To addafinishing touch to your new sink you can
addafurring strip around the apron.
(please check to make sure the cabinet doors have
clearance to acceptafurring strip.)
Note:
Haveaquestion? DON'T GO BACK TO THE STORE, WE CAN HELP, just call 1-800-626-3525, 8 a.m. to 5 p.m. EST Monday-Friday,
For Top-Mount Use Only
Retrofit Apron Front Farm Sink
With Dual Mount Capability
Installation Instructions

-9-
2. New Countertop Installation
- Please remove the false fronts (two small or one large
panel) please be careful not to damage the cabinet front.
- Apply painter's tape to the cabinet front, this will help
prevent damaging the surface when cutting out the
drawer fronts.
- If the cabinet hasacenter support (if you have two
smaller false fronts you will haveacenter support)
please remove it at this time. Cut along the bottom
even with the drawer opening making sure you
do not cut into the cabinet.
- Please remove the top rail, being careful not to cut
into the cabinet stiles.
1. Prepare the cabinet-New Countertop Installation
If needed shim along all sides
of the cabinet.
It is very important that you check to make sure
your countertop is compatible with this retrofit
apron front farm sink.
Your countertop thickness cannot exceed
1-1/2" (38mm)
Your countertop cannot overhang the cabinet
face more than 1-1/2 (38mm).
Your countertop must be fully supported by the cabinet.
If it is not please shim the countertop as needed. Ensure
the countertop is fully supported along the entire depth
of the cabinet.
- Install the countertop per the manufacturer's instructions
"
Haveaquestion? DON'T GO BACK TO THE STORE, WE CAN HELP, just call 1-800-626-3525, 8 a.m. to 5 p.m. EST Monday-Friday,
For Top-Mount Use Only
Retrofit Apron Front Farm Sink
With Dual Mount Capability
Installation Instructions

- 10 -
4. Trace the Template
- Put the painter's tape at the centerline of the cabinet
from the backsplash to the front edge of the countertop.
- Put the painter's tape across the front edge of the
countertop along the entire width of the sink base
cabinet.
- Mark the centerline of the cabinet onto the painter's
tape.
3. Preparing Your Countertop
- Cut out the paper template along the Top Mount
marked line.
- Cut out the diamond on the template this will help you
line up the centerline, it should be in the center of the
diamond.
- Please put painter's tape to all exposed outside edges
prior to securing the template in place. This will prevent
chipping when cutting.
- Put the template on the countertop. Align the template
with the lines marked on the painter's tape.
- Mark the2notches from the template 1-15/16" from the
edge of the countertop.
- Tape the template in place.
- Trace the template on to the painter's tape.
- Trace the notches at the front of the template.
- Remove the template
- Put painter's tape to the front of the countertop to prevent
chipping the laminate when cutting.
- Extend
the marked lines down the front of the countertop
onto the painter's tape.
Center line
Countertop
Overhang
Front of Cabinet
Haveaquestion? DON'T GO BACK TO THE STORE, WE CAN HELP, just call 1-800-626-3525, 8 a.m. to 5 p.m. EST Monday-Friday,
For Top-Mount Use Only
Retrofit Apron Front Farm Sink
With Dual Mount Capability
Installation Instructions

- 11 -
5. Cut the Countertop
IMPORTANT! To avoid damage to the cabinet
surfaces, cut the countertop in the order of the
steps below.
To prevent chipping the laminate, put painter's
tape to the edge of the countertop before cutting.
TIP:
TIP: Make sure your equipment is in good
working order and your blades are sharp
to ensureasmooth installation and
straight cuts.
1. Cut inside line
Do not cut beyond marked line!
2. Cut away from cutout, flush with cabinet face.
3. Cut to intersect
with previous cut.
Please use sand paper to smooth all cut edges.TIP:
- Lower the sink carefully into the countertop opening to make
sure it fits, do not force it. The fit will be tight. If the opening is
too small please recheck your dimensions.
1. Using the laminate saw blade cut the countertop along
the inside marked line.
2. Carefully cut away from the cutout to the marked notch
line. Be careful not to damage the cabinet face.
Repeat this step on the other side.
3. Carefully cut in from the edge of the countertop to
intersect with the previous cut. Be careful not to damage
the cabinet face.
Repeat this step on the other side.
4. Very Important-Spreadagenerous amount of waterproof
wood glue on both notches to seal the newly exposed wood.
This will help to make this area water resistant and keep
water from penetrating into the wood and swelling the
underlayment. Please wipe away any excess glue.
Please wipe away any excess glue.
Please allow the wood glue to dry completely.
TIP:
Haveaquestion? DON'T GO BACK TO THE STORE, WE CAN HELP, just call 1-800-626-3525, 8 a.m. to 5 p.m. EST Monday-Friday,
For Top-Mount Use Only
Retrofit Apron Front Farm Sink
With Dual Mount Capability
Installation Instructions

- 12-
Tool
6. Install the Sink
- To protect the cabinet finish, temporarily put painter's tape
around the cabinet cutout.
- Applyabead of silicone around the cutout.
- Carefully lower the sink into the cabinet.
Be sure to wipe away any excess silicone sealant.-
7. Install the clips from under the cabinet
- Slide three clips into either side of the back rail of the sink.
- Slide two clips into each side rail of the sink.
- Evenly space the clips.
- Assemble the screws into theUchannel fasteners as shown.
Screws are designed to insert into the channel
fasteners with backward threading, so that when mounting
they will turn inacounter-clockwise direction.
NOTE:
-
-
Position the fasteners claw under the top edge as shown.
Locate the fastener in position as shown.
CAUTION: Improper tightening of channel
fasteners could result in improper installation
or cause damage to sink.
A. PlaceUchannel fasteners equally spaced and with one at each
end of channel bar, hand tighten channel fasteners, starting at the
center and working toward sides.
B. Re-check sinks position on countertop.
C. Tighten all channel fasteners an additional quarter turn with a
flat head screwdriver.
IMPORTANT! DO NOT OVERTIGHTEN.
Haveaquestion? DON'T GO BACK TO THE STORE, WE CAN HELP, just call 1-800-626-3525, 8 a.m. to 5 p.m. EST Monday-Friday,
Locate the fasteners in the position as shown.
Hand tighten each fastener onto the channel so that the clamp
“teeth” point in the same direction as theUchannel. To install
U channel fasteners in channel bar: SlideUchannel fasteners
in channel bar from either open end and /or slots in channel.
For Top-Mount Use Only
Retrofit Apron Front Farm Sink
With Dual Mount Capability
Installation Instructions

- 13 -
8. Finishing the Installation
- Apply silicone sealant around the edge of the sink, be sure to
completely cover the notched area where the countertop meets
the apron front sink.
- Wipe away excess before it dries.
- Install the faucet and drain per the manufacturer’s installation
instructions.
To addafinishing touch to your new sink you
can addafurring strip around the apron (please check
to make sure the cabinet doors have clearance to
acceptafurring strip)
NOTE:
Haveaquestion? DON'T GO BACK TO THE STORE, WE CAN HELP, just call 1-800-626-3525, 8 a.m. to 5 p.m. EST Monday-Friday,
For Top-Mount Use Only
Retrofit Apron Front Farm Sink
With Dual Mount Capability
Installation Instructions

Reveal - The countertop edge
sits approximately 1/4" back
from the edge of the sink,
exposing the sink rim
Flush - The countertop meets
the edge of the sink, fitting
flush with the sink bowls.
Forward - The countertop extends
over the edge of the sink on all
sides by approximately 1/4".
Reveal
Flush
Forward
For Under-Mount Use Only
- 14 -
Caution: For Reference, Read All Instructions Before Beginning The Installation.
Under-counter Mount Instructions
Metal edges may be sharp use caution when handling.
Before You Begin
Follow all local standards and codes.
For Experienced and Professional Installation only.
For solid surface countertop installations only ie: granite, quartz, stone etc.
A custom sink base cabinet is required.
Proper installation requiresacoordinated effort including advanced dialog
between the designer (or customer), the cabinet maker, the countertop
fabricator and the sink installer during the design and installation phase.
Providing the cabinet maker with the actual sink to be installed prior to
cabinet fabrication is recommended.
Installation Options:
Please select the right installation option depending on your design.
Step 1.
Position template on countertop. Locate the template front to rear, so that sink
will not interfere with the cabinet.
Step 2.
Tracealine around the template. Cut along the inside of this line to provide
opening. This size opening will provide approximately an 1/8” over hang of
counter-top.
Haveaquestion? DON'T GO BACK TO THE STORE, WE CAN HELP, just call 1-800-626-3525, 8 a.m. to 5 p.m. EST Monday-Friday,
Step 3.
Note:
Follow the countertop manufacturer's recommendations
for how to drill the mounting holes and the best type of mounting
hardware to use.
Locate and drill the mounting holes. The
holes should allow for
even spacing of the mounting brackets around the sink, as
shown. If the mounting hardware provided is being used,
slideawhite insert into each of the holes.
Step 3
Retrofit Apron Front Farm Sink
With Dual Mount Capability
Installation Instructions
Work Station Models: Do NOT use
a forward cut as this will obstruct the
use of work station accessories.

- 15 -
Step 4.
Using the mounting screws, fasten the mounting brackets to the
countertop loosely. The brackets need to be loose enough to
slide under the rim of the sink.
Step 5.
Usingagood quality silicone sealant, applyabead evenly
around the entire sink rim.
Step 6.
Position and align the sink under the countertop opening.
Press the sink onto the countertop and slide the brackets under
the rim of the sink.
Step 7.
Tighten the screws until the mounting brackets are snug against the sink.
Step 8.
Check the alignment of the sink in the countertop opening and adjust as necessary.
Step 9.
Tighten down the screws evenly. Do not overtighten. Remove the excess silicone.
Haveaquestion? DON'T GO BACK TO THE STORE, WE CAN HELP, just call 1-800-626-3525, 8 a.m. to 5 p.m. EST Monday-Friday,
Countertop
Fasteners
Screws
Step 4
Stainless Steel Sink Care:
After Each Use:
- Remove all objects from sink.
- Clean with light soap solution, rinse and drain all water and towel dry.
Regular Maintenance:
Side Walls and Bottom of Sink: Remove stains usingacleaning product that contains mild abrasives;
always wipe in grain finish. Pay careful attention to the directional change.
Mineral Deposits:
Useacleaning product that contains mild abrasives oralight solution of vinegar and water(1:20 ratio);
rinse well and towel dry.
CAUTION: Stainless steel requires exposure to air; DO NOT leave items, objects, cloths,
mats, water, pots, pans, cast irons, knives, etc., in the sink when not washing.
DO NOT:
- Use steel wool or other metal or coarse scouring pads.
- Stand on or in sink when cleaning windows, reaching for top shelf, painting, etc.
- Drop heavy objects in sink as this will cause denting.
- Leave water, bleach, other cleaners or chemicals of any type in sink; always rinse sink after any
use and dry with towel.
- Use concentrated bleach, always dilute with water and rinse thoroughly after use.
- Use any acids, drain cleaners, harsh chemicals, paint removers, metal cleaners, etc., in sink.
- Drop sharp objects in sink
or use asacutting surface.
Countertop
Fasteners
Screws
Sink
Step 6
For Under-Mount Use Only
Retrofit Apron Front Farm Sink
With Dual Mount Capability
Installation Instructions

Revised Date: 10/22/2019
- 16 -
LlMITED LlFETIME WARRANTY
The manufacturer warrants that the parts and assemblies of this
product will be free from defects in material and workmanship under
normal household use for as long as it is owned by the original
consumer purchaser.
This warranty covers the original consumer purchaser only and
does not include business, commercial or industrial use of this product.
This warranty shall not apply to goods which have been subject to
accidents, negligence or improper installation. Our responsibility under
this warranty is limited only to the replacement of parts and no other
costs. Shouldamalfunction occur within the time covered by this
warranty, replacement parts may by obtained from Customer Service
Department 1-800-626-3525. The manufacturer will, at its discretion,
provide replacement parts for installation by consumer for any parts
that prove defective under normal usage and service with new or
equivalent parts.
Haveaquestion? DON'T GO BACK TO THE STORE, WE CAN HELP, just call 1-800-626-3525, 8 a.m. to 5 p.m. EST Monday-Friday,
Retrofit Apron Front Farm Sink
With Dual Mount Capability
Installation Instructions
/