Page is loading ...

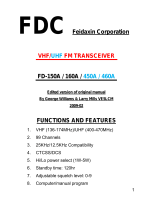
2M 70CM Compact Transceiver

I
A Note To Users
Thank you for purchasing the Mobile
transceiver. We trust this transceiver will give
you convenient and reliable communication for
many years.
For the best experience, we advise that you
read this manual completely before using your
new transceiver.
Notice
Please use the transceiver in
compliance with local regulations.

II
Contents
Security Information.................................................. 1
Accessories & Options............................................... 2
Supplied Accessories.............................................. 2
Optional Accessories.............................................. 2
Installation.................................................................. 3
Connect Power ....................................................... 3
Keeping the Transceiver Cool................................ 3
Install with Bracket ................................................ 4
Connect Accessories............................................... 4
Getting Acquainted..................................................... 6
DTMF Microphone Panel .......................................... 8
LCD Display ............................................................ 10
Front Panel Description............................................ 12
Basic Operation........................................................ 13
Power on/off......................................................... 13
Turn Volume......................................................... 13
Select Channel...................................................... 13
Transmitting and receiving................................... 14
Function Menu Operation........................................ 15
Auto Power Off(APO): Menu 01 ......................... 16
APRO (APRO): Menu 02 .................................... 16
Busy Channel Lock (BC Lock): Menu 03............ 16

III
Key Beep (Beep): Menu 04.................................. 17
Channel Save (CHASave): Menu 05.................... 17
DTMF Function (DTMF): Menu 06 .................... 18
Dual Watch (DW): Menu 07 ................................ 23
Decode Type and Decode Code (Menus 08 and 09)
.............................................................................. 23
Encode Type and Encode Code (Menus 10 and 11)
.............................................................................. 25
FM Radio Function(FM): Menu 12...................... 26
FM Scan(FM Scan)): Menu 13.......................... 27
FM SQL (FM SQL): Menu 14 ............................. 27
FM DualWatch (FM DW): Menu 15.................... 28
Font size (Choose(Font): Menu 16.................... 28
Key Lock Function (Keylock): Menu 17 ............. 28
Keypad Function(Keypad): Menu 18................... 29
Backlight (Lamp): Menu 19................................. 29
Setting Channel Names: (Name): Menus 20 /21/22
.............................................................................. 30
Set Opening Display (OpenDIS): Menu 23 ......... 31
Custom Keys Set (P1-P3、M Key): Menus 24-29
.............................................................................. 32
High/Low Power Set (Power): Menu 30.............. 33
PTT ID (PTT ID): Menu 31 ................................. 33

IV
ROGER(ROGER): Menu 32................................ 35
REVERSE (REVERSE): Menu 33 ...................... 35
Offset Frequency (RPT SET/RPT TYPE): Menus
34 and 35.............................................................. 35
Save Battery (SaveBat): Menu 36........................ 37
Scan (SCAN): Menus 37, 38, and 39 ................... 37
Squelch Level (SQL): Menu 40 ........................... 39
Step (Step): Menu 41............................................ 39
Tail Elimination (Tail): Menu 42.......................... 40
Talk Around (Talk): Menu 43............................... 40
Time out timer(TOT): Menu 44 ........................... 40
TX Stop (TXStop): Menu 45................................ 41
VOX (VOX): Menus 46-49.................................. 41
Wide and Narrow Bandwidth Set (WidNar): Menu
50.......................................................................... 42
User-defined Keys Menu ......................................... 42
OFF ...................................................................... 43
FM(FM) .......................................................... 43
Band change(Bandchange) ............................. 43
Time of system(Time)..................................... 43
Monitor Momentary(MONI) .......................... 44
Monitor Lock(MOLO).................................... 44
SQ OFF Momentary(SQM) ............................ 44

V
Mute(MUTE) .................................................. 45
Scan(SCAN) ................................................... 45
High/Low Power(LOW) ................................. 45
Emergency(EMG)........................................... 45
V/M Mode Switch(V/M) ................................ 45
DTMF Function(DTMF) ................................ 46
Call(Call) ........................................................ 46
Transmit 1750Hz(1750Hz) ............................. 46
A/B Mode Switch(A/B) .................................. 46
Talk Around(Talk)........................................... 46
Reverse Frequency(Reverse) .......................... 46
Reset Menu............................................................... 47
All Reset............................................................... 47
Function Reset...................................................... 47
Programming Operation........................................... 48
Lease Function ..................................................... 48
Wireless Change Frequency................................. 49
RX Inhibit/RXTX Inhibit..................................... 51
Setting Transmission Limits Per Minute.............. 52
Maintenance............................................................. 53
Base Knowledge................................................... 53
Cleaning and Maintenance................................... 53
Specification............................................................. 55

1
Security Information
To use this transceiver safely and efficiently, please
read the following safety information.
X Refer service to qualified technicians only.
X Turn off the transceiver while refueling or while
parked in a gasoline service station.
X Please turn off the transceiver where flammable
gases or fumes may be present.
X Do not place the transceiver where it might block
airbag deployment.
X Do not expose the transceiver to long periods of
direct sunlight or extreme heat.
X Do not transmit for long periods, especially at
high power. Doing so may damage the
transceiver or cause the transceiver to overheat.
X Do not use the transceiver with a damaged
antenna or feedline. Doing so may damage the
transmitter.
X When using this transceiver, Please make sure
the antenna is connected. Transmitting without an
antenna may damage the final amplifier in the
transmitter.
X Please keep at least 2in (5cm) away from the
antenna while transmitting.

X
2
Turn off the power immediately if the transceiver
emits peculiar odors or smoke and contact the
nearest authorized dealer for service.
Accessories & Options
Welcome to your new mobile transceiver. Please
unpack it carefully and ensure that the below
accessories are included. If you find any missing or
damaged components, please contact your dealer
immediately.
Supplied Accessories
Item Qty
Mobile transceiver 1
DC Power Cable 1
Bracket 1
Bracket Screw
(Installed in sides of transceiver )
2
User Manual 1
Optional Accessories
USB Programming
Cable
DC/AC Adaptor
DTMF Keypad
Microphone
No Keypad
Microphone
Antenna Mount Antenna

Installation
3
Connect Power
This transceiver should be connected to a 13.8V DC
power supply. It can not be connected directly to an
AC outlet. Connect the transceiver to a regulated
power supply with the supplied power cable. Do not
replace the DC power cable with a thinner wire. The
supplied cable is rated to meet the power requirements
of the transceiver.
Connect the DC power cable to a DC power supply or
battery. Connect the red wire to the positive terminal
and the black wire to the negative terminal. Then, plug
the power connector into the DC power outlet of the
transceiver.
Note: Make sure to turn off the DC power supply and
transceiver before connecting.
The DC power supply ca n only be connected to an AC
power outlet after all connections are completed.
Keeping the Transceiver Cool
As with all modern electronics, it is very important
that the transceiver not be allowed to overheat. The
Transceiver has been designed to take advantage of
natural air flow to keep it cool. Thus, to help in
providing enough space for natural air flow, it is very

4
important that you install the transceiver using the
supplied mounting bracket. If the transceiver is
installed without providing for adequate air flow, the
transceiver may overheat. If adequate air flow is not
available, the transceiver will be damaged from
overheating. Do not place books or other equipment
directly on the transceiver. Allow 4In (10cm) of
clearance between the rear of the transceiver and any
other objects.
Install with Bracket
An adjustable angle bracket is supplied with the
transceiver. Please attach the bracket to your desired
installation location. Remove the two mounting
screws from the sides of the transceiver and reinstall
them through the holes in the bracket.
Note: Do not install the transceiver where it might interfere
with the deployment of airbags.
Do not place the transceiver in the front windshield. The heat
of the sun may damage the transceiver.
Connect Accessories
Hand Microphone: The Hand microphone connection
jack is located on the left side of the front panel of the
transceiver.
Earphone: The Earphone connection jack is located
in the right of the rear panel of the transceiver. The

5
internal speaker is muted when an earphone or
external speaker is connected to this jack
Antenna: The SO-239 mount connection is on the left
of the rear panel of the transceiver. The antenna
system is composed of an antenna, feedline, and
ground network components. Carefully consider your
antenna system installation for best results with this
transceiver. For instance, be sure the antenna you will
use matches your desired operating frequencies.
Selecting an appropriate antenna is beyond the scope
of this manual. Do not transmit without first
connecting an antenna. Doing so may damage the
transceiver.

6
Getting Acquainted
Upper Panel
Front Panel

7
Rear Panel
1,Loudspeaker
2, Indicator Light
(Red light, green light)
3, MIC Connector (RJ45) 4,CHA+(Channel Up)
5, CHA-(Channel Down) 6, LCD display screen
7,VOL+(Volume Up) 8,VOL-(Volume Down)
9, Menu Key
10, P1 Key
(User defined)
11, P2 Key
(User defined)
12, P3 Key
(User defined)
13, Power Switch
14,Antenna Connector
15,Power Connector 16, Earphone Jack

8
DTMF Microphone Panel

9
1, PTT Push to Talk
2, MIC Microphone
3, UP Up, VOL+
4, DN Down, VOL-
5, A Call
6, B VFO/MR Switch
7, C A/B mode Switch
8, D VFO Band Change
9, # CHA+
10, * CHA-

10
LCD Display
No
Icon
Feature
Description
Operation Method
1
Memory Channel
No.
----
2
Being A Channel Switch A/B Key
3
Being B Channel Switch A/B Key
4
Keyboard Lockout
Press M Key for 2
Seconds
5
VOX Open Refer to Menu 45

11
6
DCS Open
In VFO/MR mode:
Decode Type and
Decode Code refer
to Menu08 and 09,
Encoded Type and
Encoded Code refer
to Menu 10 and 11
7
CT Open
The same as above
(DCS)
8
Offset Frequency
Refer to Menu 34
and 35
Wireless
Frequency Open
Refer to Page 44
10
Channel scan
disabled
Refer to Menu 39
11
Low Power Refer to Menu 30
12
High Power Refer to Menu 30
13
Indicate Power
strength when
transmitting, 10
grids for high
power, 5 grids for
small power.
Indicate signal
strength when
receiving.
----
14
Auto Power off Refer to Menu 01

12
15
Reverse
Frequency
Refer to Menu 33
16
Narrowband Refer to Menu 50
17
Dual Reception
Refer to Menu 07
18
DTMF Refer to Menu 06
19
Displayed
frequency value,
channel names,
menu items, and
other numbers,
letters or symbols
Information
----
Front Panel Description
Orient the transceiver with the front panel facing you.
Find the RJ-45 microphone jack on the left side of the
front panel. To the right of the microphone jack is a
column of three buttons. From top to bottom, these are
CH+, CH-, and M (Menu). The LCD display is
directly to the right of these three buttons.
Below the LCD display is a row of four buttons. From
left to right, these are P1, P2, P3, and the power
button.
Finally, to the right of the LCD display is a column of
two buttons, labeled VOL+ and VOL-.

13
Basic Operation
Power on/off
Once power is connected, press the
button to turn
the transceiver on. Three ascending tones will sound,
indicating that the transceiver has correctly powered
on. Hold the key for 2 seconds to turn the
transceiver off.
Turn Volume
Press “VOL+” to raise the volume. Press “VOL-” to
lower the volume. Hold the key to go fast. The volume
is adjusted in 15 steps from 0 (lowest) to 15 (highest).
The default setting is 4.
Select Channel
You can select an operating channel in one of several
ways:
1) Use the programming software to store operating
channels ahead of time. You can then access them
directly in MR mode, using the channel up/down
buttons or the numeric keypad on the microphone.
2) Input frequency values by using the numeric
keypad in VFO mode.
3) Press the “CHA+” or “CHA-” key to select the

14
frequency in VFO mode. Hold the key to go fast
4) Input channel number by using the numeric keypad
to select memory channel in MR mode.
Note: This transceiver has a dual-watch function, you can
switch between A and B channels using the “C” key (A/B
switch key) on the microphone keypad. The A channel can only
operate in MR/CH mode, while the B channel can be set to
either MR/CH or VFO mode. Please refer to page 40-41
regarding the user-defined key function of the A/B switch and
the VFO/MR switch.
In VFO mode, the transceiver will store the most recently used
frequency in each of its supported ranges. To switch quickly
between the transceiver’s supported frequency ranges, press the
key.
Transmitting and receiving
To transmit, press and hold the PTT key of the
microphone and speak normally. Release the PTT key
to stop transmitting.
¤ Please use Low Power whenever possible. If the
distance between you and the other station is
short, low power (5 watts) should be adequate.
Using low power when possible will not only use
less power from your battery or power supply,
but your transmitter will also produce less heat,
increasing the life of your final amplifier.
/