Pioneer CP-2EX Owner's manual

Category
Speaker mounts
Type
Owner's manual
2
En
Thank you for buying this Pioneer product. Please read
through these operating instructions for proper assembly
and use. After you have finished reading the instructions, put
them away in a safe place for future reference.
Before you start
Before setting up your speaker system, we recommend
reading the operating instructions for your system thor-
oughly.
Only use the screws supplied when fixing the speaker to
the speaker stand.
Do not place the stand on an unstable and/or sloping
surface. The stand and speaker may fall and cause
injury.
Do not use with any speaker system other than the one
for which the unit was designed. The stand may collapse
and be damaged and/or the speaker may fall and cause
injury.
When moving the speaker and stand, first remove the
speaker from the stand, and then move the stand,
holding it by the two stems.
Installing the speaker stands
Place the stand on a stable, level surface; placing the stand
on an unstable surface can be dangerous.
When placing the speaker, keep in mind that the tone is
affected by the position of the speaker.
If the bass is insufficient, move the speaker closer to the wall.
The richest bass sound is obtained when the speaker is right
against the wall. If the bass is too powerful, producing a
muffled tone, move the speaker away from the wall. Placing
the speaker against a thick curtain may also be effective.
50 cm
20 cm
Adjust the position as necessary to obtain optimal sound
from your system.
Pioneer assumes no liability whatsoever for damages
resulting from assembly, improper mounting, insuffi-
cient reinforcement, misuse of the product, acts of
nature, etc.
Assembling the speaker stands
Assemble the speaker stands as illustrated below. Please
note that a flathead screwdriver will be necessary for
assembly. The following illustration shows the fully assem-
bled speaker stand:
Screw holes
for securing
speaker
Speaker support
Stand base
Stand stems
Align the screw holes on the stand base and speaker
support with the screw holes in the two stems, then
insert the screws and tighten.
Screws (Bind head, M6xL40)
40 mm
Black
Screws (Bind head, M6xL40)
Nut
Spike (SBA6053)
Spike base
(SLA1057)
40 mm
Black
Speaker
support
Stand
base
Stand
stems
Please note that sunken
screw holes are provided
in the speaker support.
(SBA6054)
(SBA6054)
Make sure you assemble the stand on a flat surface that
is relatively soft (such as a carpet).
Make sure the screws are inserted in the screw holes as
shown above (with the screw head hidden) when
securing the speaker. Improper setup could result in
damage or injury if the speaker falls from the stand.
3
En
English
Using the spikes
The speaker stands include spikes that you can use to isolate
the speaker from the floor. Spikes are recommended when
placing the stand on a thick carpet (for added stability), or for
better sound when placing the stand on a hard reverberant
surface (such as a concrete or wood floor). Use the supplied
spike bases to avoid scratching the floor or other surface
where the stand is placed.
Spike
1
2
Nut
Stand base plate
1 Attach the spikes to the nuts provided.
2 Attach all four spikes to the threaded metal inserts
at the base of the speaker stand.
3 Choose the location for speaker placement then put
the spike bases on the floor.
4 Place the stand so that the spikes are resting on the
spike bases on the floor.
Before placing the speaker on the speaker stand, make sure
the stand is stable and resting squarely on all four spikes.
Note that these spikes are sharp metal and can cause
damage to flooring. Make sure to lay down a cloth or
suitable base before setting up.
The spike bases should be placed as shown below (with
the depression on the top side).
Make sure to use the spike bases provided to avoid
damaging the surface where you place the stand.
Attaching speakers to the stands
To avoid accident or injury, please use screws to secure the
speakers to the speaker stands.
Assembly with the S-2EX speaker system
If you are using the S-2EX speaker system, note that there is
a fastening nut provided on the speaker base (see below).
When using speaker spikes:
Place the speaker spike bases in the four holes provided on
the speaker support, then secure the speaker to the speaker
support using the washer, spring washer and the 62 mm
screws as shown below.
(SBA6050)
Speaker
base
Speaker
support
Washer (SBE6006)
Speaker
spike base
Fastening nut
Spring washer
(SBE6005)
Screws
(Bind head, M5xL62)
62 mm
Black
Screw holes
for securing
speaker
When not using speaker spikes:
Secure the speaker to the speaker support using the washer,
spring washer and the 36 mm screws as shown below.
(SBA6048)
Speaker
base
Speaker
support
Washer (SBE6006)
Fastening nut
Screws
(Bind head, M5xL36)
36 mm
Black
Screw holes
for securing
speaker
Spring washer
(SBE6005)
4
En
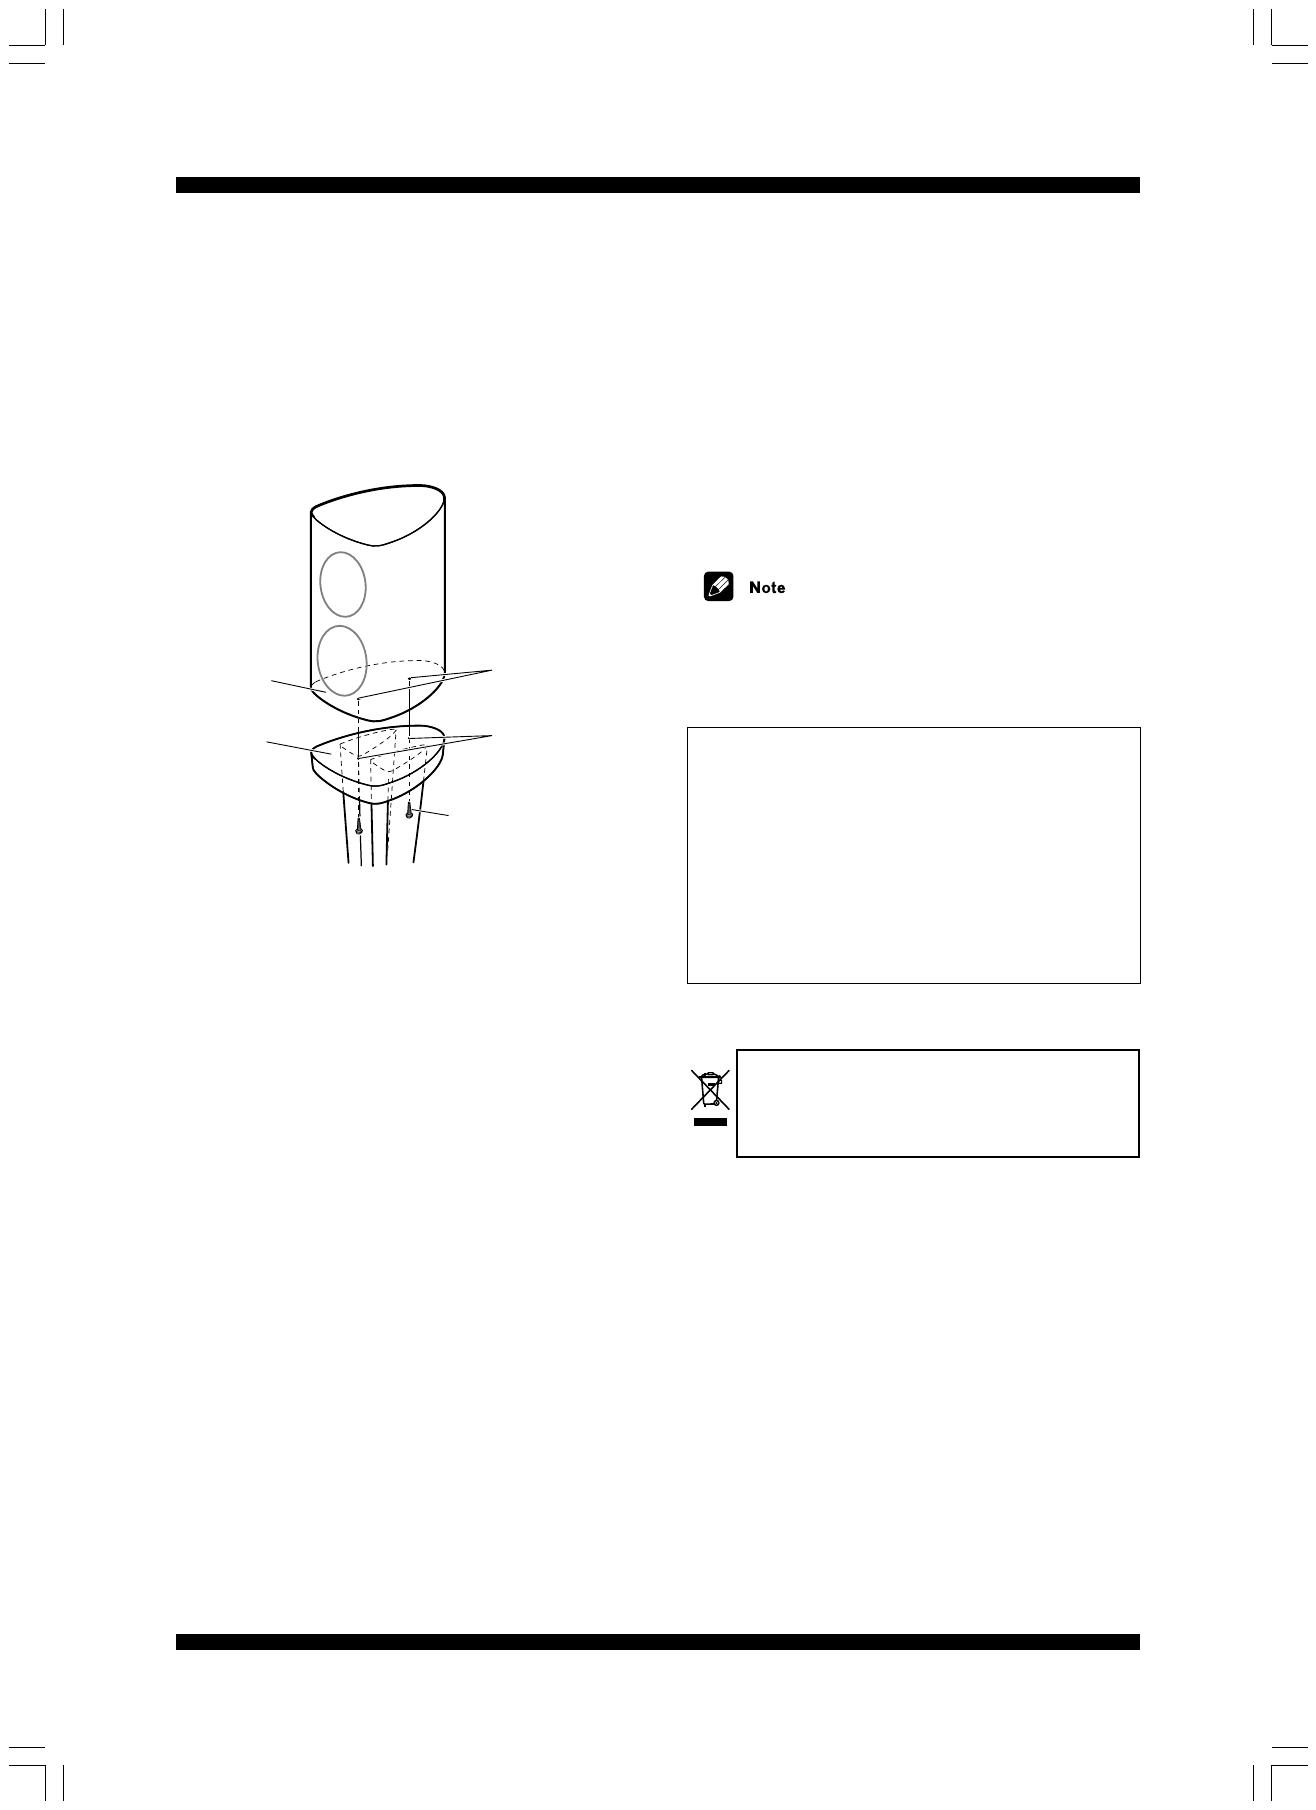
Assembly with a separate speaker system
If you are using a speaker system other than the S-2EX, note
that you will have to use a hand drill (or the like) to make
holes on the speaker base to secure it to the stand. Make
sure the speaker weight does not exceed 29 kg.
After making holes on the speaker base where indicated
(make sure they line up with the screw holes on the speaker
support), secure the speaker to the speaker support using
commercially available wood screws as shown below.
Speaker
base
Speaker
support
Fastening nut
Commercially
available wood
screw
Screw holes
for securing
speaker
Cabinet and stand maintenance
Use a polishing cloth or dry cloth to wipe off dust and
dirt.
If the cabinet or stand is very dirty, use a soft cloth
dipped in some neutral cleanser diluted 5 or 6 times
with water. Finally, wipe again using a dry cloth. Do not
use furniture wax or cleaners.
Never use thinners, benzine, insecticide sprays and
other chemicals on or near the cabinet or stand, since
these will corrode the surfaces.
Specifications
External dimensions ............... 400 (W) x 604 (H) x 513 (D) mm
Weight .............................................................................. 17.8 kg
Supplied accessories
Stand base plates ...................................................................... 2
Speaker supports ....................................................................... 2
Stems .......................................................................................... 4
Spikes (with attached nuts) [SBA6053] ................................... 8
Spike bases [SLA1057] .............................................................. 8
Screws (Bind head, M5xL62) [SBA6050] ................................. 4
Screws (Bind head, M5xL36) [SBA6048] ................................. 4
Screws (Bind head, M6xL40) [SBA6054] ............................... 24
Spring washers [SBE6005]........................................................ 4
Washers [SBE6006] ................................................................... 4
These operating instructions [SRD6045] ................................. 1
Specifications and design subject to possible modifica-
tion without notice, due to improvements.
The product number are listed above in square brackets.
If you want to dispose this product, do not mix it with
general household waste. There is a separate collection
system for used electronic products in accordance with
legislation that requires proper treatment, recovery and
recycling.
Private households in the 25 member states of the EU, in
Switzerland and Norway may return their used electronic
products free of charge to designated collection facilities or to a
retailer (if you purchase a similar new one).
For countries not mentioned above, please contact your local
authorities for the correct method of disposal.
By doing so you will ensure that your disposed product under-
goes the necessary treatment, recovery and recycling and thus
prevent potential negative effects on the environment and
human health.
Part name
Protector (Bottom)
Protector (Middle)
Protector (Top)
Protector
Packing case
Protection sheet
Protection sheet
Protection sheet
Part no.
SHA6095
SHA6096
SHA6097
SHA6098
SHG6150
SHC6044
SHC6045
SHC6046
Replacement part numbers
Published by Pioneer Corporation.
Copyright © 2005 Pioneer Corporation.
All rights reserved.
PIONEER CORPORATION
4-1, Meguro 1-Chome, Meguro-ku, Tokyo 153-8654, Japan
PIONEER ELECTRONICS (USA) INC.
P.O. BOX 1540, Long Beach, California 90810-1540, U.S.A. TEL: (800) 421-1404
PIONEER ELECTRONICS OF CANADA, INC.
300 Allstate Parkway, Markham, Ontario L3R OP2, Canada TEL: 1-877-283-5901
PIONEER EUROPE NV
Haven 1087, Keetberglaan 1, B-9120 Melsele, Belgium TEL: 03/570.05.11
PIONEER ELECTRONICS ASIACENTRE PTE. LTD.
253 Alexandra Road, #04-01, Singapore 159936 TEL: 65-6472-7555
PIONEER ELECTRONICS AUSTRALIA PTY. LTD.
178-184 Boundary Road, Braeside, Victoria 3195, Australia, TEL: (03) 9586-6300
PIONEER ELECTRONICS DE MEXICO S.A. DE C.V.
Blvd.Manuel Avila Camacho 138 10 piso Col.Lomas de Chapultepec, Mexico,D.F. 11000 TEL: 55-9178-4270
K002_A_En
<05K00001> Printed in China <SRD6045-C/1>
  • Page 1 1
  • Page 2 2
  • Page 3 3
  • Page 4 4
  • Page 5 5
  • Page 6 6
  • Page 7 7
  • Page 8 8
  • Page 9 9
  • Page 10 10
  • Page 11 11
  • Page 12 12
  • Page 13 13
  • Page 14 14
  • Page 15 15
  • Page 16 16
  • Page 17 17
  • Page 18 18
  • Page 19 19
  • Page 20 20
  • Page 21 21
  • Page 22 22
  • Page 23 23
  • Page 24 24
  • Page 25 25
  • Page 26 26
  • Page 27 27
  • Page 28 28
  • Page 29 29
  • Page 30 30
  • Page 31 31
  • Page 32 32
  • Page 33 33
  • Page 34 34
  • Page 35 35
  • Page 36 36
  • Page 37 37
  • Page 38 38
  • Page 39 39
  • Page 40 40

Pioneer CP-2EX Owner's manual

Category
Speaker mounts
Type
Owner's manual

Ask a question and I''ll find the answer in the document

Finding information in a document is now easier with AI