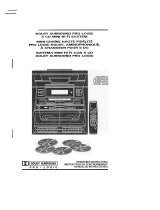
JVC MX-D602T User manual

Category
Cassette players
Type
User manual

This manual is also suitable for

GVT0004-001A
[ J ]
For Customer Use:
Enter below the Model No. and Serial
No. which are located either on the rear,
bottom or side of the cabinet. Retain this
information for future reference.
Model No.
Serial No.
INSTRUCTIONS
MX-D602T
COMPACT COMPONENT SYSTEM
COMPACT
DIGITAL AUDIO
Consists of CA-D602T, SP-D602 and SP-DS90.
CA-D602T SP-D602
DISC
DISC
DISC
PROGRAM
/RANDOM
REPEAT
EDIT
SP-D602
LABYRINTH
LABYRINTH
LABYRINTH
LABYRINTH
FM
AM
RM-SED602TU REMOTE CONTROL
VOLUME
+
TAPE A
AUX
REC PAUSE
TAPE B
DIRECTION
REPEAT
SLEEP
SHIFT
POWER
TEST TONE
CENTER MODE
DELAY TIME
L BALANCE R
CENTER
LEVEL
3CH LOGICPRO LOGIC
S.A.BASS
SOUND
MODE
DISC 1
CD
CONTROL
TAPE
CONTROL
DISC 2 DISC 3
FM MODE
–+
REAR
LEVEL
–+
SP-DS90
(SP-DSS90) (SP-DSC90) (SP-DSS90)
MX-D602T[J]Cover 98.3.31, 2:28 PM1
Warnings, Cautions and Others
CAUTION: TO REDUCE THE RISK OF ELECTRIC SHOCK.
DO NOT REMOVE COVER (OR BACK)
NO USER SERVICEABLE PARTS INSIDE.
REFER SERVICING TO QUALIFIED SERVICE PERSONNEL.
RISK OF ELECTRIC SHOCK
DO NOT OPEN
The lightning flash with arrowhead symbol,
within an equilateral triangle is intended to
alert the user to the presence of uninsulated
"dangerous voltage" within the product's
enclosure that may be of sufficient
magnitude to constitute a risk of electric
shock to persons.
The exclamation point within an equilateral
triangle is intended to alert the user to the
presence of important operating and
maintenance (servicing) instructions in the
literature accompanying the appliance.
CAUTION
WARNING: TO REDUCE THE RISK OF FIRE
OR ELECTRIC SHOCK, DO NOT EXPOSE
THIS APPLIANCE TO RAIN OR MOISTURE.
Caution –– POWER switch!
Disconnect the mains plug to shut the power off completely.
The POWER switch in any position does not disconnect the
mains line. The power can be remote controlled.
IMPORTANT FOR LASER PRODUCTS
1. 
2.
3. 
CLASS 1 LASER PRODUCT
DANGER: Invisible laser radiation when
open and interlock failed or defeated. Avoid
direct exposure to beam.
CAUTION: Do not open the top cover.
There are no user serviceable parts inside
the unit; leave all servicing to qualified
service personnel.
1. 
2. 
CAUTION
Do not remove screws, covers or cabinet.
Do not expose this appliance to rain or
moisture.
To reduce the risk of electrical shocks, fire, etc.:
For Canada/pour le Canada
CAUTION: TO PREVENT ELECTRIC SHOCK, MATCH WIDE
BLADE OF PLUG TO WIDE SLOT, FULLY INSERT
ATTENTION: POUR EVITER LES CHOCS ELECTRIQUES,
INTRODUIRE LA LAME LA PLUS LARGE DE LA FICHE DANS LA
BORNE CORRESPONDANTE DE LA PRISE ET POUSSER
JUSQUAU FOND
MX-D602T[J]Cover 98.3.31, 2:28 PM2
1
Easy operation
Great sound
Triple Tray
Thank you for purchasing the JVC Compact Component System.
We hope it will be a valued addition to your home, giving you years of enjoyment.
Be sure to read this instruction manual carefully before operating your new stereo system.
Here you will find all the information you need to set up and use the system.
For questions that are not be answered in the manual, contact your dealer.
Features
Here are some of the things that make your System powerful and easy to use.
The controls and operations have been designed to make them very easy to use, so you can spend
your time listening to music.
With the One Touch Operation feature of JVC’s COMPU PLAY you can turn on the System and
start the radio, the Cassette Deck, or the CD Player with a single touch.
To get such great sound from such a compact package the System has:
Built-in Dolby Pro Logic and Dolby 3ch Logic effects. Combined with the optional center
and rear speakers, this allows you to enjoy the dynamic, pulsating sound effects of a cinema.
Programed sound mode includes live surround effects D. CLUB, HALL, and STADIUM. It also
includes S.E.A (Sound Effect Amplifier) effects ROCK, POP, and CLASSIC. You can also
register up to three customized settings (MANUAL 1 to 3).
CD changer function can operate 3 discs.
Discs can be changed during play using the TRIPLE TRAY.
Continuous, random or program play of 3 discs.
The three timers, Daily Timer, Recording Timer, and Sleep Timer are extremely easy to set.
How This Manual Is Organized
In this manual we have incorporated some special features:
Basic information that is the same for many different functions is grouped in one place, and not
repeated in each procedure. For instance, in the section on playing a CD, we do not repeat the
information about setting the volume and the sound conditions, which are discussed in the Common
Operations section.
Name of buttons and controls are written in all capital letters like this: SOUND MODE.
The manual has a table of contents to help you quickly look up what you want to know.
We’ve enjoyed making this manual for you, and hope you will use it to enjoy the sound and many
features built into your System.
IMPORTANT CAUTIONS
1. Installation of the Unit
Select a place which is level, dry and neither too hot nor too cold. (Between 5°C and 35°C or
41°F and 95°F.)
Leave sufficient distance between the Unit and a TV.
Do not use the Unit in a place subject to vibrations.
2. Power cord
Do not handle the power cord with wet hands!
Some power (16 watts) is always consumed as long as the power cord is connected to the wall
outlet.
When unplugging the Unit from the wall outlet, always pull the plug, not the power cord.
3. Malfunctions, etc.
There are no user-serviceable parts inside. If anything goes wrong, unplug the power cord and
consult your dealer.
Do not insert any metallic object into the Unit.
Three timers
EN/MX-D602T[J]/f 98.3.31, 2:24 PM1
2
Table of Contents
Features......................................................................1
How This Manual Is Organized.................................1
IMPORTANT CAUTIONS .......................................1
Getting Started ................................................ 3
Accessories ................................................................3
How to Put Batteries in the Remote Control .............3
Using the Remote Control .........................................3
Connecting the FM Antenna......................................4
Connecting the AM Antenna .....................................4
Connecting the Speakers ...........................................5
Connecting the Center Speaker and Rear Speakers ..5
Connecting Auxiliary Equipment ..............................6
COMPU PLAY..........................................................7
Common Operations....................................... 8
Demo Mode ...............................................................8
Setting the Clock .......................................................9
Turning the Power On and Off ..................................9
Turning the System On.........................................9
Turning the System Off ........................................9
Adjusting the Volume ................................................9
Balance Adjustment............................................10
Reinforcing the Bass Sound ....................................10
Sound Modes ...........................................................11
Customizing a Sound Mode ............................... 11
When a Rear Speaker is Connected.........................12
Adjusting the Rear Speaker Level......................12
Listening to Auxiliary Equipment ...........................13
Dolby Surround ............................................. 14
Preparing the Dolby Surround.................................15
Getting Ready To Use Dolby Pro Logic..................16
Speaker Arrangements for Dolby Pro Logic ......16
Setting-up Dolby Pro Logic ...............................16
Getting Ready To Use Dolby 3 Channel Logic .......17
Speaker Arrangements for
Dolby 3 Channel Logic ..................................17
Setting-up Dolby 3ch Logic ...............................17
Using Dolby Surround.............................................17
Using the Tuner ............................................. 18
Tuning in a Station ..................................................18
Switching between Frequency Bands.................18
Three Ways to Select a Station ...........................19
Presetting Stations ...................................................19
Changing the FM Reception Mode .........................19
Using the CD Player...................................... 20
Loading CDs............................................................21
Basics of Using the CD Player —
Continuous Play .................................................21
Playing a CD ......................................................21
Selecting a Track ................................................22
Locating a Track with the Remote Control
Directly...........................................................22
Fast Forward / Reverse.......................................22
Changing Discs While Playing...........................22
Programing the Playing Order of the Tracks ...........23
Checking the Program ........................................24
Changing the Program........................................24
Random Play ...........................................................24
Repeating a Track or the Discs ................................25
Tray Lock Function .................................................25
Locking the Trays ...............................................25
Unlocking the Trays ...........................................25
Using the Cassette Deck (Playing) .............. 26
Regular Play ............................................................27
Fast Left and Fast Right .....................................27
Music Scan ..............................................................27
Finding the Beginning of the Current Selection ....27
Finding the Beginning of the Next Selection .....27
Reverse Mode ..........................................................28
Using the Cassette Deck (Recording) ......... 29
Things to Know before You Start Recording .....29
Standard Recording .................................................30
Recording AM Station to Tape .......................... 31
CD Direct Recording ...............................................31
Auto Edit Recording................................................31
Tape to Tape Recording (Dubbing) .........................32
How to Use DUBBING......................................32
Using the Timer ............................................. 33
Setting the Daily Timer ...........................................34
Turning the Daily Timer On and Off..................35
Setting the Recording Timer....................................36
Turning the Recording Timer On and Off ..........37
Setting the Sleep Timer ...........................................37
Timer Priority ..........................................................38
Care and Maintenance .................................. 39
Troubleshooting ............................................ 40
Specifications................................................ 41
EN/MX-D602T[J]/f 98.3.31, 2:24 PM2
3
Getting Started
Accessories
Check that you have all of the following items, which are supplied with the System.
AM Loop Antenna (1)
Remote Control (1)
Batteries (2)
FM Wire Antenna (1)
If any of these items is missing, contact your dealer immediately.
How to Put Batteries in the Remote
Control
Match the polarity (+ and –) on the batteries with the + and – markings in the battery compartment.
CAUTION: Handle batteries properly.
To avoid battery leakage or explosion:
Remove batteries when the Remote Control will not be used for a long time.
When you need to replace the batteries, replace both batteries at the same time with new ones.
Do not use an old battery with a new one.
Do not use different types of batteries together.
Using the Remote Control
The Remote Control makes it easy to use many of the functions of the System from a distance of up to 7m
(23 feet) away.
You need to point the Remote Control at the remote sensor on the System’s front panel.
R6P (SUM-3)/AA (15F)
DISC
DISC
DISC
PROGRAM
/RANDOM
REPEAT
EDIT
Remote sensor
EN/MX-D602T[J]/f 98.3.31, 2:24 PM3
4
CAUTION: Make all connections before plugging the Unit into an AC power outlet.
Connecting the FM Antenna
Connecting the AM Antenna
Using the Supplied Wire Antenna
FM Wire Antenna
Extend the supplied FM Wire Antenna
horizontally.
Using an FM 75-Ohm Antenna Cable (not supplied)
If reception is poor, connect the outside antenna.
13
2
Outside FM Antenna Wire
Before attaching a 75-ohm coaxial lead (the kind with a round wire going to an outside antenna),
disconnect the supplied FM Wire Antenna.
CAUTION: To avoid noise, keep antennas away from metallic parts of the System,
connecting cord and the AC power cord.
Note: Even when connecting
an outside AM antenna,
keep the indoor AM loop
connected.
AM Loop Antenna
Turn the loop until you
have the best reception.
Snap the tabs on the loop
into the slots of the base to
attach the AM Loop.
123
If reception is poor, connect the outside antenna.
AM Antenna Wire (not supplied)
EN/MX-D602T[J]/f 98.3.31, 2:24 PM4
5
CAUTION: Make all connections before plugging the Unit into an AC power outlet.
Connecting the Speakers
For each speaker, connect one end of the speaker wire to the speaker terminals on the back of the System.
1. Open each of the terminals and insert the speaker wires firmly, then close the terminals.
2. Connect the red (+) and black (–) terminals of the right side speaker to the red (+) and black (–)
terminals marked RIGHT on the System.
Connect the red (+) and black (–) terminals of the left side speaker to the red (+) and black (–)
terminals marked LEFT on the System.
IMPORTANT: Use speakers with the correct impedance only.
The correct impedance is indicated on the back panel.
CAUTION: If a TV is installed near the speakers, the TV may
display irregular colors. In this case, set the speakers away from
the TV.
SPEAKERS
RIGHT LEFT
FRONT
+
+
Right Speaker
Left Speaker
Connecting the Center Speaker and
Rear Speakers
Connect the center speaker and rear speakers.
LEFT
RIGHT
CENTER
REAR
RIGHT REAR
SPEAKER
LEFT REAR
SPEAKER
CENTER
SPEAKER
EN/MX-D602T[J]/f 98.3.31, 2:24 PM5
6
Now you can plug the AC power cord into the wall outlet, and your System is
at your command!
RIGHT LEFT
AUX
VCR or other equipment
To listen to this source, press AUX.
Connecting Auxiliary Equipment
EN/MX-D602T[J]/f 98.3.31, 2:24 PM6
7
COMPU PLAY
COMPU PLAY is JVC’s feature that lets you control the most frequently used functions of the System
with a single touch.
One Touch Operation starts playing a CD, turns on the radio, plays a tape, etc. with a single press of the
play button for that function. What One Touch Operation does for you is to turn the power on, then start
the function you have specified. If the Unit is not ready, such as no CD or tape in place, the Unit still
powers on so you can insert a CD or tape.
How One Touch Operation works in each case is explained in the section dealing with that function.
The COMPU PLAY buttons are:
On the Unit
CD Player DISC 1 to DISC 3 buttons
CD Player 0 (Open/Close) buttons
CD £/8 button
TAPE £ button
FM/AM button
AUX button
On the Remote Control
FM button
AM button
DISC 1 to DISC 3 buttons
AUX button
DISC
DISC
DISC
PROGRAM
/RANDOM
REPEAT
EDIT
COMPU PLAY
buttons
FM
AM
RM-SED602TU REMOTE CONTROL
VOLUME
+
TAPE A
AUX
REC PAUSE
TAPE B
DIRECTION
REPEAT
SLEEP
SHIFT
TEST TONE
CENTER MODE
DELAY TIME
L BALANCE R
CENTER
LEVEL
3CH LOGICPRO LOGIC
S.A.BASS
SOUND
MODE
DISC 1
CD CONTROL TAPE CONTROL
DISC 2 DISC 3
FM MODE
–+
REAR
LEVEL
–+
POWER
COMPU PLAY
buttons
EN/MX-D602T[J]/f 98.3.31, 2:24 PM7
8
Common Operations
DISC
DISC
DISC
PROGRAM
/RANDOM
REPEAT
EDIT
S.A. BASS
VOLUME
STANDBY indicator
AUX
PHONES
Display
SOUND MODE indicator
Source, Sound Mode Volume level etc.
When the System is being used, the display shows other items as well.
However, we have only shown the items described in this section.
Demo Mode
When the System is connected to an AC power outlet, a Demo automatically starts showing some of the
system’s features.
The Demo display cycles through the following items repeatedly.
Scrolling display of “DEMO MODE START”.
Demo of PRO LOGIC and 3CH LOGIC.
Demo of Sound Modes.
Demo of S.A. BASS.
Demo of continuous play from DISC 1 to DISC 3.
To turn the Demo off, press any of the operation buttons. “DEMO OFF” appears on the display and
the Demo automatically stops.
To turn the Demo on, press CANCEL/DEMO for more than 2 seconds.
FM
AM
RM-SED602TU REMOTE CONTROL
VOLUME
+
TAPE A
AUX
REC PAUSE
TAPE B
DIRECTION
REPEAT
SLEEP
SHIFT
TEST TONE
CENTER MODE
DELAY TIME
L BALANCE R
CENTER
LEVEL
3CH LOGICPRO LOGIC
S.A.BASS
SOUND
MODE
DISC 1
CD
CONTROL
TAPE
CONTROL
DISC 2 DISC 3
FM MODE
–+
REAR
LEVEL
–+
POWER
VOLUME
+, –
AUX
S.A. BASS
SOUND MODE
CANCEL/DEMO
SEA CONTROL
TIMER/CLOCK
SOUND MODE
MULTI CONTROL
SET
POWER
POWER
REAR LEVEL
–, +
SHIFT
BALANCE
L, R
EN/MX-D602T[J]/f 98.3.31, 2:24 PM8
9
Setting the Clock
Before operating the unit, set the correct time.
You can set the clock whether the Unit is on or off.
1. Press TIMER/CLOCK.
The hour digits begin flashing.
2. Press 4 P. DOWN or ¢ P. UP on
the MULTI CONTROL to set the hours.
Press ¢ P. UP to increase the hour. Press 4 P. DOWN
to decrease the hour. Holding down continuously changes
the hour setting more rapidly.
3. Press SET.
The minute digits begin flashing.
4. Press 4 P. DOWN or ¢ P. UP on
the MULTI CONTROL to set the minutes.
Press ¢ P. UP to increase the minutes. Press 4 P. DOWN
to decrease the minutes. Holding down continuously changes
the minute setting more rapidly.
5. Press SET.
“CLOCK OK” appears on the display.
The clock stops flashing, and the clock timer starts from 0 second.
If the clock is not set, “AM12:00” will flash instead of the clock indication.
When the time has been set, TIMER/CLOCK can be used to operate the Daily Timer and Recording
Timer.
To adjust the time once the clock has been set, press TIMER/CLOCK 5 times and follow the
procedure above.
CAUTION: If there is a power failure, the clock loses its setting.
The display shows “AM12:00”, and the clock must be reset.
Turning the Power On and Off
Turning the System On ——————————————————
Press POWER.
“WELCOME” appears on the display and the STANDBY indicator
goes out.
The System comes on ready to continue in the mode it was in when the power was last turned off.
If the last thing you were doing was listening to a tape in Deck B, you are now ready to listen to a
tape again in Deck B, or you can change to another source.
If you were listening to the Tuner last, the Tuner comes on playing the station it was last set to.
Turning the System Off ——————————————————
Press POWER again.
“GOOD BYE” appears on the display for a while and the STANDBY
indicator lights up. The clock time appears on the display.
Some power (16 watts) is always consumed even though the power is on standby.
To switch off the Unit completely, unplug the AC power cord from the AC outlet. When you unplug
the AC power cord, the clock will be reset to AM 12:00 immediately, and preset Tuner stations will be
erased in a few days.
Adjusting the Volume
Turn VOLUME clockwise to increase the volume or anticlockwise to decrease it.
Turning VOLUME quickly also adjusts the volume level quickly.
When using the Remote Control, press VOLUME + to increase the volume or press VOLUME – to
decrease it.
You can adjust the volume level between 0 and 50.
or
1
2 , 4
3 , 5
VOLUME
+
Flashing
Flashing
or
POWER
EN/MX-D602T[J]/f 98.3.31, 2:25 PM9
10
CAUTION: The Volume cannot be adjusted while the Unit is on STANDBY.
DO NOT turn on the Unit and/or start playing any source without setting
the VOLUME control to 0; otherwise, the sudden blast of sound can
damage your hearing, speakers and/or headphones.
For private listening
Connect a pair of headphones to the PHONES jack. No sound comes out of the speakers.
Be sure to turn down the volume before connecting or putting on headphones.
Balance Adjustment ————————————————————
You can use the Remote Control to adjust the left and right balance of the speakers.
1. Press SHIFT.
2. Press BALANCE L (10) or R (+10).
The display changes to show the balance adjustment.
Pressing L (10) moves the pointer to the left, pressing R (+10) moves the pointer to the right.
The balance is normally set to the center position.
Note: If no adjustments are made for 2 seconds in balance adjustment mode, the display reverts to the
previous display.
Reinforcing the Bass Sound
S.A. (Signal Adaptive) BASS adjusts low tones at low volume to enhance their effect. When the volume
level is low, this enhances low tones that are normally difficult to hear and adjusts low tones to a fixed
level to reduce low tone distortion.
Press S.A. BASS.
Pressing S.A. (Signal Adaptive) BASS changes the bass setting in the following order.
= SA-BASS1 = SA-BASS2 = OFF = (back to the beginning)
The S.A. BASS indicator lights up, and “SA-BASS1” or “SA-BASS2” appears on the display for three
seconds.
SA-BASS2 enhances low tones more than SA-BASS1.
To cancel the effect, press S.A. BASS until “OFF” appears on the display. The button light goes out.
To recall the previous S.A. BASS mode, press S.A. BASS once.
When listening to recording with low volume low tones, the difference between SA-BASS1 and SA-
BASS2 is clear. When listening to recording with louder low tones, however, the difference between
SA-BASS1 and SA-BASS2 may not be so clear.
S.A.BASS
or
SHIFT
L BALANCE R
Display when set for no
sound from the right speaker.
Display when set for no
sound from the left speaker.
Display at the
center position.
EN/MX-D602T[J]/f 98.3.31, 2:25 PM10
11
Sound Modes
The System has some preset sound effects that give you control of the way your music sounds, so you can
tailor it for your room and for the quality of the source. We can give you some idea of how each one
affects the music, but the only way to really tell is to try them yourself.
You can also create up to three of your own customized S.E.A. (Sound Effect Amplifier) settings and
store them in the Unit’s memory (MANUAL 1, MANUAL 2, MANUAL 3).
The preset sound modes include modes using surround effects and modes using S.E.A. effects.
Sound Mode effects cannot be recorded.
To get an effect, press SOUND MODE repeatedly until the Sound Mode you want appears on the display.
The Sound Mode selected will appear on the display for three seconds. When a surround effect mode is
selected, the frame around the SOUND MODE indicator will light up. When a S.E.A. effect mode is
selected, the SOUND MODE indicator will light up.
Each time you press SOUND MODE, the Sound Mode changes as follows:
= D. CLUB = HALL = STADIUM = ROCK = POP = CLASSIC = MANUAL 1 =
MANUAL 2 = MANUAL 3 = OFF = (back to the beginning)
Surround effect modes
D. CLUB (Dance Club) Increases resonance and bass.
HALL Adds depth and brilliance to the sound, like in a concert hall.
STADIUM Adds clarity and spreads the sound, like in an outdoor stadium.
S.E.A. effect modes
ROCK Boosts low and high frequencies.
POP Good for vocal music.
CLASSIC Set for wide and dynamic sound stereo systems.
To cancel an effect, press SOUND MODE until “OFF” appears on the display. The SOUND MODE
indicator goes out.
To recall the previous Sound Mode, press SOUND MODE once.
Customizing a Sound Mode ————————————————
You can change an existing sound mode to suit your own preferences. These changed settings can be
stored in the Unit’s sound mode memory.
1. Select the Sound Mode you want to change.
If you select D. CLUB, HALL, or STADIUM, the surround effect remains unchanged, but you can
adjust the S.E.A. effect.
2. Press SEA CONTROL.
The low tone section of the tone equalizer flashes. Once “SEA CONT” appears, the low tone levels
will appear.
Note: If no adjustments are made for 10 seconds after SEA CONTROL is pressed, Sound Mode will
appear on the display then revert to the previous display.
\
Flashing
or
SOUND
MODE
EN/MX-D602T[J]/f 98.3.31, 2:25 PM11
12
3. Use MULTI CONTROL to adjust to any Sound Mode desired.
Press 4 P. DOWN or ¢ P. UP on the MULTI CONTROL to select the tone range you want to
adjust. You can adjust “LOW”, “MID” or “HIGH” tone.
Press 1 TUNING DOWN or TUNING UP ¡
on the MULTI CONTROL to adjust the level.
The level can be adjusted between –3 and +3 in 7 steps.
4. Press SET.
“MANUAL 1” appears on the display.
5. Press 4 P. DOWN or ¢ P. UP on the MULTI CONTROL to select
the MANUAL number for the memory.
6. Press SET again.
“MEMORY” appears for 2 seconds.
The setting that has been created is stored in the memory.
The adjustment you have made will apply to the sound you hear.
If you store new settings to a memory number that has already been used, the new settings replace the
existing setting.
When a Rear Speaker is Connected
If the optional rear speaker is connected, you can use the rear speaker to enjoy Surround effects when a
Surround effect (D. CLUB, HALL, STADIUM, or a MANUAL setting based on one of these) Sound
Mode is selected.
The rear speaker cannot be used when an S.E.A. effect (ROCK, POP, CLASSIC) is selected.
Adjusting the Rear Speaker Level—————————————
You can use the steps below to adjust the rear speaker level.
1. Select a Surround effect Sound Mode.
2. Start playback from the desired source.
3. Press SHIFT on the Remote Control.
4. Press REAR LEVEL + (8) or – (7) on the Remote Control to adjust
the rear speaker level.
Each time you press the button, the level changes one step.
You can set the level between –10 and +10 in 21 steps.
The rear speaker level changes equally for both left and right. You cannot adjust the left and right
balance for the rear speaker independently.
You can adjust the rear speaker level for each of the Surround effect modes.
Flashing
Flashing
Flashing
TV
Front
Speaker
Rear
Speaker
Rear
Speaker
Front
Speaker
SHIFT
REAR
LEVEL
–+
EN/MX-D602T[J]/f 98.4.10, 1:14 PM12
13
or
AUX
Listening to Auxiliary Equipment
By playing the sound from auxiliary equipment through the System, you can gain control over how the
music or program sounds. Once the connected equipment is playing through the System, you can apply
the sound effects.
First make sure that the auxiliary equipment is properly connected to the System. (See page 6).
1. Turn down the volume level to 0.
2. Press AUX.
“AUX” appears on the display. The AUX button on the Unit lights up.
COMPU PLAY
When AUX is pressed while the power is on standby, the power is automatically turned on.
3. Start playing the equipment.
4. Adjust the volume level to the desired listening level.
5. Select a Sound Mode, if you wish.
To cancel the setting
Change the source by starting any one of the System’s built-in sound sources, such as the Tuner or CD
Player.
EN/MX-D602T[J]/f 98.3.31, 2:25 PM13
14
Dolby Surround
DISC
DISC
DISC
PROGRAM
/RANDOM
REPEAT
EDIT
PRO LOGIC
/ 3CH LOGIC
Display
Dolby Surround indicator
When the System is being used, the display shows other items as well.
However, we have only shown the items described in this section.
FM
AM
RM-SED602TU REMOTE CONTROL
VOLUME
+
TAPE A
AUX
REC PAUSE
TAPE B
DIRECTION
REPEAT
SLEEP
SHIFT
TEST TONE
CENTER MODE
DELAY TIME
L BALANCE R
CENTER
LEVEL
3CH LOGICPRO LOGIC
S.A.BASS
SOUND
MODE
DISC 1
CD CONTROL TAPE CONTROL
DISC 2 DISC 3
FM MODE
–+
REAR
LEVEL
–+
POWER
SHIFT
Operation keys
Accessing the Dolby Surround Functions
Press the operation keys with green labels on the
Remote Control to use the Dolby Surround functions.
To use the function marked in green, press SHIFT
first, then press the desired operation key.
The Dolby Surround has been also developed to reproduce the important elements of the acoustic
surround at home. To watch the sound tracks of video software bearing the mark
which
includes the same encoded surround information as found in Dolby Stereo film, the Unit can provide you
with two Dolby Surround programs (Dolby Pro Logic and Dolby 3ch Logic).
Dolby Pro Logic: Select this mode when the optional rear speakers are connected.
Dolby 3ch Logic: Select this mode when no rear speakers are connected.
Manufactured under license from Dolby Laboratories. “Dolby”, “Pro Logic” and the double-D
symbol are trademarks of Dolby Laboratories. Confidential Unpublished Words, ©1992-1997 Dolby
Laboratories, Inc. All rights reserved.
You need to connect the optional center speaker and rear speakers to use the Dolby Surround
functions.
EN/MX-D602T[J]/f 98.3.31, 2:25 PM14
15
Preparing the Dolby Surround
To use the Dolby Surround effects, you need to prepare the various settings.
These settings are set using the Remote Control.
The Dolby Surround settings are:
Center Speaker Mode
Center Speaker mode contains the following four settings.
PHANTOM: Select this setting if you have not connected a center speaker. The left and right front
speakers project the sound to give the effect of a center speaker. (PRO LOGIC only)
NORMAL: Select this setting if you are using a small center speaker. Since the center speaker
cannot boost the low tones effectively, this setting uses the front speakers to boost the
low tones from the center speaker.
WIDE: Select this setting if you are using a center speaker that is similar in power to the front
speakers.
OFF: Select this setting to turn off the output for the center speaker.
Delay Time Mode
Delay Time mode contains the following four settings.
DELAY 1: Select this setting if the rear speakers are further away from your listening position
than the front speakers. (Delay time: 15 msec.)
DELAY 2: Select this setting if the rear speakers and front speakers are about the same distance
way from your listening position. (Delay time: 20 msec.)
DELAY 3: Select this setting if the rear speakers are nearer to your listening position than the
front speakers. (Delay time: 25 msec.)
DELAY 4: Select this setting if the rear speakers are very close to your listening position
compared to the front speakers. (Delay time: 30 msec.)
Adjusting the level of the Center Speaker
Adjust the level of the center speaker between +10 and –10. Set the level so that it is about the same as
the level from the front speakers.
Adjusting the level of the Rear Speakers (for PRO LOGIC only)
Adjust the level of the rear speakers between +10 and –10. Set the level so that it is about the same as the
level from the front speakers.
You cannot adjust the levels of the left and right rear speakers independently.
EN/MX-D602T[J]/f 98.3.31, 2:25 PM15
16
Getting Ready To Use Dolby Pro Logic
Speaker Arrangements for Dolby Pro Logic————————
Setting-up Dolby Pro Logic ————————————————
1. Press PRO LOGIC/3CH LOGIC to select PRO LOGIC.
Each time you press the button, Dolby Surround programs change as follows:
= PRO LOGIC = 3CH LOGIC = OFF = (back to the beginning)
When using the Remote Control, press SHIFT then press PRO LOGIC (1).
Perform the steps below using the buttons on the Remote Control.
2. Select the desired Center Speaker mode.
Press SHIFT on the Remote Control then press CENTER MODE (6).
Each time you press the button, Center Speaker modes change as follows:
= NORMAL = WIDE = OFF = PHANTOM = (back to the beginning)
3. Select the Delay time.
Press DELAY TIME (9). Each time you press the button, Delay time changes as follows:
= DELAY 2 = DELAY 3 = DELAY 4 = DELAY 1 = (back to the beginning)
4. Set the volume to the level you like.
5. Press TEST TONE (3).
A test tone comes out of the speakers in the following order:
= LEFT = CENTER = RIGHT = REAR = (back to the beginning)
When a test tone comes out of the rear speakers, “SURROUND” appears on the display.
When “PHANTOM” or “OFF” is selected for Center Speaker mode, no test tone comes out of the
center speaker.
6. Adjust the level for the center speaker.
Press CENTER LEVEL + (5) or – (4). Set the level so that it is about
the same as the level from the front speakers.
You cannot adjust the level for the center speaker if “PHANTOM” or “OFF” is selected for
Center Speaker mode.
7. Adjust the level for the rear speakers.
Press REAR LEVEL + (8) or – (7). Set the level so that it is about
the same as the level from the front speakers.
8. Press TEST TONE (3) again.
Test Tone mode is canceled.
This completes the preparations required for using Dolby Pro Logic.
Layout when using the center speaker and
rear speakers
Layout when using the rear speakers
TV
Front
Speaker
Front
Speaker
Center Speaker
Rear
Speaker
Rear
Speaker
Rear
Speaker
Rear
Speaker
Front
Speaker
Front
Speaker
TV
SHIFT
\
PRO LOGIC
or
CENTER MODE
DELAY TIME
TEST TONE
CENTER
LEVEL
–+
REAR
LEVEL
–+
TEST TONE
EN/MX-D602T[J]/f 98.3.31, 2:25 PM16
17
Getting Ready To Use Dolby 3 Channel
Logic
Speaker Arrangements for Dolby 3 Channel Logic ————
Setting-up Dolby 3ch Logic ————————————————
1. Press PRO LOGIC/3CH LOGIC to select 3CH LOGIC.
Each time you press the button, Dolby Surround programs change as follows:
= PRO LOGIC = 3CH LOGIC = OFF = (back to the beginning)
When using the Remote Control, press SHIFT then press the 3CH LOGIC (2).
Perform the steps below using the buttons on the Remote Control.
2. Select the desired Center Speaker mode.
Press SHIFT on the Remote Control then press CENTER MODE (6). Each time you press the button,
Center Speaker modes change as follows:
= NORMAL = WIDE = OFF = (back to the beginning)
3. Set the volume to the level you like.
4. Press TEST TONE (3).
A test tone comes out of the speakers in the following order:
When “OFF” is selected for Center Speaker mode, no test tone comes out of the center speaker.
= LEFT = CENTER = RIGHT = (back to the beginning)
5. Adjust the level for the center speaker.
Press CENTER LEVEL + (5) or – (4). Set the level so that it is about
the same as the level from the front speakers.
You cannot adjust the level for the center speaker if “OFF” is selected for Center Speaker mode.
6. Press TEST TONE (3) again.
Test Tone mode is canceled.
This completes the preparations required for using Dolby 3 Channel Logic.
You cannot adjust the Delay Time or rear speaker levels in Dolby 3 Channel Logic mode.
Using Dolby Surround
1. Press PRO LOGIC/3CH LOGIC and select the desired mode.
If you are using the Remote Control, press PRO LOGIC (1) or 3CH LOGIC (2) after pressing SHIFT.
Make sure that the center speaker and rear speakers have been set up correctly, as described on pages
15 to 17.
2. Playback as source with the mark.
Enjoy the great sound achieved through Dolby Surround.
To Cancel Dolby Surround Effects
Press PRO LOGIC/3CH LOGIC until the Dolby Surround indicator goes out. If you are using the Remote
Control, press the Dolby Surround buttons (PRO LOGIC (1) or 3CH LOGIC (2)) after pressing SHIFT.
TV
Front
Speaker
Front
Speaker
Center Speaker
SHIFT
\
3CH LOGIC
or
CENTER MODE
TEST TONE
CENTER
LEVEL
–+
TEST TONE
SHIFT
\
3CH LOGIC
or
PRO LOGIC
\
EN/MX-D602T[J]/f 98.3.31, 2:25 PM17
18
Using the Tuner
You can listen to both FM and AM stations. Stations can be tuned in manually, automatically, or from
preset memory storage.
Before listening to the radio:
Check that both the FM and AM antennas are firmly connected. (See page 4.)
Tuning in a Station
Press FM/AM on the Unit (or FM or AM on the Remote Control) to turn
on the radio.
The frequency of the previously selected channel appears on the display.
Switching between Frequency Bands———————————
On the Unit
Press FM/AM.
Each time you press the button, the band alternates between FM and AM.
COMPU PLAY
When FM/AM is pressed while the power is on standby, the power is automatically turned on.
FM
AM
RM-SED602TU REMOTE CONTROL
VOLUME
+
TAPE A
AUX
REC PAUSE
TAPE B
DIRECTION
REPEAT
SLEEP
SHIFT
TEST TONE
CENTER MODE
DELAY TIME
L BALANCE R
CENTER
LEVEL
3CH LOGICPRO LOGIC
S.A.BASS
SOUND
MODE
DISC 1
CD
CONTROL
TAPE
CONTROL
DISC 2 DISC 3
FM MODE
–+
REAR
LEVEL
–+
POWER
Display
Band display, Frequency display, Preset channel
When the System is being used, the display shows other items as well.
However, we have only shown the items described in this section.
Number keys
FM
FM MODE
DISC
DISC
DISC
PROGRAM
/RANDOM
REPEAT
EDIT
FM/AM
When TUNER is selected
as the source, the button
lights up.
MULTI CONTROL
SET
AM
MULTI CONTROL
Pressing FM or AM makes the
Remote Control ready for the
Tuner operations.
When the Unit is being operated
with the Remote Control, press
FM or AM first.
EN/MX-D602T[J]/f 98.3.31, 2:25 PM18
  • Page 1 1
  • Page 2 2
  • Page 3 3
  • Page 4 4
  • Page 5 5
  • Page 6 6
  • Page 7 7
  • Page 8 8
  • Page 9 9
  • Page 10 10
  • Page 11 11
  • Page 12 12
  • Page 13 13
  • Page 14 14
  • Page 15 15
  • Page 16 16
  • Page 17 17
  • Page 18 18
  • Page 19 19
  • Page 20 20
  • Page 21 21
  • Page 22 22
  • Page 23 23
  • Page 24 24
  • Page 25 25
  • Page 26 26
  • Page 27 27
  • Page 28 28
  • Page 29 29
  • Page 30 30
  • Page 31 31
  • Page 32 32
  • Page 33 33
  • Page 34 34
  • Page 35 35
  • Page 36 36
  • Page 37 37
  • Page 38 38
  • Page 39 39
  • Page 40 40
  • Page 41 41
  • Page 42 42
  • Page 43 43
  • Page 44 44
  • Page 45 45
  • Page 46 46
  • Page 47 47
  • Page 48 48

JVC MX-D602T User manual

Category
Cassette players
Type
User manual
This manual is also suitable for

Ask a question and I''ll find the answer in the document

Finding information in a document is now easier with AI