Page is loading ...

instructions

2

3
Read the instructions and keep them safe. Pass them on if you pass the coffee maker
on. Remove all packaging, but keep it till you know the coffee maker works.
important safeguards
Follow basic safety precautions, including:
1 The coffee maker must only be used by or under the supervision of a responsible
adult. Use and store the coffee maker out of reach of children.
2 Don’t put the coffee maker in liquid, don’t use it in a bathroom, near a
source of water, or outdoors.
3 Sit the coffee maker on a stable, level, heat-resistant surface.
4 The scald hazard lasts long after boiling. Keep the coffee maker and cable away
from the edges of worktops.
5 Steam will collect under the lid. To avoid the risk of scalding, don’t open the lid till
the coffee maker has cooled.
6 Check that the lid is properly closed before using the coffee maker.
7 Take care when pouring – don’t over-tilt the carafe.
8 Don’t connect the coffee maker to an external timer or remote control system.
9 Don’t touch hot surfaces e.g. carafe or hotplate. Use the handle and grip.
10 Route the cable so it doesn’t overhang and can’t be caught or tripped over.
11 Unplug the coffee maker when not in use, before moving or cleaning. Let it cool
down before cleaning and storing away.
12 Fill the coffee maker from a jug or the carafe, not directly from the tap.
13 Don’t fill the coffee maker above the max mark.
14 Put the carafe on the hotplate before brewing.
15 To stop the coffee maker, press the [ button. The light will go out.
16 Before adding water, or reusing the coffee maker, let it cool for 10 minutes, to avoid
spitting.
17 Don’t use the coffee maker for any purpose other than those described in these
instructions.
18 Don’t put the carafe in a microwave oven.
19 Don’t try to reposition the carafe handle. You risk breaking the glass.
20 Keep the coffee maker, carafe, and cable away from hotplates, hobs, and burners.
21 Don’t use accessories unless we provide them.
22 Don’t use the coffee maker if it’s damaged or malfunctions.
23 If the cable or plug is damaged, return the coffee maker, to avoid hazard.
household use only
before using for the first time
Fill the reservoir to the max mark with water, and run the coffee maker without coffee.
When it’s finished, discard the hot water and clean the coffee maker.
positioning
1 Sit the coffee maker on a stable, level, heat-resistant surface.
2 Route the cable so it doesn’t overhang, and can’t be tripped over or caught.
3 Don’t plug it in yet.

4
water fill
4 Use the carafe to fill the reservoir, to avoid overfilling.
5 Remove the carafe from the hotplate.
6 Press the lever at the rear of the handle, to open the carafe.
7 Use the grip to open the coffee maker lid, to expose the reservoir, the filter holder,
and the filter.
8 Fill the reservoir with at least 2 cups of water, but not above the max mark. If you
overfill, excess water will escape from the overflow at the rear of the coffee maker.
9 Close the carafe lid, and sit the carafe on the hotplate.
coffee fill
10 Put filter-ground coffee into the filter. The amount will vary with the type of coffee,
and individual taste, but we suggest starting with one scoop per cup of water.
11 Use the grip to close the coffee maker lid.
power up
12 Plug the coffee maker into the power socket (switch the socket on, if it’s switchable).
13 The display will show 12:0 0.
coffee now
14 To make coffee right away:
a) ignore the display
b) press the [ button, the light will come on
c) after a few seconds, coffee will drip into the carafe
coffee later
15 If you want to use the timer to make coffee later:
set the time now
a) Press and release the
h (hour) and min (minute) buttons to set the display to the
correct time
b) AM or PM will show at the sides of the display – check you’ve got the right one
set the brewing time
c) press and release the T button, to put the display into timer mode – Auto will
flash at the bottom right of the display
d) press and release the
h (hour) and min (minute) buttons to set the display to the
time you want the coffee maker to start brewing
e) AM or PM will show at the sides of the display – check you’ve got the right one
f) if you don’t press anything within 5 seconds, the display will revert to the correct
time – go back to c) above
g) press and
release the [ button – the display will revert to the correct time, and
Auto will show at the bottom right of the display, to remind you that you’ve set
the timer
h) at the time you set, Auto will disappear from the screen, the light will come on,
and the coffee maker will start up
next time
i) next time you use the coffee maker, remember that the timer has already been
set – it’ll remember the time set until you unplug it, or set it again

5
stopping
16 If you need to cancel the timer before brewing has started, you can either:
a) press and release the [ button twice – the first press overrides the timer, and
turns the light on, to make coffee, the second press turns the light off, and resets
the display to the correct time
or b) press and release the T button once, then immediately press and release the [
button
, Whichever method you use, check that the display has reverted to the correct time,
and that Auto isn’t showing.
17 If you need to stop the coffee maker while it’s brewing, press and release the [
button. The light will go out. After about 10 seconds, the display will darken.
forget the brewing time?
18 If you want to check the brewing time, press and release the T button – Auto will
flash, the brewing time will show for about 5 seconds, then Auto will stop flashing,
and the display will revert to the correct time.
keep warm
20 When the brewing process has finished, the hotplate will stay on for 2 hours to keep
your coffee hot, then it’ll switch the hotplate off, the light will go out, and the
display will darken.
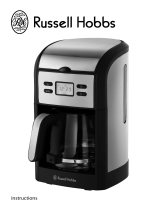
animated display
21 While the coffee is brewing, the display will show a tumbler pouring into a carafe.
22 After the coffee has brewed, while it’s keeping the coffee warm, the display will
show a full carafe.
pouring
23 To pour, remove the carafe from the hotplate, and pour from the spout.
24 Replace the carafe on the hotplate to keep your coffee warm.
25 You may notice some resistance when you replace the carafe – this is caused by the
top of the carafe pushing against the non-drip valve.
a quick cup
26 You may remove the carafe to pour coffee at any time. The non-drip valve will stop
coffee dripping on to the hotplate.
27 To avoid overflowing, replace the carafe within 30 seconds. This may not sound
much, but its more than enough time to pour a couple of cups.
finished?
28 When the carafe is empty, press the [ button to switch the hotplate off.
29 Unplug the coffee maker and let it cool down fully before cleaning, or for 10 minutes
before refilling.
caution beware of steam when you open the lid
ground coffee
30 If you want to buy ready-ground coffee, medium-ground or filter-ground coffee will
give you the best results. The amount will vary with the type of coffee and your
individual taste. We suggest starting with two rounded teaspoons per cup.

6
storing coffee
31 Coffee is best kept in an airtight container in a cool dry place, or in the fridge.
Exposure to air oxidises coffee and allows the flavour to evaporate.
milk
32 There’s a great deal of contention on the subject of milk in coffee. Our view is that
personal taste should rule, not convention.
33 If you like milk in your coffee, use warm or hot milk, to avoid overcooling the coffee.
34 To extract maximum flavour from the coffee, it should be cool enough not to scald
or burn the mouth, but hot enough to let the flavour fill the mouth, nose and
sinuses, not just the taste buds.
bottled water
35 If you use bottled water, check that there are no added ingredients, flavourings, etc.
and use still water, not sparkling. The carbon dioxide which gives the sparkle will
adversely affect the flavour of your coffee.
taste
36 Don’t be tempted to reheat coffee in the coffee maker. You’ll damage the coffee
maker and the coffee will be undrinkable.
37 Clean the filter holder, filter, and carafe after each use. Residue from a previous brew
will spoil your coffee.
38 If left for much more than about an hour, chemical changes in the coffee liquor start
to affect the flavour. It’s best to pour it away and make a fresh pot.
care and maintenance
39 Unplug the coffee maker and let it cool down fully.
40 Use the grip to open the lid.
41 Use the filter handle to lift out the filter, then tip the used coffee grounds into the
bin.
42 Use the tabs on the filter holder to lift the filter holder out of the coffee maker.
43 Wipe the outer surfaces of the coffee maker with a damp cloth.
44 Wash the filter, filter holder and carafe in warm soapy water, rinse thoroughly and
dry.
45 Replace the filter holder in the coffee maker, with the non-drip valve to the front.
46 Replace the filter in the filter holder.
47 Use the grip to close the coffee maker lid.
48 Replace the carafe on the hotplate.
49 Don’t wash any part in a dishwasher.
50 Don’t put the coffee maker in any liquid.
51 Don’t use harsh or abrasive cleaners or solvents.
descale regularly – even in soft water areas
Limescale may be white, coloured, even rusty-looking, but it’s normally visible.
Phosphate scale isn’t generally visible, but it’s there, even in soft water areas.
All scale causes overheating, and reduces the life of the coffee maker.
So, even with soft water, descale regularly, to help keep your coffee maker in working
order.

7
Use a proprietary brand of descaler suitable for use in plastic-bodied products. Follow
the instructions on the package of descaler. When descaling has finished, empty the
carafe and operate the coffee maker twice more with fresh water, but without coffee.
Discard the water to ensure that no chemical residues are left in the coffee maker.
, Products returned under guarantee with faults due to scale will be subject to a
repair charge.

8
connection
The product must be earthed. It has a 13A BS1362 fuse in a 13A BS1363
plug. To replace the plug, fit the green/yellow wire to E or E, the blue wire
to N, and the brown wire to L. Fit the cord grip. If in doubt, call an
electrician. Don’t use a non-rewireable plug unless the fuse cover is in
place. If you remove the plug, dispose of it.
wheelie bin symbol
To avoid environmental and health problems due to hazardous substances in
electrical and electronic goods, appliances marked with this symbol mustn’t be
disposed of with unsorted municipal waste, but recovered, reused, or recycled.
service
If you ring Customer Service, please have the Model No. to hand, as we won’t be able
to help you without it. It’s on the rating plate (usually underneath the product).
The product isn’t user-serviceable. If it’s not working, read the instructions, check the
plug fuse and main fuse/circuit breaker. If it’s still not working, consult your retailer. If
that doesn’t solve the problem:
Pack carefully, with a note of your name, address, day phone number, and what’s
wrong. If under guarantee, say where and when purchased, and include proof of
purchase (till receipt). Send it to Customer Returns (address below right).
Customer Service Customer Returns
(correspondence only) Salton Europe Ltd
Salton Europe Ltd Heath Mill Road
Failsworth Wombourne
Manchester Wolverhampton
M35 0HS WV5 8AQ
Customer Service (serv[email protected])
telephone 0845 658 9700 (local rate number)
guarantee
Defects affecting product functionality appearing within one year of purchase will be
corrected by replacement or repair provided the product is used and maintained in
accordance with the instructions. Your statutory rights are not affected.
Documentation, packaging, and product specifications may change without notice.
online
www.russellhobbs.co.uk for more products
439-927
/