
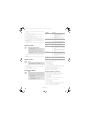
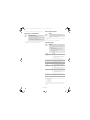
AWNINGS
INFLATABLE AWNINGS
Ace AIR, Club AIR, Grande AIR, Leggera AIR, Rally AIR, Rally AIR D/A
Awning
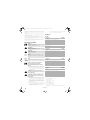
Operating manual. . . . . . . . . . . . . . . . . . .10
Vorzelt
Bedienungsanleitung . . . . . . . . . . . . . . . .13
Auvent
Notice d’utilisation . . . . . . . . . . . . . . . . . .17
Avancé
Instrucciones de uso . . . . . . . . . . . . . . . . .21
Veranda
Istruzioni per l’uso. . . . . . . . . . . . . . . . . . 25
Voortent
Gebruiksaanwijzing . . . . . . . . . . . . . . . . .29
Fortelt
Betjeningsvejledning . . . . . . . . . . . . . . . .33
Förtält
Bruksanvisning . . . . . . . . . . . . . . . . . . . . .37
Fortelt
Bruksanvisning . . . . . . . . . . . . . . . . . . . . .40
Etuteltta
Käyttöohje. . . . . . . . . . . . . . . . . . . . . . . . .44
EN
DE
FR
ES
IT
NL
DA
SV
NO
FI
DometicRallyClubGrandeAceLeggeraAIR_IOM_4445103255_EMEA10_xxxx-xx-xx.book Seite 1 Montag, 29. März 2021 4:48 16

© 2021 Dometic Group. The
visual appearance of the contents of this manual is protected by
copyright and design law. The underlying technical design and the products contained herein may
be protected by design, patent or be patent pending. The trademarks mentioned in this manual
belong to Dometic Sweden AB. All rights are reserved.
DometicRallyClubGrandeAceLeggeraAIR_IOM_4445103255_EMEA10_xxxx-xx-xx.book Seite 2 Montag, 29. März 2021 4:48 16

EN
4445103255 3
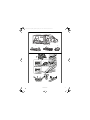
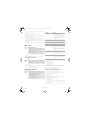
ACE AIR PRO 500
• Width: 330 cm
• Depth: 275 cm
• Weight: 27.8 / 8.74 kg
• Min weight: 22.14 kg
• Width: 400 cm
• Depth: 325 cm
• Weight: 28 kg
• Min weight: 21.9 kg
ACE AIR PRO 400
• Width: 500 cm
• Depth: 325 cm
• Weight: 30.7 / 8 kg
• Min weight: 23.9 kg
• Width: 390 cm
• Depth: 275 cm
• Weight: 29.4 / 9.44 kg
• Min weight: 24.38 kg
• Width: 330 cm
• Depth: 275 cm
• Weight: 27 kg
• Min weight: 18.5 kg
• Width: 260 cm
• Depth: 275 cm
• Weight: 26.5 kg
• Min weight: 16.7 kg
• Width: 390 cm
• Depth: 275 cm
• Weight: 28.7 kg
• Min weight: 19.4 kg
• Width: 440 cm
• Depth: 275 cm
• Weight: 25.4 / 7.35 kg
• Min weight: 20.66 kg
• Width: 390 cm
• Depth: 300 cm
• Weight: 28.1 / 9.8 kg
• Min weight: 26.8 kg
• Width: 390 cm
• Depth: 300 cm
• Weight: 21.4 /7.16 kg
• Min weight: 17.66 kg
CLUB AIR ALL-SEASON 330 CLUB AIR ALL-SEASON 390
CLUB AIR PRO 330CLUB AIR PRO 260
CLUB AIR PRO 440CLUB AIR PRO 390
GRANDE AIR ALL-SEASON 390 GRANDE AIR PRO 390
1340
4000
3250
1670
5000
3250
3900
3000
3900
3000
3900
2750
4400
2750
2600
2750
3300
2750
3900
2750
3300
2750
1
DometicRallyClubGrandeAceLeggeraAIR_IOM_4445103255_EMEA10_xxxx-xx-xx.book Seite 3 Montag, 29. März 2021 4:48 16

EN
4 4445103255
• Width: 260 cm
• Depth: 250 cm
• Weight: 23.8/7.5 kg
• Min weight: 20.14 kg
RALLY AIR PRO 260 D/A
• Width: 330 cm
• Depth: 250 cm
• Weight: 25.72/8.08 kg
• Min weight: 24 kg
RALLY AIR PRO 330 D/A
• Width: 330 cm
• Depth: 250 cm
• Weight: 28/9.82 kg
• Min weight: 25.78 kg
RALLY AIR ALL-SEASON 330 D/A
• Width: 390 cm
• Depth: 250 cm
• Weight: 27.1/9.06 kg
• Min weight: 21.96 kg
RALLY AIR PRO 390 D/A
• Width: 220 cm
• Depth: 240 cm
• Weight: 9.85 kg
• Min weight: 7.85 kg
LEGGERA AIR 220
• Width: 260 cm
• Depth: 240 cm
• Weight: 10.5 kg
• Min weight: 8.09 kg
LEGGERA AIR 260
2600
2500 900
3300
2500 900
3300
2500 900
3900
2500 900
2200
2400
2600
2400
• Width: 200 cm
• Depth: 250 cm
• Weight: 19 kg
• Min weight: 10.28 kg
• Width: 260 cm
• Depth: 250 cm
• Weight: 23.1 kg
• Min weight: 13.45 kg
• Width: 390 cm
• Depth: 250 cm
• Weight: 26.2 kg
• Min weight: 15.1 kg
• Width: 330 cm
• Depth: 250 cm
• Weight: 24.64 kg
• Min weight: 14.12 kg
RALLY AIR PRO 200 RALLY AIR PRO 260
RALLY AIR PRO 330 RALLY AIR PRO 390
3300
2500
3900
2500
2000
2500
2600
2500
• Width: 260 cm
• Depth: 250 cm
• Weight: 28.8 kg
• Min weight: 16.32 kg
RALLY AIR All-SEASON 260
2600
2500
2
DometicRallyClubGrandeAceLeggeraAIR_IOM_4445103255_EMEA10_xxxx-xx-xx.book Seite 4 Montag, 29. März 2021 4:48 16

EN
4445103255 5
S 235 - 265 CM M 265 - 295 CM L 295 - 325 CM
3
4
5
2.
1.
RALLY AIR D/A
6
7
DometicRallyClubGrandeAceLeggeraAIR_IOM_4445103255_EMEA10_xxxx-xx-xx.book Seite 5 Montag, 29. März 2021 4:48 16

EN
6 4445103255
OPEN
CLOSE
8
9
1.
2.
0
a
2.
1.
b
c
DometicRallyClubGrandeAceLeggeraAIR_IOM_4445103255_EMEA10_xxxx-xx-xx.book Seite 6 Montag, 29. März 2021 4:48 16

EN
4445103255 7
d
bu
1.
2.
e
f
1.
2.
3.
g
2.
1.
h
DometicRallyClubGrandeAceLeggeraAIR_IOM_4445103255_EMEA10_xxxx-xx-xx.book Seite 7 Montag, 29. März 2021 4:48 16

EN
8 4445103255
1.
2.
i
Rally Air D/A
j
k
l
DometicRallyClubGrandeAceLeggeraAIR_IOM_4445103255_EMEA10_xxxx-xx-xx.book Seite 8 Montag, 29. März 2021 4:48 16

EN
4445103255 9
4.3.2.
1.
m
7.
8.
10.
9.
1.
2.
3.
4.
5.
6.
n
DometicRallyClubGrandeAceLeggeraAIR_IOM_4445103255_EMEA10_xxxx-xx-xx.book Seite 9 Montag, 29. März 2021 4:48 16

EN
10 4445103255
Please read these instructions carefully and follow all instructions, guidelines, and warnings included in this
product manual in order to ensure that you install, use, and maintain the product properly at all times. These
instructions MUST stay with this product.
By using the product, you hereby confirm that you have read all instructions, guidelines, and warnings carefully
and that you understand and agree to abide by the terms and conditions as set forth herein. You agree to use
this product only for the intended purpose and application and in accordance with the instructions, guidelines,
and warnings as set forth in this product manual as well as in accordance with all applicable laws and regula-
tions. A failure to read and follow the instructions and warnings set forth herein may result in an injury to yourself
and others, damage to your product or damage to other property in the vicinity. This product manual, including
the instructions, guidelines, and warnings, and related documentation, may be subject to changes and
updates. For up-to-date product information, please visit DEFAULT value SHALL be “documents.dometic.com,
dometic.com”.
Explanation of symbols
D
!
!
A
I
General safety instructions
D
DANGER! Failure to obey this instruction will cause
death or serious injury.
Hazard of carbon monoxide poisoning
• Never use a fuel-burning appliance such as barbecues or
gas heaters inside the awning tent. The burning process
produces carbon monoxide which accumulates inside the
awning as there is no flue.
!
WARNING! Failure to obey these warnings could
result in death or serious injury.
Fire hazard
• Do not cook inside the awning tent or use open flames.
!
CAUTION! Failure to obey these cautions could result
in minor or moderate injury.
Risk of injury
• This device is not intended for use by persons (including
children) with reduced physical, sensory or mental capa-
bilities, or lack of experience and knowledge, unless they
have been given supervision or instruction concerning
use of the device by a person responsible for their safety.
• Do not allow children to play around the awning tent and
ensure that suitable protective footwear is worn. Guy lines
are a trip hazard and pegs can be sharp.
• Cleaning and user maintenance may not be carried out by
unsupervised children.
Scope of delivery
Ace AIR
Club AIR, Grande AIR, Rally AIR
Leggera AIR
Rally AIR D/A
Intended use
This awning is suitable for:
• motorhomes and caravans
• light to moderate weather
•touring
This awning is not suitable for:
• very strong winds or snowfall
• seasonal pitch* or commercial use
* All-Season models have been designed for use on seasonal pitches.
This awning is only suitable for the intended purpose and application in
accordance with these instructions.
DANGER!
Safety instruction: Indicates a hazardous situation that, if
not avoided, will result in death or serious injury.
WARNING!
Safety instruction: Indicates a hazardous situation that, if
not avoided, could result in death or serious injury.
CAUTION!
Safety instruction: Indicates a hazardous situation that, if
not avoided, could result in minor or moderate injury.
NOTICE!
Indicates a situation that, if not avoided, can result in prop-
erty damage.
NOTE
Supplementary information for operating the product.
Component Quantity
Awning 1
Additional air pole (only Ace AIR PRO500) 1
Heavy duty pegs and ladders pack 1
Storm straps (only All-Season) 2
Curtain pack 1
Hand pump 1
Transportation bag 1
Component Quantity
Awning 1
Heavy duty pegs and ladders pack 1
Storm straps (only All-Season) 2
Curtain pack 1
Hand pump 1
Transportation bag 1
Component Quantity
Awning 1
Heavy duty pegs and ladders pack 1
Storm straps (only All-Season) 2
Hand pump 1
Transportation bag 1
Component Quantity
Awning 1
Heavy duty pegs and ladders pack 1
Storm straps (only All-Season) 2
Throw-over strap pack 1
Curtain pack 1
Hand pump 1
Transportation bag 1
DometicRallyClubGrandeAceLeggeraAIR_IOM_4445103255_EMEA10_xxxx-xx-xx.book Seite 10 Montag, 29. März 2021 4:48 16

EN
4445103255 11
This manual provides information that is necessary for proper installation
and/or operation of the awning. Poor installation and/or improper oper-
ating or maintenance will result in unsatisfactory performance and a possi-
ble failure.
The manufacturer accepts no liability for any injury or damage to the prod-
uct resulting from:
• Incorrect assembly or connection, including excess voltage
• Incorrect maintenance or use of spare parts other than original spare
parts provided by the manufacturer
• Alterations to the product without express permission from the manu-
facturer
• Use for purposes other than those described in this manual
Dometic reserves the right to change product appearance and product
specifications.
This product is only suitable for the intended purpose and application in
accordance with these instructions.
This manual provides information that is necessary for proper installation
and/or operation of the product. Poor installation and/or improper oper-
ating or maintenance will result in unsatisfactory performance and a possi-
ble failure.
The manufacturer accepts no liability for any injury or damage to the prod-
uct resulting from:
• Incorrect assembly or connection, including excess voltage
• Incorrect maintenance or use of spare parts other than original spare
parts provided by the manufacturer
• Alterations to the product without express permission from the manu-
facturer
• Use for purposes other than those described in this manual
Dometic reserves the right to change product appearance and product
specifications.
Using the awning
!
Before first use
Familiarize yourself with the product by carrying out a test set up before
the product is used for the first time. Check if the scope of delivery is
complete.
Choosing a site
Choose a flat site that is protected from wind:
1. If necessary, use a windbreak.
2. Choose a shaded site to avoid UV degradation of the fabric.
3. Avoid pitching under trees as falling branches, resin, etc. can damage
the product.
4. Clear the site of sharp stones and debris to avoid damaging the
groundsheet.
5. Set up the product with the doors facing away from the wind.
Setting up the awning
!
A
I
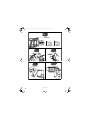
Keep the following tips in mind while setting up the awning:
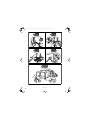
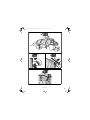
• The figures provide a general overview of the set-up. The actual set-up
will vary slightly based on the model of awning.
• Get help. The set-up is easier with more people.
• After standing the awning upright, check the corner pegs and re-peg
if necessary. The groundsheet on the inside should be taut and in a
rectangular shape.
• Peg the guy lines so that the awning is under tension without distorting
the shape.
• If available, attach the storm straps.
• Check the guy lines from time to time to ensure adequate tension, if
necessary use the runners to adjust.
Set up the awning as follows:
1. To protect the awning from dirt and damage, lay down a ground-
sheet or footprint before unpacking.
2. Unpack the awning.
3. Separate and identify the different components.
4. Proceed as shown to set up the awning (fig. 3, page 5 to fig. l,
page 8).
Only Ace AIR PRO500:
5. Inflate the additional air pole.
6. Fix the inflated air pole into place in the middle back roof panel using
the velcro fasteners.
Dismantling the awning
A
1. Remove any dirt on the outside.
2. Close all window blinds or remove curtains.
3. Close all doors and openings.
4. If installed, push the canopy pole out of the sleeve, do not pull.
5. Remove all lines and straps.
6. Remove all pegs between the corner pegs.
7. Open the valves on each pole.
8. Wait until most of the air has been expelled.
9. Remove the four corner pegs.
10. Fold/roll the awning towards the valves to expel more air.
11. When deflated, roll the awning to fit into the carry bag.
12. Ensure that all parts are clean before packing the into the carry bag.
13. If the awning is wet or damp, dry fully as soon as possible.
CAUTION! Risk of injury and material damage
Never open the zipper on the protective sleeve while an air
pole is inflated. This will result in the air pole bursting.
CAUTION! Risk of injury and material damage
• Do not use any type of compressor designed to inflate
car tires.
• Only inflate the air poles into the green zone of the
pressure gauge of the supplied hand pump
(9 psi/0.62 bar).
NOTICE! Material damage
• Do not open or close the zippers by force.
• If a wind-out awning is used to attach the awning,
support the wind-out awning while working to avoid
putting too much stress on it. After attaching the
awning, rewind the wind-out awning fully back into its
housing.
NOTE
• The awning comes with heavy duty pegs. These will be
suitable for many sites but for some types of ground
special pegs will be needed. Ask your dealer.
• Drive the pegs at a 45° angle away from the awning into
the ground.
• Peg the guy lines in line with the seam it starts from.
NOTICE! Material damage
Do not use force when dismantling the awning. Otherwise
you might damage any material.
DometicRallyClubGrandeAceLeggeraAIR_IOM_4445103255_EMEA10_xxxx-xx-xx.book Seite 11 Montag, 29. März 2021 4:48 16

EN
12 4445103255
Cleaning and maintenance
A
1. If necessary, clean the product with clean water and a soft brush.
2. Apply impregnation against water and UV radiation before each trip.
Storing the awning
I
1. Clean the awning.
2. Air fully and ensure the awning is totally dry before packing away.
3. Store in a well ventilated dry place.
Troubleshooting
I
I
Condensation
All awnings suffer from internal condensation if one or more of the
following conditions apply:
• high air humidity
• high ground moisture
• a drop in temperature
Severe condensation can run down the inside of the roof and drip off ties,
tapes and other internal fittings and can be mistaken for leaking.
➤ Increase ventilation by opening doors and/or windows.
➤ Install a waterproof groundsheet.
Repairing a puncture in the air pole
If the air pole loses air, proceed as follows:
1. Unzip the outer sleeve holding the air pole.
2. If installed, close isolation valves.
3. Remove the air pole.
4. Deflate the air pole.
5. Unzip the protective sleeve to expose the inflatable tube.
6. Blow some air into the inflatable tube.
7. Submerge the tube in water.
8. Locate the puncture.
9. Use repair tape and repair solution to seal the hole.
10. Zip the inflatable tube back into the protective sleeve.
11. Zip the air pole back into the outer sleeve.
Disposal
➤ Place the packaging material in the appropriate recycling waste bins,
wherever possible.
M
If you wish to finally dispose of the product, ask your local recy-
cling center or specialist dealer for details about how to do
this in accordance with the applicable disposal regulations.
Warranty
The statutory warranty period applies. If the product is defective, please
contact the manufacturer's branch in your country (see
dometic.com/dealer) or your retailer.
For repair and warranty processing, please include the following docu-
ments when you send in the device:
• A copy of the receipt with purchasing date
• A reason for the claim or description of the fault
The warranty covers manufacturing defects, materials and parts. The
warranty does not cover fading of the cover and wear and tear due to
UV radiation, misuse, accidental damage, storm damage, or permanent,
semi-permanent* or commercial use. It does not cover any resulting
damage. Please contact your dealer for claims. This does not affect your
statutory rights.
* All-Season models have been designed for use on seasonal pitches.
NOTICE! Material damage
• Do not use sharp or hard objects or cleaning agents for
cleaning.
• Do not use alcohol based materials, chemicals, soap
and detergents for cleaning.
• Remove bird droppings and tree resin as soon as
possible to avoid permanent damage to the material.
NOTE
• Fully set up the awning for cleaning.
• Choose a sunny day for cleaning to ensure the material
will dry thoroughly.
NOTE
• During first exposure to water there may be some
moisture at the seams. Through this moisture the threads
will swell and fill the holes that are created in the sewing
process.
• A fully equipped spare parts kit should include:
– waterproofer
– repair tape and repair solution
– silicone spray for the zippers
– spare pegs
Problem Solution
Awning only inflates with
difficulties
➤ Check that the valve is fully screwed into the air
pole.
➤ Check if the inflation tube is twisted at the
valve.This may be indicated by noise. Untwist
the inflation tube.
➤ Check that the hand pump is working.
Part of the awning does not
inflate
➤ Check that all isolation valves that connect the
air poles are open.
Part of the awning does not
deflate
➤ Check that all isolation valves that connect the
air poles are open.
Air poles are kinked
➤ Add more air (9 psi/0.62 bar).
Air leak
➤ Check that the valve is fully screwed into the air
pole and the ring seal is in place.
➤ Check that the cap of the valve is done up
tightly.
➤ Check for punctures, see chapter “Repairing a
puncture in the air pole” on page 12.
Water leak
➤ Check for leaky seams, damaged tapings and
moist areas.
➤ If you cannot find any leaks, see chapter “Con-
densation” on page 12.
➤ If you find any leaks, apply seam sealant.
Rip in the fabric
➤ Use repair tape to seal the fabric.
➤ Have repairs carried out by an authorized
specialist.
DometicRallyClubGrandeAceLeggeraAIR_IOM_4445103255_EMEA10_xxxx-xx-xx.book Seite 12 Montag, 29. März 2021 4:48 16

DE
4445103255 13
Lesen und befolgen Sie bitte alle Anweisungen, Richtlinien und Warnhinweise in diesem Produkthandbuch
sorgfältig, um sicherzustellen, dass Sie das Produkt ordnungsgemäß installieren und stets ordnungsgemäß
betreiben und warten. Diese Anleitung MUSS bei dem Produkt verbleiben.
Durch die Verwendung des Produktes bestätigen Sie hiermit, dass Sie alle Anweisungen, Richtlinien und Warn-
hinweise sorgfältig gelesen haben und dass Sie die hierin dargelegten Bestimmungen verstanden haben und
ihnen zustimmen. Sie erklären sich damit einverstanden, dieses Produkt nur für den angegebenen Verwen-
dungszweck und gemäß den Anweisungen, Richtlinien und Warnhinweisen dieses Produkthandbuchs sowie
gemäß allen geltenden Gesetzen und Vorschriften zu verwenden. Eine Nichtbeachtung der hierin enthaltenen
Anweisungen und Warnhinweise kann zu einer Verletzung Ihrer selbst und anderer Personen, zu Schäden an
Ihrem Produkt oder zu Schäden an anderem Eigentum in der Umgebung führen. Dieses Produkthandbuch, ein-
schließlich der Anweisungen, Richtlinien und Warnhinweise, sowie die zugehörige Dokumentation können
Änderungen und Aktualisierungen unterliegen. Aktuelle Produktinformationen finden Sie unter DEFAULT value
SHALL be “documents.dometic.com, dometic.com”.
Erklärung der Symbole
D
!
!
A
I
Grundlegende Sicherheitshinweise
D
GEFAHR! Nichtbeachtung dieses Hinweises führt zu
Tod oder schwerer Verletzung.
Gefahr einer Kohlenmonoxidvergiftung
• Verwenden Sie im Inneren des Vorzeltes niemals ein mit
Brennstoff betriebenes Gerät wie Grillgeräte oder Gashei-
zungen. Bei der Verbrennung entsteht Kohlenmonoxid,
das sich im Inneren des Vorzeltes ansammelt, da es keinen
Abzug gibt.
!
WARNUNG! Nichtbeachtung dieser Warnungen kann
zum Tod oder schwerer Verletzung führen.
Brandgefahr
• Kochen Sie nicht im Vorzelt und verwenden Sie keine
offenen Flammen.
!
VORSICHT! Nichtbeachtung dieser Hinweise kann zu
geringer oder mittelschwerer Verletzung führen.
Verletzungsgefahr
• Dieses Produkt ist nicht für die Benutzung durch Personen
(inkl. Kindern) mit eingeschränkten physischen, sensori-
schen oder mentalen Fähigkeiten oder fehlender Erfah-
rung und Kenntnis geeignet, es sei denn, diese werden
durch eine für ihre Sicherheit verantwortliche Person
beaufsichtigt oder wurden hinsichtlich der Benutzung des
Produkts eingewiesen.
• Erlauben Sie Kindern nicht, in der Nähe des Vorzeltes zu
spielen und vergewissern Sie sich, dass passende Schutz-
schuhe getragen werden. Abspannschnüre stellen eine
Stolpergefahr dar und Heringe können spitz sein.
• Reinigung und Pflege dürfen nicht von Kindern ohne
Beaufsichtigung durchgeführt werden.
Lieferumfang
Ace AIR
Club AIR, Grande AIR, Rally AIR
Leggera AIR
Rally AIR D/A
Bestimmungsgemäßer Gebrauch
Dieses Vorzelt ist geeignet für:
• Reisemobile und Wohnwagen
• milde bis mäßige Wetterbedingungen
• Reisetouren
Dieses Vorzelt ist nicht geeignet für:
• sehr starken Wind oder Schneefall
• einen Saisonplatz* oder eine kommerzielle Nutzung
* All-Season-Modelle sind für den Einsatz auf Saisonplätzen geeignet.
Dieses Vorzelt ist nur für den angegebenen Verwendungszweck und die
Anwendung gemäß dieser Anleitung geeignet.
GEFAHR!
Sicherheitshinweis: Nichtbeachtung dieses Hinweises
führt zu Tod oder schwerer Verletzung.
WARNUNG!
Sicherheitshinweis: Nichtbeachtung kann zu Tod oder
schwerer Verletzung führen.
VORSICHT!
Sicherheitshinweis: Nichtbeachtung dieses Hinweises
kann zu Verletzungen führen.
ACHTUNG!
Nichtbeachtung dieses Hinweises kann zu Sachschäden
führen und die Funktion des Produkts beeinträchtigen.
HINWEIS
Ergänzende Informationen zur Bedienung des Produktes.
Komponente Anzahl
Vorzelt 1
Zusätzlicher AirPole (nur Ace AIR PRO500) 1
Paket mit Schwerlast-Heringen und Leitern 1
Sturmverspannung (nur All-Season) 2
Vorhang-Set 1
Handpumpe 1
Transporttasche 1
Komponente Anzahl
Vorzelt 1
Paket mit Schwerlast-Heringen und Leitern 1
Sturmverspannung (nur All-Season) 2
Vorhang-Set 1
Handpumpe 1
Transporttasche 1
Komponente Anzahl
Vorzelt 1
Paket mit Schwerlast-Heringen und Leitern 1
Sturmverspannung (nur All-Season) 2
Handpumpe 1
Transporttasche 1
Komponente Anzahl
Vorzelt 1
Paket mit Schwerlast-Heringen und Leitern 1
Sturmverspannung (nur All-Season) 2
Überwurfriemen-Set 1
Vorhang-Set 1
Handpumpe 1
Transporttasche 1
DometicRallyClubGrandeAceLeggeraAIR_IOM_4445103255_EMEA10_xxxx-xx-xx.book Seite 13 Montag, 29. März 2021 4:48 16

DE
14 4445103255
Dieses Handbuch enthält Informationen, die für die ordnungsgemäße
Installation und die ordnungsgemäße Verwendung des Vorzelts erforder-
lich sind. Installationsfehler und/oder ein nicht ordnungsgemäßer Betrieb
oder nicht ordnungsgemäße Wartung haben eine unzureichende Leis-
tung und u. U. einen Ausfall des Geräts zur Folge.
Der Hersteller übernimmt keine Haftung für Verletzungen oder Schäden
am Produkt, die durch Folgendes entstehen:
• Unsachgemäße Montage oder falscher Anschluss, einschließlich
Überspannung
• Unsachgemäße Wartung oder Verwendung von anderen als den vom
Hersteller gelieferten Original-Ersatzteilen
• Veränderungen am Produkt ohne ausdrückliche Genehmigung des
Herstellers
• Verwendung für andere als die in der Anleitung beschriebenen
Zwecke
Dometic behält sich das Recht vor, das Erscheinungsbild des Produkts
und dessen technische Daten zu ändern.
Dieses Produkt ist nur für den angegebenen Verwendungszweck und die
Anwendung gemäß dieser Anleitung geeignet.
Dieses Handbuch enthält Informationen, die für die ordnungsgemäße Ins-
tallation und den ordnungsgemäßen Betrieb des Produkts erforderlich
sind. Installationsfehler und/oder ein nicht ordnungsgemäßer Betrieb
oder nicht ordnungsgemäße Wartung haben eine unzureichende Leis-
tung und u. U. einen Ausfall des Geräts zur Folge.
Der Hersteller übernimmt keine Haftung für Verletzungen oder Schäden
am Produkt, die durch Folgendes entstehen:
• Unsachgemäße Montage oder falscher Anschluss, einschließlich
Überspannung
• Unsachgemäße Wartung oder Verwendung von anderen als den vom
Hersteller gelieferten Original-Ersatzteilen
• Veränderungen am Produkt ohne ausdrückliche Genehmigung des
Herstellers
• Verwendung für andere als die in der Anleitung beschriebenen Zwe-
cke
Dometic behält sich das Recht vor, das Erscheinungsbild des Produkts
und dessen technische Daten zu ändern.
Verwendung des Vorzeltes
!
Vor dem ersten Gebrauch
Machen Sie sich mit dem Produkt vertraut, indem Sie einen Testaufbau
durchführen, bevor Sie das Produkt zum ersten Mal verwenden. Prüfen
Sie, ob die Lieferung vollständig ist.
Auswahl des Standorts
Wählen Sie einen ebenen Standort, der vor Wind geschützt ist:
1. Verwenden Sie gegebenenfalls einen Windschutz.
2. Wählen Sie einen schattigen Standort, um Schäden am Gewebe
durch UV-Strahlung zu vermeiden.
3. Vermeiden Sie das Aufstellen unter Bäumen, da herabfallende Äste,
Harz usw. das Produkt beschädigen können.
4. Entfernen Sie scharfe Steine und Unrat vom Standort, um eine
Beschädigung der Bodenplane zu vermeiden.
5. Bauen Sie das Produkt so auf, dass die Türen sich auf der vom Wind
abgewandten Seite befinden.
Aufbau des Vorzeltes
!
A
I
Beachten Sie beim Aufbau des Vorzeltes die folgenden Tipps:
• Die Abbildungen geben einen allgemeinen Überblick über den Auf-
bau. Der tatsächliche Aufbau kann je nach Vorzeltmodell leicht variie-
ren.
• Holen Sie sich Unterstützung. Mit mehr Personen ist der Aufbau einfa-
cher.
• Nachdem Sie das Vorzelt aufgerichtet haben, überprüfen Sie die
Heringe an den Ecken und setzen Sie sie gegebenenfalls neu ein. Die
Bodenplane im Innenraum sollte straff und in rechteckiger Form aus-
gelegt sein.
• Verankern Sie die Abspannschnüre so, dass das Vorzelt gespannt ist,
ohne dass es sich verformt.
• Falls vorhanden, befestigen Sie die Sturmverspannung.
• Überprüfen Sie von Zeit zu Zeit die Abspannschnüre auf ausreichende
Spannung und ziehen Sie sie bei Bedarf mithilfe der Spanner nach.
Stellen Sie das Vorzelt wie folgt auf:
1. Um das Vorzelt vor Schmutz und Beschädigungen zu schützen, legen
Sie vor dem Auspacken eine Bodenplane oder Unterlage aus.
2. Packen Sie das Vorzelt aus.
3. Sortieren und bestimmen Sie die verschiedenen Komponenten.
4. Gehen Sie wie gezeigt vor, um das Vorzelt aufzubauen (Abb. 3,
Seite 5 bis Abb. l, Seite 8).
Nur Ace AIR PRO500:
5. Pumpen Sie den zusätzlichen AirPole auf.
6. Befestigen Sie den aufgepumpten AirPole mit den Klettverschlüssen
an der mittleren hinteren Dachplatte.
Abbau des Vorzeltes
A
VORSICHT! Gefahr von Verletzungen und Sach-
schäden
Öffnen Sie niemals den Reißverschluss der Schutzhülle,
während ein AirPole aufgepumpt ist. Dies führt dazu, dass
der AirPole platzt.
VORSICHT! Gefahr von Verletzungen und Sach-
schäden
• Verwenden Sie keine Kompressoren, die zum Aufpum-
pen von Autoreifen bestimmt sind.
• Pumpen Sie die AirPoles nur im grünen Bereich des
Manometers der mitgelieferten Handpumpe auf
(9 psi/0,62 bar).
ACHTUNG! Materialschaden
• Öffnen oder schließen Sie die Reißverschlüsse nicht mit
Gewalt.
• Wenn eine ausziehbare Markise zur Befestigung des
Vorzeltes verwendet wird, stützen Sie die ausziehbare
Markise während der Arbeit ab, um sie nicht zu stark zu
belasten. Nach dem Befestigen des Vorzeltes, kurbeln
Sie die ausziehbare Markise komplett zurück in das
Gehäuse.
HINWEIS
• Das Vorzelt wird mit Schwerlast-Heringen geliefert.
Diese sind für viele Standorte geeignet. Bei manchen
Böden sind jedoch Spezialheringe erforderlich. Fragen
Sie Ihren Händler.
• Schlagen Sie die Heringe in einem Winkel von 45° vom
Vorzelt weg in den Boden ein.
• Richten Sie die Abspannschnüre an der Naht aus, von
der sie ausgehen.
ACHTUNG! Materialschaden
Wenden Sie beim Abbau des Vorzeltes keine Gewalt an.
Andernfalls könnten Sie Teile beschädigen.
DometicRallyClubGrandeAceLeggeraAIR_IOM_4445103255_EMEA10_xxxx-xx-xx.book Seite 14 Montag, 29. März 2021 4:48 16

DE
4445103255 15
1. Entfernen Sie Schmutz von der Außenseite.
2. Schließen Sie alle Fensterrollos und entfernen Sie Vorhänge.
3. Schließen Sie alle Türen und Öffnungen.
4. Falls vorhanden, schieben Sie die Baldachin-Stange aus der Hülse,
ziehen Sie nicht daran.
5. Entfernen Sie alle Schnüre und Gurte.
6. Entfernen Sie alle Heringe zwischen den Heringen an den Ecken.
7. Öffnen Sie die Ventile an jedem AirPole.
8. Warten Sie, bis der Großteil der Luft entwichen ist.
9. Entfernen Sie die vier Heringe an den Ecken.
10. Falten bzw. rollen Sie das Vorzelt zu den Ventilen hin, um mehr Luft
abzuführen.
11. Wenn die Luft abgelassen ist, rollen Sie das Vorzelt so auf, dass es in
die Tragetasche passt.
12. Stellen Sie sicher, dass alle Teile sauber sind, bevor Sie sie in die Tra-
getasche packen.
13. Wenn das Vorzelt nass oder feucht ist, lassen Sie es so bald wie mög-
lich vollständig trocknen.
Reinigung und Pflege
A
1. Reinigen Sie das Produkt bei Bedarf mit sauberem Wasser und einer
weichen Bürste.
2. Tragen Sie vor jeder Reise eine Imprägnierung gegen Wasser und UV-
Strahlung auf.
Lagerung des Vorzeltes
I
1. Reinigen Sie das Vorzelt.
2. Lüften Sie das Vorzelt gründlich und vergewissern Sie sich vor dem
Verpacken, dass es komplett trocken ist.
3. Lagern Sie es an einem gut belüfteten, trockenen Ort.
Fehlersuche und Fehlerbehebung
I
I
Kondenswasserbildung
Bei allen Vorzelten bildet sich Kondenswasser im Innenraum, wenn eine
oder mehrere der folgenden Bedingungen zutreffen:
• hohe Luftfeuchtigkeit
• hohe Bodenfeuchtigkeit
• ein Rückgang der Temperatur
Bei starker Kondenswasserbildung kann dieses an der Innenseite des
Daches herunterlaufen und von Schnüren, Bändern und anderen Innen-
elementen herunter tropfen; dies kann mit einer undichten Stelle ver-
wechselt werden.
➤ Sorgen Sie für eine bessere Belüftung durch Öffnen von Türen
und/oder Fenstern.
➤ Legen Sie eine wasserdichte Bodenplane aus.
Reparatur eines Lochs im AirPole
Wenn der AirPole Luft verliert, gehen Sie wie folgt vor:
1. Öffnen Sie den Reißverschluss der Außenhülle und halten Sie den
AirPole dabei fest.
2. Schließen Sie die Absperrventile, falls vorhanden.
3. Entnehmen Sie den AirPole.
4. Lassen Sie die Luft aus dem AirPole ab.
5. Öffnen Sie den Reißverschluss der Schutzhülle, um den Luftschlauch
freizulegen.
6. Pumpen Sie etwas Luft in den Luftschlauch.
7. Tauchen Sie den Luftschlauch in Wasser ein.
8. Suchen Sie das Loch.
9. Dichten Sie das Loch mit Reparaturband und Reparaturlösung ab.
10. Setzen Sie den Luftschlauch wieder in die Schutzhülle ein und
schließen Sie den Reißverschluss.
11. Setzen Sie den AirPole wieder in die Außenhülle ein und schließen
Sie den Reißverschluss.
ACHTUNG! Materialschaden
• Verwenden Sie zur Reinigung keine scharfen oder
harten Gegenstände oder Reinigungsmittel.
• Verwenden Sie zur Reinigung keine Materialien auf
Alkoholbasis, Chemikalien, Seife und Reinigungsmittel.
• Entfernen Sie Vogelkot und Baumharz so schnell wie
möglich, um dauerhafte Schäden am Material zu
vermeiden.
HINWEIS
• Bauen Sie das Vorzelt zur Reinigung vollständig auf.
• Wählen Sie einen sonnigen Tag für die Reinigung, um
sicherzustellen, dass das Material gründlich trocknet.
HINWEIS
• Beim ersten Kontakt mit Wasser kann sich an den Nähten
etwas Feuchtigkeit bilden. Durch diese Feuchtigkeit
quellen die Fäden auf und füllen die Löcher, die beim
Nähen entstehen.
• Ein vollständig ausgestattetes Ersatzteilset enthält:
– Imprägniermittel
– Reparaturband und Reparaturlösung
– Silikonspray für die Reißverschlüsse
– Ersatzheringe
Problem Lösung
Vorzelt lässt sich nur
schwer aufpumpen
➤ Überprüfen Sie, ob das Ventil vollständig in den
AirPole eingeschraubt ist.
➤ Überprüfen Sie, ob der Luftschlauch am Ventil ver-
dreht ist. Ein Geräusch kann darauf hinweisen. Dre-
hen Sie den Luftschlauch in die richtige Position.
➤ Überprüfen Sie, ob die Handpumpe funktioniert.
Ein Teil des Vorzeltes lässt
sich nicht aufpumpen
➤ Überprüfen Sie, ob alle Absperrventile, die die Air-
Poles verbinden, geöffnet sind.
Ein Teil des Vorzeltes ent-
leert sich nicht
➤ Überprüfen Sie, ob alle Absperrventile, die die Air-
Poles verbinden, geöffnet sind.
Die AirPoles sind geknickt
➤ Pumpen Sie mehr Luft ein (9 psi/0,62 bar).
Luft entweicht
➤ Überprüfen Sie, ob das Ventil vollständig in den
AirPole eingeschraubt ist und die Ringdichtung
richtig sitzt.
➤ Überprüfen Sie, ob die Ventilkappe fest zugedreht
ist.
➤ Prüfen Sie, ob Löcher vorhanden sind, siehe Kapi-
tel „Reparatur eines Lochs im AirPole“ auf Seite 15.
Wasserleck
➤ Prüfen Sie das Vorzelt auf undichte Nähte, beschä-
digte Anschlüsse und feuchte Bereiche.
➤ Wenn Sie keine undichten Stellen finden, siehe
Kapitel „Kondenswasserbildung“ auf Seite 15.
➤ Wenn Sie eine undichte Stelle finden, tragen Sie
Nahtdichtungsmittel auf.
Riss im Gewebe
➤ Reparieren Sie das Loch mit Reparaturband.
➤ Lassen Sie Reparaturen von autorisiertem Fachper-
sonal durchführen.
DometicRallyClubGrandeAceLeggeraAIR_IOM_4445103255_EMEA10_xxxx-xx-xx.book Seite 15 Montag, 29. März 2021 4:48 16

DE
16 4445103255
Entsorgung
➤ Geben Sie das Verpackungsmaterial möglichst in den
entsprechenden Recycling-Müll.
M
Wenn Sie das Produkt endgültig außer Betrieb nehmen, infor-
mieren Sie sich bitte beim nächsten Recyclingcenter oder bei
Ihrem Fachhändler über die zutreffenden Entsorgungs-
vorschriften.
Garantie
Es gilt die gesetzliche Gewährleistungsfrist. Sollte das Produkt defekt
sein, wenden Sie sich bitte an die Niederlassung des Herstellers in Ihrem
Land (siehe dometic.com/dealer) oder an Ihren Fachhändler.
Zur Reparatur- bzw. Gewährleistungsbearbeitung müssen Sie folgende
Unterlagen mitschicken:
• eine Kopie der Rechnung mit Kaufdatum,
• einen Reklamationsgrund oder eine Fehlerbeschreibung.
Die Garantie deckt Herstellungsfehler, Materialien und Teile ab. Die
Garantie erstreckt sich nicht auf das Ausbleichen des Bezugs und die
Abnutzung durch UV-Strahlung, fehlerhafte Verwendung, versehentliche
Beschädigung, Sturmschäden, eine Nutzung auf Dauer- und Saisonstell-
plätzen* oder eine kommerzielle Nutzung. Sie deckt keine daraus resul-
tierenden Schäden ab. Bitte wenden Sie sich an Ihren Händler, um
Ansprüche geltend zu machen. Dies beeinflusst nicht Ihre gesetzlichen
Rechte.
* All-Season-Modelle sind für den Einsatz auf Saisonplätzen geeignet.
DometicRallyClubGrandeAceLeggeraAIR_IOM_4445103255_EMEA10_xxxx-xx-xx.book Seite 16 Montag, 29. März 2021 4:48 16

FR
4445103255 17
Veuillez lire et suivre attentivement toutes les instructions, directives et avertissements inclus dans ce manuel du
produit afin de vous assurer que vous installez, utilisez et entretenez le produit correctement à tout moment.
En utilisant le produit, vous confirmez par la présente que vous avez lu attentivement cette clause de non-res-
ponsabilité, toutes les instructions, directives et avertissements et que vous comprenez et acceptez de respec-
ter les termes et conditions énoncés dans le présent document.
Vous acceptez d’utiliser ce produit uniquement pour l’usage et l’application prévus et conformément aux ins-
tructions, directives et avertissements figurant dans le manuel du produit ainsi que conformément à toutes les
lois et réglementations applicables.
Le fait de ne pas lire et de ne pas suivre les instructions et les avertissements figurant dans ce manuel peut entraî-
ner des blessures pour vous-même et d’autres personnes, endommager votre produit ou endommager
d’autres biens à proximité.
Dometic décline toute responsabilité en cas de perte, de dommage ou de blessure résultant, directement ou
indirectement, de l’installation, de l’utilisation ou de la maintenance du produit non conformes aux instructions
et aux avertissements figurant dans le manuel du produit.
Le présent manuel du produit, y compris les instructions, directives et avertissements, ainsi que la documenta-
tion associée peuvent faire l’objet de modifications et de mises à jour. Pour obtenir des informations actualisées
sur le produit, veuillez consulter le site documents.dometic.com, dometic.com.
Signification des symboles
D
!
!
A
I
Consignes générales de sécurité
D
DANGER ! Le non-respect des présentes instructions
entraîne des blessures graves, voire mortelles.
Risque d’empoisonnement au monoxyde de
carbone
• N’utilisez jamais un appareil à combustible comme un
barbecue ou un chauffage au gaz à l’intérieur de l’auvent.
Le processus de combustion produit du monoxyde de
carbone qui s’accumule à l’intérieur de l’auvent car il n’y a
pas de conduit de fumée.
!
AVERTISSEMENT ! Le non-respect de ces mises en
garde peut entraîner des blessures graves, voire
mortelles.
Risque d’incendie
• Ne cuisinez pas dans l’auvent et n’utilisez pas de flammes
nues.
!
ATTENTION ! Le non-respect de ces mises en garde
peut entraîner des blessures légères ou de gravité
modérée.
Risque de blessure
• Cet appareil ne doit pas être utilisé par des personnes (y
compris les enfants) souffrant de déficiences physiques,
sensorielles ou mentales ou manquant d’expérience ou
de connaissances, sauf si une personne garante de leur
sécurité les surveille ou leur fournit toutes les instructions
adéquates concernant son utilisation.
• Ne laissez pas les enfants jouer autour de l’auvent et
assurez-vous de porter des chaussures de protection. Les
cordons d’ancrage présentent un risque de trébuche-
ment et les piquets peuvent être coupants.
• Le nettoyage et la maintenance ne doivent pas être
effectués par des enfants sans surveillance.
Contenu de la livraison
Ace AIR
Club AIR, Grande AIR, Rally AIR
Leggera AIR
Rally AIR D/A
Usage conforme
Cet auvent convient pour :
• Camping-cars et caravanes
• Intempéries légères à modérées
• Excursions
DANGER !
Consignes de sécurité : Le non-respect des présentes ins-
tructions entraîne des blessures graves, voire mortelles.
AVERTISSEMENT !
Consignes de sécurité : Le non-respect des présentes ins-
tructions peut entraîner des blessures graves, voire mor-
telles.
ATTENTION !
Consignes de sécurité : Le non-respect de cette consigne
peut entraîner des blessures.
AVIS !
Le non respect de ces instructions peut causer des dom-
mages matériels et affecter le fonctionnement du produit.
REMARQUE
Informations complémentaires sur l’utilisation de ce produit.
Composant Quantité
Auvent 1
Tube d’air supplémentaire (uniquement Ace AIR
PRO500)
1
Jeu de piquets résistants et d’échelles 1
Sangles pour tempête (uniquement All-Season) 2
Jeu de rideaux 1
Pompe manuelle 1
Sac de transport 1
Composant Quantité
Auvent 1
Jeu de piquets résistants et d’échelles 1
Sangles pour tempête (uniquement All-Season) 2
Jeu de rideaux 1
Pompe manuelle 1
Sac de transport 1
Composant Quantité
Auvent 1
Jeu de piquets résistants et d’échelles 1
Sangles pour tempête (uniquement All-Season) 2
Pompe manuelle 1
Sac de transport 1
Composant Quantité
Auvent 1
Jeu de piquets résistants et d’échelles 1
Sangles pour tempête (uniquement All-Season) 2
Jeu de sangles de renvoi 1
Jeu de rideaux 1
Pompe manuelle 1
Sac de transport 1
DometicRallyClubGrandeAceLeggeraAIR_IOM_4445103255_EMEA10_xxxx-xx-xx.book Seite 17 Montag, 29. März 2021 4:48 16

FR
18 4445103255
Cet auvent ne convient pas pour :
• Vents très forts ou chutes de neige
• Emplacement saisonnier* ou usage commercial
* Les modèles All-Season ont été conçus pour une utilisation sur les
emplacements saisonniers.
Cet auvent convient uniquement à l’usage et à l’application prévus,
conformément au présent manuel d’instructions.
Ce manuel fournit les informations nécessaires à l’installation et/ou à l’uti-
lisation correcte de l’auvent. Une installation, une utilisation ou un entre-
tien inappropriés entraînera des performances insatisfaisantes et une
éventuelle défaillance.
Le fabricant décline toute responsabilité en cas de blessure ou de dom-
mage résultant :
• d’un montage ou d’un raccordement incorrect, y compris d’une
surtension
• d’un entretien inadapté ou de l’utilisation de pièces de rechange
autres que les pièces de rechange d’origine fournies par le fabricant
• des modifications apportées au produit sans autorisation explicite du
fabricant ;
• des usages différents de ceux décrits dans le manuel.
Dometic se réserve le droit de modifier l’apparence et les spécifications
produit.
Ce produit convient uniquement à l’usage et à l’application prévus,
conformément au présent manuel d’instructions.
Ce manuel fournit les informations nécessaires à l’installation et/ou à l’uti-
lisation correcte du produit. Une installation, une utilisation ou un entre-
tien inappropriés entraînera des performances insatisfaisantes et une
éventuelle défaillance.
Le fabricant décline toute responsabilité en cas de blessure ou de dom-
mage résultant :
• d’un montage ou d’un raccordement incorrect, y compris d’une
surtension
• d’un entretien inadapté ou de l’utilisation de pièces de rechange
autres que les pièces de rechange d’origine fournies par le fabricant
• des modifications apportées au produit sans autorisation explicite du
fabricant ;
• des usages différents de ceux décrits dans le manuel.
Dometic se réserve le droit de modifier l’apparence et les spécifications
produit.
Utilisation de l’auvent
!
Avant la première utilisation
Familiarisez-vous avec le produit en effectuant un test de mise en place
avant la première utilisation du produit. Vérifiez si l’étendue de la livraison
est complète.
Choisir un emplacement
Choisissez un emplacement plat et protégé du vent :
1. Si nécessaire, utilisez un brise-vent.
2. Choisissez un emplacement ombragé pour éviter la dégradation du
tissu par les UV.
3. Évitez les emplacements sous les arbres car la chute de branches, la
résine, etc. peuvent endommager le produit.
4. Débarrassez l’emplacement des pierres et débris coupants pour
éviter d’endommager le tapis de sol.
5. Essayez d’installer le produit avec les portes bloquant le vent.
Installation de l’auvent
!
A
I
Gardez les conseils suivants à l’esprit lorsque vous installez l’auvent :
• Les illustrations donnent un aperçu général de l’installation. L’installa-
tion réelle varie légèrement en fonction du modèle d’auvent.
• Demandez de l’aide. L’installation est plus facile avec plusieurs per-
sonnes.
• Une fois l’auvent dressé, vérifiez les piquets d’angle et refixez-les si
nécessaire. Le tapis de sol à l’intérieur doit être tendu et de forme rec-
tangulaire.
• Attachez les cordons d’ancrage avec des piquets, afin que l’auvent
soit tendu sans se déformer.
• Si disponibles, fixez les sangles pour tempête.
• Vérifiez de temps en temps les cordons d’ancrage pour vous assurer
qu’ils sont bien tendus ; si nécessaire, utilisez les rails de coulissement
pour les ajuster.
Installez l’auvent comme suit :
1. Pour protéger l’auvent de la saleté et des dommages, posez un revê-
tement de sol ou une empreinte avant de déballer.
2. Déballez l’auvent.
3. Séparez et identifiez les différents composants.
4. Procédez comme indiqué pour installer l’auvent (fig. 3, page 5 à
fig. l, page 8).
Uniquement Ace AIR PRO500 :
5. Gonflez le tube d’air supplémentaire.
6. Mettez le tube gonflé en place et fixez-le dans le panneau de toit
arrière central à l’aide des attaches velcro.
ATTENTION ! Risque de blessure et de dommage
matériel
N’ouvrez jamais la fermeture éclair de la housse de protec-
tion lorsqu’un tube d’air est gonflé. Cela entraînerait l’écla-
tement du tube d’air.
ATTENTION ! Risque de blessure et de dommage
matériel
• N’utilisez pas de compresseurs conçus pour gonfler les
pneus de voiture.
• Ne gonflez les tubes d’air que dans la zone verte du
manomètre de la pompe manuelle fournie
(9 psi/0,62 bar).
AVIS ! Dommages matériels
• N’ouvrez pas et ne fermez pas les fermetures éclair par
la force.
• Si vous utilisez un auvent déroulant, soutenez l’auvent
déroulant pendant le travail pour éviter de le soumettre
à une trop forte contrainte. Après avoir fixé l’auvent,
enroulez complètement l’auvent déroulant dans son
logement.
REMARQUE
• L’auvent est fourni avec des piquets résistants. Ceux-ci
conviennent pour de nombreux emplacements mais
pour certains types de sols, des piquets spéciaux sont
nécessaires. Consultez votre revendeur.
• Enfoncez les piquets dans le sol à un angle de 45° par
rapport à l’auvent.
• Fixez les cordons d’ancrage en les alignant sur la cou-
ture d’où ils partent.
DometicRallyClubGrandeAceLeggeraAIR_IOM_4445103255_EMEA10_xxxx-xx-xx.book Seite 18 Montag, 29. März 2021 4:48 16

FR
4445103255 19
Démontage de l’auvent
A
1. Enlevez toute saleté à l’extérieur.
2. Fermez tous les stores de fenêtre ou enlevez les rideaux.
3. Fermez toutes les portes et ouvertures.
4. Le cas échéant, poussez le tube du toit solaire hors du manchon, sans
tirer.
5. Retirez toutes les lignes et sangles.
6. Retirez tous les piquets entre les piquets d’angle.
7. Ouvrez les valves sur chaque tube.
8. Attendez jusqu’à ce que presque tout l’air soit sorti.
9. Retirez les quatre piquets d’angle.
10. Pliez/roulez l’auvent vers les valves pour expulser plus d’air.
11. Une fois dégonflé, roulez l’auvent pour le faire rentrer dans le sac de
transport.
12. Assurez-vous que toutes les pièces sont propres avant de les mettre
dans le sac de transport.
13. Si l’auvent est mouillé ou humide, séchez-le complètement dès que
possible.
Nettoyage et entretien
A
1. Si nécessaire, nettoyez le produit avec de l’eau propre et une brosse
douce.
2. Appliquez une imprégnation contre l’eau et les rayons UV avant
chaque voyage.
Rangement de l’auvent
I
1. Nettoyez l’auvent.
2. Aérez complètement l’auvent et assurez-vous qu’il est entièrement
sec avant de l’emballer.
3. Conservez dans un lieu sec et bien ventilé.
Guide de dépannage
I
I
Condensation
Tous les auvents souffrent de condensation interne si une ou plusieurs des
conditions suivantes s’appliquent :
• Humidité de l’air élevée
• Humidité du sol élevée
• Baisse de température
Une forte condensation peut s’écouler à l’intérieur du toit et s’égoutter
des attaches, des rubans et autres accessoires internes et peut être
confondue avec une fuite.
➤ Augmentez la ventilation en ouvrant les portes et/ou les fenêtres.
➤ Installez un tapis de sol étanche.
Réparation d’une perforation dans le tube d’air
Si le tube d’air perd de l’air, procédez comme suit :
1. Ouvrez la fermeture à glissière du manchon extérieur tenant le tube
d’air.
2. Le cas échéant, fermez les valves d’isolement.
AVIS ! Dommages matériels
Ne forcez pas lors du démontage de l’auvent. Sinon, vous
risquez d’endommager le matériel.
AVIS ! Dommages matériels
• N’utilisez pas d’objets pointus ou durs ni de produits de
nettoyage pour le nettoyage.
• N’utilisez pas de matériaux à base d’alcool, de produits
chimiques, de savon et de détergents pour le net-
toyage.
• Enlevez les fientes d’oiseaux et la résine des arbres dès
que possible pour éviter d’endommager le matériau de
façon permanente.
REMARQUE
• Montez entièrement l’auvent pour le nettoyage.
• Choisissez une journée ensoleillée pour le nettoyage
afin que le matériel sèche complètement.
REMARQUE
• Lors de la première exposition à l’eau, il peut y avoir un
peu d’humidité au niveau des coutures. Grâce à cette
humidité, les fils vont gonfler et remplir les trous créés
lors du processus de couture.
• Un kit de pièces de rechange entièrement équipé
devrait contenir :
– Produit d’imperméabilisation
– Ruban de réparation et solution de réparation
– Spray silicone pour les fermetures éclair
– Ancrages de rechange
Problème Solution
L’auvent ne se gonfle
qu’avec difficulté
➤ Vérifiez que la valve est entièrement vissée
dans le tube d’air.
➤ Vérifiez si le tube de gonflage est tordu au
niveau de la valve. Cela se remarque par un
bruit. Détordez le tube de gonflage.
➤ Vérifiez que la pompe manuelle fonctionne.
Une partie de l’auvent ne
se gonfle pas
➤ Vérifiez que toutes les valves d’isolement qui
relient les tubes d’air sont ouvertes.
Une partie de l’auvent ne
se dégonfle pas
➤ Vérifiez que toutes les valves d’isolement qui
relient les tubes d’air sont ouvertes.
Des tubes d’air sont tordus
➤ Ajoutez de l’air (9 psi/0,62 bar).
Fuite d’air
➤ Vérifiez que la valve est entièrement vissée
dans le tube d’air et que le joint d’étanchéité
est en place.
➤ Vérifiez que le capuchon de la valve est bien
serré.
➤ Vérifiez s’il y a des perforations, voir chapitre
« Réparation d’une perforation dans le tube
d’air », page 19.
Fuite d’eau
➤ Vérifiez si les coutures ne fuient pas, si les
rubans ne sont pas endommagés et s’il n’y a
pas de zones humides.
➤ Si vous ne trouvez pas de fuites, consultez le
chapitre « Condensation », page 19.
➤ Si vous trouvez des fuites, appliquez un produit
d’étanchéité pour les coutures.
Déchirure dans le tissu
➤ Utilisez du ruban de réparation pour étancher
le tissu.
➤ Faites effectuer les réparations par un spécia-
liste autorisé.
DometicRallyClubGrandeAceLeggeraAIR_IOM_4445103255_EMEA10_xxxx-xx-xx.book Seite 19 Montag, 29. März 2021 4:48 16

FR
20 4445103255
3. Retirez le tube d’air.
4. Dégonflez le tube d’air.
5. Ouvrez la fermeture éclair du manchon de protection pour dégager
le tube gonflable.
6. Soufflez de l’air dans le tube gonflable.
7. Immergez le tube dans de l’eau.
8. Trouvez la perforation.
9. Utilisez du ruban de réparation et une solution de réparation pour
sceller le trou.
10. Refermez le tube gonflable dans le manchon de protection.
11. Replacez le tube d’air dans le manchon extérieur.
Mise au rebut
➤ Jetez les emballages dans les conteneurs de déchets recyclables
prévus à cet effet.
M
Lorsque vous mettrez votre produit définitivement hors ser-
vice, informez-vous auprès du centre de recyclage le plus
proche ou auprès de votre revendeur spécialisé sur les pres-
criptions relatives au retraitement des déchets.
Garantie
Le délai légal de garantie s'applique. Si le produit s'avérait défectueux,
veuillez vous adresser à la filiale du fabricant située dans votre pays (voir
dometic.com/dealer) ou à votre revendeur spécialisé.
Veuillez y joindre les documents suivants pour la gestion des réparations
et de la garantie :
• une copie de la facture avec la date d'achat,
• le motif de la réclamation ou une description du dysfonctionnement.
La garantie couvre les défauts de fabrication, les matériaux et les pièces. La
garantie ne couvre pas la décoloration de la couverture et l’usure et les
déchirures dues aux rayons UV, à une mauvaise utilisation, des dommages
accidentels, des dommages dûs aux tempêtes ou une utilisation perma-
nente, semi-permanente* ou commerciale. Elle ne couvre pas les dom-
mages qui en résultent. Veuillez contacter votre revendeur pour toute
réclamation. Ceci n’affecte pas vos droits statutaires.
* Les modèles All-Season ont été conçus pour une utilisation sur les
emplacements saisonniers.
DometicRallyClubGrandeAceLeggeraAIR_IOM_4445103255_EMEA10_xxxx-xx-xx.book Seite 20 Montag, 29. März 2021 4:48 16
Page is loading ...
Page is loading ...
Page is loading ...
Page is loading ...
Page is loading ...
Page is loading ...
Page is loading ...
Page is loading ...
Page is loading ...
Page is loading ...
Page is loading ...
Page is loading ...
Page is loading ...
Page is loading ...
Page is loading ...
Page is loading ...
Page is loading ...
Page is loading ...
Page is loading ...
Page is loading ...
Page is loading ...
Page is loading ...
Page is loading ...
Page is loading ...
Page is loading ...
Page is loading ...
Page is loading ...
Page is loading ...
-
 1
1
-
 2
2
-
 3
3
-
 4
4
-
 5
5
-
 6
6
-
 7
7
-
 8
8
-
 9
9
-
 10
10
-
 11
11
-
 12
12
-
 13
13
-
 14
14
-
 15
15
-
 16
16
-
 17
17
-
 18
18
-
 19
19
-
 20
20
-
 21
21
-
 22
22
-
 23
23
-
 24
24
-
 25
25
-
 26
26
-
 27
27
-
 28
28
-
 29
29
-
 30
30
-
 31
31
-
 32
32
-
 33
33
-
 34
34
-
 35
35
-
 36
36
-
 37
37
-
 38
38
-
 39
39
-
 40
40
-
 41
41
-
 42
42
-
 43
43
-
 44
44
-
 45
45
-
 46
46
-
 47
47
-
 48
48


Dometic Rally AIR Pro 260 DA Awning User manual
- Type
- User manual
- This manual is also suitable for
Ask a question and I''ll find the answer in the document
Finding information in a document is now easier with AI
in other languages
- italiano: Dometic Rally AIR Pro 260 DA Awning Manuale utente
- français: Dometic Rally AIR Pro 260 DA Awning Manuel utilisateur
- español: Dometic Rally AIR Pro 260 DA Awning Manual de usuario
- Deutsch: Dometic Rally AIR Pro 260 DA Awning Benutzerhandbuch
- Nederlands: Dometic Rally AIR Pro 260 DA Awning Handleiding
- dansk: Dometic Rally AIR Pro 260 DA Awning Brugermanual
- svenska: Dometic Rally AIR Pro 260 DA Awning Användarmanual
- suomi: Dometic Rally AIR Pro 260 DA Awning Ohjekirja
Related papers
-
Dometic Guide Wire Hold Down Installation guide
-
Dometic Awnings Inflatable User manual
-
-
Dometic ACC3100D Quick start guide
-
-
Dometic Rally AIR Operating instructions
-
-
Dometic Gale 12V User manual
-
Dometic PW1100 Operating instructions
-
Dometic MCK750 Operating instructions
Other documents
-
Royal Lounge 260 Operating instructions
-
 Royal Leisure WINDSOR 390 User manual
-
Kampa Rally Air 390 User manual
-
Prima Ripstop 260 User manual
-
-
-
Outwell Bremburg Air Pitching Instruction
-
-
Adventuridge 4 Person Air Tent User manual
-
