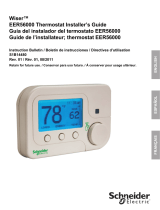
Trane Touch-Screen Programmable Thermostat Owner's manual

Category
Thermostats
Type
Owner's manual

This manual is also suitable for

Trane™ Touch-screen Programmable Thermostat
July 2011 BAS-SVX44A-EN
Installation and Operation
Trane Part Number:
X13511538-01
Clarksville Part Number:
BAYSTAT152A
Service Part Number:
THT02775
SAFETY WARNING
Only qualified personnel should install and service the equipment. The installation, starting up, and servicing
of heating, ventilating, and air-conditioning equipment can be hazardous and requires specific knowledge and
training. Improperly installed, adjusted or altered equipment by an unqualified person could result in death or
serious injury. When working on the equipment, observe all precautions in the literature and on the tags,
stickers, and labels that are attached to the equipment.
2 BAS-SVX44A-EN
Copyright
© 2011 Trane. All rights reserved.
This document and the information in it are the property of Trane and may not be used
or reproduced in whole or in part, without the written permission of Trane. Trane reserves
the right to revise this publication at any time and to make changes to its content without
obligation to notify any person of such revision or change.
Trademarks
Trane and its logo are trademarks of Trane in the United States and other countries. All
trademarks referenced in this document are the trademarks of their respective owners.
Warnings, Cautions, and Notices
Warnings, cautions, and notices are provided in appropriate places throughout this
document:
WARNING: Indicates a potentially hazardous situation which, if not avoided,
could result in death or serious injury.
CAUTION: Indicates a potentially hazardous situation which, if not avoided,
could result in minor or moderate injury. It could also be used to alert against
unsafe practices.
NOTICE: Indicates a situation that could result in equipment or property-
damage-only accidents.
Table of Contents
BAS-SVX44A-EN 3
Overview .............................................................. 5
Packaged Contents and Tools ............................................ 5
Packaged Contents ................................................. 5
Tools ............................................................. 5
Specifications and Dimensions .......................................... 6
Product Features and Functions .......................................... 7
Features .......................................................... 7
Functions ......................................................... 7
Pre-Installation ......................................................... 8
Location Considerations ............................................ 8
Height Requirements ............................................... 8
Mounting Surfaces ................................................. 8
Maximum Wire Length ............................................. 9
Installation and Wiring ................................................. 10
Mounting the Thermostat and Cover Removal ........................ 10
Mounting the Backplate ....................................... 10
Wiring and Wiring Diagrams ....................................... 12
Wiring ...................................................... 12
Terminal Identification ........................................ 13
Wiring Diagrams ............................................. 13
Thermostat Cover Replacement ..................................... 18
Power, System Tests, and Software Reset ...............................19
Applying Power ................................................... 19
Power-up Test .................................................... 19
System Tests ..................................................... 20
Software Reset ................................................... 22
Configuration Option Setup ............................................23
Installation Options ............................................... 24
Operation ............................................................. 27
Thermostat Icon Descriptions ....................................... 27
Functions .............................................................28
Time Setup ...................................................... 28
Dehumidify Setup ................................................ 28
System Mode Setup ..............................................29
Fan Mode ....................................................... 29
4 BAS-SVX44A-EN
Temporary Override (TOV) Setup ................................... 30
General Notes: ............................................... 30
Schedule Setup ................................................... 31
Schedule Display Mode ....................................... 31
Day/Period/Time Schedule Change Mode ........................32
Setpoint/Fan Schedule Change Mode ........................... 33
General Notes for All Schedule Modes ........................... 34
Other Thermostat Functions ............................................ 36
Heat/Cool Indicator Display ......................................... 36
Non-programmable Mode ......................................... 37
Filter Change ..................................................... 38
Clean Screen .....................................................38
Local/Remote/Outdoor Temperature Display and Control .............. 39
Local/Remote Humidity Display and Control .......................... 40
System Lockout ................................................... 41
To lock the thermostat: ........................................ 41
To unlock the thermostat: ...................................... 41
Temperature Cycle Control ............................................. 42
Other Functional Components .......................................... 44
Sleep Mode ...................................................... 44
Changeover Operation ............................................. 44
Changeover Valve Control ......................................... 44
Extension of Fan-on Time .......................................... 45
Economizer/Time of Day (TOD) ..................................... 45
Configuration, Time, and Programming Retention ..................... 45
Heat/Cool Relay Confirmation ......................................45
Deadband ........................................................45
Temperature Display Offset ........................................ 46
Humidity Display Offset ............................................ 46
LCD Backlight .................................................... 46
Compressor Protection ............................................46
Permanent Memory Data .......................................... 46
Compressor and Auxiliary Heat Lockout ............................. 47
Error Codes and Exceptions ............................................ 48
Error Codes ...................................................... 48
Exceptions ....................................................... 49
Troubleshooting ....................................................... 50
BAS-SVX44A-EN 5
Overview
The Trane™ Touch-screen Programmable Thermostat is for use with conventional Rooftop Units
(RTU) air conditioners and heat pumps. These units are compact, easy to install, configure, and
operate.
This installation and operation manual provides information about the following:
Specifications and dimensions
Product features and functions
Pre-installation requirements
Installation and wiring
Power, system tests, and software reset
Configuration option setup
Other thermostat functions
Temperature cycle control
Other functional components
Error codes and exceptions
Troubleshooting
Note: Before beginning installation, visually inspect all parts for obvious defects for damage. All
components are thoroughly inspected before leaving the factory. Any claims for damage
incurred in shipping should be filed immediately with the carrier.
Packaged Contents and Tools
Packaged Contents
Each programmable thermostat ships with the following:
One (1) Trane Touch-screen Programmable Thermostat
One (1) Installation/Configuration Instructions (X39641190-01)
One (1) Setup/Programming Instructions (X39641189-01)
One (1) bag of:
- Two (2) machine screws
- Two (2) wood screws
- One (1) security screw
- Two (2) wall anchors
- Two (2) terminal blocks; an 8-pin and a 6-pin
Tools
One (1) 1/8 inch, flat-bladed service screwdriver
One (1) small Phillips screwdriver
Level
Drill
Hammer
Wire cutter/stripper
6 BAS-SVX44A-EN
Specifications and Dimensions
The following table and illustration provides the thermostat specifications and dimensions.
Table 1. Specifications and dimensions
Storage
Temperature: –4°F to 158°F (–20°C to 70°C)
Relative Humidity: Between 5% and 95% (noncondensing)
Operating
Temperature: 32°F to 122°F (0°C to 50°C)
Humidity: Between 5% and 95% (noncondensing)
Input Power:
24 Vac (minimum 18 Vac/maximum 32 Vac), 50Hz to 60Hz
Note: Frequency is selected using Configuration Option #0190.
Power Consumption: <2 Watts @24 Vac RMS nominal
Wire Size: 18 to 22 AWG
Output Terminal Rating: 1A @ 30 Vac
Temperature Accuracy: ±1.4°F (0.8°C) from 50°F to 90°F (10°C to 32.2°C)
Temperature Resolution: Configurable @1°F, 0.5°F, 1°C, 0.5C, 0.1°C
Humidity Accuracy: ±3% RH from 20% to 80% RH
Humidity Resolution: 1%
Housing Material:
Polycarbonate/ABS Blend
UV protected
U.L. 94-5VA flammability rating
Mounting: 3.24 in (8.26 cm) for two mounting screws (supplied)
Dimensions
5.90 in
(150 mm)
1.30 in
(33 mm)
0.3 in
(8 mm)
4.65 in
(118 mm)
BAS-SVX44A-EN 7
Product Features and Functions
The following is a list of features and functions of the programmable thermostat.
Features
Liquid Crystal Display (LCD) Touch Screen: with symbols for temperature, setpoints, and system
operating modes. In addition, the thermostat has settings for the day of the week, time of day, and
occupancy.
System Modes:
- Heat
- Cool
- Auto
- Off
- Emergency heat
Fan Modes:
- On
- Auto
System Configurations:
- 1 heat/1 cool conventional
- 1 heat/1 cool heat pump
- 1 heat conventional (with and without fan)
- 1 cool conventional
- 2 heat/1 cool heat pump
- 2 heat/2 cool conventional
- 2 heat/1 cool conventional
- 1 heat/2 cool conventional
- 2 heat/2 cool heat pump
- 3 heat/2 cool heat pump
Time and Dehumidify Settings
Temporary Override (TOV)
Scheduling:
- All days: (Mo, Tu, We, Th, Fr, Sa, Su)
- Five (5) days, plus one day, plus one day: (Mo, Tu, We, Th, Fr), (Sa),(Su)
- Five (5) days, plus two days,: (Mo, Tu, We, Th, Fr,) (Sa, Su)
- Seven (7) individual days [default]: (Mo) (Tu) (We) (Th) (Fr) (Sa) (Su)
Temperature Cycling Control (Patent Pending):
- Integrated adjustable deadband staging
- Configurable cycles per hour (CPH) heat/cool cycles
Functions
The touch-screen programmable thermostat provides additional functions that provide more
flexibility and control. Refer to the sections, “Other Thermostat Functions,” p. 36 and “Other
Functional Components,” p. 44.
8 BAS-SVX44A-EN
Pre-Installation
Pre-Installation
This section provides the following pre-installation information:
Location considerations
Height requirements
Mounting surfaces
Maximum wire length
Location Considerations
When selecting a location, avoid the following areas when installing the thermostat:
Direct sunlight
Direct airstream of air diffusers
Exterior walls and other walls that have a temperature differential between the two sides
Close proximity to heat sources such as sunlight, appliances, concealed pipes, chimneys, or
other heat-generating equipment
Drafty regions
Dead spots behind doors, projection screens, or corners
Walls subject to high vibration
High humidity regions
High traffic areas (to reduce accidental damage or tampering)
Height Requirements
It is recommended to mount the thermostat a maximum distance of 54 inches (137 cm) above the
floor. If a parallel approach by a person in a wheelchair is required, reduce the maximum height
to 48 inches.
Note: For further details regarding wheelchair requirements, refer to ADA Standards for
Accessible Design/4.27 Controls and Operating Mechanisms/4.27.3 Height online at
www.ADA.gov and to local building codes.
Mounting Surfaces
The thermostat can be mounted to any sturdy, vertical surface. Plastic-threaded anchors and M3.5
x 20 mm screws are provided for mounting to plaster or wallboard; 6-32 x 3/4 inch machine screws
are provided for mounting directly to a standard electrical device box. For other surface types, the
user must provide fasteners that are appropriate for the surface.
BAS-SVX44A-EN 9
Pre-Installation
Maximum Wire Length
The thermostat may not function properly if the total resistance of any of the thermostat wires
exceeds 2.5 ohms (refer to Table 2).
Important: Ensure
that the wires from the thermostat to the HVAC equipment do not exceed
lengths shown in Table 2. Best
practice: use shorter wire lengths.
18 AWG (0.75 mm
2
) 385 ft (117 m) 2,500 ft (762 m) 385 ft (117 m)
20 AWG (0.50 mm
2
) 240 ft (73 m) 1,500 ft (457 m) 240 ft (73 m)
22 AWG (0.33 mm
2
) 150 ft (46 m) 1,000 ft (305 m) 150 ft (46 m)
Table 2. Maximum wire lengths
Copper Wire size
Maximum Recommended Wire
Length From Thermostat to HVAC
Equipment
Remote
Temperature Sensor
to Thermostat
(Max
(a)
)
Remote Humidity Sensor to
Thermostat (Max
(a)
)
(a) Temperature and humidity readings can be adjusted in the configuration setup for longer wire runs.
10 BAS-SVX44A-EN
Installation and Wiring
This section provides information about the following:
Mounting the thermostat and cover removal
Wiring and wiring diagrams
Thermostat cover replacement
Mounting the Thermostat and Cover Removal
Before beginning installation, it is recommended to re-read the section, “Pre-Installation,” p. 8 and
then ensure that the following conditions are met:
A wire access hole is available at the thermostat location
The wires are accessible through the hole
The wires are attached to the appropriate terminals on the HVAC equipment
There is continuity (and not more than 2.5 ohms resistance) between the thermostat location
and the HVAC equipment
The wires are accurately labeled or color coded
Mounting the Backplate
WARNING
Hazardous voltage!
Disconnect all electric power, including remote disconnects before servicing. Follow proper
lockout/tagout procedures to ensure the power cannot be inadvertently energized. Failure to
disconnect power before servicing could result in death or serious injury.
NOTICE
Equipment damage!
Applying excessive voltage to the thermostat can permanently damage it.
To mount the backplate:
1. Shut off the power to all HVAC equipment. If the security screw was previously installed,
remove it (refer to
Figure 1, p. 11).
BAS-SVX44A-EN 11
Installation and Wiring
Figure 1. Security screw removal and cover release
2. Push the cover thumb tab to release the cover from the backplate as shown above.
3. Route the wires through the opening in the backplate as shown below. Wires should be marked
to
ensure proper connection to terminals.
Figure 2. Wire routing, mounting, and mounting dimensions
4. If mounting the backplate directly to a wall surface, hold the backplate against the surface and
then
level and mark the fastener locations.
5. Secure the backplate using appropriate fasteners (refer to the section, “Mounting Surfaces,”
p. 8.) The thermostat must be level and plumb to ensure proper air movement through the
thermostat enclosure.
Security Screw
NOTE: If the
security screw is
installed, remove
it before
attempting to
remove the cover.
Cover thumb tab
Dimension
Programmable
Touch-screen
H 3.3 in. (85 mm)
W 5.9 in. (150 mm)
D 1.3 in. (33 mm)
M 3.3 in. (85 mm)
W
H
D
M
Two (2) slots for standard #8-32 (M4),
2”x4” junction box mounting screws.
12 BAS-SVX44A-EN
Installation and Wiring
Wiring and Wiring Diagrams
Wiring
WARNING
Hazardous voltage!
Disconnect all electric power, including remote disconnects before servicing. Follow proper
lockout/tagout procedures to ensure the power cannot be inadvertently energized. Failure to
disconnect power before servicing could result in death or serious injury.
NOTICE
Equipment damage!
Applying excessive voltage to the thermostat can permanently damage it.
Note: Terminal
blocks are included with the mounting hardware contained in a small plastic bag
(new installation) or remove terminal blocks from pin header (existing installation).
To wire the thermostat:
1. Connect the wires to the terminal block(s) by:
a. Removing approximately 1/4 inch (6 mm) of insulation from the wires.
b. Using the terminal block screws to securely fasten each wire into the terminal block.
Note: Refer
to Table 3, p. 13 and the wiring diagrams on page 14- through 18 to
determine the correct terminal for each wire.
In some cases the terminal labels (such as Y, G, or R) correctly correspond to the
first
letter of the color wire in which they are connected. However, it is important to
verify which equipment terminals are connected at the other ends of the wires
before connecting the wires to the thermostat.
2. Align the pins/label on the circuit board with the holes/label on the terminal blocks and gently
push
the wired terminal blocks into place on the circuit board (refer to Figure 3).
Figure 3. Attaching the wired terminal blocks to the pins on the circuit boards
3. Push the excess wire through the hole in the wall cavity or into the junction box.
Important: Do not coil excess wire between the thermostat and the backplate. Use non-
flammable insulation to prevent air movement between the wall cavity and the
thermostat.
(W1)W2
Y2
S1
S2
Hp
Hs
Dh
A
C
G
(O/B)W
Rc
R
Y
C G Y W Rc R
W2 Y2 A S1 S2 Hp Hs Dh
BAS-SVX44A-EN 13
Installation and Wiring
Terminal Identification
Table 3 identifies the programmable thermostat terminals.
Wiring Diagrams
The following diagrams show typical wiring scenarios for the touch-screen programmable
thermostat.
Use Table 4 and the corresponding figure to correctly wire the thermostat.
Table 3. Terminal identification
Connector
Type
Terminal
Label
(a)
(a) Label order above is how they appear on the thermostat terminal block.
Terminal Description
8-pin Connectors
Dh Dehumidify relay
Hs External humidity sensor input
Hp External humidity sensor power
S2 External temperature sensor
S1 External temperature sensor
A Economizer relay
Y2 Stage 2 compressor control relay
(W1)W2 (Aux or Em heat relay)
(b)
Second stage heat relay
(b) Text in parentheses applies to only heat pump systems.
6-pin connectors
R
24 Vac heating
Important: Terminal shipped with jumper connected. Remove jumper if the 24 Vac
power supplies are separate.
Rc
24 Vac cooling
Important: Terminal shipped with jumper connected. Remove jumper if the 24 Vac
power supplies are separate.
(O/B)W (Changeover valve)
(b)
Heat relay
Y Stage 1 compressor control relay
G Fan relay
C Common
Table 4. System type options for programmable thermostats
System Type Value for Option 130
See Diagram
1-heat/1-cool, conventional 1 Figure 4
1-heat/1-cool, heat pump without auxiliary heat 2 Figure 5
1-heat only, conventional without fan 3 Figure 6
1-heat only, conventional with fan 4 Figure 7
1-cool, conventional 5 Figure 8
2-heat/1-cool, heat pump with auxiliary heat 6 Figure 9
2-heat/2-cool, conventional 7 Figure 10
2-heat/1-cool, conventional 8 Figure 11
1-heat/2-cool, conventional 9 Figure 12
2-heat/2-cool, heat pump without auxiliary heat 10 Figure 13
3-heat/2-cool, heat pump with auxiliary heat 11 Figure 14
14 BAS-SVX44A-EN
Installation and Wiring
Figure 4. Programmable Thermostat, 1H/1C, Conventional (Option 1)
Figure 5. Programmable Thermostat, 1H/1C, Heat Pump Without Auxiliary Heat (Option 2)
Fan
24 Vac
C
G
Y
W
Rc
R
W2
Y2
A
S1
S2
Hp
Hs
Dh
Heat
Economizer/TOD
Dehumidification
Remote Humidity Sensor
Remote Temperature Sensor
Compressor
L2
L1 (hot)
Single Transformer:
(jumper
installed)
Fan
L2
L1 (hot)
24 Vac
Heat
Compressor
L2
L1 (hot)
24 Vac
Cooling Transformer
Heating Transformer
Two Transformers:
(jumper
removed)
Economizer/TOD
Dehumidification
Remote Temperature Sensor
Remote Humidity Sensor
C
G
Y
W
Rc
R
W2
Y2
A
S1
S2
Hp
Hs
Dh
Fan
24 Vac
Changeover Valve
Compressor
L2
L1 (hot)
(jumper
installed)
Economizer/TOD
Dehumidification
Remote Temperature Sensor
Remote Humidity Sensor
W1
Y2
A
S1
S2
Hp
Hs
Dh
C
G
Y
O/B
Rc
R
BAS-SVX44A-EN 15
Installation and Wiring
Figure 6. Programmable Thermostat, 1H Only, Conventional Without Fan (Option 3)
Figure 7. Programmable Thermostat, 1H, Conventional With Fan (Option 4)
Figure 8. Programmable Thermostat, 1C, Conventional (Option 5)
24 Vac
C
G
Y
W
Rc
R
W2
Y2
A
S1
S2
Hp
Hs
Dh
Heat
Economizer/TOD
Dehumidification
Remote Temperature Sensor
Remote Humidity Sensor
L2
L1 (hot)
(jumper
installed)
Fan
24 Vac
C
G
Y
W
Rc
R
W2
Y2
A
S1
S2
Hp
Hs
Dh
Heat
Economizer/TOD
Dehumidification
Remote Temperature Sensor
Remote Humidity Sensor
L2
L1 (hot)
(jumper
installed)
Fan
24 Vac
C
G
Y
W
Rc
R
W2
Y2
A
S1
S2
Hp
Hs
Dh
Economizer/TOD
Dehumidification
Remote Temperature Sensor
Remote Humidity Sensor
Compressor
L2
L1 (hot)
(jumper
installed)
16 BAS-SVX44A-EN
Installation and Wiring
Figure 9. Programmable Thermostat, 2H/1C, Heat Pump With Auxiliary Heat (Option 6)
Figure 10. Programmable Thermostat, 2H/2C, Conventional (Option 7)
Fan
24 Vac
Changeover Valve
Compressor
Auxiliary Heat
L2
L1 (hot)
(jumper
installed)
Economizer/TOD
Dehumidification
Remote Temperature Sensor
Remote Humidity Sensor
W1
Y2
A
S1
S2
Hp
Hs
Dh
C
G
Y
O/B
Rc
R
Fan
Heat 1
Heat 2
24 Vac
C
G
Y
W
Rc
R
W2
Y2
A
S1
S2
Hp
Hs
Dh
Economizer/TOD
Dehumidification
Remote Temperature Sensor
Remote Humidity Sensor
Compressor 1
Compressor 2
L2
L1 (hot)
Single Transformer:
(jumper
installed)
Fan
L2
L1 (hot)
24 Vac
Heat 1
Compressor 1
L2
L1 (hot)
24 Vac
Cooling Transformer
Heating Transformer
Two Transformers:
(jumper
removed)
Compressor 2
Economizer/TOD
Dehumidification
Remote Temperature Sensor
Remote Humidity Sensor
Heat 2
C
G
Y
W
Rc
R
W2
Y2
A
S1
S2
Hp
Hs
Dh
BAS-SVX44A-EN 17
Installation and Wiring
Figure 11. Programmable Thermostat, 2H/1C, Conventional (Option 8)
Figure 12. Programmable Thermostat, 1H/2C, Conventional (Option 9)
Fan
Heat 1
Heat 2
24 Vac
C
G
Y
W
Rc
R
W2
Y2
A
S1
S2
Hp
Hs
Dh
Economizer/TOD
Dehumidification
Remote Temperature Sensor
Remote Humidity Sensor
Compressor
L2
L1 (hot)
Single Transformer:
(jumper
installed)
Fan
L2
L1 (hot)
24 Vac
Heat 1
Compressor
L2
L1 (hot)
24 Vac
Cooling Transformer
Heating Transformer
Two Transformers:
(jumper
removed)
Economizer/TOD
Dehumidification
Remote Temperature Sensor
Remote Humidity Sensor
Heat 2
C
G
Y
W
Rc
R
W2
Y2
A
S1
S2
Hp
Hs
Dh
Fan
Heat 1
24 Vac
C
G
Y
W
Rc
R
W2
Y2
A
S1
S2
Hp
Hs
Dh
Economizer/TOD
Dehumidification
Remote Temperature Sensor
Remote Humidity Sensor
Compressor 1
Compressor 2
L2
L1 (hot)
Single Transformer:
(jumper
installed)
Fan
L2
L1 (hot)
24 Vac
Heat
Compressor 1
L2
L1 (hot)
24 Vac
Cooling Transformer
Heating Transformer
Two Transformers:
(jumper
removed)
Compressor 2
Economizer/TOD
Dehumidification
Remote Temperature Sensor
Remote Humidity Sensor
C
G
Y
W
Rc
R
W2
Y2
A
S1
S2
Hp
Hs
Dh
18 BAS-SVX44A-EN
Installation and Wiring
Figure 13. Programmable Thermostat, 2H/2C, Heat Pump Without Auxiliary Heat (Option 10)
Figure 14. Programmable Thermostat, 3H/2C, Heat Pump With Auxiliary Heat (Option 11)
Thermostat Cover Replacement
After completing all wiring, replace the thermostat cover. To replace the cover:
1. Hook the cover over the top of the backplate. Apply light pressure to the bottom of the cover
until
it snaps into place.
2. To help deter tampering, install the security screw into the bottom of the cover as shown below.
Figure 15. Close cover and replace security screw
Fan
24 Vac
Changeover Valve
Compressor 1
Compressor 2
L2
L1 (hot)
(jumper
installed)
Economizer/TOD
Dehumidification
Remote Temperature Sensor
Remote Humidity Sensor
W1
Y2
A
S1
S2
Hp
Hs
Dh
C
G
Y
O/B
Rc
R
Fan
24 Vac
Changeover Valve
Compressor 1
Auxiliary Heat
Compressor 2
L2
L1 (hot)
(jumper
installed)
Economizer/TOD
Dehumidification
Remote Temperature Sensor
Remote Humidity Sensor
W1
Y2
A
S1
S2
Hp
Hs
Dh
C
G
Y
O/B
Rc
R
Install security screw
to deter tampering.
BAS-SVX44A-EN 19
Power, System Tests, and Software Reset
This section provides information about:
Applying power
Power-up test
System tests
Applying Power
Restore power to the HVAC equipment. The thermostat initiates a power-up test and will display
an error, if one is detected (refer to the sections, “Power-up Test,” p. 19 and “Error Codes,” p. 48).
If no errors are detected, the home screen appears as shown in Figure 16.
Figure 16. Home screens
Power-up Test
The power-up test is performed any time power is applied to the thermostat. At the start of the
power-up test, the thermostat screen will display the following sequence of events, in order:
All icons for approximately 1.5 seconds and then;
The firmware version for 1.5 seconds (in
the clock digit location), and finally;
Self-testing.
If an error is detected, the error code will display whereby, the user can bypass the error by pressing
the Cancel icon
( ). Once the self-testing has completed checking for any errors, the thermostat
will display the Home screen.
During the test, the configuration/test icon ( ) blinks on the LCD screen indicating a test is in
progress. Table 5 lists the sequence of tests that occurs:
Note: For a detailed list and descriptions of error codes, refer to the section, “Error Codes,” p. 48.
Example of Home Screen: Heat OnlyExample of Home Screen: Auto Heat/Cool
20 BAS-SVX44A-EN
Power, System Tests, and Software Reset
System Tests
The system test mode is used to run diagnostics on the thermostat to verify that the unit is
functioning properly.
Referring to Table 6, p. 22, to run a system test:
1. Remove the thermostat cover as shown in the section,“Mounting the Backplate,” p. 10.
2. Press and hold the Configuration button
(refer to Figure 17, p. 21) for 3 seconds. The
configuration/test icon ( ) displays and the thermostat is now in Configuration
Setup
Mode.
3. Press and hold the Configuration button
for 3 seconds again to activate System Test Mode
indicated by the blinking parameter/test icon. When activating system test mode, the first
system test number displayed is always 01.
The test number is changed with the Up ( ) or Down ( ) arrows in the center of the display
screen.
Note: The OK button ( ) functions the same as the Up arrow and steps to the next
higher test number.
The test value is changed with the Up ( ) or Down ( ) arrows on the right-hand side of
the display screen.
Note: Changing
a test value will start/stop the test as described in Table 6. Refer to
Figure 17 for arrow locations and Table 6, p. 22 for a list of test values and test
value descriptions.
4. Exit the System
Test Mode and return to the Home screen by:
a. Pressing the Configuration button
momentarily (less than 3 seconds).
b. Touching and holding for 2 seconds.
c. Powering down the thermostat and then powering it up again.
d. Waiting for a 10-minute time out after the last touch.
Table 5. Error code test sequence
Test
Sequence
Error Code and Description
1 E4;
Operating range is 18 to 32 Vrms.
Low error detection is less than 16.6, ±8.5%.
High error detection is greater than 34, ±8.5%
2 E7;
Memory error (write and read 0x55 and 0xAA failed).
3 E3;
Permanent data error. Access error or checksum error is detected.
4 E0;
Temperature sensor error. Checks internal and/or external temperature sensor depending on
setting of configuration option 0210.
5
E1;
Humidity sensor error. Checks internal or external humidity sensor depending on setting of
configuration option 0200.
6 E5;
Real Time Clock (RTC) Error.
  • Page 1 1
  • Page 2 2
  • Page 3 3
  • Page 4 4
  • Page 5 5
  • Page 6 6
  • Page 7 7
  • Page 8 8
  • Page 9 9
  • Page 10 10
  • Page 11 11
  • Page 12 12
  • Page 13 13
  • Page 14 14
  • Page 15 15
  • Page 16 16
  • Page 17 17
  • Page 18 18
  • Page 19 19
  • Page 20 20
  • Page 21 21
  • Page 22 22
  • Page 23 23
  • Page 24 24
  • Page 25 25
  • Page 26 26
  • Page 27 27
  • Page 28 28
  • Page 29 29
  • Page 30 30
  • Page 31 31
  • Page 32 32
  • Page 33 33
  • Page 34 34
  • Page 35 35
  • Page 36 36
  • Page 37 37
  • Page 38 38
  • Page 39 39
  • Page 40 40
  • Page 41 41
  • Page 42 42
  • Page 43 43
  • Page 44 44
  • Page 45 45
  • Page 46 46
  • Page 47 47
  • Page 48 48
  • Page 49 49
  • Page 50 50
  • Page 51 51
  • Page 52 52

Trane Touch-Screen Programmable Thermostat Owner's manual

Category
Thermostats
Type
Owner's manual
This manual is also suitable for

Ask a question and I''ll find the answer in the document

Finding information in a document is now easier with AI