Page is loading ...


TABLE OF CONTENTS
QUICK START GUIDE 4
TECHNICAL SPECIFICATIONS 6
SAFETY GUIDELINES 7
KEY PARTS DIAGRAM 12
IMPORTANT INFORMATION 13
ASSEMBLY INSTRUCTIONS 14
OPERATION 16
MAINTENANCE 19
TROUBLESHOOTING GUIDE 21
EXPLODED VIEW AND PARTS LIST 24
WARRANTY 29
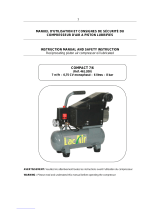
2
TABLE OF CONTENTS
model no. 058-9317-8 | contact us 1-888-670-6682


model no. 058-9317-8 | contact us 1-888-670-6682
4
QUICK START GUIDE
Fix the wheels (1) to the tank using the
bolts and nuts. Place the compressor
(2) on the floor or a hard, level surface
in a clean, well-ventilated area.
See step 4 referenced below.
1
Connect the air hose (1)
between the air line outlet (2)
and air tool (3). See page 15,
step 4.
2
Make sure the AUTO/OFF switch
(1) is in OFF position and the drain
valve at the bottom of tank is
closed. See page 16, steps 1-2.
3
2
1
1
2
3
1
1
1
3
2
2
2
1
1
2
3
1
1
1
3
2
2
2
1
1
2
3
1
1
1
3
2
2

5
TM
QUICK START GUIDE
Adjust the hose pressure
gradually with respect to the
operating pressure of the air
tool by turning the pressure
regulator knob (1) clockwise.
See page 17, step 6.
5
Turn the pressure regulator knob (1)
counter-clockwise completely. Plug
in the power cord (2) into electrical
outlet. Turn the AUTO/ OFF switch
(3) to the AUTO position.
See pages 16-17, steps 3-5.
4
2
1
1
2
3
1
1
1
3
2
2
2
1
1
2
3
1
1
1
3
2
2

model no. 058-9317-8 | contact us 1-888-670-6682
6
TECHNICAL SPECIFICATIONS
COMPRESSOR TYPE Oil-less, single stage, direct drive
RUNNING HORSEPOWER 1.5
POWER 120 V, 60 Hz 15A
DUTY CYCLE 50%
TANK SIZE 15 U.S. GALLONS (56.8 L)
MOTOR TYPE Heavy-duty induction motor
CUT-IN PRESSURE 160 PSI (1.10 MPa)
CUT-OFF PRESSURE 200 PSI (1.38 MPa)
COMPRESSOR CAPACITY 5 CFM* @ 40 PSI
4 CFM* @ 90 PSI
PACKAGING WEIGHT 92 lb (41.7 kg)
TECHNICAL SPECIFICATIONS
*CFM: Cubic feet per minute

7
TM
SAFETY GUIDELINES
FPO
FPO
SAFETY GUIDLINES
This manual contains information that relates to PROTECTING PERSONAL SAFETY and
PREVENTING EQUIPMENT PROBLEMS. It is very important to read this manual carefully
and understand it thoroughly before using the product. The symbols listed below are
used to indicate this information.
DANGER!
Potential hazard that will result in serious injury or loss
of life.
FPO
WARNING!
Potential hazard that could result in serious injury or loss
of life.
CAUTION!
Potential hazard that may result in moderate injury or
damage to equipment.
SAFETY RECOMMENDATIONS
These precautions are intended for the personal safety of the user and others working
with the user. Failure to follow these instructions may result in a permanent loss of
vision, serious personal or even fatal injury, property damage, and/or tool damage.
Please take the time to read and understand them.
DANGER!
Potential hazard that will result in serious injury or loss of life.
• Keep bystanders, children, and visitors away from the work area while operating
the compressor. Do not allow children to handle the compressor. Distractions can
affect the control over compressor.
• Never direct compressed air, dust, or dirt toward yourself, other people or animals
to reduce the risk of serious injury.
• Wear a face or dust mask or use a respirator in dusty environments or when
spraying paint.
• Never remove the pressure switch housing at anytime.
• Never use the compressor in a combustible environment or in the presence of
combustible materials, such as flammable chemicals, adhesives, gasoline or
solvents, as the internal combustion produces hot exhaust gases that may ignite
flammable materials. Failure to observe this warning can cause explosion and
serious personal injury or death.
• Risk of inhalation. Operate the compressor in an open area at a minimum of
12” (30 cm) away from any wall or object that could restrict the flow of fresh
air to ventilation openings. Do not use the compressor to spray chemicals, as
doing so may affect your lungs by inhaling toxic fumes. Use a respirator in dusty
environments or when spraying paint.

8
model no. 058-9317-8 | contact us 1-888-670-6682
SAFETY GUIDELINES
• Risk of bursting. Do not adjust the pressure regulator knob to increase the output
pressure to greater than the maximum rated pressure of the air tool attached to the
compressor.
WARNING!
Potential hazard that could result in serious injury or loss of life.
• Do not allow inexperienced or untrained individuals to operate the compressor.
• Before servicing the compressor, always disconnect the power supply and open the
drain valve to decompress the air tank. Make sure water is drained. Wait until the
compressor becomes cool.
• Turn the pressure regulator knob fully clockwise after shutting off the compressor,
to avoid accidental rise in pressure when starting the compressor.
• Use head protection accessory such as hard hat, if required. It must conform to
American National Standards Institute (ANSI Z89.1) requirements.
CAUTION!
Potential hazard that may result in moderate injury or damage to equipment.
• Do not wear watches, rings, bracelets, or loose clothing when using the compressor.
Keep your hair, clothing, and gloves away from moving parts.
• Use the compressor only for its intended purpose. Do not alter or modify the
compressor from its original design or function.
• Do not use a compressor that is malfunctioning or with loose, missing or damaged
parts, or that requires repairs. Verify that all screws are securely tightened.
• Keep the compressor and work area clean and well lit. A cluttered or dirty place
may lead to an accident. Floors should be kept clear.
• Do not misuse the power cord. Never use the cord to carry the compressor. Always
use grip handle to move it. Remove the power plug from the power supply outlet
after use.
• Do not operate the compressor if it does not contain a legible warning label.
• Never use the compressor when there is air or water leakage.
• Store the compressor in a dry location, out of reach of children and other untrained
persons.
FPO
CAUTION!
Potential hazard that may result in moderate injury or
damage to equipment.
FPO
WARNING!
Potential hazard that could result in serious injury or loss
of life.

9
TM
SAFETY GUIDELINES
• Always maintain the compressor the compressor properly to avoid internal
corrosion and possible failure.
• Release all pressure within the compressor slowly, as the dust and debris is harmful
and affect human health.
• Keep the exterior of the compressor dry, clean, and free from oil and grease.
Always use a clean cloth for cleaning. Never use brake fluids, gasoline, petroleum-
based products, or any strong solvents to clean the compressor to reduce the risk of
deterioration of the plastic enclosure.
• When servicing the compressor, use only replacement parts of same specification
to avoid risk of injury and equipment damage.
• Drain out the moisture from the tank completely after each day’s use to prevent
corrosion on the inside of the tank.
• Before using the compressor, check for damaged parts, misalignment or binding
of moving parts, broken parts, and any other condition that affects the operation.
The damaged parts should be properly repaired or replaced only by a qualified
electrician. The repaired part should be checked carefully to ensure that it operates
properly and performs its intended function.
• Use the proper extension cord. Make sure to use an extension cord that is suitable
to carry the current required by the air tool. A wire of 12 gauge size is recommended
for an extension cord of length 50’ (15 m) or less. It is not recommended to use a
cord exceeding 100’ (30 m). If in doubt, use the next heavier gauge. An undersized
cord will cause a drop in line voltage, resulting in loss of power and overheating of
the air tool.
• Ensure compressor is plugged into a circuit protected by a fuse or breaker.
• Inspect the air tank yearly for rust, pin holes, or other imperfections. Never weld or
drill holes in the air tank.
• Use safety glasses and ear protection. Wear safety glasses with side shields when
operating the tool and verify that others in the work area are also wearing safety
glasses. Safety glasses must conform to American National Standards Institute
(ANSI Z87.1) requirements and must provide protection from flying particles from
the front and the sides. Compressors are loud and the sound can cause hearing
damage. Always wear ear protection to help prevent hearing damage and loss.
Failure to comply may result in moderate injury.

10
model no. 058-9317-8 | contact us 1-888-670-6682
SAFETY GUIDELINES
SAFETY INSTRUCTIONS FOR USING AIR TOOL
• The air tool is not a toy. Careless and improper use of the tool may result in serious
accident.
• Never leave or store the tool with air hose attached to avoid accidental start of the
tool and serious personal injury.
• Protect air hose from damage or puncture. Keep the air hose away from sharp
objects, chemical spills, oil, solvents, and wet floors.
• Make sure the hose is free of obstructions or snags. Entangled or snarled hoses can
cause loss of balance or footing and may become damaged.
• Inspect the power cord of the tool and air hose before each use. Ensure that all
connections are secure. Do not use a damaged hose. Have a qualified electrician to
repair or replace the damaged part.
• Stay alert, and use common sense when operating the tool. Do not use the tool
when you are tired or under the influence of drugs, alcohol, or medication.
• Do not overreach. Keep proper footing and balance at all times to enable better
control of the tool in unexpected situations.
• For personal safety, use an extension cord marked as “W-A” or “W” while operating
the tool outdoors.
• Maintain the tool with care.
• Make sure the tool is serviced only by a qualified technician.
• Store idle tools out of reach of children and other untrained persons.
• Always wear eye protection when using the tool. If required, use a dust mask, non-
skid safety footwear, a hard hat or hearing protection.
WARNING!
This manual contains important safety and operating
instructions for your air compressor. Before using the
compressor, read all instructions and warnings in the Safety
Guidlines.
FPO

11
TM
SAFETY GUIDELINES
FPO
ELECTRICAL SAFETY
Grounding instructions: In the event of a malfunction
or breakdown, grounding provides the path of least
resistance for electrical current in order to reduce the risk
of electric shock. This tool is equipped with an electric
cord that has a grounding wire and a grounding plug (1).
The plug must be plugged into a matching power supply
outlet (2) that is properly installed and grounded in
accordance with all local codes and ordinances or grounded wall socket for optimum
performance. The grounding plug has two flat blade terminals and grounding pin. If
the grounding plug does not fit into the outlet, do not try to modify it. Have a qualified
electrician to install the proper type of electrical outlet. If the compressor electrical
cord requires repair or replacement, have this done by an authorized, qualified service
technician.
Guidelines for using extension cords.
• Use only 3-wired extension cord that have 3-prong grounding plug that fits into a
3-slot receptacle.
• Never use an electrical adaptor with the grounding plug.
• Ensure the extension cord is properly wired and in good condition. Always replace a
damaged extension cord immediately or have it repaired by a qualified technician.
• The length of the extension cord should not exceed 50’ (15 m). The minimum wire
size of the extension cord is 12 gauge (AWG).
• Protect the extension cords from sharp objects, excess heat and damp or wet areas.
• Using extension cords with inadequately-sized wires will cause a serious drop in
voltage, resulting in loss of power and tool damage. The smaller the gauge number,
the heavier the extension cord. If in doubt, select the next heavier gauge.
NOTE: Do not use an extension cord unless it is necessary. It is better to
use a longer air hose that reaches the work area where air is needed.
NOTE: Recycle unwanted materials rather than disposing of them as
waste. Sort the tools and their components in specific categories and take
to the local recycling centre or dispose of them in an environmentally-safe
way.
2
1

model no. 058-9317-8 | contact us 1-888-670-6682
12
KEY PARTS DIAGRAM
No. Description
1 Motor
2 Air filter cap
3 Tank pressure gauge
4 Pressure relief valve
5 Pressure switch
6 Power cord
7 Air tank
No. Description
8 Wheel
9 Check valve
10 AUTO/OFF switch
11 Pressure regulator knob
12 Air line outlet
13 Regulated pressure gauge
14 Handle
9
11
12
3
4
5
6
7
13
2
1
14
10
8
WARNING!
• Remove the compressor and any accessories from the
package. Make sure that all items listed in the packing list
are included.
• Inspect the compressor carefully to make sure no
breakage or damage occurred during shipping.
• Do not discard the carton or any packaging material until
all parts have been examined.
FPO

13
TM
IMPORTANT INFORMATION
GENERAL USE
This Maximum
®
Workshop Air Compressor is designed to be compact and portable and
used for air tool applications, inflation and nailing tasks, and heavy DIY automotive
applications. This compressor is equipped with pressure switch, air tank, pump and
motor with automatic reset thermal overload protector. The compressor is factory
lubricated and does not require any oil.
AIR COMPRESSOR COMPONENTS
AIR FILTER
• The air filter is a porous element contained within a metal or plastic housing. The filter is
attached to the compressor cylinder head for removing impurities from the air intake of the
compressor.
AIR TANK
• This air tank is a cylindrical component which is used to store the compressed air.
CHECK VALVE
• This valve prevents backflow of compressed air from air tank to the compressor pump.
MOTOR
• The motor provides rotational force necessary to operate the compressor pump.
PRESSURE REGULATOR KNOB
• The knob can be adjusted to regulate the pressure at the air line outlet of the compressor. Turn
the knob clockwise to increase pressure and counter-clockwise to decrease pressure.
PRESSURE SWITCH
• The switch automatically controls the on/off cycling of the compressor. It stops the
compressor when the air pressure in the air tank reaches the cut-off pressure, and restarts the
compressor automatically when the air pressure drops below the cut-in pressure.
Cut-in pressure: The low pressure (160 PSI) at which the motor will automatically restart.
Cut-off pressure: The high pressure (200 PSI) at which the motor will automatically shut off.
PUMP
• The pump is used to compress the air and discharge the compressed air into the air tank via
the reciprocating piston contained within the cylinder.
REGULATED PRESSURE GAUGE
• The gauge is used to measure the regulated pressure at the air line outlet.
PRESSURE RELIEF VALVE
• This valve will activate automatically if the pressure switch does not shut down the motor in
case of abnormally high pressure in the air tank. To operate manually, pull the relief valve ring
to relieve air pressure in the tank.
TANK PRESSURE GAUGE
• The gauge indicates the pressure level of stored air in the air tank. It is not adjustable by the
operator.
THERMAL OVERLOAD PROTECTOR
• This protector will automatically turn off the compressor if the temperature of the electric
motor exceeds a predetermined limit. If the thermal overload protector is actuated, the motor
must be allowed to cool down before restarting.
AUTO/OFF SWITCH
• This switch is operated manually to turn ON/OFF the compressor. In the AUTO position of
the lever, the compressor shuts down or starts up automatically based on air pressure level in
the air tank. Always set this lever to OFF position when the compressor is not being used and
before unplugging the compressor. To reset the motor overload condition, toggle the AUTO/
OFF lever to OFF position and unplug the compressor from the power outlet. Allow the motor
to cool for 10 minutes. Then plug in the compressor and restart it.

model no. 058-9317-8 | contact us 1-888-670-6682
14
BEFORE ASSEMBLY
• Unpack the carton and remove the compressor. Make sure all parts are present.
Inspect the unit for damage.
• If any part is missing or damaged, do not attempt to assemble the product.
Contact customer service for replacement parts.
• Claim for replacement parts immediately as there is time limitation.
• Check the compressor’s serial label to ensure that the correct model has been
received, and that it has the required pressure rating (160/200 PSI)
for its intended use.
ASSEMBLY
1. Align the holes on the wheels (1) with
corresponding holes on both sides at
bottom of the tank (2). Insert bolts (3)
through the holes and tighten them
using washers (4) and nuts (5)
(FIG. A).
2. Place the compressor (1) on the floor
or a hard, level surface in a clean, well-
ventilated area to ensure sufficient
air flow and cooling. Make sure the
compressor is placed at least 12”
(30 cm) from any wall or obstruction
(FIG. B).
3
1
4
5
2
1
12”(30 cm)
3
1
4
5
2
1
12”(30 cm)
CAUTION!
• Potential hazard that may result in moderate injury or
damage to equipment.
• Do not use compressor in areas containing dust particles
to avoid damage to the motor.
FPO
ASSEMBLY INSTRUCTIONS

15
TM
2
1
3
2
2
1
3
2
NOTE: During cold weather or in cold temperature environments,
store the compressor in a warm area when not in use. This will
improve performance and reduce starting problems.
NOTE: The compressor must be placed on a flat surface to ensure
proper drainage of the moisture in the tank.
ASSEMBLY INSTRUCTIONS
3. Locate the compressor near a
grounded electrical outlet (2)
(FIG. C).
4. Connect an air hose (1) to the air line
outlet (2). Then connect the air hose
to an air tool (3) e.g. air-powered
spray gun (FIG. D).

16
model no. 058-9317-8 | contact us 1-888-670-6682
OPERATION
FPO
STARTING THE COMPRESSOR
1. Make sure the AUTO/OFF lever (1) is in
OFF position (FIG. E).
2. Make sure the drain valve (1) at the
bottom of the tank is closed (FIG. F).
3. Turn the pressure regulator knob (1)
counter-clockwise completely, before
starting the compressor (FIG. G).
1
1
WARNING!
• Potential hazard that could result in serious injury
or loss of life.
• Do not touch the compressor while operating, as the motor
will be very hot. Allow the compressor to cool before handling
or servicing it to avoid skin burns or other injuries.
• Do not use any storage cover to cover the compressor
during operation.
• Do not move the compressor when the air tank is under
pressure. Never use air hose or power cord to pull or move
the compressor. If required use the grip handle to move it.
• Never direct air stream towards yourself or other people
standing nearby.
FPO
1
1
1

17
TM
OPERATION
NOTE: Do not exceed the operating pressure of the air tool.
The regulated pressure gauge measures the hose pressure.
1
2
1
1
4. Plug in the power cord (1) of the
compressor to the electrical outlet
(2). Turn ON the power supply to the
compressor (FIG. H).
5. Turn the AUTO/OFF switch (1) to AUTO
position. Let the motor run (FIG. I).
6. Adjust the hose pressure gradually with
respect to the operating pressure of the
air tool by turning the pressure regulator
knob (1) clockwise (FIG. J).

18
model no. 058-9317-8 | contact us 1-888-670-6682
SHUTTING DOWN THE COMPRESSOR
1. Turn the AUTO/OFF switch (1) to the
OFF position. Turn OFF the power
supply and unplug the power cord (2)
from the electrical outlet (FIG. K).
2. Pull the pressure relief valve ring (1)
and keep the relief valve open to
release the pressure in the tank
(FIG. L).
3. Open the drain valve (1) by turning
counter-clockwise to release water in
the tank (FIG. M).
1
1
1
CAUTION!
• Potential hazard that may result in moderate injury or
damage to equipment.
• Wear safety glasses when opening the drain valve, as the
air and moisture being released from the tank can propel
debris that may cause eye injury.
FPO
OPERATION

19
TM
MAINTENANCE
GENERAL MAINTENANCE
Regular and periodic maintenance of the compressor ensures trouble-free operation.
The compressor components should be inspected on a regular basis.
FPO
WARNING!
• Potential hazard that could result in serious injury or loss of life.
• To avoid personal injury, always shut off and unplug the
compressor from the power supply outlet and relieve all air
pressure from the air supply system before performing any
service on the air compressor.
• Do not use damaged tool. If abnormal noise or vibration occurs,
rectify the problem before use.
FPO
NOTE: During cold temperatures, drain the air tank after each use to
reduce freezing problems.
DRAINING THE AIR TANK
1. Turn OFF the power supply to the pump. Release air pressure in tank by pulling the
relief valve ring.
2. Turn the drain valve counter-clockwise to open it and tilt the tank to drain out water
completely.
DESCRIPTION COMPONENTS Daily Weekly Monthly
Drain moisture Air tank X
Check proper operation Pressure relief valve, air filter X X
Check air leaks, abnormal
noise, or vibration
Worn or broken parts X X
MAXIMUM SERVICE INTERVAL

20
model no. 058-9317-8 | contact us 1-888-670-6682
MAINTENANCE
• Potential hazard that could result in serious injury or
loss of life.
• Make sure the tank is drained every day to prevent
corrosion of tank.
FPO
FPO
WARNING!
CAUTION!
• Potential hazard that may result in moderate injury or
damage to equipment.
• Wear safety glasses when opening the drain valve, as
the air and moisture releases out from the tank can
propel debris that may cause eye injury.
CHECKING THE PRESSURE RELIEF VALVE
1. Turn OFF the power supply to the pump.
2. Pull the relief valve ring to check whether it s operating properly and to clear
possible obstructions of the valve.
CHANGING THE AIR FILTER
After continuous use of the compressor, the air filter may get clogged. This will reduce
the air intake capability of the compressor. Therefore it is necessary to replace the air
filter.
1. Turn OFF the power supply to the pump.
2. Open the air filter cap (1) and remove the old
air filter (2) (FIG. N).
3. Place a new air filter and close the filter cap.
NO
OFF
1
2
TESTING FOR LEAKS
Check whether all connections are tight. To find leakage
in hose, transfer tube, or pipe connection, spray a small
amount of soapy water around the damaged area with
a spray bottle. If bubbles appear around the area, repair
or replace the faulty component. Do not overtighten any
connections.
STORAGE
Before storing the compressor for a prolonged period, follow the below steps correctly.
• Disconnect the power cord and coil it up on the handle.
• Clean all dust and debris from the compressor using an air blow gun.
• Pull the relief valve ring to release all pressure from the tank.
• Drain all moisture from the air tank.
• Cover the compressor to protect it from moisture and dust.
FIG. N
/