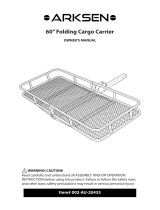
35801

SPEEDWAY 35801 User manual

  • Hello! I am an AI chatbot trained to assist you with the SPEEDWAY 35801 User manual. I’ve already reviewed the document and can help you find the information you need or explain it in simple terms. Just ask your questions, and providing more details will help me assist you more effectively!
  • What is the maximum weight capacity of the SPEEDWAY 35801 aluminum cargo carrier?
    What size hitch receiver is required for the SPEEDWAY 35801 cargo carrier?
    What are the overall dimensions of the SPEEDWAY 35801 cargo carrier?
    What is the size of the inside platform of the SPEEDWAY 35801 cargo carrier?
    What are the dimensions of the vertical braces on the SPEEDWAY 35801 cargo carrier?
2
1-800-348-5004
OPERATION INSTRUCTION MANUAL
Safety Instructions
These safety instructions have been
provided for the safe use and operation
of this product.
WARNING! Read all instructions. Failure
to follow all instructions listed below may
result in serious injury.
1) Work area
a) Make sure the area in which the carrier is
assembled is clean and well lit.
Cluttered or dark areas invite accidents.
b) Keep children and bystanders away while
assembling the carrier.
4) Service and replacement
The service and replacement parts for this
product are available by placing an order.
2) Personal safety
Stay alert, watch what you are doing and use
common sense when using the carrier. Do not use
the carrier while you are tired or under the influence
of drugs, alcohol or medication. A moment of
inattention while using the carrier may result in
serious personal injury.
d) Use this Carrier in accordance with these
instructions and in the manner intended for
this particular type of product, taking into
account the area conditions and the task to
be performed. Use of this Carrier for operations
different from those intended could result in
a hazardous situation.
3) Carrier use and care
a) Use the correct carrier for your application.
The correct carrier will do the job better and safer
at the rate for which it was designed.
b) Store the carrier out of reach of children and
do not allow people unfamiliar with the carrier or
these instructions to use the carrier. Use of carrier
by untrained people may not be safe.
c) Maintain the carrier. Check for misalignment or
binding of moving parts, breakage of parts and any
other condition that may affect the carrier’s
operation. If damaged, have the carrier repaired
before use. Many accidents are caused by
poorly maintained equipment.
Please read and save these instructions. Read through this owner’s manual carefully before using
product. Protect yourself and others by observing all safety information and warnings. Failure to
comply with instructions could result in personal injury and/or damage to product or property.
Please retain instructions for future reference.
3
1-800-348-5004
ALUMINUM CARGO CARRIER
Using the aluminum cargo carrier
SPECIFICATION
1) The Cargo Carrier must be attached to a 2” x 2”
Class III or higher hitch receiver. The hitch must be
properly installed by aqualified service technician
and be certified to support the weight of this Cargo
Carrier and its contents (500 Lbs. capacity).
2) This Cargo Carrier is designed to haul firewood,
coolers and other similar loads. Do not modify the
carrier and do not use this product for purposes
that it was not designed for.
3) Never exceed the maximum weight capacity
of 500 Lbs.
4) Be aware of the danger of “dynamic loading”.
This situation arises when a load is dropped onto
the carrier, resulting in a short term excessive load.
Dynamic loading can result in damage and failure
of the Carrier and/or hitch receiver, and personal
injury to the person loading the Carrier.
5) Never load people or animals into the Cargo
Carrier. Keep children and spectators well clear
when loading and using this product.
6) Adhere to all Department of Transportation
(D.O.T.) requirements when using this product.
Use ropes and tie downs to securely hold all
cargo in place.
7) For the vehicle that will support the Cargo Carrier,
read all pertinent vehicle instructions and warnings
provided in the owner’s manual. Make sure the
vehicle’s engine is OFF, with parking brake set,
before loading or unloading the Cargo Carrier.
8) Weight inside the Cargo Carrier should be
evenly distributed, with heavier items positioned
towards the center of the Carrier.
9) Note the position of the vehicle’s exhaust
pipes before setting up the Cargo Carrier. Make
sure exhaust pipes are not in close proximity of
the Cargo Carrier; flammable goods in the Cargo
Carrier could catch on fire due to heat from exhaust.
If this risk exists on your vehicle, do not use the
Cargo Carrier.
10) Never exceed the maximum tongue rating of
your trailer hitch.
Vehicle Hauling Capacity: Your hauling weight may
be limited by your vehicle’s suspension to carry a
load. Not recommended for hitches less than 12”
from the ground to the bottom of the hitch without
use of a hitch riser adapter. Some vehicles may
require air shocks or heavier springs to stiffen up
the suspension to prevent sagging.
11) Wear ANSI-approved safety goggles and
heavy-duty work gloves during installation,
loading, or unloading.
12) Keep Carrier clean and dry.
13) This product is not a toy. Keep it out of reach
of children.
14) The warnings, cautions, and instructions
discussed in this instruction manual cannot cover
all possible conditions and situations that may
occur. It must be understood by the operator that
common sense and caution are factors which
cannot be built into this product, but must be
supplied by the operator.
Maximum Weight Capacity
Construction
Overall Dimension
Inside Platform
For use with
Safety Reflectors
500 lb.
Aluminum
49” x 22 - 1/2” x 8”
47-1/2” x 20 - 15/32” x 5-7/8”
2” x 2” Class III or Higher Hitch Receivers
Included
ASSEMBLING THE CARGO CARRIER
4
1-800-348-5004
Top Frame
Lower Frame
Vertical Brace
Vertical Brace
Vertical Brace
Vertical Brace
Vertical Brace
Vertical Brace
Wide Brace
Wide Brace
Reflector
Reflector
1) Refer to picture above of an already assembled
Carrier, and to the Assembly Diagram in the next
page of this manual.
2) Place Lower Frame (3) on the ground (hitch
tube (1) is on bottom). Top Frame (2) is positioned
above, and parellel to the Lower Frame as shown
above. Connect the Top Frame and Lower Frame
with two Wide Braces (5) using three Bolts (9) and
three Nuts (10) on top and bottom of Wide Braces.
3) Further support the Top Frame and Lower
Frame by attaching the 10 Vertical Braces (4).
Use Bolts (9) and Nuts (10) to secure Vertical
Braces in place.
4) Put two Reflectors (6) in place (reflective side
facing the rear of Cargo Carrier) using Bolts (9)
and Nuts (10).
5) Secure hitch tube(1) to Lower Frame with eight
Bolt (11), eight Nuts (12) and eight Washers(13).
6) With all components now assembled make
sure all hardware is securely tightened.
7) To place the Cargo Carrier on the vehicle’s
hitch receiver:
a) First remove the Cotter Pin (8) attached to
the Hitch Pin (7).
b) With a helper, lilt the empty Cargo
Carrier and slide the open end of the Hitch
Tube (1) into the vehicle’s 2” x 2” hitch receiver.
c) Align the hole openings on hitch receiver and
Hitch Tube (1), and put the Hitch Pin (7) in place.
Secure Hitch Pin with the Cotter Pin (8).
8) Load the Cargo Carrier as needed. Use
ropes and tie downs to securely hold all
cargo in place.
The Cargo Carrier must be attached to a
2” x 2” Class III or higher hitch receiver.
Do not exceed the 500 lb. maximum weight
capacity. Weight inside the Cargo Carrier
should be evenly distributed, with heavier
items positioned towards the center of
the Carrier.
!
WARNING
ASSEMBLING DIAGRAM
PARTS LIST
5
1-800-348-5004
3
5
4
6
2
9
10
1
7
8
11
13
12
PART #
1
2
3
4
5
6
7
QTY
1
1
1
10
2
2
1
DESCRIPTION
Hitch Tube
Top Frame
Lower Frame
Vertical Brace
Wide Brace
Reflector
Hitch Pin
PART#
8
9
10
11
12
13
QTY
1
40
40
8
8
8
DESCRIPTION
Cotter Pin
Bolt M5 x 12
Nut M5
Bolt M6 x 45
Nut M6
Washer
Limited Manufacturer Warranty
North American Tool Industries (NATI) makes every effort to ensure that this product
meets high quality and durability standards. NATI warrants to the original retail consumer
a 1-year limited warranty from the date the product was purchased at retail and each
product is free from defects in materials. Warranty does not apply to defects due directly
or indirectly to misuse, abuse, negligence or accidents, repairs or alterations, or a lack of
maintenance. This product is intended for personal use. The warranty will be voided if
used in commercial, rental, or industrial applications. NATI shall in no event be liable for
death, injuries to persons or property, or for incidental, special or consequential damages
arising from the use of our products. To receive service under warranty, the original
manufacturer part must be returned for examination by an authorized service center.
Shipping and handling charges may apply. If a defect is found, NATI will either repair or
replace the product at its discretion.
DO NOT RETURN TO STORE
For Customer Service:
Email: [email protected] or Call 1-800-348-5004
6
1-800-348-5004
MAINTAINING THE CARGO CARRIER
Check the condition of the Cargo Carrier and the vehicle’s hitch receiver before each use.
Make sure all components are in good condition. If the Carrier or hitch receiver become
damaged through accident, or if any weld damage is noted, the product should be replaced.
Check to make sure that all hardware is tightly secured in place.
Clean the Carrier after each use. Make sure dirt, oil, grease, and debris are not on the carrier.
!
WARNING
Procedures not specifically explained in this manual must be performed only by a qualified
technician. To prevent serious injury: Remove load from the Carrier before performing any
maintenance or service. Do not use damaged equipment. If the Carrier is damaged,
have the problem corrected before further use.
/