
FlexStoneProducts.com 5/18
Install Instructions
3-panel tub kits
For missing items or returns
do not return to store.
Please call 877-941-3662
(Monday through Friday 8:00 AM – 5:00 PM MST)
Elite Series
Tub Model:
TSK60326031

FlexStoneProducts.com - 1 - 5/18
3-wall Tub Surround Instructions
Tub Model: TSK60326031
Item
Description
Qty
A
Back wall panel
1
B
Side wall panel
2
C
Left wall front mitered trim
1
D
Left wall top mitered trim
1
E
Right wall front mitered trim
1
F
Right wall top mitered trim
1
G
Back wall top trim
1
I
Corner shelf with bracket
1
J
Inside corner reinforcement
2
Please inspect packages for damage or missing pieces, and read instructions carefully prior to
installation. All FlexStone products come with a protective masking covering the image side of the
material. If you have any questions or issues, please call our customer support Monday through Friday
8:00 AM – 5:00 PM MST at 877-941-3662.
Visit FlexStoneProducts.com for up-to-date manuals, or to register your product warranty.
RECOMMENDED: Visit http://FlexStoneProducts.com/installation to access a walk-through video
and other useful installation information.

FlexStoneProducts.com - 2 - 5/18
Required Tools Helpful Tools
Before Starting
Consult your local building codes with questions on installation compliance
standards. Building and plumbing codes may vary by location, and FlexStone Bath
Systems is not responsible for code compliance standards for your project.
1. The FlexStone wall system is designed to be installed over a solid substrate such as green board,
cement board, or other water resistant backers. Substrate should be clean, dry, and free of dust
or loose paint. Unless using our Remodel Trim Kit, any existing surround material should be
removed.
2. The Remodel Trim Kit (sold separately) allows FlexStone to be used
over
existing tile. Tile should
be in good shape, and wall surfaces should be flat (i.e. remove any accessories that would
interfere with the FlexStone panels.) The 4 pieces of 96” length would replace Items C, D, E, F,
and G. Follow instructions included with Remodel Trim Kit.
3. If installing a new bathtub or tub prior to FlexStone installation, follow the manufacturer’s
instructions, and install the tub or base level and square to walls.
4. Turn off the water supply and complete any plumbing modifications prior to installing your
FlexStone surround. Leave plumbing handles off until surround is installed. Plan the placement
of the shower head such that it is either above the height of the wall panels or at least 2” below
the top of the wall panels. This will keep the trim moldings from interfering with the pipe and
escutcheon plate.
5. Review Section 6 and decide how the vertical trim moldings will be installed, either outside the
tub, or on top of the tub. This may impact the width of the side wall panels in Section 3.
x 8
x 2
FlexStone offers an installation kit that includes eight
cartridges of Performance Pro Adhesive and two cartridges
of Performance Pro Color-Tinted 100% Silicone. Select
retailers include this in FlexStone kits, while others offer it
for purchase separately.

FlexStoneProducts.com - 3 - 5/18
Install Instructions
1 INSTALLATION OF INSIDE CORNER REINFORCEMENTS (J).
1.1) Flashing Tape Corner Reinforcements go behind
the panels in the back vertical corners for added
leak protection. This tape has been cut to length,
matching the height of the panels of your kit.
1.2) Apply a generous bead of adhesive onto both walls
about 3/4 inch away from the corner. Fold the
flashing tape at the center crease with the print
side together, then press the tape into the corner
using a taping or putty type blade. Using the same
blade, flatten out the tape to create a flat, smooth
inside corner. Wipe away any excess adhesive.
2 INSTALLATION OF BACK WALL PANEL (A).
NOTE: It is not necessary to cut the top edges of panels to be level,
as they will be covered by trim moldings.
2.1) The back panel must be fit to both the left and
right corners, and to the tub. Keep in mind that
walls may not be square or plumb, so you will
want to measure width of the alcove at both the
bottom and top of the alcove prior to trimming
panel. (See TIP on right for a technique for
achieving good fit measurements.) Trim the
panel to size with a utility knife, jigsaw, or power
plane and dry fit until a tight fit is achieved.
2.2) When satisfied with the fit, peel protective
masking back from the edges of the panel
(approx. 4”) and clean burs from any rough
edges. Generously apply Performance Pro
Adhesive in lines or blobs to the back of the
panels in a pattern every 3 to 4 inches. Use
approx. one 10oz tube per 8 square feet following
any adhesive directions on tube. Push the panels
in place, lightly pounding to achieve good bond.
TIP: Draw a vertical plumb line directly on the middle of the
sheetrock from top to bottom of wall. Now draw a horizontal
level line crossing the plumb line about halfway up the wall.
Record measurements left from the vertical line to corner at top,
middle and bottom (L1, L2, L3), then right from the vertical line
to corner (R1, R2, R3.) Now record measurements down from
the horizontal line to the tub (D1, D2, D3.) Transfer these
measurements to your back wall panel (A). These 9
measurements will account for out of plumb walls AND out of
level tubs!

FlexStoneProducts.com - 4 - 5/18
INSTALLATION OF WET / PLUMBING WALL PANEL (B).
2.3) Hold side panel as close to plumbing wall as
possible. Scribe and trim the inside edge and
bottom edge against the tub for best fit
before
measuring, marking, and cutting holes for
plumbing fixtures. The depth of the side wall
panels can also be trimmed down from 32 in. to
fit the opening,
although how you decide to install
vertical trims C and E will influence the width sizing
of side wall panels (see Section 6.)
NOTE: You will be able to fine tune your panel to a more accurate fit
after the holes are cut and your panel can be firmly pushed into the
corner.
2.4) For each hole to be cut, measure the vertical
distance between the center of the plumbing
fixture and the tub. Measure the horizontal
distance between the center of the fixture and the
installed back wall panel. Mark the center of the
fixtures on the face of the panel.
2.5) Using a drill, make a small pilot hole in marked
locations. Using a jigsaw, hole saw, or paddle bit
cut out each hole in the panel to the appropriate
size for the particular pipe or fixture. Make each
hole only as large as necessary for access to the
plumbing. Cover plates only cover so much!
2.6) With holes drilled so the panel now fits over the
plumbing, you can fine tune the fit of the panel
into the back corner and against the tub from step
3.1.
2.7) Prior to adhering the plumbing wall panel, seal the
back panel A to the corner reinforcement using a
small bead of Performance Pro 100% Silicone.
2.8) Follow Step 2.2 and adhere the side panel, but also
form a bead of adhesive on the back around each
plumbing hole.
3 INSTALLATION OF OPPOSITE SIDE WALL PANEL (B).
3.1) Use same procedures as in steps 3.1-3.6 except
that no holes will be drilled in this panel. Dry fit
first, and then apply silicone to seal the corner,
and adhesive as you did on previous side panel.
Inside Wall
Shower Base

FlexStoneProducts.com - 5 - 5/18
4 INSTALLATION OF BACK WALL TOP TRIM (G)
NOTE: Trim moldings are shaped like an “L”, and the long leg is
designed to overlap panels, with the short leg returning back to the
sheetrock and hiding the panel edge. Be sure to peel protective
masking back from the edges of the panels before adhering the trim
moldings.
4.1) Note the height of the shower head. Decide if top
trims will be installed above or below shower
head/escutcheon, keeping in mind that trims can
overlap panels from ½” to 2-1/2”. Mark a level line
at desired height of the top of the trim on the back
wall (above the back wall panel).
4.2) Measure the distance from plumbing wall to
opposite wall (sheetrock to sheetrock, NOT
FlexStone to FlexStone). Cut item (G) to this
measurement, then cut a notch ¼” wide in both
ends. This will enable the trim to overlap the back
panel and fit over the end panels eliminating any
large gaps or holes in the corners.
4.3) Dry fit this trim piece and make sure it fits properly
in a level position. Peel away protective masking
from the trim, apply adhesive to the back of the
trim molding, and adhere it over the back wall
panel. Secure the trim piece in place while the
adhesive cures using paint-safe masking tape.
Side
Side
Back Panel

FlexStoneProducts.com - 6 - 5/18
5 INSTALLATION OF SIDE WALL TRIMS (C, D, E, F).
Note: Vertical trim moldings are designed to be installed just outside
the tub, running down to the floor, and contour cut to match the tub
front shape. Optionally, trims can be cut short to rest on top of the
tub.
5.1) Place horizontal left wall top mitered trim (Item D)
in place, push into the corner against back wall
trim piece, then level it. Mark a level line on the
wall on the top side of the molding near the outer
end. Set aside this trim piece.
5.2) Measure from the floor to the level mark made in
6.1 to determine the length needed for the vertical
trim piece (Item C). Cut vertical trim piece (C) to
this length,
but do not cut from the pre-mitered
end!
5.3) Fit vertical trim piece (C) over panel and plumb
using a level. If contour cutting this molding to
match the tub shape, do so now. You can scribe
the contour with a compass, or by hand, and cut
with a jig saw or utility knife. The back side of the
trim molding will not be supported by panel
material in the contour cut region outside the tub.
Use a piece of cutoff scrap as a filler behind this
area of the molding. Peel away protective masking
from the trim, apply adhesive and adhere molding
to panel. Secure with masking tape as in Step 5.3.
5.4) Measure horizontal distance from back wall
molding piece to the tip of miter on the vertical
molding. Cut horizontal top trim molding (Item D)
to this dimension by cutting off the end opposite
the miter. Be sure not to cut the mitered end.
5.5) Dry fit the molding (D) in place for a tight fit. Peel
away protective masking from the trim, apply
adhesive on the backside of the molding and
adhere to the wall as before. Make any minor
adjustments necessary to ensure that the mitered
end makes a tight joint.
5.6) Repeat 6.1-6.5 for the opposite wall trims (E, F).
Vertical trim installed outside tub, and contour
cut to match tub shape
Vertical trim installed to top of tub
Contour cutting the trim molding to match
the tub shape gives a professional look

FlexStoneProducts.com - 7 - 5/18
6 INSTALLATION OF CORNER SHELF (I).
NOTE: Corner shelf includes a folding-triangle metal bracket with
screw holes which is designed to mount directly to the FlexStone wall
panels. Be sure to peel away protective masking from the installation
area before securing the bracket.
6.1) Position corner shelf bracket in desired corner at
desired height. Use a level to mark level lines in
pencil. Adjust alignment to include a slight forward
slope for water runoff.
6.2) Using drywall screws or other coarse-thread
screws, fasten each side of the bracket through
the FlexStone panels and the sheetrock.
6.3) Fold bracket and complete triangle by bending the
tab over to secure bracket. Dry fit the corner shelf
material over the bracket. If corner is out of
square, trim one side of shelf to achieve a tight fit.
6.4) Peel back protective masking from edges of shelf,
apply adhesive to top and bottom of bracket and
place FlexStone material over bracket like a
clamshell. Clamp until dry (24 hours).
7 SEALING WITH SILICONE
7.1) If you desire to paint the walls now or in the future,
use paintable latex caulk where trim moldings
meet sheetrock. Use wet finger or caulk tool to
shape the latex caulk to a nice finish.
7.2) Using denatured alcohol, clean and prime all joints
in the surround, including vertical and horizontal
joints where panel meets tub, panel meets panel,
or trim meets panel. Clean any oils, greases, or
adhesive residues from these joints.
7.3) Seal all joints in your surround with 100% silicone.
Our installation kit has color-matched translucent
silicone, tinted to complement your selected
FlexStone color. As an alternative, use plain
translucent, although the color will not match as
well. Apply a fine bead of silicone to all joints. Use
wet finger or caulk tool to shape the silicone to a
nice finish. Follow any directions on sealant tube.
PLEASE WAIT 24 HOURS BEFORE INSTALLING FINISH PLUMBING OR USING YOUR NEW
TUB/SHOWER SURROUND. REMOVE REMAINING PROTECTIVE MASKING PRIOR TO USE.

FlexStoneProducts.com - 8 - 5/18
THIS PAGE IS INTENTIONALLY LEFT BLANK.

FlexStoneProducts.com - 9 - 5/18
PACKAGE CONTENTS
KIT TYPE
ELITE 3-PANEL
KIT CONTENTS
BACK WALL PANEL LEFT WALL FRONT MITERED TRIM
LEFT SIDE WALL PANEL LEFT WALL TOP MITERED TRIM
RIGHT SIDE WALL PANEL RIGHT WALL FRONT MITERED TRIM
CORNER SHELF BRACKET RIGHT WALL TOP MITERED TRIM
CORNER SHELF CLAMSHELL BACK WALL TOP TRIM
2 INSIDE CORNER REINFORCEMENTS
PACKAGED DATE PACKAGED BY AND
-
 1
1
-
 2
2
-
 3
3
-
 4
4
-
 5
5
-
 6
6
-
 7
7
-
 8
8
-
 9
9
-
 10
10
FlexStone TSK60326031FR Installation guide
- Type
- Installation guide
- This manual is also suitable for
Ask a question and I''ll find the answer in the document
Finding information in a document is now easier with AI
Related papers
-
 FlexStone TSK60326031CW Installation guide
-
 FlexStone SSK40407821CA Installation guide
-
 FlexStone SSK60367831BP Installation guide
-
 FlexStone SSK48367831CC Installation guide
-
 FlexStone SSK48367821GB Installation guide
-
 FlexStone FLXICN1.596TR Installation guide
-
 FlexStone FLXSG396TR User manual
-
FlexStone FLXSBC6036GB User manual
-
 FlexStone FLXSG3296BC Operating instructions
-
 FlexStone FLXCSB15CW Installation guide
Other documents
-
 Trim-Tex 09TT3010 Pullaway L Bead Installation guide
-
 Retro Art HARMONY141 Operating instructions
-
 Cleancut UL-W-W Measurement Guide
-
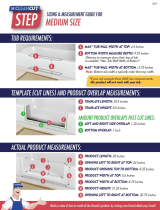 Cleancut S-B-M Measurement Guide
-
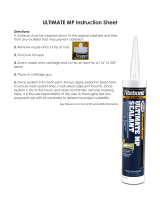 Titebond TB-GR71131 Operating instructions
-
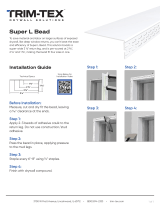 Trim-Tex Super L Bead Installation guide
-
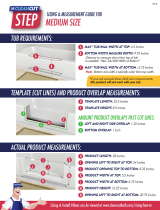 Cleancut S-W-M Dimensions Guide
-
Simplicity by Strasser 01.193 Installation guide
-
 Cleancut S-W-W User guide
-
Loctite 1884678 User manual


