Page is loading ...

VX7012 / VX4012
What’s in the Box
The following items are supplied
with the VX7012/VX4012:
• HeadUnit
• TrimRing
• HardwareBag
• Power/SpeakerOutputHarness
• RemoteControl
• ExternalMicrophone
• MountingSleeve& RemovalKeys
• Installation/ Quick Start Guide
Tools and Supplies
The following tools and supplies are needed to
install the head unit:
• Torx type, flat-head and Philips
screwdrivers
• Wire cutters and strippers
• Tools to remove existing radio (screw
driver, socket wrench set or other
tools)
• Electrical tape
• Crimping tool
• Volt meter/test light
• Crimp connections
• 18 gauge wire for power connections
• 16 – 18 gauge speaker wire
WARNING!Neverinstallthisunitwhereoperationandviewingcouldinterferewith
safedrivingconditions.
• GPS Antenna (VX7012 Only)
Installation / Quick Start Guide
Complete operation manuals are
online at www.jensenmobile.com
Note: There is no operation manual in this package

2
Disconnect the Battery
To prevent a short circuit, be sure to turn off the ignition and remove the negative (-) battery cable prior to installation.
NOTE: If the head unit is to be installed in a car equipped with an on-board drive or navigation computer, do not
disconnect the battery cable. If the cable is disconnected, the computer memory may be lost. Under these conditions,
use extra caution during installation to avoid causing a short circuit.
Replacing the Fuse
When replacing the vehicles radio fuse always use the proper rated replacement fuse. Using a fuse with an improper rating
could damage the unit and cause a fire.
ISO-DIN Installation
The head unit is designed to fit into a 1.0 DIN dashboard opening. The unit has threaded holes in the chassis side panels which
may be used with the original factory mounting brackets of some Toyota, Nissan, Mitsubishi, Isuzu, Hyundai and Honda
vehicles to mount the radio to the dashboard. Please consult with your local car stereo specialty shop for assistance on this
type of installation.
NOTE: It is the end-users responsibility to install and operate this unit in a manner in accordance with local, state and federal
laws. The PARKING BRAKE wire MUST BE CONNECTED as directed in the manual.
Using the Cosmetic Trim Ring
A cosmetic trim ring is supplied with the head unit for installation flexibility. This unit will fit into most import dashes with little or
no modification to the dash board/cavity. Some US domestic vehicle dashes will accept a Single-DIN chassis, but there is usually a
small gap between the radio and dash piece after installation is complete. In this case, use the trim ring to conceal any gaps that
may be present.
2.
Remove the factory mounting brackets and hardware from the
existing radio and attach them to the new radio.
CAUTION! Do not exceed M5 X 6MM screw size. Longer
screws may damage components inside the chassis.
3.
Place the radio in front of the dashboard opening so the wiring
can be brought through the mounting sleeve. Follow the
wiring diagram carefully and make certain all connections are
secure and insulated with wire nuts or electrical tape.
After
completing the wiring connections, plug the
connector into
the mating socket on the rear of the chassis. Turn the
unit on
to confir
m operation (vehicle ignition switch must be “ON”). If
the unit does not operate, re-check all wiring until the
problem
is corrected.
4. Mount the new radio assembly to the dashboard or center
console using the reverse procedure in step 1 above.
CAUTION! Be careful not to damage the car wiring.
NOTE: For proper operation of the CD/DVD player, the chassis must be mounted within 30° of horizontal. Make sure the
unit is mounted within this limitation.
Mounting
The rear of the unit
Trim plate
Rubber Sheath
Dash Board
1. Remove the existing factory radio from the dashboard or
center console mounting. Save all hardware and brackets as
they will be used to mount the new radio.
Steering Wheel Control (SWC) Ready
The recommended SWC Interface is the PAC SWI-RC
steering wheel control adapter.
SWI-RC installation hints:
1. Set "Radio Select Switch". Set the SWI-RC to position 7 - "Pioneer/Sony/Other".
2. Programming - Use the Pioneer/Sony/Other radio function mapping order for Jensen branded head units.
3. When programming the SWI-RC, if a function is not supported (or not desired), then the function MUST be skipped as per
the PAC SWI-RC instructions.
4. The SWC functions
MUST also be programmed in the correct order per the PAC SWI-RC radio function mapping order
instructions.

Wiring Diagram
Need Help?
Some vehicles may not support all SWC functions.
Professional Installation is recommended.
MOBILE POWER AMP
GPS ANTENNA (VX7012 Only)
HDMI

QUICK START GUIDE
Turning the Unit ON or OFF
Press the front panel volume knob to turn the unit ON. Press and hold the volume knob > 1 second to turn the unit OFF.
Selecting an Audio/Video Source, Phone, Steering Wheel Controls, Backup Camera or Pandora
To select a source:
1. Press the front panel MENU button or touch the SRC icon to view the Main
Source Menu
2.
Touch the desired source icon on one of the two main menu screens. Screen 1 of 2: Disc, Radio, USB, AV-IN1, Settings,
Phone or Camera. Touch Next
at the bottom of the screen to access Screen 2 of 2: Steering Wheel Controls (SWC), AV-IN2,
Pandora or SiriusXM (SXM).
Volume Adjustment / Turn On Volume
To increase or decrease the volume level, rotate the rotary encoder knob. The unit’s front panel screen will display the volume level
for 2 seconds. The volume level ranges from 0 to 50. To set the Turn-On volume, press and hold the rotary encoder knob 1 second
while the green volume bar is displayed after setting the desired volume level. You will hear 2 beeps to confirm the new Turn-On
volume level.
Audible Beep Conrmation
An audible beep tone confirms each function selection. The beep tone can be disabled through the Setup menu.
Muting the Audio
Press the front panel volume knob ( ) to mute the audio from the unit. Mute icon is displayed on the LCD screen. Press the front
panel volume knob again to restore the audio volume to its previous level. Adjusting the volume or using any of the audio setup
features cancels the mute function.
Equalizer Controls
Equalizer (
EQ): Adjustment can be made after entering one of the audio/video sources (Disc, Radio, USB, AV-IN or SXM).
Touch the Equalizer (EQ) icon to view the Equalizer Control Screen to select a desired preset setting (Optimal, Classic, Rock, Jazz,
Techno or Pop), Flat setting, custom User setting, make adjustments to the audio Balance and Fader levels or to turn the Loudness
option ON or OFF. Touch the SRC icon to return to the current source.
Voxx Electronics Corporation
Hauppauge, NY 11788
Technical Assistance: 800-323-4815
www.jensenmobile.com
© 2015 Printed in China
SRC
Button

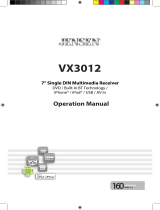
VX7012
Operation Manual
7” Single DIN Multimedia Receiver
DVD / NAV / SiriusXM Ready™ / Built-In BT
Technology / iPhone® - iPod® / Pandora® / USB / AV In
6VRMS
RCA Output

2
VX7012
Android is a trademark of Google Inc.
microSD is a trademark or registered trademark of SD-3C, LLC in the United States,
other countries or both.
Pandora® is a registered trademark of Pandora Media, Inc.
Sirius, XM and all related marks and logos are registered trademarks of Sirius XM
Radio Inc. All rights reserved.

3
VX7012
CONTENTS
Features ...��������������������������������������������������������������������������������������������������������������� 5
Controls and Indicators ..........������������������������������������������������������������������������������� 8
Remote Control ..... �����������������������������������������������������������������������������������������������10
External Devices ......�.�������������������������������������������������������������������������������������������14
Quick Start ................�.������������������������������������������������������������������������������������������15
Audio Equalizer .....................�.�����������������������������������������������������������������������������18
System Settings ....�.����������������������������������������������������������������������������������������������20
Disc Operation �.��������.....���������������������������������������������������������������������������������������29
AM-FM Radio ......................�.��������������������������������������������������������.������������������������41
USB / MicroSD card...............�.��������������������������������������........���������������������������������46
iPod®/ iPhone® Connectivity�.����������������������������������������.��������������������������������������51
AV-In1 / AV-In2 .....................�.�������������������������������������������������������������������������������55
BT / Hands Free Calling...........�.����������������������������������������������������������������������������.59
Rear Camera .........................�.�������������������������������������������������������������������������������67
Steering Wheel Controls (SWC) ..............................�.�������������������������������������������68
Pandora® Radio ..........................�������������������������������������������������.�����������������������.69
SiriusXM® Radio .......................�.��������������������������������������������������������������������������.73
Care and Maintenance .......�.���������������������������������������������������������������������������������91
Specifications �.���������������������������������������������.....����������������������������������������������������92
Notes �.����������������������������������������������������������...�������������������������������������������������������94
Common Replacement Parts����������������������������������������������������������������..Back Cover
HDMI / MHL Connectivity .....�.������������������������������������������������������������������������������56
User Uploadable Wallpaper ....�.��������������������������������������������������������������������������.86
Troubleshooting ......................�.��������������������������������������������������������������������������.87

4
VX7012
FCC Statement
1. This device complies with Part 15 of the FCC Rules.
Operation is subject to the following two conditions:
(1) This device may not cause harmful interference, and
(2) This device must accept any interference received, including interference that
may cause undesired operation.
2. Changes or modifications not expressly approved by the party responsible for
compliance could void the user’s authority to operate the equipment.
NOTE: This equipment has been tested and found to comply with the
limits for a Class B digital device, pursuant to Part 15 of the FCC Rules.
These limits are designed to provide reasonable protection against
harmful interference in a residential installation.
This equipment generates, uses and can radiate radio frequency energy and, if
not installed and used in accordance with the instructions, may cause harmful
interference to radio communications. However, there is no guarantee that
interference will not occur in a particular installation. If this equipment does cause
harmful interference to radio or television reception, which can be determined
by turning the equipment o and on, the user is encouraged to try to correct the
interference by one or more of the following measures:
• Reorient or relocate the receiving antenna.
• Increase the separation between the equipment and receiver.
FCC Radiation Exposure Statement
This equipment complies with FCC radiation exposure limits set forth for an
uncontrolled environment. This equipment should be installed and operated with
minimum distance of 20 centimeters between the radiator and your body.
“Made for iPod,” and “Made for iPhone” mean that an electronic accessory (This head unit) has
been designed to connect specifically to iPod®/, or iPhone® , respectively, and has been certified by
the developer to meet Apple performance standards.
Apple is
not responsible for the operation of this device or its compliance with safety and regulatory
standards. Please note that the use of this head unit with iPod® or iPhone® may affect mobile
phone
performance.
iPod®/ iPhone® are trademarks of Apple Inc., registered in the U.S. and other countries.

5
VX7012
Thank you for choosing a Jensen product. We hope you will nd the instructions
in this owner’s manual clear and easy to follow. If you take a few minutes to look
through it, you’ll learn how to use all the features of your new Jensen VX7012
Multimedia Receiver for maximum enjoyment. Please save this manual for future
reference.
We recommend having your Jensen VX7012 Multimedia Receiver installed by
a reputable installation shop.
FEATURES
DVD
• Audio Equalizer
• Next Chapter and Previous Chapter
• Play/Pause
• Track Direct Entry
• Disc Menu
• Selection Repeat / Track Repeat
• Disc Audio
• Disc Language
• Picture Control
CD / MP3 / WMA
• CD-Text Compatible
• ID3 Tag Compatible
• Directory Search (MP3 / WMA Only)
• Burn up to 1500 MP3 and WMA Files onto a DVD+R / RW
• Audible Forward / Reverse Track Search (CD-DA Only)
• Random, Repeat and Intro
• Play, Pause, Stop, Next Track and Previous Track
AM-FM
• USA, China, Japan, Europe, Europe (LW) and Orient (OIRT)
• 30 Station Presets (18 FM / 12 AM)
• Auto Stereo / Mono
• Local / Distance
• Auto Store / Preview Scan
iPod®/iPhone®
• iPod®/ iPhone® via USB
•
High Speed Direct Connect Interface to Access iPhone® and iPod® Playlists,
Artists, Albums
• Power Management Charges iPhone® / iPod® while Connected

6
VX7012
SiriusXM-Ready®
• Satellite Channel Name, Artist, Song, and Categories Displayed on Monitor
(Vehicle Tuner and Subscription required and sold separately)
Chassis
• 1.0 DIN (Import / ISO-DIN Mountable)
• Motorized Flip-Out / Flip-Up TFT Screen
• 7” High Definition TFT LCD
•
800h x 480v x RGB WVGA
General
• Beep Tone Confirmation (ON-OFF Option)
• BT Hands-Free operation for safety and convenience and A2DP for streaming
music from your smartphone.
• One Composite Video Output for Additional Screens
• Front Panel Audio/Video Input
• Front Panel USB - Playback Music / Video Files via Portable Hard Drives / USB
Sticks
• Ten-Band Graphic Equalizer
• Rear Subwoofer Line Output
• Rear Camera Input
• Touch Screen Calibration Mode
• Rotary Encoder Audio Control
Rear Camera
• The VX7012 is “camera ready.” Before accessing any camera features, you must
purchase and install a rear video camera.
Built-In Navigation
• USA Map Data (Tele Atlas)
• >10 Million Points of Interest
• 4GB MicroSD card w/ Navigation Software
• Latest Map Guarantee (Must be redeemed within 30 days of initial activation)
• 13 Natural Voice Languages for Navigation Guidance
•
HDMI / MHL Connectivity - See and control smartphone apps on the larger
TFT screen. *Some apps may not be supported.
• 6VRMS Front / Rear / Subwoofer RCA Line Output
• iGo Primo Next Gen Navigation Engine
•
USB Charging Current - 2.1 Amp Support

7
VX7012
WARNING! Never install this unit where operation and viewing could
interfere with safe driving conditions.
WARNING! To reduce the risk of a traffic accident (except when using for
rear view video camera) never use the video display function
while driving
the vehicle. This is a violation of federal law.
WARNING! Never disassemble or adjust the unit.
WARNING! To prevent injury from shock or fire, never expose
this unit to
moisture or water.
WARNING! Never use irregular discs.
WARNING! Using an improper fuse may cause damage to the unit and
result in fire.

8
VX7012
CONTROLS AND INDICATORS
OPEN
VX7012 Controls and Indicators
1. LCD Screen and Touch Screen:
Touch icons on this screen to access menus or control functions.
2. Eject ( ) Button:
Press this button to eject a DVD/CD/MP3 disc. Disc play is stopped, the disc is
ejected and the unit will change to radio operation. If the disc is not removed
from the unit and the button is pressed again, the disc will be re-loaded. If the
disc is not removed from the disc slot within 10 seconds of being ejected, it
will be automatically reloaded to prevent it from being accidentally damaged.

9
VX7012
3. Display (DISP) Button:
Touch to adjust the screen brightness.
Touch and hold to turn the screen o.
When the TFT is closed, press once and repeat to cycle through clock time,
metadata, RDS information, etc. The type of information displayed depends
upon the selected source
4.
3�5 mm AV IN Jack:
This connector accepts a 3.5 mm jack through which signals from various
audio/video devices can be applied to the unit.
5.
Open Button:
Press to open/close the TFT/LCD screen.
6.
Reset Button:
Press this button to reset the system settings (except password and parental
lock settings) and to correct a system halt or other illegal operation. Use the
tip of a pen to press the Reset button.
7.
MicroSD card slot:
Used to insert microSD cards containing navigation software. Do not
delete or modify microSD card contents.
8. USB slot:
Used to connect an iPod®, MP3 player or flash d ive connection adapter for
playback of music/video file .
9.
Interface Cover:
Covers the Micro SD card slot
, USB slot and Reset button.
10. Remote Sensor:
Used to receive command signals from the remote control.
11. Previous ( ) / Next ( ) Buttons:
Press the Previous ( ) button to play the previous track on a disc.
Press the Next ( ) button to play the next track on a disc.
12. Rotary Volume ( ) Knob / Mute Button
Rotate the knob to adjust the volume from 0 to 50.
Press the knob momentarily to mute the audio. Press the knob again to
restore the audio.
13. SRC / Power On/Off ( ) Button
Press to turn the unit ON.
When on, press to switch the playing source.
Press and hold to turn the unit o.
14. Disc Slot:
Accepts DVD/CD/MP3 discs. If the unit is turned on, playback begins when a
disc is inserted.

10
VX7012
NOTES ON REMOTE CONTROL USAGE
• Aim the remote control at the TFT/screen.
• Remove the battery from the remote control or insert a battery insulator if
the remote control will not be used for a month or longer.
• DO NOT store the remote control in direct sunlight or in a high
temperature environment, or it may not function properly.
• The battery will last for 6 months under normal conditions. If the remote
control does not work, please change the battery.
• Use lithium battery type CR2025 (3V) only.
• DO NOT recharge, disassemble, heat or expose the battery to fire.
• Insert the battery in the proper direction according to the ( + ) and ( - ) polarity
marks.
• Store the battery in a place where children cannot reach it to avoid the risk
of an accident.

11
VX7012
Remote Control Functional Description
1. SOURCE (SRC) Button: Press this button to switch between and select
available sources. (Radio/Disc/Phone/USB/Phone-Audio/SWC/AUX-1/AUX-2/
Camera)
2. EJECT Button ( ): Press this button to eject a DVD/CD/MP3 disc. Disc play is
stopped, the disc is ejected and the unit will change to radio operation. If the
disc is not removed from the unit and the button is pressed again, the disc will
be re-loaded. If the disc is not removed from the disc slot within 10 seconds
of being ejected, it will be automatically reloaded to prevent it from being
accidentally damaged.
3.
AUDIO Button: Press to display and select the audio language in DVD mode.
Each time the button is pressed, the language changes. NOTE: The languages
for audio vary from disc to disc.
4. VOLUME Button (VOL + and -): Press these buttons to increase or decrease
the playback volume.
7.
MUTE Button: Press this button to turn the audio output ON and OFF.
8. POWER Button ( ): Press this button to turn the unit ON and OFF.
9. SUBTITLE Button: Press to display and select the subtitle language in DVD
mode.
Each time the button is pressed, the subtitle language changes. NOTE:
The type and number of languages for subtitles vary from disc to disc.
10. MENU Button: Press this button to access the root menu of
a DVD or CD
during playback. The disc will return to normal playback and
the root menu
will disappear if no selection is made within 10 seconds.
11.
FAST FORWARD [ ] Button: Press this button to forward Disc play 2x, 4x, 8x
or 20x normal speed. Press this button while in Radio mode to search available
radio station by increasing tuning frequency.
5.
BAND Button: Press this button to scroll though preset stations or when in
disc mode, this button is used for Fast playback / Slow playback. Press this
button to answer an incoming BT phone call.
6. REP
EAT (RPT)
Button:
Repeat playback

12
VX7012
15.
FAST REVERSE [ ] Button: Press this button to reverse Disc play 2x, 4x, 8x
or 20x normal speed. Press this button while in Radio mode to search available
radio station by decreasing tuning frequency.
16. NUMBER Buttons (1-6): Press these buttons to directly access chapters and
tracks, dialing phone numbers, or entering passwords.
17.
RANDOM (RDM) Button: Press this button to play tracks or chapters in
random order while playing a disc.
12. NEXT (uul) Button: Press this
button to skip to the next chapter, track or
song during playback of a disc. Press this
button while in Radio mode to
search available radio station by increasing tuning frequency.
13.
PLAY / PAUSE ( ) Button: Press this button to pause the playback of a
disc. Press this button again to resume normal playback.
14.
PREVIOUS (ltt) Button :: Press this button to go back to the previous
chapter, track or song during playback of a disc. Press this button while in
Radio mode to search available radio station by decreasing tuning frequency.

13
VX7012
USING THE TFT MONITOR
Opening / Closing the TFT Monitor
Open the TFT Monitor
Press the OPEN button on the front panel to activate the mechanism that
moves the TFT screen into the viewing position.
Close the TFT Monitor
Press the OPEN button on the front panel to load the TFT screen back into the
compartment.
TFT Monitor Tilt Angle Adjustment
A known characteristic of TFT panels is that the quality of the display varies in
relationship to the viewing angle. To adjust the monitor angle for optimum
viewing:
1.
Press and hold the OPEN button (> 1 second) on the front panel.
2. To adjust the tilt of the display panel, turn the rotary volume ( ) knob.
3.
To store the new tilt setting, press and hold the OPEN button again or let
the feature time out after 5 seconds. The rotary volume ( ) knob will
return to normal operation.

14
VX7012
EXTERNAL DEVICES
You cannot directly control external devices connected to the A/V inputs using
the front panel controls or this unit’s remote control.
3.5mmA/V Cable (not included)
Video
Left Audio
Right Audio
Ground
1
2
3
4
USB Cable (not included)
Connecting External Devices
Connecting External Devices
External devices, including a game console, video camera, etc. can be connected
to this unit using its front A/V In 3.5mm connector (AV
In1), the rear RCA inputs
(AV In 2) or the USB port.
AV In 1
AV
In1 is used for playback of audio/video from an external device connected to
the unit through a 3.5mm connector. The unit can increase or decrease the
volume of the connected device. All other controls are done on the connected
device. Select AV In1 to playback audio/video from the front panel 3.5mm AV In.
AV In 2
AV In2 is used for playback of audio/video from an external device connected to
the RCA connectors located on the back of the unit (see the VX7012 Installation
Guide). The unit can increase or decrease the volume of the connected device. All
other controls are done on the connected device. Select AV In 2 to playback audio/
video from the rear RCA AV In
MicroSD card slot

15
VX7012
QUICK START GUIDE
Turning the Unit ON or OFF
Press the front panel SRC / Power ( ) button to turn the unit ON. To turn the unit
OFF, press and hold the front panel SRC / Power ( ) button for 2 seconds.
Selecting an Audio/Video Source, Phone, Steering
Wheel Controls, Backup Camera or Pandora
To select a source by using the front panel SRC button or main menu screens:
1.
Press the SRC button on the front panel to switch playing sources.
SRC
Button
VX7012 Front Panel
2. Touch the desired source icon on one of the two main menu screens.
Screen 1 of 2: Disc, Radio, USB, AV-IN1, Settings, Phone or Camera. Touch Next
at the bottom of the screen to access Screen 2 of 2: Steering Wheel Controls
(SWC), AV-IN2, Pandora or SiriusXM (SXM).

16
VX7012
System Settings Adjustment
To access and adjust system settings:
1.
Touch the Settings (
) icon on the Main Menu screen to enter the SETTINGS
MENU. Sub-menus where adjustments can be made will be highlighted.
Audible Beep Confirmation
An audible beep tone confir
ms each function selection. The beep tone can be
disabled through the Setup menu.
Muting the Audio
Press the front panel Rotary Volume ( ) knob / Mute button to mute the audio
from the unit. Mute icon is displayed on the LCD screen. Press the Rotary
Volume ( ) knob / Mute button again to restore the audio volume to its
previous level. Adjusting the volume or using any of the audio setup features
cancels the mute function.
Equalizer Controls
Equalizer (
EQ): Adjustment can be made after entering one of the audio/video
sources (Disc, Radio, USB, AV-IN or SXM).
Touch the Equalizer (EQ) icon to view the Equalizer Control Screen to select a
desir
ed preset setting (Optimal, Classic, Rock, Jazz,
Techno or Pop), Flat setting,
custom User setting, make adjustments to the audio Balance and Fade levels or to
turn the Loudness option ON or OFF. Touch the SRC icon to return to the current
source.
Volume Adjustment / Turn On Volume
To increase or decrease the volume level, rotate the rotary encoder knob. The
unit’s front panel screen will display the volume level for
2 seconds. The
volume level ranges from 0 to 50. To set the Turn-On volume, press and hold
the rotary encoder knob 1 second while the green volume bar is displayed
after setting the desired volume level. You will hear 2 beeps to confirm the
new Turn-On volume level.
/