Important Safety Information
2 - English
Please read this guide
Please read this owner’s guide carefully. Save this guide for future reference and make it easily accessible for passengers and third
parties who use the headset.
Safety Warnings:
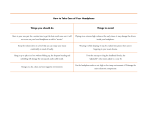
• Turn the headset off if it emits any loud noise.
As with any complex electronic device, it is possible for this headset to fail during operation. Symptoms of failure, which
may include loud tones, distortion, feedback squeals and loss of communications signal in the headset, can occur in
either the Acoustic Noise Cancelling
®
mode (turned on) or in the passive mode (turned off). If the headset emits any
loud noise and the related loss of communications in the Acoustic Noise Cancelling mode, turn off the power switch.
The headset will continue to provide communications in the passive noise reducing mode. If the problem persists, see
Troubleshooting on page 30.
•
Switch to an alternate communications method in the event of a headset issue.
In the unlikely event of any headset issue or failure in the passive noise reducing mode, switch to an alternate
communications method and use standard cockpit resource management skills to minimize distractions.
•
Be aware of sound differences while wearing the headset.
With the headset’s active and passive noise reduction, typical aircraft sounds (such as from engines, propellers, and
stall or gear up warnings) will not sound familiar on your rst few ights. Such important sounds may be quieter than you
are used to. You are responsible for making sure that you can hear, notice and recognize these sounds when using the
headset while operating any aircraft.
•
Use the headset at a moderate volume level.
To avoid hearing damage, use the headset at a comfortable, moderate volume level. Limit the headset volume to safe
levels that do not interfere with your ability to hear informational sounds and warning alarms, such as stall warnings or
gear up, while piloting.
•
Do not make phone calls while piloting.
During ight operations, do not use the headset for telephone calls.
•
Make sure your aircraft communications system volume control is easily accessible.
Make sure you can understand critical communications even with Acoustic Noise Cancelling turned off. We recommend
that you set the audio system volume so that you can understand radio communications in passive mode, in full aircraft
noise, then use the control module’s volume controls to set a comfortable level with Noise Cancelling on. In passive
mode, the control module will automatically switch to maximum volume. If your headset is aircraft powered, connect the
headset to the aircraft power sources only as described in “Connecting the headset to the aircraft” on page 13.
•
Make sure portable devices do not interfere with the aircraft’s navigation and communication systems.
It is a pilot’s responsibility to ensure that portable devices do not interfere with the aircraft’s navigation and communica-
tion systems, as well as to determine if the portable device is suitable for use with the Bose
®
A20
®
Aviation Headset.
•
Make sure AUX source volume is turned up.
If the AUX source audio volume is set at a low level, it may be below the detectable threshold or may cut in and out.
•
Do not use the headset with a helmet or as part of a crash protection system.
The headset is not intended for such use, and has not been certied for crash protection. Dismantling, reassembly
or modication of the headset, or any part, for use in a helmet or other crash protection system could result in severe
bodily injury and such unauthorized use will void the limited product warranty.
•
Use only AA alkaline batteries.
Replace the batteries only with AA alkaline batteries (IEC LR06). There is a danger of explosion if batteries are incor-
rectly replaced with any other battery chemistries. Batteries may cause a re or chemical burn if mishandled. Do not
recharge, disassemble, heat, or incinerate batteries. Dispose of used batteries properly, following any local regulations.
The headset will not operate properly if used with any battery source other than the Bose A20 Aviation Headset control
module.
•
Keep batteries out of reach of children.
WARNING: Contains small parts which may be a choking hazard. Not suitable for children under age 3.
WARNING: This product contains magnetic material. Contact your physician if you have questions on whether
this might affect the operation of your implantable medical device.
This symbol means the product must not be discarded as household waste, and should be delivered to an
appropriate collection facility for recycling. Proper disposal and recycling helps protect natural resources,
human health and the environment. For more information on disposal and recycling of this product, contact
your local municipality, disposal service, or the shop where you bought this product.
China Importer: Bose Electronics (Shanghai) Company Limited, Part C, Plan 9, No. 353 North Riying Road, China (Shanghai)
Pilot Free Trade Zone
EU Importer: Bose GP, Castleblayney Road, Carrickmacross, Ireland
Taiwan Importer: Bose Taiwan Branch, Room 905, 9F, Worldwide House, 131 Min Sheng East Rd, Section 3, Taipei, Taiwan, 105