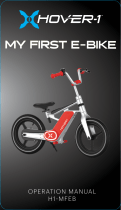
mini pithog
User Manual

2
Safety
When operang the Mini Pithog please make sure you adhere to the following:
• Always wear a helmet when riding the Mini Pithog
• Have a parent assemble the unit to ensure security.
• Do not operate without parental supervision
• Always ride in open areas free of obstrucon
• Make sure that your baery power is sucient before you go out to ride.
• Do not exceed weight limits of the unit
• To start, make sure unit is in slowest speed to prevent accidents.
• Periodically charge the unit when not in use for long periods of me
• Do not over charge the baery by leaving the charger in the charging port. Once
the baery is fully charged remove the charger immediately.
• Do not try to operate the unit while charging.
• Do not make sharp / abrupt turns at high speeds to avoid pping.
• Do not operate under the inuence of any use of drugs or alcohol
• Do not completely submerge the unit in water
• Do not operate in harsh weather condions.
For any quesons or concerns please call
1-800-649-9320 or visit www.daymak.com

3
About Daymak
Daymak is one of Canada’s largest Alternave Vehicle providers. We design, engineer,
manufacture, import and repair everything from recreaonal dirt bikes, go-karts and
electric golf cars to alternave transportaon soluons such as e-bikes electric scooters.
Our electric bicycles represent an energy-ecient and eco-friendly alternave for
people who need to get around the city. They greatly increase the praccality of bicycle
transportaon in urban centres. Cosng only a few cents to charge, an e-bike can make
city life more convenient and much less expensive.
While there are many new Green technologies that are sll in their infancy, electric
bicycles have been developing over the last 40 years or more. E-bike technology has been
dramacally rened since the introducon of the rst custom-conversion bicycles. Today,
electric bicycles are a supremely reliable and aordable means of transportaon.
Daymak is constantly developing new eco-friendly alternave transportaon strategies,
led by its own Research and Development department in Toronto, Canada. We are always
improving our products. Our innovave in-house engineering and quality tesng provide
customers with many new kinds of reliable, eco-friendly vehicles, designed to help change
the lives of our customers and the world.
Daymak warranes, services, and stocks parts for everything it sells. We support our
products. Please feel free to visit our website. You’ll nd the latest in cool transportaon
soluons, support for the products you’ve purchased and contact informaon.

4
Introduction
E-Bikes
Using an electric bicycle is a great way to ride around town conveniently and economically.
E- Bikes represent a natural progression in the development of urban transportaon.
Using only small amounts of electricity, e-bikes have the potenal to radically reduce the
amount of polluon in our cies. They are also very quiet, so they do not add to the high
levels of noise polluon which we oen take for granted. They are easy, and usually free
to park. They are unobtrusive and highly praccal addions to the urban landscape.
E-bikes are also inexpensive. They (currently) require no registraon, no insurance, no
licence and do not incur parking charges. Compared to internal combuson engines, the
engines in electric vehicles have fewer moving parts and require far less maintenance.
Your Daymak e-bike is the result of Daymak’s years of experience, the highly trained
technical skills of our sta, and careful ongoing design work by our engineers. We hope
you enjoy using this product and welcome any feedback that you may have.
New Laws
Most provinces in Canada, most states in the U.S.A, the United Kingdom and many
European countries have new laws that permit cyclists to use electric motors to assist the
regular operaon of bicycles. Please check with your provincial or state government to
learn about your local laws.
Liability
Daymak does not assume any liability for damages, loss of prots, or claims from third
pares due to improper use of this product. Daymak does not assume any liability for
damages due to problems with the product resulng from service by a third party that is
not cered by Daymak.
The informaon in this guide may be subject to change without noce. For the latest
informaon available, please contact your local Daymak dealer or visit our website.
We have taken all possible measures to ensure the accuracy and completeness of the
informaon in this guide. However, if you do nd anything missing, incomplete or wrong,
do not hesitate to contact us.

5
Table of Contents
• SAFETY 2
• ABOUT DAYMAK 3
• INTRODUCTION 4
• PART DIAGRAMS 6
• RIDING INSTRUCTIONS 7
• ASSEMBLY 7
• FUSE 11
• THE BATTERY 12
• CHARGING YOUR E-BIKE 13
• CHARGING THE MINI PITHOG 14
• OPERATION 16
• TECHNICAL DATA 18
• VEHICLE IDENTIFICATION NUMBER (VIN) 19
• MAINTENANCE AND TROUBLESHOOTING 20
• EBIKE MAINTENANCE 22

6
Part Diagrams
Diagram 1: MINI Pithog
This diagram illustrates the various parts of your unit. Please note that many of these
parts are not user-serviceable and should be repaired only by trained professionals. This
is especially true of the electrical systems and the mechanical components.
1. Throle
2. Brakes
3. Shocks
4. Tire Pump Valve
5. Kick Stand
6. Foot Pegs
7. Brake Disc
8. Chain
9. Fuse Port
10. Charge Port
11. Seat
12. Ignion

7
Riding Instructions
This guide assumes that you already know how to ride a standard bicycle. Before you try
to ride an electric dirt bike, you should be very familiar with controlling and balancing a
normal bicycle.
Cauon
If you do not have cycling experience, an e-bike is too dangerous to ride. Do not begin
learning to ride a bicycle using an e-bike.
Important Notes
• Ebikes are Fast! E-bikes are capable of traveling at higher speeds than many bicycle
riders are accustomed to. Use cauon at all mes, especially when travelling in mixed
trac. Always take into account driving and traveling condions.
• Obey the Law. Be sure to follow all provincial and city trac laws. This includes
obeying stop signs, checking carefully when turning, and riding defensively.
An e-bike is a motorized vehicle, even though it is classed as a bicycle. You must
follow the law.
• Stay Sober. Never ride your bicycle while intoxicated. An e-bike is capable of
traveling faster than a normal bicycle, and you should always be in control of it.
• Share the Road. Be careful in mixed trac. Let vehicles that are faster than you
Overtake you and give ample room for vehicles travelling slower.
AsSEMBLY
For a full guide on how to assemble the Mini Pithog please go the following url:
hps://www.daymak.com/assembly/mini-pithog

8
Items to Carry with the Electric Bike
It is a good idea to carry the following items with you at all mes when you ride your
e-bike.
• The charger, to charge the bike in case the baery power runs out.
• 30 Amp Fuse, spares for the baeries, in case the fuses blow (if applicable).
• A lock, to secure your e-bike when you park it.
• A helmet, as required by safety laws.
Inspecting your Electric Bike
Always inspect your e-bike before you ride it, to make sure its safety features are
operang properly. Many accidents can be avoided with roune inspecons. Once you
are comfortable with your e-bike, you will be able to detect small changes in the way it
feels. If anything changes between uses, make sure to have it properly examined. Also, be
sure to listen for changes in the sounds your e-bike makes over me. Any mechanical or
power issues may have eects on the sounds the bicycle makes.
Holding the Handlebars
As with a normal bicycle, place your ngers over the brake levers, using the palms of your
hand and your thumbs to wrap around and under the handlegrips. Doing this allows you
to acvate the brakes easily, by squeezing your hand, in case you have to stop quickly. This
is the safe way to control your electric bicycle.
Turning your E-bike On and Off
To turn on your e-bike, insert the key into the “ignion”, located just below the dash
board, and turn the key to the right. When your e-bike is acvated, the power indicator
will light and the baery charge indicator will jump, showing you how much power your
e-bike has. To turn o the e-bike, simply turn the key to the le, and remove the key.

9
Warning
When you acvate the e-bike, the electrical system becomes live. Do not try to aect
changes to the E-Bike (such as removing the baery or repairing electrical components)
while the E-Bike is acvated. Turn the E-Bike o and remove the key before you aempt
to access any of the electrical components. Also, the baery carries a signicant electric
charge and can injure people if not treated properly and with respect.
Accelerating and Decelerating
The throle is found on the right-side hand grip on the handlebars. Turn rotate the grip
counterclockwise (towards you) to accelerate. To decelerate, release the grip (turn it
away from you). Don’t over-rotate the accelerator, as this could damage the baery and
electrical components.
Warning
Do not acvate the accelerator unl you are seated on the bicycle and are ready to
accelerate. The e-bike can easily escape from your control, possibly injuring you or others,
and the e-bike may be damaged by being dropped.
Stopping
Your e-bike has two sets of brakes, at the front and at the rear. The levers aached to
the handlebars, on the le and right, acvate the brakes. Pull the levers toward you to
acvate the brakes.
You can use both brakes to come to a stop more quickly, or you can use one of the brakes
to come to a gentle stop, depending on your riding needs at the moment. When the
brakes are acvated, the power to the engine is automacally turned o, unl you release
the brakes. This allows you to stop safely.
Safety Tips
• When you are traveling in wet weather, water may cause your brakes to funcon
less eciently because it reduces fricon between the brake pads and the wheels.
• Take care to slow down and give yourself more room to stop or slow if necessary.
• It is a good idea to have your brakes and brake pads checked regularly. The brake
pads will eventually wear down through fricon, and aer signicant use will have to
be replaced.
• Engage the rear brakes rst before the front brakes to avoid ipping the unit.

10
Riding in Wet Weather
Your e-bike is designed to funcon in wet condions, such as when it is raining. However,
because the motor is on the rear wheel, it is easy to slip when moving at high speeds. If
it is very wet, be sure to avoid high speeds. When you are traveling in wet weather, water
may cause your brakes to funcon less eecvely because it reduces fricon between the
brake pads and the wheels. Take care to slow down and give yourself more room to stop
or slow if necessary.
The Motor and Water
Your e-bike is not designed to be immersed in water. Always ensure that the water level
does not go above the middle of the re, to prevent water from geng inside the motor.
Water in the motor can cause short-circuits and may damage the electrical systems in
your e-bike.
Riding in Cold Weather
Your e-bike is designed to operate year-round. However, in very cold condions or when
there is a lot of snow or slush on the ground, it is possible for the motor in the e-bike
to get wet or for the brakes to funcon less eecvely, just as it can happen in wet
weather. Below 10 degrees Celsius, the baery will not work as well as it would in warmer
temperatures. While Lithium-Ion baeries perform beer than Lead-Acid baeries in
temperature extremes, both will experience reduced performance in cold temperatures.
Also, riding the e-bike in cold temperatures may require you to replace the baery sooner
rather than later.
Maximum Load
Do not exceed the maximum load capabilies of your e-bike. You can nd the exact loading
capacity listed in the technical specicaons in this guide.
If you exceed the maximum load, the performance of the bike will suer.
Exceeding the maximum load of your e-bike could cause damage to the shocks, to the
mechanism and, ulmately, even to the frame. It could also cause your motor to work too
aggressively, and may cause it to burn out.

11
Disconnecting the Circuit Breaker
When the circuit breaker is disconnected, all power from the baery to the e-bike is
blocked. This is useful if you are going to store your e-bike or if it is damaged and you wish
to bring it to be serviced.
Note: The circuit breaker must be on for the alarm system to work. Do not leave the
circuit breaker o in an unsafe locaon if you are worried about the.
Long-Term Storage of your E-bike
If you are storing your bike for a long period, disconnect the circuit breaker. This is a safer
way to store the electric bicycle, as it prevents accidental acvaon of the e-bike and
makes it impossible to acvate it even with the key.
Please see the secon tled “The Baery” for instrucons on baery maintenance while
your e-bike is being stored.
Fuse
The Mini Pithog requires a 30 Amp fuse to operate. Seen here: To put it in, look for the red
fuse holder and open the top. Then put the fuse into the slot and close it again.

12
The Battery
This secon details what you need to know about the baery that powers your e-bike.
Always remember to treat your e-bike’s electrical systems with respect.
Battery Power
The dashboard has a baery charge indicator. When the e-bike is acvated, the guage
will jump and indicate the currently available baery power. If the power has dropped
signicantly, you should charge your e-bike.
Distance and Power
Your baery has the capacity to carry you anywhere from 10+ km before it must be
recharged. The ability of your baery to power your bicycle depends on many variables.
These variables include the weight of the rider, the prevailing wind resistance, the rider’s
driving habits, the presence of steep hills and inclines, and other issues such as proper air
pressure in the res.
Saving Power
If you are traveling long distances, you can save a lot of electricity by using beer driving
habits:
• Coasng: When going downhill or over long, at road surfaces, try using your e-
bike’s momentum and allow it to coast, without drawing power from the motor.
• Stopping and Starng: Try to avoid stop and go movements. The motor draws
more power when starng from a full stop.
• Weight: Remove unnecessary weight from the bike. This reduces the amount of
power the motor must draw.
• Air Pressure: Make sure your res have the proper air pressure. Proper pressure
reduces drag on the res and radically increases the eciency of any vehicle.

13
Charging your E-Bike
Charging your e-bike is a simple process. You require the following:
• The charger that came with your e-bike.
• A 110V household electrical outlet.
Charger Warning
Only use the chargers that were supplied with your e-bike. Using chargers that do not have
specicaons idencal to those which came with the e-bike could irreparably damage
your e-bike’s baery and electrical systems, and may cause injury.
To charge your e-bike, follow these steps:
1. Turn o the e-bike and remove the key from the “ignion.”
2. Plug the female end of the charger cable into the charging slot on the e-bike.
3. Plug the male end of the charger power cable into your wall socket. This should be
a110v household electricity supply. You can also use a portable generator, if necessary,
but make sure it provides 110V current.
4. Allow the e-bike’s baery to charge for the appropriate amount of me
(6-12 hours).
5. Disconnect the charger when the LED light on the charger is green. The baeries
have been fully charged.
If your charger’s LED status light does not change from red to green over an extended
period of me, for perhaps more than 14 hours, and the baery is very hot, the baery
or charger may need replacing. Stop charging and bring both to your Daymak dealer
immediately. Do not charge the baery.

14
Charging the Mini Pithog
The Mini Pithog comes with a 36V baery pack. To charge the Mini Pithog directly in the
unit look for the charge port on the le hand side of the bike. It will be covered with a ap
that you must li up and then plug the female end into that port.
Once the bike is charging the charger will glow red. When the unit is fully charged the
charger will glow green and then your bike is ready to go.
Warning
Do not leave the Mini Pithog charging for long periods of me aer it is fully charged.
Once the bike is charged unplug it ASAP.

15
Battery Care
Follow these suggesons to maintain your baery’s opmal performance. If you do not
follow these suggesons, your baery may lose its ability to maintain a charge and might
have to be replaced sooner than would otherwise be necessary.
• Charge it: Charge your baery immediately aer riding it.
• Full Charge: Do not allow the baery to run down completely and lie in storage
without a charge. This signicantly reduces the baery’s lifespan and may cause
damage.
• Keep it Charged: When being stored, charge the baery occasionally to make
sure its power supply does not run down. Charging it once every 21 days should be
sucient.
• Storage Condions: Store the baery on a at, cool, dry surface. Do not allow the
baery temperature to drop below 10 degrees Celsius for extended periods of me.
Warning
DO NOT place your Lead-Acid baery on concrete. Concrete drains the baery’s power
and will neutralize the lead-acid. Placing the baery on concrete for any length of me
will likely result in the baery being drained of power and possibly losing its ability to
store electricity.
Cold Weather and your Battery
Below 10 degrees Celsius, the baery will not work as well as it would in warmer
temperatures. While Lithium-Ion baeries perform beer than Lead-Acid baeries in
temperature extremes, both will experience reduced performance in cold temperatures.
Also, repeatedly riding the e-bike in cold temperatures may cause your baery to have to
be replaced sooner.
Replacement and Disposal
Aer approximately 300 charges, a lead-acid baery will need to be replaced. A lithium-
ion baery will last approximately 1000 charges. When the baery has to be replaced,
you will noce that your baery cannot carry as much of a charge as it could inially.
Contact your local Daymak dealer to purchase a new baery.
When replacing your baery, dispose of it at a proper municipal baery recycling facility.
If none is available, please contact your local Daymak dealer.

16
Operation
Throttle
On the right handle is the throle. This is used to
engage the motor. Twist this handlebar towards you
to engage the motor.
Warning
Be sure to be sing on it properly, with proper
protecve equipment (helmet, elbow pads, knee
pads etc.) and be sure that the kick stand is up.
Brakes
In front of either handlebar you will nd the brakes.
To engage the brakes squeeze the lever shown here
towards handlebar grip.
Remember to always use the rear brake rst before
to start slowing down and then apply the front
brake if necessary.
Le Brake Handle : Engages Rear Brakes
Right Brake Handle: Engages Front Brakes
display
On the right handle is the display. This is used to
show the baery power remaining. 4 Bars is a
full baery 1 Bar shows it needs to be charged.
Warning
Once the baery starts geng low you will
begin to lose the amount of power you get
from the motor. That is a sign that you need to
get it to a charging locaon.

17
Keys
The Mini Pithog comes with two sets of keys one is
for the ignion and the other for the safety speed
lock.
Ignion - Located on the right handlebar just below
the display. Put the key in here and turn it clockwise
to turn on the bike. Turn it counterclockwise to turn
o the bike.
parental safety Lock
The Mini Pithog comes with a parental safety lock
that limits the maximum speed the unit can go.
Put the other set of key into the parental safety lock
located on the le side of the unit and turn it to
either Low (L), Medium (M), or High (H) and then
remove the key
Warning
For rst me riders ALWAYS set the speed seng
to Low, unl they’re comfortable and gradually
work up to the highest speed.

18
Technical Data
This secon provides you with the technical specicaons for your e-bike.
The Motor and Wheel Assembly
The Mini Pithog has a 500 Wa magnec chain drive motor. This type of motor has
excellent low-end torque and high eciency when working within its range. Note that
while the motor is very quiet, it does produce some noise. Also aached to the rear hub
are speed reducon gear and the speed free clutch.
The Freewheel
The wheels have freewheels, so the e-bike’s drive train is not xedly geared. This means
that when coasng or traveling downhill, you can turn o the engine and your e-bike will
connue to move without slowing. This feature will allow you to achieve faster speeds
when coasng, moving downhill or moving with the wind. It will also allow you to conserve
electrical power, because you will be able to let to the motor rest while moving.
The Controller
Daymak pioneered the development of intelligent component control in e-bikes. The
Daymak Drive technology developed by Daymak is the brain of your e-bike. It allows your
e-bike to achieve faster acceleraon, to climb steeper hills, and to save energy.
The electronic controller is located under the seat assembly. This controller eciently
regulates the speed and electronic funcons of the bicycle. It allows for stepless speed
adjustment, shuts o the motor when the brakes are acvated, has low voltage protecon
and has fuses to prevent excess current from damaging the e-bike’s systems.

19
VeHICLE IDENTIFICATION NUMBER
(VIN)
Your unit comes with a Vehicle Idenaon Number. You should write this down and
keep it somewhere safe in case of the of your unit. This is also required for registering
your warranty on the warranty secon of Daymak.com. To nd the VIN on your Mini
Pithog look on the side of the steering column for a plate like below.

20
Maintenance and
Troubleshooting
This secon outlines problems you may have and soluons you may be able to use.
Many of the parts in this product are not user-serviceable and should be repaired by
trained professionals. This is especially true of the electrical systems and the mechanical
components. Alteraon of these components voids the warranty.
Tire Pressure
Maintain the air pressure in your res at the appropriate level. If the air pressure is too
low, your e-bike’s performance will suer and it will become damaged more easily.
Cold weather and lower temperatures will cause the air pressure in your res to drop, and
warmer weather will cause it to increase, even if there are no leaks in the re tube. To
replace the air in your res, follow this procedure:
1. Idenfy the required pressure by examining the text along the side of the re rim.
This text should indicate the recommended pressure for your re.
2. Locate the air valve on the inner surface of the re rim.
3. Remove the valve cap and place in a secure locaon.
4. Place the nozzle end of an air pump (hand-power or mechanical) over the valve.
5. Pump up the air in the re, being careful not to let the pressure go above the level
prescribed on the side of the re wall.
6. Remove the pump nozzle from the air valve without allowing much air to escape
from the re.
7. Replace the valve cap on the air valve.
Maintaining the proper air pressure will allow you to travel much further on a single
charge, because the motor will not have to work as hard to move the e-bike.
Page is loading ...
Page is loading ...
Page is loading ...
Page is loading ...
/