Page is loading ...

Helix PD
TM
Owner’s Manual

Wilderness Systems, 575 Mauldin Road, Suite 200, Greenville, SC 29607
TABLE OF CONTENTS
1. INTRODUCTION ...................................................................................................................................................................................................................... 1
2. IMPORTANT SAFETY AND OPERATING INFORMATION .......................................................................................................................................... 1
3. EQUIPMENT ........................................................................................................................................................................................................................... 2
3.1 Items Supplied .............................................................................................................................................................................................................. 2
3.2 Tools Required ............................................................................................................................................................................................................ 4
4. ASSEMBLY OF THE HELIX PD .......................................................................................................................................................................................... 5
4.1 Items Supplied .............................................................................................................................................................................................................. 5
4.2 Tools Required ............................................................................................................................................................................................................ 5
4.3 Installing the Crank Arms to the Helix PD ............................................................................................................................................................ 5
4.4 Installing the Pedals to the Crank Arms ............................................................................................................................................................... 5
4.5 Installing the Latch Hanger ...................................................................................................................................................................................... 6
5. INSTALLING MOUNTING BRACKET TO THE KAYAK ................................................................................................................................................. 6
5.1 Items Supplied .............................................................................................................................................................................................................. 6
5.2 Tools Required ........................................................................................................................................................................................................... 7
5.3 Installing the Latch Base ........................................................................................................................................................................................... 7
5.4 Installing the Mounting Bracket to the Kayak ..................................................................................................................................................... 7
6. INSTALLING THE NOISE REDUCTION BAFFLE SYSTEM ......................................................................................................................................... 8
6.1 Items Supplied .............................................................................................................................................................................................................. 8
6.2 Tools Required ............................................................................................................................................................................................................ 8
6.3 Installing the Noise Reduction Bae System ..................................................................................................................................................... 8
7. INSTALLING THE STOWAGE STRAPS ............................................................................................................................................................................. 8
7.1 Items Supplied............................................................................................................................................................................................................... 8
7.2 Tools Required ............................................................................................................................................................................................................. 8
7.3 Installing the Stowage Straps .................................................................................................................................................................................. 9
8. INSTALLING THE RUDDER SYSTEM ............................................................................................................................................................................... 9
8.1 Items Supplied .............................................................................................................................................................................................................. 9
8.2 Tools Required ............................................................................................................................................................................................................ 9
8.3 Installing the Rudder Mounting Bracket ..............................................................................................................................................................10
8.4 Installing the Rudder to Rudder Mounting Bracket ..........................................................................................................................................10
8.5 Installing the Rudder Lift Line Round Deck Fittings .........................................................................................................................................10
8.6 Installing the Rudder Deployment Control Line Assembly .............................................................................................................................11
8.7 Installing the Rudder Hold-Down Strap ...............................................................................................................................................................13
9. INSTALLING THE STEERING CONTROL .......................................................................................................................................................................13
9.1 Items Supplied ............................................................................................................................................................................................................. 13
9.2 Tools Required ...........................................................................................................................................................................................................13
9.3 Installing the Steering Control ................................................................................................................................................................................14
10. INSTALLING THE HELIX PD TO YOUR KAYAK FOR USE .......................................................................................................................................16
11. OPERATING THE HELIX PD .............................................................................................................................................................................................16
11.1 Launching and Landing ............................................................................................................................................................................................16
11.2 Pedaling .......................................................................................................................................................................................................................18
11.3 Deploying the Rudder .............................................................................................................................................................................................. 18
11.4 Using the Steering Control .....................................................................................................................................................................................18
11.5 Using the Stowage Strap ........................................................................................................................................................................................19
12. STORAGE AND CARE INSTRUCTIONS .......................................................................................................................................................................19
12.1 General Care Advice ................................................................................................................................................................................................19
12.2. Instructions for Rinsing the System ....................................................................................................................................................................19
12.3 Storage ......................................................................................................................................................................................................................20
12.4 Lubrication ................................................................................................................................................................................................................20
13. WARRANTY CONDITIONS .............................................................................................................................................................................................20
13.1 Warranty Process......................................................................................................................................................................................................20
13.2 Extent of Warranty ..................................................................................................................................................................................................20
13.3 Limitations and Exclusions ..................................................................................................................................................................................... 21

Wilderness Systems, 575 Mauldin Road, Suite 200, Greenville, SC 29607 1
1. INTRODUCTION
Congratulations on your purchase of the Wilderness Systems Helix PD Pedal Drive. For your safety and to ensure your highest
level of enjoyment from the Helix PD it is imperative that you read and comply with this Owner’s Manual prior to use.
The Helix PD is intended for use in select Wilderness Systems Helix PD compatible kayaks.
The Helix PD is state-of-the-art technology. It has been designed and manufactured with the utmost care and with a special
focus on performance, user-friendliness, and safety.
2. IMPORTANT SAFETY AND OPERATING INFORMATION
The Helix PD is designed to operate safely and reliably as long as it is used according to the Owner’s Manual.
Please read this manual carefully before you start to use the Helix PD. Ignoring these instructions can result in damage or
personal injury. Confluence Outdoor accepts no liability for damage caused by actions that contradict this Owner’s Manual.
• STAY CLEAR/ USE CAUTION WHEN RAISING THE SPRING LOADED MAST OF THE HELIX PD
• Remove system from kayak when transporting kayak
• Keep hands and limbs clear of scupper area when deploying or raising the Helix PD
• Keep gear and other object clear of scupper area when deploying or raising the Helix PD
• Use stowage straps on the Helix PD when in rough water or during surf launches
• Stowage straps should not be used for transporting or securing your kayak
• Do not operate with mast in the zero draft (raised vertical) position for extended periods
• Rinse the system with fresh water after use in brackish or salt water
• Be aware of your environment when operating the Helix PD
• Avoid collisions and impacts to the system
• Raise unit when launching and coming ashore
• Ensure the Helix PD is fully secured and locked into mounting brackets before operating
• Always take a paddle and PFD with you on board
• Never exceed a distance pedaling from which you are not willing to paddle back
• Do not exceed the capacity limits
• Do not operate the propeller if someone is in the water near the boat
• Inspect the unit often for damage. Do not use if damaged
• Follow the recommended maintenance schedules
• After use, always take the Helix PD out of the water
• Do not operate the Helix PD deployment mechanism when not installed in a kayak
• DO NOT DISASSEMBLE THE HELIX PD UNLESS GIVEN SPECIFIC DIRECTION TO DO SO BY A WILDERNESS SYSTEMS
CUSTOMER SERVICE REPRESENTATIVE
• If a dierent propulsion method is used (towing the boat, sailing, use of motor), the Helix PD must be removed or in the
stowed position.
• Follow local laws for the use of permissible mechanized means or registration of your kayak
In addition to these selected warnings, please comply with the complete operating manual.

Wilderness Systems, 575 Mauldin Road, Suite 200, Greenville, SC 29607Wilderness Systems, 575 Mauldin Road, Suite 200, Greenville, SC 296072
3. EQUIPMENT
3.1 Items Supplied
PARTS OVERVIEW
MOUNTING BRACKET IMAGES DESCRIPTION INSTRUCTION CODE PART NUMBER QUANTITY
INDEPENDENT Mounting Bracket A 18160049 1
KIT A
(A1) Latch Hanger
(A2) Latch Base
A1 & A2 30700091 2
¼-20 X 1” Screw A3 1FAS0011 6
⁄-20 x 1” x ⁄” A4 1FAS0125 6
Cotter Pin with Tether A5 30700087 1
Quick Release Pin A6 30700086 1
4-40 X 3/4” Screw A7 3000067 4
4-40 Nylcok Nut A8 30100021 4
6-32 X 1/2” Screw A9 30000068 4
HELIX
TM
CORE UNIT IMAGES DESCRIPTION INSTRUCTION CODE PART NUMBER QUANTITY
INDEPENDENT
Helix PD
TM
Pedal Drive E 18501090 1
Crank Arm
(Left & Right)
F
18160026
18160027
1 Set
(Left & Right)
Crank Arm Bolt G 30200010 2
Pedal
(Left & Right)
H 18160043
1 Set
(Left & Right)

Wilderness Systems, 575 Mauldin Road, Suite 200, Greenville, SC 29607 3
STEERING CONTROL IMAGES DESCRIPTION INSTRUCTION CODE PART NUMBER QUANTITY
INDEPENDENT V Steering Control J 18501089 1
RUDDER SYSTEM IMAGES DESCRIPTION INSTRUCTION CODE PART NUMBER QUANTITY
INDEPENDENT Rudder B 17060035 1
KIT B
Rudder Mounting Bracket B1 14820041 1
¼-20 x ⁄” Socket Head Screw B2 30000015 2
¼” Lock Washer B3 3730-0103 2
Round Deck Fitting B4 3455-0099 4
10-32 x ¾” Screw B5 3585-0223 4
Rudder Deployment Control Line
Assembly
B6 18500163 1
Rudder Hold-Down Strap B7 15440072 1
J- Hook B8 2FAS041 1
Cord Lock B9 30700078 2
¼ x ⁄” Neoprene Washer B10 59602000 2
⁄” Split Ring B11 2RUD01 2
10-32 x ⁄” Set Screw B12 30000054 2

Wilderness Systems, 575 Mauldin Road, Suite 200, Greenville, SC 29607Wilderness Systems, 575 Mauldin Road, Suite 200, Greenville, SC 296074
3.2 Tools Required
Note: All direction references for left or right in these instructions are given from the perspective of being seated in the boat
and looking forward towards the bow of the kayak.
STOWAGE STRAP IMAGES DESCRIPTION INSTRUCTION CODE PART NUMBER QUANTITY
KIT C
Stowage Strap with Male Buckle
Stowage Strap with Female Buckle
C 15440075 1
Deck Loop C1 14830022 2
10-32 x ¾” Screw C2 3585-0223 4
10 x ⁄” Neoprene Washers C3 1FAS090 4
10-32 Cap Nut C4 2RUD004 4
BAFFLES IMAGES DESCRIPTION INSTRUCTION CODE PART NUMBER QUANTITY
INDEPENDENT Fiber Brush Bae D 18501091 2
TOOLS REQUIRED (Not Supplied) TOOL DESCRIPTION
Phillips Screw Driver
8mm Allen Wrench
⁄” Allen Wrench
⁄” Allen Wrench
15mm Wrench
⁄” Wrench
Cordless Drill
⁄” Drill Bit (#21)
Needle Nose Pliers

Wilderness Systems, 575 Mauldin Road, Suite 200, Greenville, SC 29607 5
4. ASSEMBLY OF THE HELIX PD
4.1 Items Supplied
• Helix PD (E)
• (2) Crank Arm Bolts (G)
• Left & Right Crank Arm (F)
• Left & Right Pedal (H)
• (2) Latch Hanger (A1)
4.2 Tools Required (not supplied)
• 8 mm Allen Wrench
• 15 mm Open End Wrench
• #1 Phillips Head Screw Driver
4.3 Installing the Crank Arms to the Helix PD
Place the Helix PD (E) on a flat work surface with the propeller side facing upwards. Locate the right crank arm (F). It is marked
with an “R” on the back side of the crank arm, below the hole for the pedal (H) spindle. Place the right crank arm (F) over the
right crank arm shaft of the Helix PD (E) head unit. The crank arm (F) should be parallel with the propeller and the shaft of the
Helix PD (E) and extending forward past the Helix PD head unit. Secure with a crank arm bolt (G). Use an 8 mm Allen wrench
tighten the crank arm bolt (G) and crank arm (F) to the Helix PD (E).
Repeat process with the left crank arm (F). The crank arm (F) should be parallel with the propeller and the shaft of the Helix
PD (E) and extending back towards the Helix PD propeller.
Note: It is imperative the propeller and the crank arms are aligned properly for the drive unit to be removed from the kayak
using the prop alignment marks on the drive unit head.
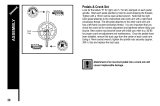
4.4 Installing the Pedals to the Crank Arms
Locate the left pedal (H). It is identified by a score line mark on the threaded pedal (H) mounting spindle (Score line is just
below the threading).
Thread the pedal (H) mounting spindle into the left crank arm (F). While holding the opposite crank arm in place to generate
resistance, tighten the pedal (H) to the crank arm (F) with a 15 mm open end or adjustable wrench.
Note: The left pedal uses reverse threading so it requires a counter-clockwise tightening.

Wilderness Systems, 575 Mauldin Road, Suite 200, Greenville, SC 29607Wilderness Systems, 575 Mauldin Road, Suite 200, Greenville, SC 296076
Repeat process with the right pedal (H) with clockwise tightening.
4.5 Installing the Latch Hanger (from Kit A)
Install the latch hanger (A1) with the two 4-40 x ⁄” screws (A7) and (2) 4-40 nylock nuts (A8). Hold nut with finger to start, then
use needle nose pliers to tighten.
Repeat the process on the opposite side of the upper housing blocks of the Helix PD (E).
The Helix PD (E) is now assembled.
5. INSTALLING MOUNTING BRACKET TO THE KAYAK
5.1 Items Supplied
• Mounting Bracket (A)
Kit A
• (2) Latch Base (A2)
• (6) ¼-20 X 1” Screw (A3)
• (6) ¼ x 1 x ⁄” Washers (A4)
• Cotter Pin with Tether (A5)
• Quick Release Pin (A6)
• (4) 4-40 X 3/4” Screw (A7)
• (4) 4-40 Nylock (A8)

Wilderness Systems, 575 Mauldin Road, Suite 200, Greenville, SC 29607 7
5.2 Tools Required (not supplied)
• #1 Phillips Head Screw Driver
5.3 Installing the Latch Base
Install the latch base (A2) with the two 6-32 x ⁄” screws (A9) from bag (A).
Repeat the process on the opposite side of the mounting bracket (A).
5.4 Installing the Mounting Bracket to the Kayak
Align the mounting bracket (A) with the molded-in inserts located on top of the Helix PD
TM
kayaks console area. The open end
of the u-shaped mounting bracket (A) should face the stern of the boat. Place the ¼ x 1 x ⁄” washers (A4) on the 1/4-20 x 1”
screws (A3) and secure the mounting bracket (A) to the inserts with the screws (A3). Before installing the right side, bow-most
1/4-20 x 1” screw (A3) place the looped end of the tether and cotter pin (A5) between the mounting bracket (A) and the ¼ x 1
x ⁄” washer (A4) and then install screw (A3) to secure the cotter pin (A5) in place.
(A3). Before installing the right side, bow-most ⁄-20 x 1” screw (A3) place the looped end of the tether and cotter pin (A5) between
the mounting bracket (A) and the ¼ x 1 x ⁄” washer (A4) and then install screw (A3) to secure the cotter pin (A5) in place.
Insert the quick release pin (A6) into the receiver from the left side and use the cotter pin (A5) to tether the quick release pin
(A6) into place until you are ready to install the Helix PD (E) to the kayak. (See section 9)

Wilderness Systems, 575 Mauldin Road, Suite 200, Greenville, SC 29607Wilderness Systems, 575 Mauldin Road, Suite 200, Greenville, SC 296078
6. INSTALLING THE NOISE REDUCTION BAFFLE SYSTEM
6.1 Items Supplied
• (2) Fiber Brush Baes (D)
• (8) 10-32x ⁄” Screws (included with Helix PD
kayak)
6.2 Tools Required (not supplied)
• #2 Phillips Head Screw Driver
6.3 Installing the Noise Reduction Bae System
Turn over your Helix PD kayak so the hull bottom is exposed. Locate the 8 insert locations surrounding the Helix PD scupper
area of the kayak. Remove the filler screws included with the Helix PD kayak from the inserts.
Place the baes (D) into the stepped recess of the scupper. The face of bae plate (D) that has the step on it aligns with the
detent in the scupper molded into the hull of the kayak.
Use the filler screws that were included with your Helix PD kayak to secure the baes (D) to the inserts so that the fiber
brushes create a gate covering the scupper recess.
Note: The 10-32 x ⁄” Philips truss head screws required for this step were included and installed with your Helix PD kayak.
7. INSTALLING THE STOWAGE STRAPS
7.1 Items Supplied
Kit C
• Stowage Strap with Male Buckle (C)
• Stowage Strap with Female Buckle (C)
• (2) Deck Loops (C1)
• (4) 10-32 x ¾” Screws (C2)
• (4) 10 x ⁄” Neoprene Washers (C3)
• (4) 10-32 Cap Nut (C4)
7.2 Tools Required (not supplied)
• #2 Phillips Head Screw Driver
• ⁄” Wrench
• ⁄” Drill Bit
• Drill

Wilderness Systems, 575 Mauldin Road, Suite 200, Greenville, SC 29607 9
7.3 Installing the Stowage Straps
Locate the four drill locations marked with star symbols on vertical wall surface to the left and right side of the Flex Pod OS
Pod Scupper. Drill the center of the star drill locations with a ⁄” drill bit.
Thread one of the deck loops (C1) through the loop at the end of the stowage strap (C) with female buckle. Attach the deck loop
(C1) to the left side of the boat with two 10-32 x ¾” screws (C2). Utilize access through the bow hatch to secure the deck loop
(C1) on the inside with a neoprene coated 10 x ⁄” washers (C3) and 10-32 cap nuts (C4). Neoprene side of the 10 x ⁄” washer
(C3) should be pressed against the inside hull of boat. Tighten the hardware assembly with the ⁄” wrench and screw driver.
Repeat the process with the stowage strap (C) with male buckle on the right side of boat.
Tip: You may have to work the neoprene 10 x ⁄” washer (C3) up onto the 10-32 x ¾” screw (C2) with your hand to allow room
for the cap nut (C4).
Tip: The neoprene 10 x ⁄” washer (C3) is intended to fit securely on the 10-32 x ¾” screw (C2). A screw driver must be used
to completely drive and secure the hardware assembly against the hull of boat. This is critical to ensure a watertight seal.
8. INSTALLING THE RUDDER SYSTEM
8.1 Items Supplied
• Rudder (B)
• Kit B
8.2 Tools Required (not supplied)
• ⁄” Allen Wrench
• #2 Phillips Head Screw Driver
• Scissors

Wilderness Systems, 575 Mauldin Road, Suite 200, Greenville, SC 29607Wilderness Systems, 575 Mauldin Road, Suite 200, Greenville, SC 2960710
8.3 Installing the Rudder Mounting Bracket
Items needed:
• Rudder Mounting Bracket (B1)
• (2) ¼-20 x ⁄” Socket Head Screws (B2)
• (2) ¼” Lock Washer (B3)
At the stern transom of the kayak locate, remove and discard the two filler screws from the transom inserts. Place a ¼” lock
washer (B3) on each ⁄-20 x ⁄” socket screw (B2). Align the rudder mounting bracket (B1) screw receivers with the inserts.
Position the rudder mounting bracket (B1) so the raised knob is on top. Using the 3/16” Allen wrench secure rudder mounting
bracket (B1) to transom with ⁄-20 x ⁄” socket screws (B2) and ¼” lock washers (B3).
Tip: To help install the bracket (B1), start one screw (B2) through the bracket and into an insert to hold bracket (B1) in place
while the second screw (B2) is installed, then tighten both screws.
8.4 Installing the Rudder to Rudder Mounting Bracket
Items needed:
Rudder with pre-attached lift line (B)
Remove rudder (B) from packaging and unwrap the lift lines from the rudder. Remove and save the ⁄” split ring from the
rudder post. Insert rudder post of the rudder (B) in to the rudder post receiver on rudder mounting bracket (B1) at stern of
kayak. Re-install ⁄” split ring to rudder post to secure rudder to bracket.
Note: The ⁄” split ring comes pre-attached to the rudder.
8.5 Installing the Rudder Lift Line Round Deck Fittings
Items needed:
• (3) Round Deck Fittings (B4)
• (3) 10-32 x ¾” Screw (B5)
Locate the three round deck fitting recess that are molded into the right side of the kayak between the stern transom and the
stern of the seating well. Remove and discard the filler screw from the insert of each recess location. Secure the three round
deck fittings (B4) to each recess insert with a 10-32 x ¾” screw (B5). Orientation of the round deck fittings (B4) should be so
that the openings on each side the round deck fittings (B4) allow the lift lines to pass horizontally through from left to right in
a straight line.

Wilderness Systems, 575 Mauldin Road, Suite 200, Greenville, SC 29607 11
8.6 Installing the Rudder Deployment Control Line Assembly
Items needed:
• Rudder Deployment Control Line Assembly (B6)
• Round Deck Fitting (B4)
• 10-32 x ¾” Screw (B5) Screw
• Tape Measure
Locate the final round lift line deck fitting recess molded into the right side of the Kayak behind the paddle park at the seating
well. Remove and discard the filler screw from the insert. Place the rudder deployment control line bungee (B6) into the slots
on the back of the round deck fitting (B4) and secure to the insert in the recess with 10-32 x ¾” screw (B5). See illustration for
proper configuration.
Lower the rudder (B) to the vertical deployed position by hand. Ensure the rudder is in a straight steer position. Thread the lift
lines from the rudder forward through the three round deck fitting (B4) that you have secured to the kayak. The lift line from
the left side of the rudder (B) routes through the top of the round deck fittings (B4) and the lift line from the right side of the
rudder (B) routes through the bottom of the round deck fittings (B4).

Wilderness Systems, 575 Mauldin Road, Suite 200, Greenville, SC 29607Wilderness Systems, 575 Mauldin Road, Suite 200, Greenville, SC 2960712
Insert the top rudder lift line through the hole in the top fitting of the rudder deployment control line (B6) and pull until all slack
in rope is taught. Position the top control fitting of the rudder deployment control line (B6) so that it is 3 ½” behind the final
round deck fitting (B4) and tie an overhand knot. Pull knot into the fitting.
Raise the rudder (B) so the blade is resting in the rudder rest slot on the stern deck of the boat. Insert the bottom rudder lift
line through the hole in the bottom fitting of the rudder deployment control line (B6) and pull until all slack in lift line rope is
taught. Position the bottom control fitting of the rudder deployment control line (B6) so that it is 3 ½” behind the final round
deck fitting (B4) and tie an overhand knot. Pull knot into the fitting.

Wilderness Systems, 575 Mauldin Road, Suite 200, Greenville, SC 29607 13
Test the rudder deployment control line assembly (B6). Pull the stern most control fitting of the rudder deployment control
line (B6) forward to deploy the rudder (B) and then pull the opposite control fitting of the rudder deployment control line (B6)
to stow the rudder (B).
Once you are satisfied with the operation of your rudder (B), trim the excess lift line from the rudder deployment control line
(B6) assembly and burn the ends to prevent fraying.
Tip: Online video instruction of this assembly and many other assemblies are available at wildernesssystems.com
8.7 Installing the Rudder Hold-Down Strap
Items needed:
• Rudder Hold-Down Strap (B7)
• J-Hook (B8)
Attach the J-hook (B8) to the bungee on the Rudder hold-down strap (B7) and tie an overhand knot to secure.
Remove the screws from stern handle. Remove the handle and then reattach handle with the rudder hold-down strap (B7)
positioned on the right screw between the handle and the deck of the boat.
9. INSTALLING THE STEERING CONTROL
9.1 Items Supplied
• Steering Control (J)
• Kit B
• (2) Cord Lock (B9)
• (2) ¼ x ⁄” Neoprene Washer (B10)
• (2) ⁄” Split Rings (B11)
• (2) 10-32 x ⁄” Set Screw (B12)
9.2 Tools Required (not supplied)
• Phillips Head Screw Driver
• ⁄” Allen Wrench

Wilderness Systems, 575 Mauldin Road, Suite 200, Greenville, SC 29607Wilderness Systems, 575 Mauldin Road, Suite 200, Greenville, SC 2960714
9.3 Installing the Steering Control
Remove the screws from steering control cover plate located on the left side of the boat. Retain the screws. Save the steering
control cover plate for possible future use. Unwrap the steering control cords from the steering control (J). Align the handle
of the steering control (J) to the vertical position so that is centered vertically between the mounting holes on the wings at
the base of the steering control (J) handle. The cord exit holes on the back of the steering control (J) assembly should be on
the left side. Pull the top cord to right and drape it into the top groove of the steering control (J) pulley. Pull the bottom cord
down and to the right and align on the underside of the steering control (J) pulley.
Locate the preinstalled tubing entrances on the right side of the inside lip of the steering control mounting recess location
of the kayak. Thread the end of the top cord from the steering control (J) into the top tubing entrance and feed until the cord
exits the left tubing exit at the stern transom of the boat where the rudder (B) is attached. Thread the end of the bottom cord
of the steering control (J) into the bottom tubing entrance and feed until the cord exits the right tubing exit at the stern transom
of the boat where the rudder (B) is attached.
Carefully insert the steering control (J) into the mounting recess of the kayak. Ensure the top cord stays to the top of the pulley
and the bottom cord stays to the bottom of the pulley. Make sure the cords do not become pinched between the mounting
recess of the kayak and the steering control (J) base when inserting into the recess. Install and secure the steering control (J)
with the two screw removed from the steering control cover plate.

Wilderness Systems, 575 Mauldin Road, Suite 200, Greenville, SC 29607 15
Make sure the steering control (J) handle is in the upright vertical position. Move to the stern transom of the kayak. Attach a
cord lock (B9) through the bottom of each of the rudder (B) wings and re-secure at the top with a ¼ x ⁄” neoprene washer
(B10) and ⁄” split rings (B11).
Make sure the rudder (B) is in the down deployed and straight steer position. Use a ⁄” Allen wrench to start the 10-32 x
⁄” set screws (B12) in the threaded hole on each of the cord locks (B9). Pull the cords taught, making sure not to aect the
position of the steering control (J) handle, and thread cord into the corresponding cord locks (B9) of the rudder (B) wings.
Keep the cords taught and tighten the 10-32 x ⁄” set screw (B12) to capture the cords. Tie a double overhand knot at the end
of cord and tighten until ½” from cord lock (B9).
Test the steering control (J) assembly. Push the steering control (J) handle forward to control the rudder to the left and then
pull the handle to the rear to control the rudder to the right.
Once you are satisfied with the operation of your rudder (B), trim the excess cord leaving ½” of a tail from the knot.
Note: The steering control cover plate and associated screws were included with the purchase of the Helix PD kayak.
Note: A kit and instructions to reconfigure the steering control to the right side of your kayak is available at wildernesssystems.com
Tip: Online Video Instruction of this assembly and many other assemblies are available at WildernessSystems.com

Wilderness Systems, 575 Mauldin Road, Suite 200, Greenville, SC 29607Wilderness Systems, 575 Mauldin Road, Suite 200, Greenville, SC 2960716
10. INSTALLING THE HELIX PD TO YOUR KAYAK FOR USE
Remove the quick release pin (A6) from the mounting bracket (A). Holding the Helix PD (E) at an angle, lower the upper
housing block portion of the Helix PD (E) into the mounting bracket (A) and align the mounting bracket (A) receiver hole
with upper housing receiver hole of the Helix PD (E) and insert the quick release pin (A6) until it is fully engaged through the
receiver holes and the cotter pin hole is exposed. Secure the quick release pin (A6) with the cotter pin (A5). Pivot the Helix PD
forward into the stowed position until ready for use in the water.
Tip: Never transport your kayak with the Helix PD
unit attached to it.
11. OPERATING THE HELIX PD
11.1 Launching and Landing
With the Helix PD (E) attached to your kayak and in the stowed position, launch your kayak into the water. Pull the Helix PD (E)
upwards and towards you to pivot the Helix PD (E) in to the vertical zero daft position. On each side of the Helix PD (E) and
mounting bracket (A) secure the blade of the latch base (A2) into the hook of the latch hanger (A1) and tighten the draw
latches down. To fully deploy the Helix PD (E) into the pedaling position, push the Helix PD (E) down until it locks and you hear
it click into place. You are now ready to pedal the unit.

Wilderness Systems, 575 Mauldin Road, Suite 200, Greenville, SC 29607 17
NOTE: The tension on the draw latch system is adjustable. Do not over-tension the latches to the point that you are forcing
the latches closed or you can damage the system. Please take some time to tune-in the proper amount of tension required to
stabilize movement within the Helix PD system during pedaling.
NOTE: Ensure that your kayak is in a sucient depth of water to accommodate the full depth of a deployed Helix PD (approx. 18”).
To raise the Helix PD (E) to the zero draft position, align the crank arms (F) to a vertical position so that the right crank arm (F)
and pedal (H) is positioned between the marks on the Helix PD’s (E) head unit. This will align the propeller to a vertical position
so that the unit can be raised through the scupper. To raise the Helix PD (E), depress and hold the release pedal and the Helix PD (E)
mast will raise automatically to the zero draft position.
Caution: Keep clear of the scupper when releasing the Helix PD (E) mast to zero draft to avoid possible injuries.

Wilderness Systems, 575 Mauldin Road, Suite 200, Greenville, SC 29607Wilderness Systems, 575 Mauldin Road, Suite 200, Greenville, SC 2960718
From the zero draft position you can lower the Helix PD into a stowed position. Disconnect the latches (A1) (A2) on each side
and lower the Helix PD (E) forward by hand to pivot it into the stowed position.
The Helix PD (E) can be completely removed from the kayak when it is in the zero draft or stowed position by removing the
quick release pin (A6) and lifting the Helix PD (E) from the mounting bracket (A).
Caution: Always raise the Helix PD (E) to the zero draft position or stowed position when approaching the shore to avoid
impacts to the Helix PD (E).
Tip: Look through the scupper and baes (D) to help visually align the propeller.
11.2 Pedaling
With the Helix PD (E) fully deployed, and your feet on the pedals (H), adjust your seat until you are in a comfortable pedaling
position. Generally, this means that there is a slight bend in your extended leg when the pedals (H) are horizontal. When you
are comfortable, tighten your seat into position.
The Helix PD (E) can be pedaled in forward and reverse to maximize your performance.
Tip: The Helix PD kayak utilizes the AirPro Max seating system. The Helix PD (E) is optimized for use from the high seat
position.
11.3 Deploying the Rudder.
The Helix PD (E) is best utilized with a rudder (B) for steering. Before you launch make sure that the rudder hold-down (B7) has
been disengaged from the rudder.
To lower the rudder, utilize the rudder deployment control line (B6) assembly that you installed. Pull the stern most control
fitting of the rudder deployment control line (B6) forward to deploy the rudder and then pull the opposite control fitting of the
rudder deployment control line (B6) to stow the rudder.
11.4 Using the Steering Control
Control your rudder (B) with the steering control (J). Push the steering control (J) handle forward to control the kayak to the
left and then pull the steering control (J) handle to the rear to control the kayak to the right. Position the steering control (J)
handle in the neutral middle position to steer straight.
There is a storage position for the steering control (J) handle for transit or if you want the handle in a low-profile, out of the
way position. To secure in the staging position, grip the steering control (J) handle from near the steering control (J) base, and
pull out and away from the kayak. The steering control (J) handle will disengage from the steering control (J) mounting base
by approximately ¼”. Pull the steering control (J) handle down towards the stern in a horizontal position and secure in place
with the bungee paddle park on the Helix PD.
/