− 4 −
Additional Information for Using Sony Wall-Mount Bracket (SU-WL500)
✍
• Do not remove the Table-Top Stand for any reason other than to install corresponding accessories on
the TV.
• When removing the Table-Top Stand from the TV, lay the TV face down on a stable work surface that is
larger than the TV.
• To prevent damaging the surface of the TV, make sure to place a soft cloth on the work surface.
• When lifting or moving the TV, keep a soft cloth underneath to prevent damage.
• The number and position of the screws on the rear of the TV differs, depending on the model of TV; be
sure to read the operating instructions of your TV.
• Be sure to remove the joint when the Table-Top Stand is not attached to the TV.
• Be sure the TV is in a vertical position before turning it on. The TV set must not be powered on with
the LCD panel face down to avoid uneven picture uniformity.
CAUTION
• If pressure or shock is applied to the surface of the TV, the TV may break or become damaged.
• Lay the TV face down on a stable and level surface with the Table-Top Stand hanging over the edge of
the surface. Having the TV face and the base of the Table-Top Stand on the same level surface will create
an unstable working condition and can damage the TV.
• When detaching the Table-Top Stand from the TV, hold the Table-Top Stand securely with both hands.
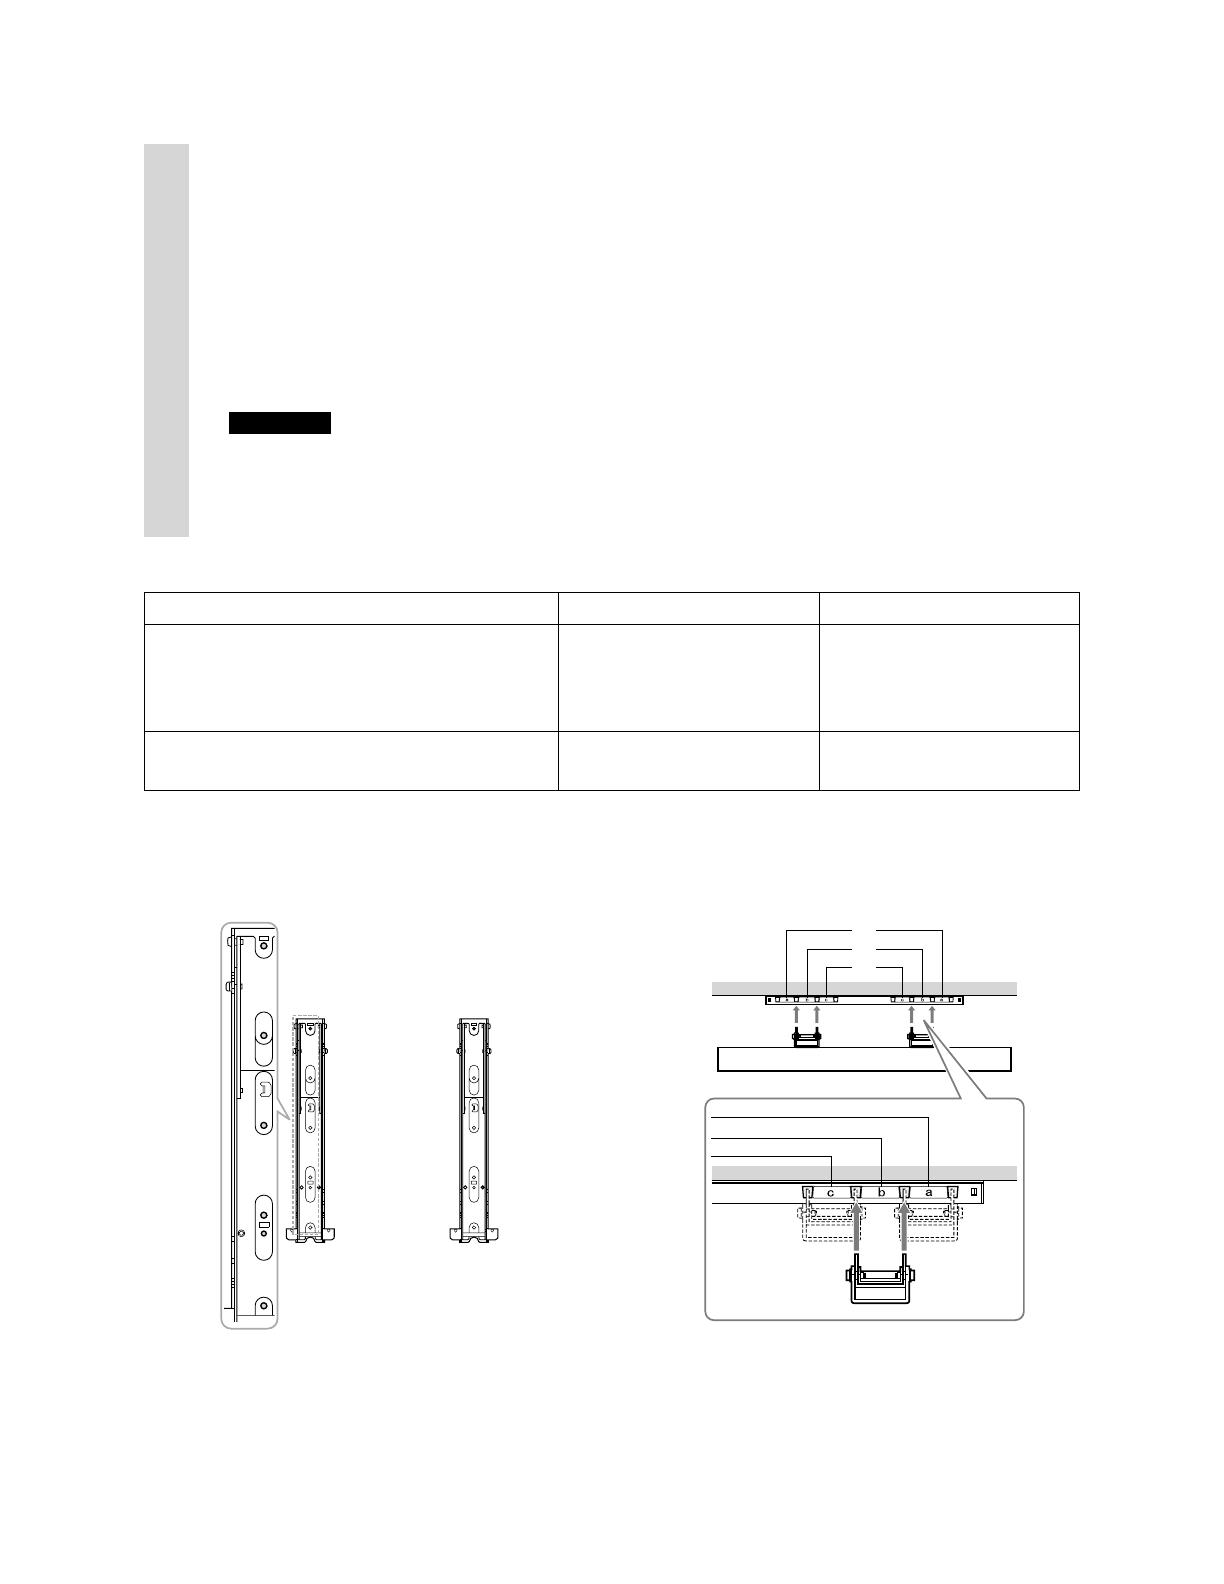
Screw and Hook Locations Diagram/Table
Model Name Screw Locations Hook Location
KDL-55HX85*/KDL-46HX85*/
KDL-55HX75*/KDL-46HX75*/
KDL-40HX75*/KDL-46EX65*/
KDL-40EX65*
e, j b
KDL-32HX75*/KDL-32EX65*/
KDL-32EX55*
e, g c
* In the actual model names, the “” indicates numbers and/or characters specific to each model.
Hook Location
When installing the TV onto the Base Bracket.
Screw Location
When installing the Mounting Hook on the TV.
✍
• Available TV models vary depending on the country/region.
• The availability of this Wall-Mount Bracket (SU-WL500) varies depending on the country/region.


