LG MS4040SRB Owner's manual

Category
Microwaves
Type
Owner's manual
OWNER’S MANUAL
MICROWAVE OVEN
Please read this owner’s manual thoroughly before operating.
www.lg.com
MFL40257841
(optional, please check model specification)
MS404
***
2
You cannot operate your oven with the door open due to the safety interlocks built into the door
mechanism. These safety interlocks automatically switch off any cooking activity when the door is opened;
which in the case of a microwave oven could result in harmful exposure to microwave energy.
It is important not to tamper with the safety interlocks.
Do not place any object between the oven front face and the door or allow food or cleaner residue to
accumulate on sealing surfaces.
Do not operate your oven if it is damaged. It is particularly important that the oven door closes properly and
that there is no damage to the: (1) door(bent), (2) hinges and latches (broken or loosened), (3) door seals
and sealing surfaces.
Your oven should not be adjusted or repaired by anyone except qualified service personnel.
Precautions to avoid possible exposure to excessive microwave energy.
Please ensure cooking times are correctly set as over cooking may result in the FOOD catching
fire and subsequent damage to your oven.
When heating liquids, e.g. soups, sauces and beverages in your microwave oven, overheating the liquid
beyond boiling point can occur without evidence of bubbling. This could result in a sudden boil over of the
hot liquid. To prevent this possibility the following steps should be taken:
1. Avoid using straight sided containers with narrow necks.
2. Do not overheat.
3. Stir the liquid before placing the container in the oven and again halfway through the heating time.
4. After heating, allow to stand in the oven for a short time and check the
temperature of the liquid
before
consumption to avoid burns (especially, contents of feeding bottles and baby
food jars).
Always allow food to stand after being cooked by microwaves and check the temperature of
them before consumption. Especially contents of feeding bottles and baby food jars.
Never leave lids on bottles when heating as they will explode and may cause personal injury
and damage the oven.
How the Microwave Oven Works
Microwaves are a form of energy similar to radio and television waves and ordinary daylight. Normally,
microwaves spread outwards as they travel through the atmosphere and disappear without effect.
Microwave ovens, however, have a magnetron which is designed to make use of the energy in microwaves.
Electricity, supplied to the magnetron tube, is used to created microwave energy.
These microwaves enter the cooking area through openings inside the oven. A turntable or tray is located
at the bottom of the oven. Microwaves cannot pass through metal walls of the oven, but they can penetrate
such materials as glass, porcelain and paper, the materials out of which microwave-safe cooking dishes are
constructed.
Microwaves do not heat cookware, though cooking vessels will eventually get hot from the heat generated
by the food.
With Safety in mind
Your microwave oven
h
as built in safety features for peace of mind.
When the door is opened, the
oven automatically stops producing microwaves. Microwave energy is converted completely to
heat when it enters food, leaving no “left over” energy to harm you when you eat your food.
PRECAUTIONS
Warning
Warning
CONTENTS
3
PRECAUTIONS
CONTENTS
3
IMPORTANT SAFETY INSTRUCTIONS
UNPACKING & INSTALLING
8~9
FEATURE DIAGRAM
10
OPERATING INSTRUCTIONS 11
TIMED COOKING
2 or 3 STAGE TIMED COOKING
MICROWAVE POWER LEVELS
CHILD LOCK
COOKING TIMER
HEATING/REHEATING GUIDE
21
FRESH VEGETABLE GUIDE
22
23
MICROWAVE-SAFE UTENSILS
FOOD CHARACTERISTICS & MICROWAVE COOKING
24~25
QUESTION & ANSWERS
26
PLUG WIRING INFORMATION/TECHNICAL SPECIFICATIONS
2
12
12
12
ADD MINUTE
MORE/LESS
SETTING CLOCK
13
ONE TOUCH AUTO MENU
13
AUTO COOK
14
AUTO REHEAT
BREAKFAST MENU
15
QUICK DEFROST
15
CHICKEN CHOICES
16
MELT
SOFTEN
AUTO DEFROST
14
17
17
18~20
12
11
11
11
4~7
13
ENERGY SAVING
15
QUICK START
27
IMPORTANT SAFETY INSTRUCTIONS
4
Please keep for future reference. Read and follow all instructions before using your oven to prevent the risk of fі
electric shock, personal injury, or damage when using the oven. This guide does not cover all possible conditions
that may occur. Always contact your service agent or manufacturer about problems that you do not understand.
WARNING
This is the safety alert symbol. This symbol alerts you to potential hazards that can kill or hurt you and others.
All safety messages will follow the safety alert symbol and either the word “WARNING” or “CAUTION”.
These word means :
WARNING
This symbol will alert you to hazards or unsafe practices which could cause serious bodily harm or death.
CAUTION
This symbol will alert you to hazards or unsafe practices which could cause bodily injury or property damage.
WARNING
1
D
o not attempt to tamper with, or make any adjustments or repairs to the door, door seals,
control panel, safety interlock switches or any other part of the oven which would involve the
removal of any cover protecting against exposure to of service technician.the microwave oven
are faulty. Repairs should only be undertaken by a qualified service technician.
Unlike other appliances, the microwave oven is a high-voltage and a highelectrical-current piece of equipment.
Improper use or repair could result in harmful exposure to excessive microwave energy or in electric shock.
2
D
o not use the oven for the purpose of dehumidification.(ex. Operating themicrowave oven
with wet newspapers, clothes, toys, electric devices, pet or child etc.)
It can be the cause of serious damage to safety such as a fire, a burn or a sudden death due to an electric shock.
3
This appliance is not intended for use by persons (including children) with reduced physical,
sensory or mental capabilities, or lack of experience and knowledge, unless they have been
given supervision or instruction concerning use of the appliance by a person responsible for
their safety.
4
A
ccessible parts may become hot during use. Young children should be kept away.
They may get a burn.
5
L
iquids or other foods must not be heated in sealed containers since they are liable to explode.
Remove the plastic wrapping from food before cooking or defrosting. Note though that in some
cases food should be covered with plastic film, for heating or cooking.
They could burst.
6
B
e certain to use proper accessories on each operation mode
.
Improper use could result in damage to your oven and accessories, or could make spark and a fire.
7
T
he children should not allow to play with accessories or hang down from the door handle.
They may get hurt.
8 I
f the door or door seals are damaged, the oven must not be operated until it has been repaired
by a competent person.
5
9
I
t is hazardous for anyone other than a competent person to carry out any service or repair
operation that involves the removal of a cover which gives protection against exposure to
microwave energy.
10
W
hen the appliance is operated in the combination mode, children should only use the oven
under adult supervision due to the temperatures generated.
CAUTION
1
2
3
4
5
6
7
You cannot operate your oven with the door open due to the safety interlocks built into the door
mechanism. It is important not to tamper with the safety interlocks.
Do not place any object (such as kitchen towels, napkins, etc.) between the oven front face and
the door or allow food or cleaner residue to accumulate on sealing surfaces.
It could result in harmful exposure to excessive microwave energy.
Do not operate your oven if it is damaged. It is particularly important that the oven door closes
properly and that there is no damage to the:(1) door(bent), (2) hinges and latches (broken or
loosened), (3) door seals and sealing surfaces.
It could result in harmful exposure to excessive microwave energy.
Please ensure cooking times are correctly set, Small amounts of food require shorter cooking or
heating time.
When heating liquids, e.g. soups, sauces and beverages in your microwave oven,
Avoid using straight sided containers with narrow necks.
Do not overheat.
Stir the liquid before placing the container in the oven and again halfway through the
heating time.
After heating, let it stand in the oven for a short time; stir or shake it again carefully and check
the temperature of it before consuming to avoid burns
(especially, contents of feeding bottles and baby food jars).
Microwave heating of beverages can result in delayed eruptive boiling, therefore care has to
be taken when handling the container.
An exhaust outlet is located on the top, bottom or side of the oven.
Don't block the outlet.
It could result in damage to your oven and poor cooking results.
Do not operate the oven when empty. It is best to leave a glass of water in the oven when not
in use. The water will safely absorb all microwave energy, if the oven is accidentally started.
Improper use could result in damage to your oven.
8
Do not cook food wrapped in paper towels, unless your cook book contains instructions for the
food you are cooking. And do not use newspaper in place of paper towels for cooking.
9
Do not use wooden containers and ceramic containers that have metallic (e.g. gold or silver)
inlays. Always remove metal twist ties. Check that the utensils are suitable for use in
microwave ovens before use.
Metallic containers for food and beverages are not allowed during microwave cooking.
They may heat-up and char. Metal objects in particular may arc in the oven, which can cause serious damage.
IMPORTANT SAFETY INSTRUCTIONS
6
10
D
o not use recycled paper products.
11
D
o not rinse the tray and rack by placing it in water just after cooking. This may cause breakage
or damage.
Improper use could result in damage to your oven.
12
B
e certain to place the oven so the front of the door is 8 cm or more behind the edge of the
surface on which it is placed, to avoid accidental tipping of the appliance.
Improper use could result in bodily injury and oven damage.
13
B
efore cooking, pierce the skin of potatoes, apples or any such fruit or vegetable.
They could burst.
14
D
o not cook eggs in their shell. Eggs in their shell and whole hardboiled eggs should not be
heated in microwave ovens since they may explode, even after microwave heating has ended.
Pressure will build up inside the egg which will burst.
15
D
o not attempt deep fat frying in your oven.
This could result in a sudden boil over of the hot liquid.
16
I
f smoke is observed (or emitted), switch off or unplug the appliance and keep the door closed
17
W
hen food is heated or cooked in disposable containers made of plastic, paper or other
combustible materials, keep an eye on the oven and check it frequently.
18
T
he temperature of accessible surfaces may be high when the appliance is operating. Do not
touch the oven door, outer cabinet, rear cabinet, oven cavity, accessories and dishes during
grill mode, convection mode and auto cook operations, before clearing make sure they are
not hot.
As they will become hot, there is the danger of a burn unless wearing thick culinary gloves .
19
T
he oven should be cleaned regularly and any food deposits should be removed.
Failure to maintain the oven in a clean condition could lead to deterioration of the surface that
could adversely affect the life of the appliance and possibly result in a hazardous situation.
20
O
nly use the temperature probe recommended for this oven.
You can not ascertain that the temperature is accurate with an unsuitable temperature probe.
21
F
ollow exact directions given by each manufacturer for their popcorn product. Do not leave the
oven unattended while the corn is being popped. If corn fails to pop after the suggested times,
discontinue cooking. Never use a brown paper bag for popping corn. Never attempt to pop
leftover kernels.
22
T
his appliance must be earthed.
The wires in the mains lead are colored in accordance with the following codes
BLUE ~ Neutral
BROWN ~ Live
GREEN & YELLOW ~ Earth
IMPORTANT SAFETY INSTRUCTIONS
7
23
As the colours of the wires in the mains lead of this appliance may not correspond with the
coloured markings identifying the terminals in your plug proceed as follows:
The wire which is colored BLUE must be connected to the terminal which is marked with the letter
N or Colored BLACK. The wire which is colored BROWN must be connected to the terminal which
is marked with the letter L or colored RED. The wire which is colored GREEN & YELLOW or
GREEN must be connected to the terminal which is marked with the letter E or .
If the supply cord is damaged, it must be replaced by the manufacturer, a service
Improper use may cause serious electric damage.
This oven should not be used for commercial catering purposes.
Improper use could result in damage to your oven.
24
25
26
27
28
29
30
31
32
33
T
he connection may be achieved by having the plug accessible or by incorporating a switch in
Children should be supervised to ensure that they do not play with the appliance.
Cleaning and user maintenance shall not be made by children without supervision.
The appliance is not intended to be operated by means of an external timer or separate
remote-control system.
Only use utensils that are suitable for use in microwave ovens.
This microwave oven must not be placed in a cabinet.
This microwave oven is intended to be used freestanding.
Keep the appliance and its cord out of reach of children less than 8 years.
The door or the outer surface may get hot when the appliance is operating.
This appliance is intended to be used in
hou
sehold
and similar applications
such as
- farm houses
- by clients in hotels, motels and other residential environments
- bed and breakfast type environments
The microwave oven is intended for heating food and beverages. Drying of food or clothing
and heating of warming pads, slippers, sponges, damp cloth and similar may lead to risk of
34
35
T
he contents of feeding bottles and baby food jars are to be stirred or shaken and the temperature
checked before consumption, in order to avoid burns.
According to the installation requirements set, otherwise the impact of heat, prone to danger.
36
37
S
team cleaner is not to be used.
This appliance is not intended for use by persons (including children) with reduced physical,
sensory or mental capabilities, or lack of experience and knowledge, unless they have been given
supervisionor instruction concerning use of the appliance by a person responsiblefor their safety.
Children should be supervised to ensure that they do not play with the appliance.
IMPORTANT SAFETY INSTRUCTIONS
8
UNPACKING & INSTALLING
Place your oven on a flat, level surface but make sure there is at least 20 cm of space on the
top and 10 cm on the rear and sides so there is air flow for ventilation. Exhaust outlets are
located in the back and on the underside of the oven, and can emit very hot air temperatures.
If the bench top is made of timber or has a veneered finish, a shield must be placed between the
oven and the bench top to avoid it from being damaged or discolored. Blocking the outlets can damage
your oven. The microwave oven must not be placed in a cabinet.
Unpack your oven and place it on a flat level surface.
By following the basic steps on these two pages you will be able to quickly check that your oven
is operating correctly. Please pay particular attention to the guidance on where to install your
oven. When unpacking your oven make sure you remove all accessories and packing.
Check to make sure that your oven has not been damaged during delivery.
GLASS TRAY
ROTATING RING
THIS OVEN SHOULD NOT BE USED $6$%8,/7,129(125)25 COMMERCIAL
CATERING PURPOSES, IT IS INTENDED FOR INDOOR '20(67,&86(21/<$1'
FOR THE PURPOSES OF+($7,1*25&22.,1*)22'6
9
UNPACKING & INSTALLING
YOUR OVEN IS NOW INSTALLED
Fill a microwave safe container with 300 ml (1/2 pint) of water. Place on the GLASS TRAY
and close the oven door. If you have any doubts about what type of container to use please
refer to page .
Plug your oven into a standard household socket. Make sure your oven is the only appliance
connected to the socket. If your oven does not operate properly, unplug it from the
electrical socket and then plug it back in.
Open your oven door by pressing the DOOR OPEN button.
Place the ROTATING RING inside the oven and
place the GLASS TRAY on top.
Enter the time by touching [3] and [0].
And touch
START/Q-START.
30
SECONDS
The DISPLAY will count down from 30 seconds. When it reaches 0 it will sound BEEP
several times repeatedly until the door is opened. Open the oven door and test the
temperature of the water. If your oven is operating the water hould be HOT.
Be careful when removing the container it may be hot.
10
NOTE: A beep sounds when a keypad on the control panel
is touched to indicate
that the setting has been entered.
FEATURE DIAGRAM
Remove your Microwave Oven and all
material from the shipping carton.
Your oven will be packed with the
following materials:
Glass Turntable .........................1 each
Owner's Manual &
Cooking Guide...........................1 each
Rotating Ring.............................1 each
This microwave oven is designed
for household use only. It is not
recommended for commercial
purposes.
Door Seal
Display Window
Oven Front Plate
Window Door Screen
Control Panel
Door Open Button
Safety Door Lock System
Glass Turntable
Rotating Ring
CONTROL PANEL
11
2 or 3 STAGE TIMED COOKING
MICROWAVE POWER LEVELS
MICROWAVE POWER LEVEL TABLE
Power
Level
100%
(High)
90
80
70
60
50
40
30
20
10
0
* Standing time.
* Independent.
*Boiling water.
*Making candy.
*Cooking poultry pieces, fish, & vegetables.
*Cooking tender cuts of meat.
*Whole poultry.
*Reheating rice, pasta, & vegetables.
Use
*Thawing meat, poultry and seafood.
*Reheating prepared foods quickly.
*Reheating sandwiches.
*Cooking ham, whole poultry, lamb.
*Cooking rib roast, sirloin tip.
*Cooking less tender cuts of meat.
*Cooking pork chops, roast.
*Taking chill out of fruit.
*Softening butter.
*Keeping casseroles and main dishes warm.
*Softening butter and cream cheese.
*Cooking egg, milk and cheese dishes.
*Cooking cakes, breads.
*Melting chocolate.
*Cooking veal.
*Cooking whole fish.
*Cooking puddings and custard.
Example:To cook food on 80% Power (Power8)
for 5 minutes 30 seconds
OPERATING INSTRUCTIONS
1. Touch STOP/CLEAR.
2. Touch TIME.
3. Enter 5 minutes
30 seconds by touching
[5], [3],and [0].
4. Touch POWER.
P-HI appears in the
display. This is to tell you
that the oven is set on HI
unless a different power
setting is chosen.
5. Touch 8.
To select power level 80%.
Display shows P-80.
6. Touch
START/Q-START.
NOTE:
If you do not select the power level, the oven will
operate at power HIGH. To set HI-POWER
cooking, skip steps 4 & 5
above.
TIMED COOKING (manual cooking)
This function allows you to cook food for a
desired time. There are
11
power levels available.
The example below shows how to set 80% power
level for the desired time.
For Two Stage cooking, repeat timed cooking
steps 2 to 5 from the above example before
pressing
the START/Q-START button. The 2nd stage will
continue on from the 1st stage
and apply
the set
power level
and set time automatically.
Auto Weight Defrost can be programmed
as
the first
stage to defrost first and then a second stage cook.
Your microwave oven is equipped with
eleven
power levels to give you maximum flexibility and
control over cooking. The adjacent table will give you
some idea of which foods are prepared at each of
the various power levels.
* The below chart shows the power level settings
for your oven.
When cooking is complete, four short tones will
sound. The word Endshows in the display window.
Then the oven shuts itself
off.
ADD MINUTE
A time-saving option, this simplified control lets
you quickly set and start microwave cooking
without the need to touch
NOTE:
If you touch ADD MINUTE, it will add 1 minute
increments up
to
99 minutes 59 seconds.
CHILD LOCK
COOKING TIMER
You can use the Timer of your oven for purposes
other than food cooking.
Example : To set the timer for 3 minutes.
1. Touch STOP/CLEAR.
2. Touch TIMER
.
3. Touch 3, 0, 0.
4. Touch
START/Q-START
.
Example : To set ADD MINUTE cooking 2 minutes.
1. Touch STOP/CLEAR.
2. Touch ADD MINUTE
The oven then begins cooking
and the remaining cooking
time will then count down in the
display.
To set the child lock
Touch and hold STOP/CLEAR
or 0, until L appears in the
display and two beeps are
heard. If the time of day was
already set, the time of day will
disappear on the display window.
Touch and hold
STOP/CLEAR
or 0,
key pad until L disappears
in the display.
OPERATING INSTRUCTIONS
After the CHILD LOCK is turned off, the time of
day will return to the display window. The oven
will operate normally.
This is a unique safety feature that prevents
unwanted oven operations. Once the CHILD
LOCK is set, no cooking can take place.
If the CHILD LOCK was already set and you
touch another cooking pad, the word L
shows in the display. You can cancel the
CHILD LOCK according to below procedure.
START/Q-START
1. Touch STOP/CLEAR.
2. Touch POPCORN once
then the oven will start
automatically.
3. Touch MORE or LESS.
Remaining time will
increase or decrease by 10
second increments.
MORE/LESS
By using the MORE or LESS keys,
the TIMED COOK
program can be adjusted to cook food for a
longer or shorter time. Pressing MORE will add
10 seconds to the cooking time each time you
press it. Pressing LESS will subtract 10 seconds
of cooking time each time you press it.
To adjust the One Touch Auto Menu
(ex. popcorn 100g)
time,or for a shorter time
2 times.
the
12
To cancel the child lock
OPERATING INSTRUCTIONS
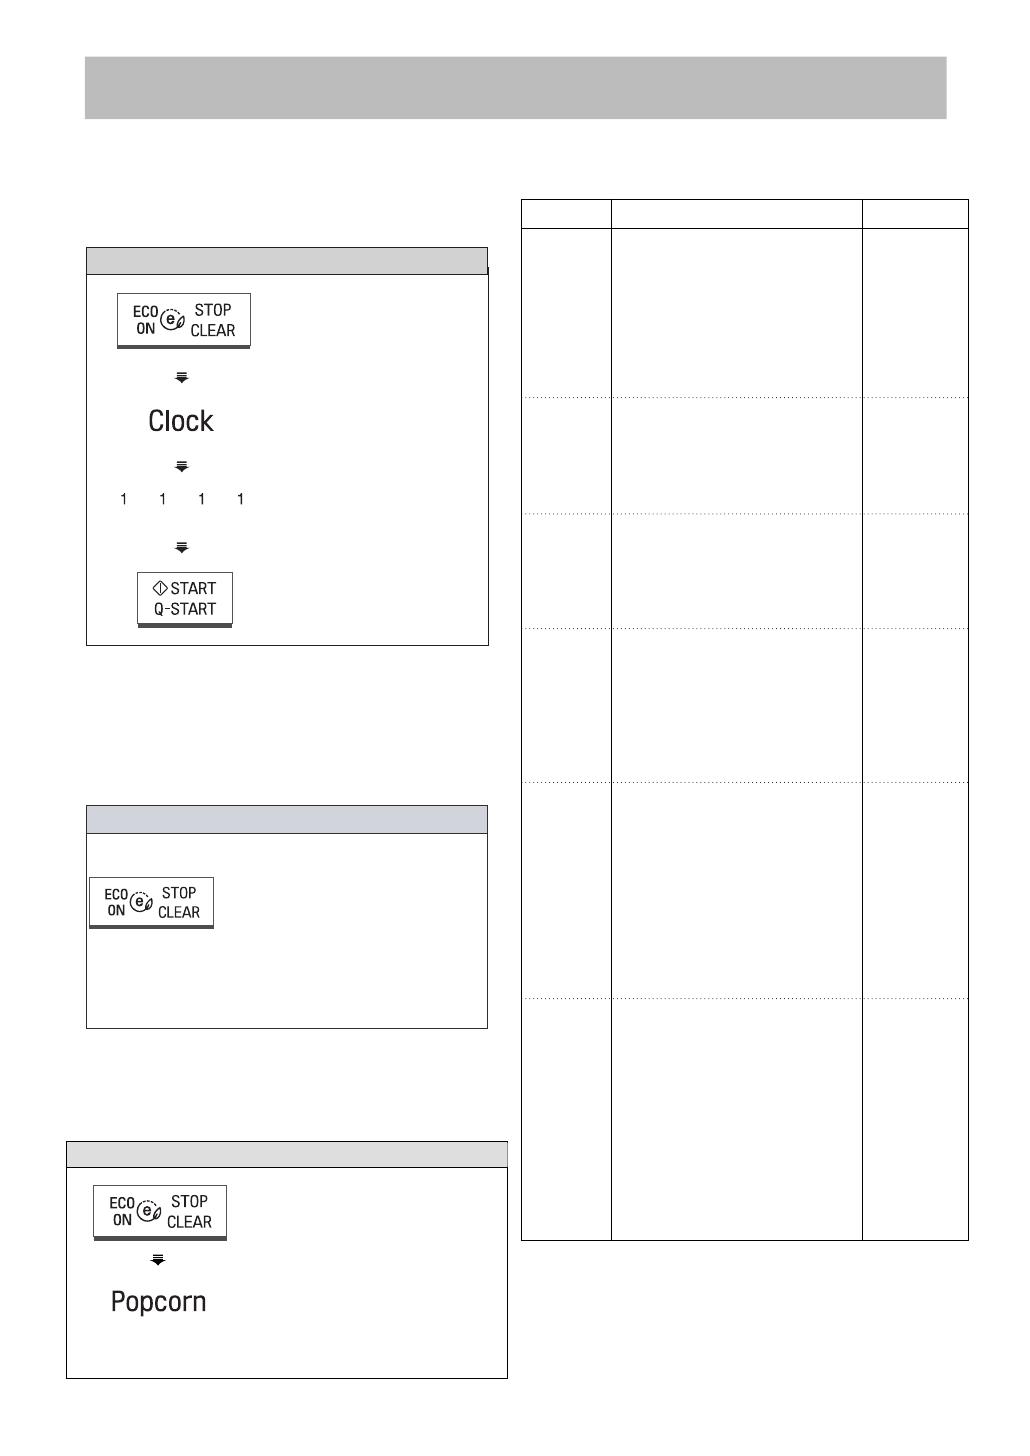
Example:To set 11:11.
ONE TOUCH AUTO MENU
Use this function to cook food without entering a
cooking
time or
power level.
Refer to the One touch Auto Menu
table
for more information.
Example : One touch Auto Menu (popcorn 100g)
1. Touch STOP/CLEAR.
2. Touch POPCORN
once.
then the oven will start
automatically.
ONE TOUCH AUTO MENU TABLE
Popcorn
Potato
Beverage
Frozen
Entree
Fresh
Prepare as desired, wash and 1, 2, 3 or 4
Vegetable
leave residual water on the cups
vegetables. Place in an
appropriately sized microwave
container.
Add amount of water according to
the quantity (1~2 cups : 2
tablespoons, 3~4 cups : 4
tablespoons).
Cover with plastic wrap and vent.
After cooking, stir and allow to
stand for 3 minutes.
Frozen
Remove from package, rinse off 1, 2, 3 or 4
Vegetable
frost under running water. cups
Place in an appropriately sized
microwave container.
Add amount of water according to
the quantity (1~2 cups : 2
tablespoons, 3~4 cups : 4
tablespoons). Cover with plastic
wrap and vent. After cooking, stir
and allow to stand for 3 minutes.
Popcorn lets you pop commercially
packaged microwave popcorn. Pop
only one package at a time.
For best results, use fresh bag of
popcorn.
Place bag of prepackaged
microwave popcorn on the center
of turntable.
Pierce each potato with a fork and
place on the oven tray around the
edge, at least 25.4mm apart.
After cooking, allow to stand for 5
minutes.
Use a wide-mouth mug. Do not
cover. (Be careful! The beverage
will be very hot! Sometimes liquids
heated in cylindrical containers will
splash out when the cup is moved.)
Remove from outer display
package. Vent the plastic film by
piercing with a fork (3 times)
If not in microwave safe container,
place on a plate, cover with plastic
wrap and vent. After cooking, allow
to stand for 3 minutes.
100 or 85g
package
1, 2, 3 or 4
potatoes
Medium size
(approx. 227to
284g each)
1 or 2 cups
(240ml per
cup)
284g
AmountCategory Direction
SETTING CLOCK
When your oven is plugged in for the first time or
when power resumes after a power interruption,
the numbers in the display reset to "0".
1. Touch STOP/CLEAR.
2. Touch CLOCK
once.
3. Enter the time by using
the number key pads.
("11:11")
4. Touch
ENERGY SAVING
ECO ON feature saves energy by turning off
the display.This feature only operates when the
STOP/ CLEAR (ECO ON)
button is
touched
and
then cancels
when the door is opened or any button
is
touched.
1.
Touch
STOP/CLEAR (ECO ON)
The display will go out
and
ECO ON will be
active.
Touch
the STOP/CLEAR (ECO ON) or any
other button
to cancel this feature when it is on.
START/Q-START
Example for ONE TOUCH POPCORN
13
To set the ECO ON
AUTO COOK
This feature allows to cook foods that you select by
touching AUTO COOK pad.
There are
4 foods categories.
AUTO COOK TABLE
First, touch AUTO COOK pad, then select food and
amount.
Example : To cook 113g of Pasta
1. Touch STOP/CLEAR.
2. Touch AUTO COOK
once.
’ appears in the display.
4. Touch
3. Touch number 1.
‘113’ appears in the display.
If you open the door or press STOP during cooking, the
process will be canceled.
Pasta
Rice
Ground
Meat
Hot Water
Add boiling water to the pasta in a
microwave container large enough.
113g - 3 cups of boiling water,
227g - 4 cups of boiling water.
Drain, add sauce, cheese, or
whatever and serve.
Add twice the amount of water to
the rice.
Use a microwave container large
enough to prevent water from
boiling over dish. Cover with plastic
wrap or lid.
After cooking, allow to stand for 10
minutes. Stir for fluffier rice.
Place in an appropriate sized
container and cover with plastic
wrap. At beep, pull apart or stir,
inside to outside and continue
cooking.
Use this function for tea, hot
chocolate or other recipes. Pour
measured water into microwave
container which is 2 times larger
than amount of water. (Be careful!
The water will be very hot!
Sometimes liquids heated in
cylindrical containers will splash out
when the cup is moved.)
113 or 227g
1 or 2 cups
227,454,
680 or 907g
1 or 2 cups
AmountCategory Direction
AUTO REHEAT
This feature allows you to reheat pre-cooked
room-temperature or refrigerated foods without
having to select the cooking time and power level.
This feature has 4 categories: dinner plate, pizza,
soup/sauce and casserole.
AUTO REHEAT TABLE
Example : To Reheat 3 cups of Casserole
Dinner
Plate
Pizza
Soup/
Sauce
Casserole
Place foods to be heated on dinner
plate or similar dish.
Cover with plastic wrap and vent.
After cooking, allow to stand for 3
minutes.
This is reheat function for a leftover
pizza.
Place on paper towel on a
microwave safe plate.
Place foods to be heated in an
appropriately sized microwave
container.
Cover with plastic wrap and vent.
After cooking, allow to stand for 3
minutes.
Cover dish containing the casserole
with plastic wrap and vent.
After cooking, allow to stand for 3
minutes.
1 or 2
servings
1, 2 or 3
slices
( 142 g each)
1, 2, 3 or 4
cups
1, 2, 3 or 4
cups
AmountCategory Direction
OPERATING INSTRUCTIONS
1. Touch STOP/CLEAR.
2. Touch AUTO REHEAT
four
times. ‘rh-4’ appears in the
3. Touch number 3.
‘3’ appears in the display.
display.
4. Touch
3
START/Q-START.
START/Q-START.
14
Ac-1
(Ac-1)
(Ac-2)
(Ac-3)
(Ac-4)
(rh-4)
(rh-3)
(rh-2)
(rh-1)
uick
56 85 g
The Quick Defrost feature provides you with the
express defrosting method for 500g of frozen
minced meat. if more than 500g is required to be
defrosted, this should be done
separately in weights
of 500gms for each cycle.
1. Touch STOP/CLEAR.
2. Touch
two times.
‘bF-2’ appears in the display.
4. Touch
3. Touch number 4.
‘8’ appears in the display.
START/Q-START.
QUICK START
The QUICK START feature allows you to set 30 seconds
intervals of HIGH power cooking with a touch of the
START/Q-START.
Example: Set 2 minutes of cooking on high power.
1.
1. Touch STOP/CLEAR.
2. Touch START/Q-START
2.
Four times on high power
The oven will start before you have
finished the
fourth touch.
During QUICK START cooking,you can extend the
cooking time up to 10 minutes by repeatedly touching
the START/Q-START key if longer cooking
times are
required.
15
(bF-2)
(bF-1)
(bF-3)
(bF-6)
(bF-4)
(bF-5)
170 or 340g
113 or 227g
680 g
680 g
340 g
1. Touch STOP/CLEAR.
2. Touch CHICKEN CHOICES
once.
‘Ch-1’ appears in the display.
4. Touch
3. Touch number 2.
‘340’ appears in the display.
2
START/Q-START.
QUICK START
The QUICK START feature allows you to set 30 seconds
intervals of HIGH power cooking with a touch of the
START/Q-START.
Example: Set 2 minutes of cooking on high power.
1.
1. Touch STOP/CLEAR.
2. Touch START/Q-START
2.
Four times on high power
The oven will start before you have
finished the
fourth touch.
During QUICK START cooking,you can extend the
cooking time up to 10 minutes by repeatedly touching
the START/Q-START key if longer cooking time are
required.
16
(Ch-1)
(Ch-2)
(Ch-3)
(Ch-4)
SOFTEN
The oven uses low power to soften foods (butter, ice
cream, cream cheese, and frozen juice)
See the following table.
SOFTEN TABLE
Example : To Soften 227g Cream Cheese.
When the cook time is over,
you will hear four beeps and
END will be displayed.
1. Touch STOP/CLEAR.
2. Touch two times.
‘2’ appears in the display.
4. Touch
3. Touch number 2.
‘227’ appears in the display.
MELT
1. Touch STOP/CLEAR.
2. Touch
three times.
‘3’ appears in the display.
4. Touch
3. Touch number 2.
‘227’ appears in the display.
SOFTEN
When the cook time is over,
you will hear four beeps and
END will be displayed.
Butter
Ice Cream
Cream
Cheese
Frozen
Juice
Unwrap and place in microwavable
container. No need to cover butter.
Butter will be at room temperature
and ready for use in recipe.
Place container in oven. Ice cream
will be soft enough to make
scooping easier.
Unwrap and place in microwavable
container. Cream cheese will be at
room temperature and ready for
use in recipe.
Remove top.
Place in oven.
Frozen juice will be soft enough to
easily mix with water.
1, 2 or 3
sticks
(Pint, Quart,
Half gallon)
85 or 227g
170, 340 or
454g
AmountCategory Direction
Butter
Chocolate
Cheese
Marshmallows
Unwrap and place in
microwavable container. No
need to cover butter. Stir at the
end of cooking to complete
melting.
Chocolate chips or squares of
baking chocolate may be used.
Unwrap squares and place in
microwavable container. Stir at
the end of cycle to complete
melting.
Use processed cheese food
only. Cut into cubes. Place in a
single layer in microwavable
container. Stir at the end of
cooking to complete melting.
Large or miniature
marshmallows may be used.
Place in microwavable
container. Stir at the end of
cycle to complete melting.
1, 2 or 3
sticks
113 or 227g
227 or 454g
142 or 284g
AmountCategory Direction
MELT
The oven uses low power to melt foods (butter,
chocolate, marshmallows and cheese). See the
following table.
MELT TABLE
Example : To Melt 227g Chocolate.
OPERATING INSTRUCTIONS
17
START/Q-START.
START/Q-START.
1, 2 or 3
dEF 1
dEF 2
dEF 4
dEF 3
t
25.4mm
1. Touch STOP/CLEAR.
2. Touch
AUTO DEFROST
one time.
‘dEF1’ appears in the display.
3.
4
START/Q-START
18
*For best results, remove fish, shellfish, meat,
and poultry from its original wrapping paper or
plastic package. Otherwise, the wrap
will hold steam and juice close to the foods,
which can cause the outer surface of the foods
to cook.
*For best results, shape your ground meat into
the form of a doughnut before freezing. When
defrosting, separate any thawed meat when the
beep sounds and continue defrosting.
*Place foods in a shallow container or on a
microwave roasting rack to catch drippings.
*Food should still be somewhat icy in the center
when removed from the oven.
START/Q-START
START/Q-START
WHEN OVEN BEEPS
56.7g
19
AUTO DEFROST TABLE (CONT.)
Poultry setting
Fish setting
Bread setting
FOOD
SETTING
SPECIAL INSTRUCTIONS
CHICKEN
Whole
Cut-up
CORNISH
HENS
Whole
TURKEY
Breast
POULTRY
POULTRY
POULTRY
Turn over (finish defrosting breast-
side down). Cover warm areas with
aluminum foil.
Separate pieces and rearrange.
Turn over. Cover warm areas with
aluminum foil.
Turn over. Cover warm areas with
aluminum foil.
Turn over. Cover warm areas with
aluminum foil.
Place chicken breast-side up on a microwav -
able roasting rack. Finish defrosting by
immersing in cold water. Remove giblets
when chicken is partially defrosted.
Place on a microwavable roasting rack.
Finish defrosting by immersing in cold water.
Place on a microwavable roasting rack.
Finish defrosting by immersing in cold water.
Place on a microwavable roasting rack.
Finish defrosting by immersing in cold water.
FOOD
SETTING
SPECIAL INSTRUCTIONS
FISH
Fillets
Steaks
Whole
SHELLFISH
Crabmeat
Lobster tails
Shrimp
Scallops
FISH
FISH
FISH
FISH
FISH
FISH
FISH
Turn over. Separate fillets when
partially thawed if possible.
Separate and rearrange.
Turn over.
Break apart. Turn over.
Turn over and rearrange.
Separate and rearrange.
Place in a microwavable baking dish.
Carefully separate fillets under cold
water.
Place in a microwavable baking dish.
Run cold water over to finish defrosting.
Place in a microwavable baking dish.
Cover head and tail with foil; do not let
foil touch sides of microwave. Finish
defrosting by immersing in cold water.
Place in a microwavable baking dish.
FOOD
SETTING
SPECIAL INSTRUCTIONS
Bagel
Dinner Roll
Muffin
Hamburger
Hot Dog Bun
Slices of Bread
Loaf of Bread
BREAD Turn over and rearrange. Place on 3 sheets of paper towel.
OPERATING INSTRUCTIONS
20
WHEN OVEN BEEPS
WHEN OVEN BEEPS
WHEN OVEN BEEPS
  • Page 1 1
  • Page 2 2
  • Page 3 3
  • Page 4 4
  • Page 5 5
  • Page 6 6
  • Page 7 7
  • Page 8 8
  • Page 9 9
  • Page 10 10
  • Page 11 11
  • Page 12 12
  • Page 13 13
  • Page 14 14
  • Page 15 15
  • Page 16 16
  • Page 17 17
  • Page 18 18
  • Page 19 19
  • Page 20 20
  • Page 21 21
  • Page 22 22
  • Page 23 23
  • Page 24 24
  • Page 25 25
  • Page 26 26
  • Page 27 27
  • Page 28 28

LG MS4040SRB Owner's manual

Category
Microwaves
Type
Owner's manual

Ask a question and I''ll find the answer in the document

Finding information in a document is now easier with AI