FORCE
®
TROLLING MOTOR
STABILIZER
INSTALLATION
INSTRUCTIONS
Getting Started
This is an optional accessory that can help stabilize and provide
additional support for the trolling motor when it is in the stowed
position.
Tools Needed
• 9/16 in. (14 mm) wrench or socket
• 3/16 in. hex bit or wrench
• Torque wrench
• Hacksaw or similar cutting tool to trim the length of the
stabilizer (optional)
Installation Procedures
NOTICE
When assembling the motor, you must use hand tools to install
all of the parts, observing the torque specifications when
provided. Using power tools to assemble the motor may damage
the components, and voids the warranty.
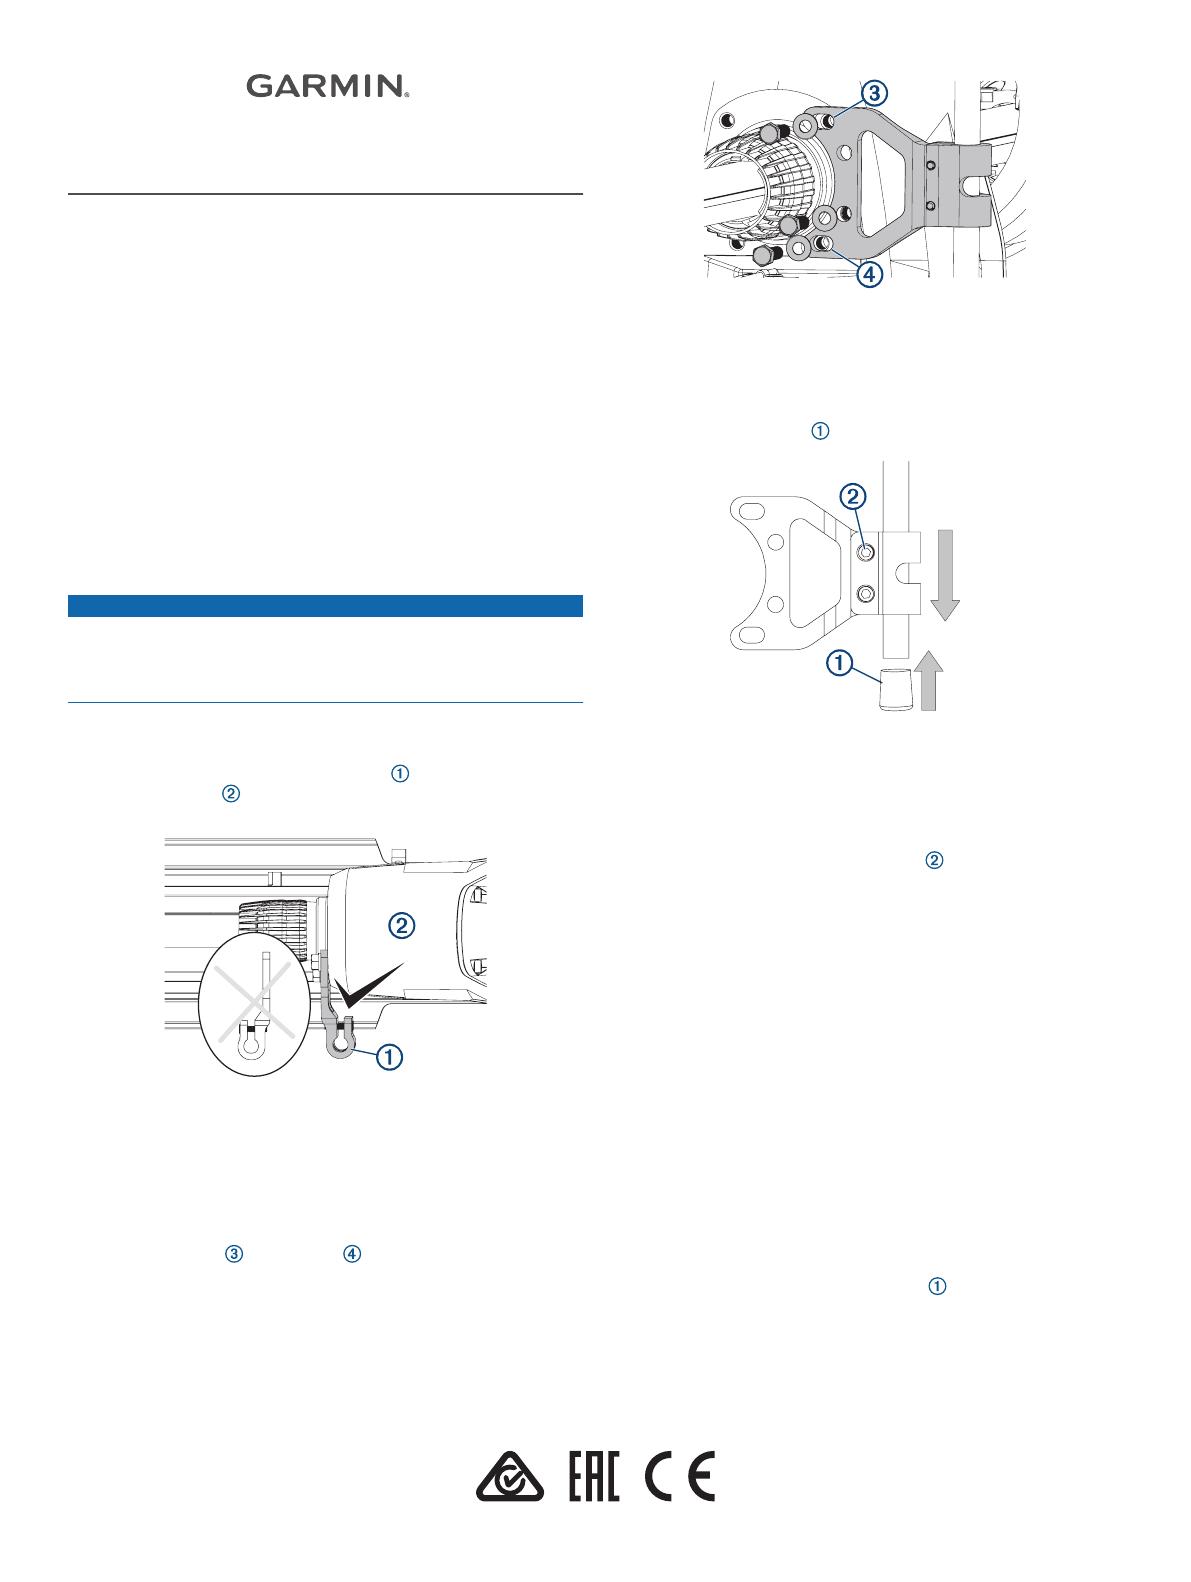
Attaching the Bracket
1
Place the trolling motor into the stowed position.
2
With the folded portion of the bracket facing the steering
system housing , place the bracket on either the port or the
starboard side of the motor steering housing.
NOTE: If you place the bracket with the folded portion facing
away from the steering system housing, the stabilizer will
contact the base of the trolling motor and prevent it from
being placed in the stowed position.
3
Loosely attach the bracket to the motor steering housing
using the included bolts and washers.
4
Pull up on the bracket until the bolts contact the edges of the
oval-shaped top and bottom mounting holes, and
tighten the bolts to 20 lbf-ft. (27 N-m).
NOTE:
If you secure the bracket without first pulling up on it,
the stabilizer may contact the base of the trolling motor and
prevent it from being placed in the stowed position.
Installing the Stabilizer Rod
1
Place the stabilizer rod into the bracket.
2
Place the bumper cap onto the lower end of the rod.
NOTE: Two caps are included with the stabilizer. The
notched cap fits over the top of the rod and allows you to
store the pull handle when it is not in use. You should install
the notched cap on the top after you have trimmed the rod in
a later step.
3
Apply light pressure to the top of the rod, and use a
3
/
16
in.
hex bit or wrench to tighten the bolts and secure the rod in
the bracket.
NOTE: Apply only light pressure, because setting the length
of the rod too deep may apply pressure on the motor latch
system and make it difficult to transition the trolling motor
from the stowed to the deployed position.
4
Move the motor between the stowed and deployed position to
test for stabilizer-rod clearance and proper support.
5
Repeat steps 3 and 4 until the motor transitions smoothly
between the stowed and deployed positions, and the
stabilizer provides proper support when in the stowed
position.
Trimming the Stabilizer Rod
Before you trim the stabilizer rod, you must install the rod and
test the installation for clearance and proper support.
Trimming the height of the stabilizer rod is optional. If you decide
to use the rod at its full length, proceed to the final step to install
the upper cap.
1
Using a hacksaw or similar cutting tool, remove the desired
excess length from the top of the rod .
GUID-051D8638-DDC1-49A4-B3D4-01965932DFB4 v1February 2020


