Page is loading ...

1/5
Pre-installation
Please read and understand all sections in this manual before you begin the installation of your laminate flooring.
SAFETY INFORMATION
READ ALL INSTRUCTIONS BEFORE INSTALLATION.
MANUFACTURER’S REQUIRED MINNESOTA DISCLOSURE – IMPORTANT HEALTH NOTICE: SOME OF THE
BUILDING MATERIALS USED IN THIS HOME (OR THESE BUILDING MATERIALS) EMIT FORMALDEHYDE. EYE, NOSE, AND THROAT IRRITATION,
HEADACHE, NAUSEA AND A VARIETY OF ASTHMA-LIKE SYMPTOMS, INCLUDING SHORTNESS OF BREATH, HAVE BEEN REPORTED AS
A RESULT OF FORMALDEHYDE EXPOSURE. ELDERLY PERSONS AND YOUNG CHILDREN, AS WELL AS ANYONE WITH A HISTORY OF
ASTHMA, ALLERGIES OR LUNG PROBLEMS, MAY BE AT GREATER RISK. RESEARCH IS CONTINUING ON THE POSSIBLE LONG-TERM
EFFECTS OF EXPOSURE TO FORMALDEHYDE.
REDUCED VENTILATION MAY ALLOW FORMALDEHYDE AND OTHER CONTAMINANTS TO ACCUMULATE IN THE INDOOR AIR. HIGH INDOOR
TEMPERATURES AND HUMIDITY RAISE FORMALDEHYDE LEVELS. WHEN A HOME IS TO BE LOCATED IN AREAS SUBJECT TO EXTREME SUMMER
TEMPERATURES, AN AIR-CONDITIONING SYSTEM CAN BE USED TO CONTROL INDOOR TEMPERATURE LEVELS. OTHER MEANS OF CONTROLLED
MECHANICAL VENTILATION CAN BE USED TO REDUCE LEVELS OF FORMALDEHYDE AND OTHER INDOOR CONTAMINANTS. IF YOU HAVE ANY
QUESTIONS REGARDING THE HEALTH EFFECTS OF FORMALDEHYDE, CONSULT YOUR DOCTOR OR LOCAL HEALTH DEPARTMENT.
IMPORTANT: Home Decorators Collection laminate flooring is intended for a floating installation only. Do not glue, nail, or attach in any other
way to your existing subfloor. Cabinets and kitchen islands should be installed prior to the laminate flooring.
CAUTION:
□ Use safety glasses and gloves when cutting laminate floors. Laminate floors will create wood dust; always cut the product in a well-
ventilated area.
□ Never tap laminate floors during installation.
□ Never use tools designed for other laminate flooring installation systems.
□ Never wax, polish, or use abrasive cleaners on laminate floors.
□ Home Decorators Collection laminate floors should not be installed in rooms that are susceptible to moisture such as full bathrooms,
entryways or laundry rooms.
WARRANTY
Home Decorators Collection offers a limited warranty against manufacturing defects from date of purchase on this product. Home Decorators
Collection guarantees that:
□ The decorative laminate surface will not wear through.
□ The surface of the plank will resist staining.
□ The surface of the plank will not fade or discolor, due to natural or artificial lighting.
TOOLS REQUIRED
□ Table or circular
saw
□ Measuring tape
□ Carpenter’s
square
□ Utility knife □ Safety glasses □ Dust mask (NIOSH-designated)
□ Gloves □ Pencil/marker □ Pull bar □ 3/8 in. (10 mm) thick spacers □ Laminate floor underlayment
□ 6 mil (0.15 mm) thick vapor barrier if installing over concrete □ 2 in. (51 mm) wide moisture-resistant adhesive tape
ALLOWING THE FLOORING TO ACCLIMATE TO THE INSTALLATION AREA
Allow 48 hours for your flooring to acclimate to the conditions of the installation area before opening the cartons. Cross-stack unopened
cartons in the installation area, away from outside walls, heat, and air conditioning vents. Installation temperatures should be at a minimum
of 64°F (18°C) with a maximum relative humidity of 75%.
EXPANSION CONSIDERATIONS
Home Decorators Collection laminate floors expand and contract with changes in relative humidity. For this reason, leave a 3/8 in. (10
mm) expansion space around the perimeter of the room and all other objects such as toe kicks and plumbing. The expansion space will be
covered by wall base moldings or quarter rounds once the floor is installed.
Installation Instructions
HDC Fold-Down
For assistance, call: 1-888-864-4520
HomeDepot.com/HomeDecorators
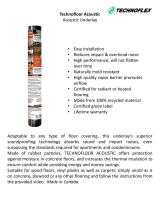
Product Description
Coastal Travertine 8mm
Laminate Flooring Planks
Click Lock Joints
Grade Levels
Above Grade / On Grade
Below Grade
Warranty
Limited 40-Year Residential
7-Year Light Commercial
Installation Method
Floating
Item #203335314
Model #32685
HOMEDEPOT.COM/HOMEDECORATORS
Please contact 1-888-864-4520 for further assistance.

COASTAL TRAVERTINE 8MM | FOLD DOWN
MODEL #32685
2/5
MAXIMUM ROOM SIZE / ADJACENT ROOMS
Home Decorators Collection laminate floors can be installed in a single room up to 33 ft. (10 m) in length and 26 ft. (8 m) in width.
Installations in rooms that are over the maximum allowable length and width must use T-moldings. Also use T-moldings when installing
laminate floors to separate adjacent rooms (i.e. through doorways).
INSTALLATION LAYOUT
There are no rules when it comes to the layout of your installation. Typically, laminate flooring installations are laid out parallel to the longest
wall in the room or perpendicular to the main window in the room.
Subfloor Preparation
Home Decorators Collection laminate floors can be installed over many types of subfloors as long as they are properly prepared and meet the
required criteria outlined in this section.
GENERAL SUBFLOOR PREPARATION AND PRECAUTIONS
□ Subfloors must be clean and free of dirt and debris prior to
installation.
□ Subfloors must be structurally sound prior to installation.
□ Subfloor moisture must be tested prior to installation and should
not exceed 12% through the installation area.
□ Carpet is not a suitable underlay for laminate floors. All carpet,
carpet pad, and carpet tack should be removed prior to
installation.
□ Variations in the subfloor flatness should not exceed 3/16 in. per
10 ft. (2 mm/m). Floors must be leveled to meet this specification
prior to installation. Level by filling depressed areas with flooring
leveling compound and sanding or grinding down any raised
areas.
□ Installations over hydronic radiant heated subfloors are
acceptable but temperatures should never exceed 80°F (27°C).
Radiant heat systems must be operating for a minimum of
3 weeks prior to installation of Home Decorators Collection
laminate floors to ensure the subfloor meets the moisture
requirements.
WOOD SUBFLOOR PREPARATION
□ Wood subfloors must be structurally sound and screwed or
nailed to supporting beams.
□ A 6 mil (0.15 mm) polyethylene vapor barrier must be used if
installing laminate floors over wood subfloors applied directly to
concrete.
□ If installing floors over a crawl space, install a 6 mil (0.15 mm)
vapor barrier:
□ Overlap vapor barrier edges by 8 in. (20 cm) and seal with
moisture resistant adhesive tape.
□ Run the vapor barrier ¾ in. (2 cm) up the wall and trim
after the wall base is installed.
□ Crawl space should be dry and vented as per local
building code.
□ Underlay must be installed prior to installing the laminate floors.
□ Underlay edges should not be overlapped. Butt end edges
together and seal with adhesive tape.
CONCRETE SUBFLOOR PREPARATION
□ Concrete subfloors must be properly cured and allowed to dry for
at least 60 days prior to installation. Test the concrete subfloor
for moisture prior to installation. To do so:
1. Tape 3 ft. x 3 ft. (91 cm x 91 cm) pieces of polyethylene vapor
barrier to the subfloor.
2. If condensation appears on the film after 24 hours or concrete
appears dark in color, moisture is likely present and a Calcium
Chloride test must be performed.
3. The maximum allowable moisture emission is 5.0 lbs/1000 ft
2
per 24 hours (2.26 kg/101.6 m
2
per 24 hours).
□ A 0.12 in. (3 mm) thick underlay and 6 mil (0.15 mm)
polyethylene vapor barrier must be used when installing over
concrete.
□ Overlap vapor barrier edges by 8 in. (20 cm) and seal with
moisture resistant adhesive tape.
□ Run the vapor barrier ¾ in. (2 cm) up the wall and trim after the
wall base is installed.
□ The underlay must be installed prior to installation of laminate
floors.
□ Do not overlap underlay edges. Butt end edges together and seal
with adhesive tape.
VINYL (SHEET/TILE), LINOLEUM, AND CERAMIC TILE SUBFLOOR
PREPARATION
□ If vinyl, linoleum, or ceramic tile is installed over concrete, install
a 6 mil (0.15 mm) vapor barrier over it:
□ Overlap vapor barrier edges by 8 in. (20 cm) up the wall and
trim after the wall base is installed.
□ Run the vapor barrier ¾ in. (2 cm) up the wall and trim after the
wall base is installed.
□ Underlay must be installed prior to installing the laminate floors.
□ Underlay edges should not be overlapped. Butt end edges
together and seal with adhesive tape.
HOMEDEPOT.COM/HOMEDECORATORS
Please contact 1-888-864-4520 for further assistance.

COASTAL TRAVERTINE 8MM | FOLD DOWN
MODEL #32685
3/5
Room Preparation
WALL BASE/TRIM
□ Removal of the existing wall base/trim is optional. If the existing
wall base/trim is not removed, leave the required expansion
space in front of the existing wall base/trim.
□ Install wall base or trim after the flooring installation is complete
to cover the expansion space around the perimeter of the room.
□ Always nail/adhere the wall base and trim to the wall. Never nail/
adhere it to the laminate flooring.
DOORS/DOOR JAMBS
□ Undercut door jambs so that the laminate floor can be installed
under them. To do this, use a laminate flooring off-cut and a
small piece of underlay to support a hand saw blade at the
correct height for undercutting.
□ Check the door clearances and make any necessary height
adjustments before installing laminate floors.
□ Leave the correct expansion spacing under the door jamb.
WALL IRREGULARITIES
Walls are not always perfectly straight. Home Decorators Collection
laminate floors need to be cut so as to fit within the irregularities of
your walls. Complete these steps:
1. Install the first row of laminate floors (following the Installation
section) and ensure that all long edges of the laminate flooring
planks are aligned.
2. Slide the whole row against the wall. You will now notice any
irregularities (areas where the wall is not straight).
3. Trace the contour of the wall onto the row of laminate flooring
with a pencil or marker.
4. Once traced, uninstall the planks carefully so as not to damage
the locking system and cut along the traced line.
5. Re-install the plank, leaving the necessary 3/8 in. (10 mm)
expansion space.
Preparing for Installation
Before you begin the steps in the Installation section, ensure you
have completed the following:
□ Sort planks before installation to avoid plank repetition and to
achieve the most natural and varied results.
□ Inspect every plank for damage before installing it.
□ The first and last row of the installation should be wider than 3.5
in. (9 cm):
□ Measure the width of the room and divide it by the width of the
planks you are installing.
□ If the remainder is less than 3.5 in. (9 cm), cut 3.5 in. (9 cm)
from the width of the first row. If this is not possible, ensure
that both edge planks are as even in width as possible.
□ The first and last plank in a row should be a minimum of 16 in.
(40 cm) long.
□ Stagger the planks from row to row by a minimum of 16 in. (40
cm).
□ Use spacers to maintain the 3/8 in. (10 cm) expansion space
between the planks and walls/vertical objects.
□ Select a starting corner of the room and work from left to right.
TIP: It is often easiest to start at the door of the room so that the
first plank can be easily slid under the door jamb.
HOMEDEPOT.COM/HOMEDECORATORS
Please contact 1-888-864-4520 for further assistance.

COASTAL TRAVERTINE 8MM | FOLD DOWN
MODEL #32685
4/5
Installation
1 INSTALLING THE FIRST ROW 2 INSTALLING THE REMAINING ROWS
□ Lay the first plank with the long edge tongue facing the wall.
□ Position the short edge tongue of the second plank so that it overlaps
the short edge groove of the first plank by half the width of the plank.
□ Press down on the second plank so as to engage the locking
mechanism and physically connect it to the first plank.
□ The two planks should lock together tightly and there should be no
height differences between them.
□ Slide the second plank horizontally towards the wall until the two
planks’ long edges are aligned.
□ Continue in this manner until the first row is complete.
□ Use the remainder of the last plank of the first row to start the second
row provided that it is a minimum of 16 in. (40 cm) long. If the cut
piece is shorter than 16 in. (40 cm) long, cut a new plank in half and
use it to begin the second row.
□ Install the first plank of the second row by installing its
long edge to the previous row’s groove.
□ Install the long edge of the plank to the previous row.
□ Before lowering the plank, make sure its short end tongue
overlaps with the previous plank’s short end groove.
□ Lower the plank slowly (a short oscillating or up and down
motion may help lower the plank).
□ Apply pressure to the short edge of the planks so as to
activate the locking mechanism. You will typically hear an
audible click sound.
□ When you are finished installing all rows, remove all wall
spacers and install wall base and applicable moldings/
transitions.
3/8 in.
(10 mm)
min.
16 in.
1
2
3
Groove
Tongue
HOMEDEPOT.COM/HOMEDECORATORS
Please contact 1-888-864-4520 for further assistance.

COASTAL TRAVERTINE 8MM | FOLD DOWN
MODEL #32685
5/5
Care and Cleaning
GENERAL CARE
□ Place mats and area rugs at main entrances to minimize
abrasive debris that may be tracked in on shoes.
□ Place protective pads under furniture legs and other movable
furniture.
□ Use protective mats under wheeled office-type chairs.
□ Avoid using lacquers, polishes, waxes or detergent-based
cleaners as they will leave a film on the surface of the floor and
may cause irreparable damage. The surface of this flooring does
not require refinishing and will maintain its original appearance.
□ Never use abrasive cleaners.
□ Never flood your floor or wet mop it. Excessive liquid on your
floor may cause plank edges to swell and become damaged
beyond repair.
□ Never use a steam cleaner as the steam may cause plank edges
to swell and become damaged beyond repair
DAILY CLEANING
□ Use a dust mop or vacuum with a hard surface attachment to
remove dust, loose dirt, or debris.
□ For a more thorough cleaning, where a cleaning solution may be
required, use a water-based laminate floor cleaner. Lightly mist
the cleaner into the soiled surface and wipe up immediately.
HOMEDEPOT.COM/HOMEDECORATORS
Please contact 1-888-864-4520 for further assistance.
/