Page is loading ...

Copyright Notice:
This owner’s manual is copyrighted, all rights reserved. It may not, in whole or in part, be copied, photocopied, reproduced,
translated, or formed into any electronic format without prior consent in writing from Diver Entertainment Systems Inc.
iRiver is a registered trademark of iRiver Limited. Oceanic is a registered trademark of Oceanic Worldwide.
Several patents have been issued on this product; Others are also Pending.
P/N DV-0404: rev.17A
Manufactured by: Diver Entertainment Systems Inc.
iRiver 300 Series MP3 Players
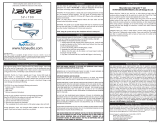
www.desworldwide.com
H
2
O Audio
TM
Before using this system, please be sure to read,
understand, and follow the instruction of this manual.
USER INSTRUCTION MANUAL
Oceanic DV Series

FCC CERTIFICATION:
THIS DEVICE COMPLIES WITH PART 15 OF THE FCC RULES. OPERATION IS SUBJECT TO THE FOLLOWING TWO CONDITIONS:
(1) THIS DEVICE MAY NOT CAUSE HARMFUL INTERFERENCE, AND (2) THIS DEVICE MUST ACCEPT ANY INTERFERENCE,
RECEIVED, INCLUDING INTERFERENCE THAT MAY CAUSE UNDESIRED OPERATION.
Note: This equipment has been tested and found to comply with the limits for a Class B digital service, pursuant to part 15 of the FCC
Rules. These limits are designed to provide reasonable protection against harmful interference in a residential installation. This
equipment generates, uses, and can radiate radio frequency energy and, if not installed and used in accordance with the instructions,
may cause harmful interference to radio communications. However, there is no guarantee that interference will not occur in a
particular installation. If this equipment does cause harmful interference to radio or television reception, which can be determined by
turning the equipment off and on, the user is encouraged to try to correct the interference by one or more of the following measures:
- Reorient or relocate the receiving antenna
- Increase the separation between the equipment and receiver
- Connect the equipment into an outlet on a circuit different from that to which the receiver is connected
- Consult the dealer or an experienced radio/TV technical for help.
NOTE: THE MANUFACTURER IS NOT RESPONSIBLE FOR ANY RADIO OR TV INTERFERENCE CAUSED BY UNAUTHORIZED
MODIFICATIONS TO THIS EQUIPMENT. SUCH MODIFICATIONS COULD VOID THE USER'S AUTHORITY TO OPERATE THE
EQUIPMENT.
INTRODUCTION:
The H
2
O Audio DV system enables you to listen to digital audio while S.C.U.B.A. diving or snorkeling. The system is designed to
provide high fidelity audio to a depth of 200 feet (66 m). It utilizes the latest MP3 player technology capable of playing both MP3
and WMA files.
HOUSING: The housing features a simple and secure rotary locking mechanism to keep the unit waterproof during operation. The
H
2
O Audio DV housing allows for complete functional control of the iRiver 300 Series MP3 Players while submerged in an aqueous
environment
NOTE: The MP3 player is NOT waterproof without the H
2
O Audio DV housings
SPEAKERS: The speaker set is specially designed with clips for attachment to mask straps. The clips are removable for users who
wish to put the speakers inside a diving hood.
NOTE: The speakers are rigidly fixed to the housing and should not be disassembled from the housing for any reason.

I
MPORTANT WARNING:
Pay special attention to these labels:
WARNING: Could cause injury to the user.
CAUTION: Could cause damage to the product and/or injury to the user.
READ THIS MANUAL CAREFULLY. IF YOU HAVE ANY QUESTIONS PLEASE CONTACT YOUR NEAREST DEALER OR
CUSTOMER SUPPORT PRIOR TO USE.
IMPROPER USE OF THIS SYSTEM MAY CAUSE THE USER TO MAKE MISTAKES OR DECISIONS THAT MAY LEAD TO
SERIOUS INJURY OR DEATH.
IMPORTANT WARNING AND DISCLOSURE
ANY INDIVIDUAL INTENDING TO UTILIZE THIS PRODUCT DURING S.C.U.B.A DIVING ACTIVITIES MUST BE
PROPERLY TRAINED AND CERTIFIED BY AN ACCREDITED AGENCY. FURTHER, IT IS RECOMMENDED THAT ALL
DIVERS STAY WITHIN RECREATIONAL DIVE LIMITS AND FOLLOW ALL SAFETY STOP CONSIDERATIONS.
THOSE USERS THAT ELECT TO UTILIZE THIS SYSTEM AT, OR NEAR, THE WATER’S SURFACE, MUST MAINTAIN
SAFETY AWARENESS OF MOVING WATERCRAFTS.
ALWAYS MAKE SURE TO HAVE THE MP3 PLAYER VOLUME TURNED TO ZERO AND THE SPEAKERS AWAY FROM
THE EARS WHEN TURNING ON THE H
2
O AUDIO DV UNIT (NOTE: LED LIGHT ON/OFF). THE SYSTEM CONTAINS A
POWERFUL STEREO AMPLIFIER THAT BOOSTS THE AUDIO VOLUME DELIVERED TO THE SPEAKERS. IF THE
VOLUME LEVEL IS NOT ZERO WHEN THE H
2
O AUDIO DV IS TURNED ON, IT MAY CAUSE EAR INJURY DUE TO A
SUDDEN BURST OF VOLUME. THE VOLUME SHOULD BE SLOWLY INCREASED WITH AN AUDIO FILE PLAYING TO
SET THE SPEAKER VOLUME TO COMFORTABLE OUTPUT LEVELS PRIOR TO POSITIONING THE SPEAKERS NEXT
TO THE EARS.

LEAK TEST:
Before utilizing the system for the first time, it is highly recommended to perform a 'Leak Test’. Follow
the instructions below, but DO NOT INSTALL THE MP3 PLAYER inside the housing for the leak test.
1. Visually inspect the main housing seal by opening the unit. Verify the seal is seated as intended
and the O-ring is clean of any artifacts, then close and lock the housing using the OPEN-CLOSE Dial.
2. Make a first dive to your intended depth, taking the housing and speakers only (NO MP3).
3. During this dive, manipulate the controls at various depths.
4. After surfacing, check inside the housing for any sign of leaks.
5. Only after a successful Leak Test, install the MP3 player in the housing.
6. If you are not diving, but using the system in a wet environment, first immerse the housing, without
the MP3 player, in a tank of water to (1 meter or 3 feet if possible) and manipulate the controls. Then
check for any signs of leakage.
HOW TO LISTEN TO THE H
2
O AUDIO DV:
1. Turn the MP3 player on (Button 1).
2. Adjust volume to ZERO (Lever 2)
3. Turn the H
2
O Audio DV unit Power ON (Button 4)
4. Press Play (Button 1)
5. Adjust the volume to desired level (Lever 2)
6. Stop the music (Button 1)
7. Adjust the volume to ZERO (Lever 2)
8. Turn OFF the H
2
O Audio DV (Button 4)
9. Turn OFF the MP3 player (Button 1, Long press,)

O-RING PREPARATION:
1. Gently Remove the O-ring with the Remover. Be careful not to stretch the O-ring
CAUTION: Never use a sharp or metal object to remove O-rings as they damage the O-ring or the O-ring
groove contact surface. Use only the O-ring Remover Tool included in the packaging.
2. Check the O-ring for hair, sand, lint, or other debris and wipe clean as necessary. Be
careful not to stretch the O-ring. If the O-ring is cut or cracked it must be removed and
replaced with a new O-ring.
3. Wash your hands prior to greasing the O-ring. Grease the O-ring using your fingertips.
Uniformly spread a bead of grease on the O-ring until there is a thin film covering the
complete surface. Do not stretch the O-ring.
CAUTION: Only use the O-ring grease provided with
your housing.
4. Before replacing the O-ring, visually inspect the groove in the lid and the contact surface
for hair, sand, lint, or other debris and wipe clean as necessary. Also, check the contact
surfaces scratches, blemishes, or other imperfections. If an O-ring contact surface is
damaged, do not use the housing. It is very possible the housing will flood and damage the
electronics. Contact your dealer for advice.
5. Install the O-ring with the flat side down; making sure that it is seated uniformly, with no
twists or loose areas. Be careful not to stretch the O-ring unnecessarily.

GENERAL STORAGE PROCEDURES:
For long-term storage, remove O-ring and store out of direct sunlight. If the O-ring will not be used for a
long period of time, remove from it the housing and store in a plastic bag out of direct sunlight. If the O-
ring is stored in a dry environment for a long period of time, it will develop cracks and become unusable.
CAUTION: The life of an O-ring is typically one (1) year. Contact your supplier for spare O-Rings or a
maintenance kit. Always remember to reinstall and lubricate the main housing O-ring before next use.
Do not expose the housing to extreme heat, such as the inside of a hot car, or in hot direct sunlight, such
as a beach, or boat deck. Doing so may cause damage and subsequent flooding.
CAUTION: Do not store housing in following environments: * Solvents or other chemical fumes
* High humidity
* High Ozone
* Extreme temperature fluctuations
Storage in such conditions may lead to housing damage and leakage.
Rinse the EXTERIOR of the system in fresh water after EACH use:
1. Make sure the housing is sealed and closed
2. Soak in clean fresh water for 30 minutes.
3. Rinse the entire system with freshwater
4. Then completely dry the entire exterior of the system using a clean soft cloth.
Strong detergents, soaps, and chemicals MUST NEVER be used to clean the system. If you must use a
soap, it should be a very diluted.

HOUSING OPERATIONS:
Open the Housing
STEP 1: Pull out the Tab
STEP 2: Rotate the Dial counterclockwise
Closing the Housing
STEP 1: -Rotate the Dial Clockwise until both halves of the housing are fully closed.
STEP 2: Push in the small locking Tab.
CAUTION: DO NOT FORCE THE LID CLOSED. If you feel resistance, check to
make sure the MP3 player and O-Ring are properly positioned.
Volume
UP
Volume
DOWN
Button 3: Mode
Button 2:Memory/EQ
Button 1: MP3 ON/OFF/Play/Stop
Button 5: Menu
Lever 1:
Navigation
O
P
E
N
C
L
O
S
E
CAUTION: If the housing has
been subjected to pressure and
become ‘tighter’ and more
difficult to open than usual, in this
case, rotate the dial a little more
strongly than usual.
TAB
BACKWARDFORWARD
+
-

Lever 2: Volume
Button 4:
Amplifier Power ON/OFF
CAUTION: This device provides powerful amplification of
the audio signal beyond the normal output of standard
stereo devices. This system is specifically engineered for
underwater use to enhance fidelity at depth. This power
amplifier is powerful and must be used carefully. After using
the product, lower the volume to zero before turning the
device on again.
The MP3 player Volume level
MUST be at ZERO before turning
the Amplifier Power ON
WARNING: The MP3 player volume MUST be at ZERO
before turning the Amplifier Power ON. Button 4 will turn
the H
2
O AUDIO DV Amplifier unit ON and OFF. Pushed
once, it will turn the module ON, LED will illuminate.
Pushed again will turn the module OFF. This system is
equipped with a Stereo Amplifier Module located within
the housing. The Amplifier is engineered to provide output
power needed at depth to maintain high fidelity and clarity
of the audio.

INSTALLING & REPLACING AMPLIFIER BATTERY:
STEP 3: OPEN HOUSING
CAUTION: Completely dry the
inside of any moisture
STEP 4: REMOVE AND UNPLUG THE MP3 PLAYER
STEP 1: WIPE EXTERIOR AND MAKE SURE IT IS DRY
STEP 2: TURN OFF THE AMPLIFIER

INSTALLING THE MP3 PLAYER:
CAUTION: Before opening be sure to rinse the sealed system in fresh water. Before installing the MP3
player, make sure the housing interior is dry. Moisture in the housing can cause damage to the electronics.
STEP 3: PLUG STEREO ADAPTER
INTO MP3 PLAYER
NOTE: Some MP3 players have two audio jacks.
Make sure you plug the adapter into the
HEADPHONE audio jack
STEP 4: PLACE THE MP3 PLAYER IN THE
HOUSING
NOTE: Use the buttons on the side of the player
to guide the unit into place
STEP 2: OPEN HOUSINGSTEP 1: DRY THE EXTERIOR
Note: Use a soft clean cloth. NEVER
use direct heat

Make sure the O-ring is partially squeezed, sealing the gap between the
housing front and rear halves. If this contact line is not uniform, there is
a good chance the housing will flood. Therefore, open the housing,
reseat the O-ring and/or remove the contaminants as necessary.
STEP 5: CLOSE THE LID
Begin to close the lid by bringing it down towards the housing. Make sure the Lever
Controls are lined up with the Joysticks on the MP3 Player.
CAUTION: Make sure the lid is free of any lint, hair, sand, or other items. DO
NOT FORCE THE LID CLOSED. If you feel resistance, check to make sure
the MP3 player is seated correctly. Rotate the OPEN/CLOSE Dial
CLOCKWISE until the front and rear halves of the housing are fully closed,
then push in the small locking tab on the dial.
CAUTION: If you cannot manipulate all of the controls with the housing, go back to step 1 above and start again. This is
important because it could mean the MP3 Player is not seated properly in the housing, or the housing controls are out of
the position, which could cause water leakage and damage.
CAUTION: Only take the system into the water when you are fully assured the housing in proper condition and the MP3
player installed correctly by following the steps outlined above.
Manipulate each of the housing
controls. Check that they are aligned
with and are properly contacting the
MP3 player controls.
STEP 6: SEAL CHECK

STEP 12: Turn on the Amplifier using the external button. The LED will turn on.
STEP 11: Insert and connect the MP3 Player
STEP 7: Insert a NEW & DRY 9-Volt Alkaline battery.
CAUTION: Visually inspect the inside to make sure it is dry.
STEP 5: PUSH UP
STEP 6: SLIDE OUT
TO OPEN
STEP 8: SLIDE IN
STEP 9: PUSH DOWN
STEP 10: SNAP CLOSE
TO CLOSE
WARNING: THE MP3 PLAYER VOLUME MUST BE
SET TO ZERO BEFORE TURNING ON THE
AMPLIFIER.

REMOVING THE MP3 PLAYER:
STEP 2: WIPE DOWN THE EXTERIOR WITH CLEAN FRESH WATER
STEP 3: WIPE THE UNIT DRY
STEP 1: TURN OFF THE AMPLIFIER
STEP 5: TURN HOUSING TO SIDE AND
LET MP3 PLAYER SLIDE OUT INTO
YOUR PALM
STEP 6: UNPLUG THE STEREO ADAPTER
STEP 7: REMOVE THE MP3 PLAYER
STEP 4: CAREFULLY OPEN THE HOUSING

STEP 2: PLUG CONNECTOR INTO MP3
PLAYER JACK
NOTE: Make sure you plug the connector all
the way into the stereo jack
STEP 1: LINE UP CONNECTOR WITH MP3
PLAYER STEREO JACK
NOTE: Make sure you plug the connector into the
stereo jack. Some of the higher end 300 Series also
includes an input jack for a recording device. Make
sure you know the difference. Look for the jack
with the ‘headphones’ symbol.
INSTALLING THE STEREO JACK:

SPEAKER AMPLIFIER OPERATIONS:SPEAKER MASK STRAP OPERATION:
Care must be taken when handling the speakers. Do not let the speakers hang freely from the housing. Maintain control of the
speakers at all times.
CAUTION: Failure to maintain control of the speakers during handling may result in damage to the speakers and
compromise the integrity of the speaker set.
Make sure to position the speakers
to face towards the ears.
Feed the mask strap
through the slits in each
slot of the clip.
MASK STRAP MOUNTING:
The clip is a removable item to make the speakers
more comfortable for those that wish to have the
speakers inserted underneath a hood or under the
mask strap
REMOVABLE MASK STRAP CLIP:

REMOVING/REPLACING THE SPEAKER CLIP:
CAUTION: Make sure that you are holding the mask on your face when entering the water. The
speakers may try to pull the mask off the face when entering the water, so pay special attention to
keeping the mask on your face.
To replace the clip onto the speaker:
1. Make sure the unit is turned off
2. Hold the speaker face down.
3. Slide the clip so that it snaps into the bottom
grooves first.
4. Then fit the screw through the hole.
5. Gently tighten the screw using a Phillips head screwdriver.
STEP 1: UNSCREW
To remove the clip from the speaker:
1. Make sure the unit is turned off.
2. Hold the speaker face down.
3. With a Phillips head screwdriver, gently unscrew the clip
from the speaker
4. Make sure to save the screw and clip in a safe place.
Do not lose them.
STEP 2: PULL APART
STEP 1: PUSH TOGETHER
STEP 2: TIGHTEN THE SCREW

LIMITED WARRANTY COVERAGE:
WARRANTY LIMITATIONS:
Diver Entertainment Systems Inc. (DES) guarantees, to the original purchaser only, that the equipment purchased
(EXCLUDING THE MP3 PLAYER) is free of defects in material and/or under normal recreational SCUBA use
for a period of one year (1) from date of consumer purchase from an Authorized DES Dealer; provided that proper
care and maintenance have been performed as prescribed by the owner's guide included with the equipment.
Should this product prove to be defective for any reason (other than those listed as limitations below) the product
will be serviced or replaced at DES' sole discretion at no charge (excluding shipping and handling). This warranty
shall be void if the registration is not completed and sent to DES Customer Services within 30 days of purchase.
This warranty shall be void if the equipment has been tampered with by anyone not Authorized by to perform
service. The warranty is non-transferable and extends to the original purchaser only and is valid only if the
equipment was purchased from a DES Authorized dealer.
Warranty does not extend to cover damage from accident, abuse, tampering, lack of maintenance, theft, or loss.
Service or modifications by anyone other than an Authorized DES agent will void the warranty. DES will not be
responsible for recovery or replacement of the product in the event of loss or theft. DES, its Authorized
International Distributors, and Authorized Dealers make no other warranties, either express or implied or orally,
or in writing, with respect to any other warranty coverage except those expressly stated within the preceding
paragraphs. DES will not be held responsible for any agreements orally or in writing with the exception of those
expressly included in this warranty statement. This warranty registration card and the terms contained herein
supersede all statements contained in any and all owner's guides, instruction cards, or other equipment literature or
catalogs. In no event will DES, its Authorized International Distributors, and Authorized Dealers be held
responsible or liable for any personal injuries resulting from the use of the covered equipment, or for any other
damages, whether direct, indirect, incidental, or consequential; even if DES has been advised of such damages.
Warranty does not extend to any damages that may occur to the MP3 players.

WARRANTY CORRESPONDENCE:
A copy of the original sales receipt and a copy of the owner’s portion of the warranty card must
accompany all correspondence regarding the equipment covered by this warranty agreement or in direct
reference to this warranty.
CONTACTING CUSTOMER SUPPORT:
Customer Services is available Monday to Friday 9AM to 5PM PST.
The following are ways to reach a support agent:
1. Visit the website: http://desworldwide.com
2. Ph.:858-623-0339
3. Fax: 858-225-0815
4. Email: [email protected]
RETURNING FOR SERVICE:
Prior to any return, a Return Authorization (RA) number must be attained. Proof of purchase from an
Authorized Dealer will be required. Contact Custom Support to attain the RA number and shipping
instructions.
P/N DV-0404: rev.17B
/