Page is loading ...

34000-94600 · 03· 06/2001 · 5’ B+W · ©
Truma
Gerätetechnik GmbH & Co
Postfach 1252
D-85637 Putzbrunn
Service
Telefon 0049 (0)89 4617-142
Telefax 0049 (0)89 4617-159
e-mail: [email protected]
http://www.truma.com
Trumatic
C 3402
C 6002
Einbauanweisung
Seite 1
Installation instructions
Page 5
Instructions de montage
Page 9
Istruzioni di montaggio
Pagina 13
Inbouwhandleiding
Pagina 17
Monteringsanvisning
Side 21
Bruks- och monterings-
anvisningar på svenska kan
rekvireras från tillverkaren
Truma eller från Truma-Service
i Sverige.
Návod k použití a montáži
ve svém jazyce obdržíte
na požádání u firmy Truma
nebo u jejího servisního
zástupce ve vaší zemi.
Instrucciones
de montaje
Página 25
A magyar nyelvü használati és
szerelési utasítást a gyártónál
a Truma cégnél vagy a Truma
magyarországi képviseleténél
lehet beszerezni.
Käyttö- ja asennusohjeita on
saatavissa Truma-valmistajalta
tai Truma-huollosta.
Instrukcję obsługi i montażu
w ojczystym języku mogą
Państwo dostać u producenta
(Truma) lub w serwisie Trumy
w swoim kraju.
Instruções de utilizaçaõ e
instruções de montagem
podem ser solicitadas junto
ao fabricante Truma ou da
assistência técnica da Truma
no seu país
Bruksanvisningen og
monteringsveiledningen på ditt
språk kan fås hos produsenten
Truma eller hos Truma-Service
i ditt land
Τις δηγίες ρήσης και
τπθέτησης στη µητρική
σας γλώσσα µπρείτε να τις
λάετε απ τν κατασκευαστή
Truma ή απ τ σέρις Truma
στη ώρα σας.

5
Trumatic
C 3402, 6002
Liquid gas heater with
integrated storage
water heater
(Special version with
additional electrical
heating unit 230 V,
450 W for hot water)
Installation
instructions
The installation and repair
of the appliance is only to
be carried out by an ex-
pert. Read the installation in-
structions carefully prior to
starting work and observe the
instructions!
Intended use
This appliance is designed for
installation in mobile homes,
caravans and boats. Other
forms of use are also possible
after consultation with Truma.
Approval
Declaration of conformity:
The Trumatic C has been
DVGW-tested and complies
with the EC gas appliance
guideline (90/396/EEC) as
well as the associated EC
guidelines. The following CE
Product Ident. No. is available
for EU countries:
C 3402: CE-0085AS0121
C 6002: CE-0085AS0122
The heater is approved for in-
stallation in rooms frequented
by people (in motor vehicles)
and for operation while the
vehicle is moving.
It is not approved for installa-
tion in buses and vehicles for
the transportation of haz-
ardous goods. If the appli-
ance is to be installed in spe-
cial vehicles, always observe
the respectively valid regula-
tions.
In Germany, for inspection or
testing of the vehicle accord-
ing to Sections 19, 20 and 21
of StVZO, the installation is
also to be inspected. For sub-
sequent installation proceed
as specified in Section 19 of
StVZO.
General Design Approval
of the German Federal Of-
fice for Motor Vehicles
C 3402: S 300
C 6002: S 301
Regulations
Any alteration to the appli-
ance (including exhaust duct
and cowl) or the use of spare
parts and accessories which
are important for the func-
tioning of the heater and
which are not original Truma
parts, as well as the non-ob-
servance of the installation
and operating instructions,
shall lead to the cancelling of
the guarantee and exclusion
of liability claims. It also be-
comes illegal to use the appli-
ance, and in some countries
this even makes it illegal to
use the vehicle.
The operating pressure for
the gas supply is 30 mbar
(or 28 mbar butane/37 mbar
propane) or 50 mbar and
must correspond to the
operating pressure of the
appliance (see name plate).
The first year of operation
must be marked on the
name plate.
When installing the appli-
ance always observe the
technical and administra-
tive rules and regulations
of the country in which
the vehicle is to be regis-
tered for the first time.
In Germany, gas appliances,
cylinder mountings, pipe
routing as well as approval
and leak test must comply
with the DVGW form G 607
for liquid gas systems in vehi-
cles.
For vehicles used for com-
mercial purposes, the rele-
vant accident prevention reg-
ulations issued by the profes-
sional associations are to be
respected (BGV D 34).
For further details on the
rules and regulations in the
respective country of desti-
nation, please contact our
agencies abroad (refer to
operating instructions).
Exhaust ducts and cowls
must be routed in such a way
that exhaust gas does not en-
ter the inside area of the vehi-
cle. Parts of the vehicle which
are important for operation
are not to be adversely affect-
ed. The opening of the ex-
haust duct must point to the
side or upwards.
Warm air distribution:
Heating air intake vents must
be arranged in such a way
that under normal operating
conditions exhaust gas from
the vehicle engine and heater
appliance cannot enter the in-
side of the vehicle. It must be
ensured by means of con-
struction design that the
heating air introduced into
the vehicle is not polluted
(e.g. by oil vapour). This is
achieved, for example, with
air heaters with circulating air
operation, both for interior in-
stallations and for external in-
stallations. (In heaters with
fresh air operation the fresh
air is not to come from the
engine compartment or from
the vicinity of the exhaust or
the exhaust outlet of the
heater).
Notes on installation
in boats
Installation in boats must be
carried out in accordance
with EN ISO 10239 („Liquid
gas systems; small water-
craft“) or the technical and
administrative regulations of
the country in which the ves-
sel was registered for the first
time.
In Germany, the „Technical
specifications“ of the DVGW
form G 608 must be observed
for sports boats, and for com-
mercial inland shipping the
„guidelines for construction,
fitting, testing and operation
of liquid gas systems for do-
mestic purposes on boats,
within the scope of inland
shipping“ (BGR 146) must be
observed. According to these
guidelines the liquid gas sys-
tem is only to be installed by
fitters recognised by the in-
land shipping liability insur-
ance association (Berufs-
genossenschaft) and is only
to be checked and tested by
experts of this association. In
other countries always ob-
serve the respectively valid
regulations.
For further details on the
rules and regulations in the
respective country of desti-
nation, please contact our
agencies abroad (refer to
operating instructions).
Further installation instruc-
tions are provided in the
Truma Installation Instruction
for Boat Heating Systems.
1
Choice of location
Always install the appliance
and its exhaust duct in such
a way that it is always easily
accessible for service work
and can be removed and in-
stalled easily.
For evenly distributed heating
of the vehicle, the heater
should be installed as near to
the centre as possible, e.g.
in a wardrobe or in storage
space with sufficient height.
It is to be installed in such a
way that the air distribution
ducts can be routed with ap-
proximately the same
lengths.
For this purpose cut out an
opening of at least 480 x
480 mm or remove furniture
panelling.
Attention: To avoid the risk
of possible injury to persons
through the heater becoming
loose in the event of an acci-
dent, the upper cover of the
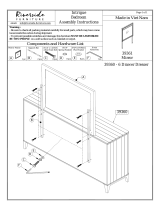
built-in cupboard (Fig. C: 30)
can be bolted flush with the
heater to the other furniture
items. Or crosswise to the di-
rection of travel (particularly
with installations at the rear),
a stable furniture bracket
must be installed in front of
(next to) the heater (Fig. C:
31). For this purpose a rigid
strip (min. 30 x 50 mm) or
plate can be attached to a
stable furniture bracket for in-
sertion at a height of approx.
200 mm above the floor.
Attention: There is to be no
heat-sensitive material stored
beneath the appliance (no ca-
bles, carpets etc.), as high
temperatures can be reached
at the bottom of the appli-
ance and in the surrounding
area!
To prevent damage to electri-
cal components in the appli-
ance, make sure never to at-
tach electrical leads or water
pipes to the insulation of the
appliance.
Do not install the wall cowl
on the side with a canopy,
particularly in caravans. In
such cases install a roof cowl
instead.
For caravans with a roof cov-
er there is a special cowl ex-
tension available as well as a
double-skin leadthrough (re-
fer to operating instructions).
The cowl must be placed in
such a way that exhaust gas
cannot find its way into the
vehicle interior. For this rea-
son, choose a location where
there are no opening win-
dows, skylights or ventilation
openings directly above the
cowl or for 30 cm on either
side. If this is not possible, a
warning plate must be placed
on the inside of the window
(or skylight) stating that it
must be kept closed while the
heater is operating. In this
case refrigerator ventilation
ducts must be tight-sealed
from the interior of vehicle.

6
Note: By using the 72 mm
diameter VR duct up to the re-
spective first air outlet, the
amount of noise is reduced. For
connecting this duct, first re-
move the reducing sleeve from
the air outlet connection fitting.
Circulating air return
The circulating air is sucked in
again by the device, either
directly via an aperture mea-
suring about 150 cm
2
from
the living room to the instal-
lation room, or via several
smaller apertures with the
same surface area.
8
Gas connection
The gas supply line, diameter
8 mm, is connected to the
connection fitting with olive
couplings. Carefully hold in
place with a second wrench
when tightening!
Attention: The gas connecti-
on fitting on the appliance is
not to be shortened or bent.
Prior to connecting the appli-
ance make sure that the gas
lines are free from dirt, chips
and such!
Route the pipes in such a way
that the appliance can be re-
moved again for servicing.
Keep the number of parting
connections in the gas supply
line in rooms frequented by
people to a technically feasi-
ble minimum. The gas system
must comply with the techni-
cal and administrative rules
and regulations of the respec-
tive country of destination.
9
Water connection
For operating the water
heater it is possible to use all
pressure pumps and sub-
mergible pumps up to 2.8 bar,
also all mixing taps with or
without electrical switch.
Fig. H: When using immer-
sion pumps, a non-return
valve (33 - not included in the
scope of supply) must be fit-
ted between the pump and
the first branch point (arrow
points in direction of flow).
Fig. J: When using pressure
pumps with high switching
hysteresis, hot water may
flow back through the cold
water tap. To prevent the
backflow, we recommend
that a non-return valve (34 -
not included in the scope of
supply) be fitted between the
outlet to the hot water tap
and the drain valve.
4
Assembly of wall
cowl
Fig. E: Choose a wall which
is as straight as possible and
which is well exposed to
wind from all directions. Drill
an opening of 83 mm diame-
ter (pack wood into any hol-
low spaces in the area of the
cowl opening). Use the en-
closed rubber seal (8) for
sealing. In the event of struc-
tured surfaces coat with plas-
tic body sealant - do not use
silicone!
Slide clamp (7) over the ducts
prior to passing the exhaust
double duct through the
opening.
Slide rubber seal (8) and
clamp (4) on the cowl inner
part (9). Press together end of
exhaust duct (1) so that wind-
ing touches winding, and
slide over O-ring (10) onto the
connection fitting (11) (bend
pointing up).
Engage clamp (4) with hole
on the upper pin (screw
pointing down) and tighten.
Slide combustion air intake
duct (5) on the serrated con-
nection fitting (12).
Fasten cowl inner part (9)
with 6 self-tapping screws
(14), mount cowl outer part
(15) and fasten with 2 screws
(16).
Fasten combustion air intake
duct with clamp (7), from the
inside, on the connection fit-
ting (12).
Fasten cowl double duct to
the wall with at least one
clamp ZRS (17).
Attention: Always install a
new O-ring following any dis-
assembly.
5
Assembly of the
roof cowl
Fig. F: Select a part of the
roof which is as straight as
possible and which is well ex-
posed to wind from all direc-
tions. Drill an opening of
83 mm diameter at a center
distance of at least 65 mm to
the side walls (pack hollow
cavities in the area of the
cowl opening with wood).
Sealing is carried out with the
enclosed rubber seal (20)
without further sealing com-
pound.
Slide rubber seal (20) on the
cowl part (21). Pass cowl
from above through the roof
and secure with retention ring
(22).
Mount cowl cover (23) and
secure with two screws (24).
Attention: The exhaust
outlets (25) must be posi-
tioned crosswise to the di-
rection of travel, the label
„FRONT“ (26) must be fac-
ing in the direction of trav-
el.
Slide clamp (7) over the ex-
haust gas double duct.
Press together end of exhaust
duct (1) so that winding
touches winding and slide
over the O-ring (27) onto the
connection fitting (28). En-
gage clamp (4) and tighten.
Slide combustion air intake
duct (5) onto the connection
fitting (29) and secure with
clamp (7).
Fasten cowl double duct to the
wall with at least 3 clamps
ZRS (17).
Attention: Always install a
new O-ring following any dis-
assembly.
6
Fastening the
appliance
Bring appliance into installa-
tion position and, using the
three provided fastening bolts
B 5.5 x 25, ensure the appli-
ance is firmly connected to a
suitable base (sawn wooden
board, laminated wooden
battens or metal base).
7
Warm air distribu-
tion and circulating
air return
Warm air distribution
The warm air system is de-
signed for each type of vehi-
cle individually, on a modular
basis. There is an extensive
accessories program available
(refer here to our brochure).
You can obtain diagrams free
of charge from the Truma
Service Centre, showing opti-
mal installation suggestions
for warm air systems in all
current-type caravans and
mobile homes.
In the Trumatic C 6002 the
duct ÜR with 65 mm dia-
meter (Art.-no. 40230-00)
must be connected at all
4 warm air outlets.
With the Trumatic C 3402, all
four or only three of the hot
air outlets can be assigned.
The unassigned hot air outlet
is closed off by means of the
closure cover VD (Art.-no.
40352-00).
2
Exhaust duct
For the Trumatic C only use
the Truma exhaust duct AA-3
(Art.-no. 39320-00) or, for
boat installation, the Truma
stainless steel exhaust duct
AEM 3 (Art.-no. 39360-00)
and the combustion air supply
duct ZR (Art.-no. 39580-00),
as the appliance has only
been tested and approved
with these ducts.
Attention: The length specifi-
cations refer to the combusti-
on air intake duct (Ref. no. 5).
Cut ducts to lengths so that
these project out of the open-
ing for the cowl during instal-
lation. Cut the exhaust duct
(1) so that it is 10 cm longer
(5 cm longer for shorter ex-
haust ducts measuring up to
70 cm). This avoids elonga-
tion and a tension load on the
exhaust duct.
Permissible duct
lengths
Fig. A: For the wall cowl the
duct lengths can be routed
from min. 50 cm to max.
100 cm as ascending duct in
whichever way required, or
descending by max. 5 cm.
Duct lengths of min. 100 cm
to max. 150 cm must be
ascending at an angle of at
least 45°.
Fig. B: Roof cowl duct
lengths of up to max. 230 cm
must be ascending at an an-
gle of at least 45°.
3
Connection of the
exhaust double duct
to the appliance
Fig. D: Press end of exhaust
duct (1) together so that win-
ding touches winding. Slide
clamp (4) over the exhaust
duct (1) and slide clamp (7)
over combustion air supply
duct (5). Slide exhaust duct
over the O-ring (2) onto the
connection fitting (3). Engage
clamp (4) and screw on. Slide
combustion air supply duct
(5) onto connection fitting (6)
and fasten with clamp (7).
Attention: Always install a
new O-ring following any dis-
assembly.

7
For the connection to the wa-
ter heater and electrical safe-
ty/drain valve, always use
hoses which are resistant to
pressure and hot water (e.g.
Truma water heater hose
SBH, foodproof and pressure
resistant up to 3.5 bar) with
an inside diameter of 10 mm.
For fixed pipe routing (e.g.
John Guest System) Truma
can provide the water con-
nectors (42), the safety/drain
valve (36) and a non-return
valve (33 + 34) with a straight
10 mm diameter tap connec-
tor as special accessories.
When connecting to a central
water supply (rural or city
mains) or if using more pow-
erful pumps, a pressure re-
duction valve must always be
installed which prevents pres-
sures above 2.8 bar from de-
veloping in the water heater.
Attention: Route water ho-
ses as short as possible and
free of kinks. All hose con-
nections must be secured
with hose clamps (also cold
water hoses!) The thermal
expansion of the water can
cause pressures of up to
3.5 bar before the overpres-
sure safety device in the safe-
ty/drain valve reacts (also in
submergible pumps).
For fastening the hoses to the
wall or floor we recommend
using the hose clips (Art.-no.
40710-00), which also permit
frost-proof routing of water
hoses on the hot air distribu-
tor pipes of the heater.
Note: In order to guarantee
complete emptying of the
water content and ongoing
sealing tightness of the water
hoses on the device, the
screw connection elements
provided must always be
used.
The angled connection ele-
ment (with venting valve,
Fig. K) is connected to the
upper hot water connec-
tion, and the straight con-
nection is connected to the
cold water connection.
Always route all water
pipes in such a way that
they descend to the safe-
ty/drain valve! There shall
be no guarantee claims for
damage caused by frost!
Installation of the
electrical safety/drain
valve
The electrical safety/drain
valve must be installed in the
heated area in the direct
vicinity of the appliance, in a
place which is easily acces-
sible for the user.
Attention: When choosing
the location, make sure that
the safety/drain valve is not
installed in the vicinity of oth-
er heat sources (e.g. power
packs)!
Fig. G: Drill a hole measuring
18 mm in diameter in the
floor of the vehicle. Mount
drain hose on drain connec-
tion fitting and pass through
the floor. Fasten valve with
2 screws. Drain directly to the
outside at a position protect-
ed against splash water (ap-
ply splash guard, if neces-
sary).
Routing of water pipes
Fig. G: Connect the cold wa-
ter supply (35) to the safety/
drain valve (36). The direction
of flow is of no significance.
Attention: The water hoses
must be routed free of ten-
sion to ensure satisfactory
operation of the safety/drain
valve!
Screw straight screw fitting
to cold water connecting pipe
(lower pipe) and screw elbow
connection with integrated
vent valve to hot water con-
necting pipe (upper pipe).
Fig. K: Slide on nut (37),
clamping ring (38) and O-ring
(39). Join screw fitting and
connecting pipe and tighten
with nut (37).
Fig. H + J: Provide hose con-
nection (40) for cold water
supply between safety/drain
valve (36) and supply on wa-
ter heater.
Route the hot water supply
(41) from the elbow connec-
tion with integrated vent
valve (42) to the hot water
consumers.
Fig. K: Push the venting
hose, external diameter
11 mm (43), onto the hose
grommet of the venting valve
(44), and lay it to the outside
without any kinks. Ensure
that the bend radius is not
smaller than 40 mm.
Cut off breather hose approx.
20 mm beneath the vehicle
floor, at an angle of 45° facing
the direction of travel.
10
Installation of the
control panel
Attention: When using con-
trol panels which are specific
to the vehicle or the manufac-
turer, the electrical connec-
tion must be established in
accordance with the Truma
interface descriptions. Any
modification made to the
Truma components pertaining
to this will lead to the invali-
dation of the guarantee, as
well as to the exclusion of
any claims for liability. The
installer (manufacturer) is re-
sponsible for providing in-
structions for use for the user
as well as for identification
printing on the control panels.
When choosing the location,
make sure that neither the
front nor rear of the control
panel is exposed to direct
heat radiation.
If the control panel can only
be installed behind curtains
or similar location where tem-
perature fluctuations may oc-
cur, it is necessary to use a
remote sensor for the room
temperature (refer to opera-
ting instructions).
Length of connecting cable
3 m.
An extension cable measur-
ing 5 m in length is also avai-
lable, if necessary (providing
an overall length of 8 m in
combination) as well as a
control panel frame for „con-
cealed assembly“ of the con-
trol panel and timer (refer to
operating instructions).
Drill a hole measuring 15 mm
in diameter for the cable
leadthrough and pass the ca-
ble through. Connect to con-
trol panel.
Remove control knob. Fasten
control panel with the two
screws and mount control
knob again.
Route the control panel cable
to the appliance. Unscrew co-
ver of electronic control unit.
Attach plug of control panel
cable and screw cover back on.
11
Electrical
connection 12 V
Electric cables, switching
units and control units for
heaters must be arranged in
the vehicle in such a way that
their satisfactory operation
cannot be adversely affected
under normal operating con-
ditions. All cables leading to
the outside must be splash
proof at the leadthrough
opening.
Prior to working on elec-
tric components the appli-
ance must be disconnect-
ed from the power supply.
Switching off at the con-
trol panel is not sufficient!
When carrying out electric
welding work on the body
the appliance connection
must be disconnected from
the vehicle electrical system.
Attention: If the connec-
tions are transposed there
is a risk of cable burning.
This also rules out any
guarantee or liability
claims.
The red cable is positive,
the blue cable is negative!
Connect the appliance to the
fused vehicle electrical sy-
stem (central electrical sy-
stem 10 A) using the 2 x
1.5 mm
2
cable, for lengths
over 6 m use 2 x 2.5 mm
2
ca-
ble. Negative cable to central
ground. For direct connec-
tion to the battery the posi-
tive and negative cable must
be fused. Connections in
Faston terminals, fully insu-
lated (motor vehicle flat con-
nector system, 6.3 mm).
Do not connect any other
consumers to the supply
line!
When using power packs,
please observe that the
appliance is only to be oper-
ated with safety extra-low
voltage in accordance with
EN 60742!
Note: When connecting sev-
eral 12 V devices we recom-
mend the electronically con-
trolled Truma Power Pack NT
(Art.-no. 39900-01). The Tru-
ma power pack (6 A continu-
ous current) is also suitable
for trickle charging of lead-
acid batteries (not gel batter-
ies!). Other chargers are only
to be used with a car battery
12 V acting as buffer. When
calculating the power re-
quirement always consider
the starting currents: The
peak performance of power
packs can differ. A ripple
content U
Br
≤ 1 V with load
is possible.
Tip: For saving the battery
we recommend using solar
collectors. Please ask for in-
formation from your dealer.

8
Electrical connection
of the safety/drain
valve
Fig. G: Connect the valve
with the red continuous cur-
rent cable (+) to the fused ve-
hicle power supply (1 A).
Connect the 2-pin cable with
double connector (54) to the
control unit. The brown cable
(55) is provided for the remote
control of the safety/drain
valve (refer to operating in-
structions - accessories).
12
230 V electrical
connection
(special version)
Attention: The electrical con-
nection is only to be carried
out by an expert (in Germany,
acc. to VDE 0100, Section 721).
The information given here is
not intended as instructions
for you to carry out. It is for
assisting the expert assigned
to carry out the job, acting as
auxiliary information when
connecting the appliance!
Connection to the mains sup-
ply is effected by means of
cables 3 x 1.5 mm
2
(e.g. hose
line H05VV-F) to a distributor
box (not included in the
scope of supply).
Always make sure to connect
carefully, observing the cor-
rect colours!
For maintenance and repair
work a disconnecting device
must be provided on the vehi-
cle for all-pole disconnection
from the power supply, with
at least 3 mm contact clear-
ance.
Mount splitting box near to
the appliance - on the vehicle
floor or on the wall (length of
cable: 90 cm).
Mount control panel in such a
way that it is not exposed to
direct heat radiation form the
heater (cable length: 2.5 m).
Drill a hole measuring 8 mm
in diameter for the cable
leadthrough, pass the cable
through and fasten control
panel with the two screws.
Connect control panel cable,
230 V cable and heating
collar cable as shown in the
diagram.
1 = Control panel cable
2 = Supply 3 x 1.5 mm
2
3 = Heating collar cable
4 = brown
5 = green
6 = blue
7 = yellow
8 = white
9 = yellow/green
Attention: All cables must
be secured with cable clips.
13
Function check
After installation, check the
gas supply line for leaks ac-
cording to the pressure drop
method. Then check all func-
tions of the appliance, as speci-
fied in the operating instruc-
tions, in particular the water
content draining function.
There shall be no claims
under guarantee for dam-
age caused by frost!
14
Warning information
The installer or vehicle owner
must apply the yellow sticker
with the warning information,
which is enclosed with the
appliance, to a place in the
vehicle where it is clearly visi-
ble to all users (e.g. on the
wardrobe door)! Ask Truma to
send you stickers, if neces-
sary.
/