Page is loading ...

Water Tech
TM
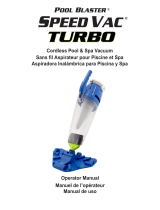
Handheld Pool & Spa Cleaner
Use and Care Manual
POOL BLASTER
®
MAX
IMPORTANT: DO NOT RETURN THIS PRODUCT TO THE STORE
Should you have any problems or questions concerning your product
you should contact Water Tech’s Customer Service Division toll free in the U.S. at
1-800-298-8800 or via fax at 1-800-488-0700
or via the web at www.PoolBlaster.com

Warning
This device complies with Part 15 of the FCC Rules.
Operation is subject to the following two conditions:
(1) This device may not cause harmful interference, and
(2) this device must accept any interference received,
including interference that may cause undesired
operation.
NOTE: This equipment has been tested and found to
comply with the limits for a Class B digital device, pursu
-
ant to Part 15 of the FCC Rules. These limits are de-
signed to provide reasonable protection against harmful
interference in a residential installation. This equipment
generates, uses and can radiate radio frequency energy
and, if not used in accordance with the instructions, may
cause harmful interference to radio communications.
However, there is no guarantee that interference will not
occur in a particular installation, If this equipment does
cause harmful interference to radio or television recep
-
tion, which can be determined by turning the equipment
off and on, the user is encouraged to try and correct the
interference by one or more of the following measures:
- Reorient or relocated the receiving antenna.
- Increase the separation between the equipment and
receiver.
- Connect the equipment into an outlet on a circuit
different than that to which the receiver is connected.
- Consult the dealer or an experienced radio/TV
technician for help.
NOTE: Changes or modifications not expressly approved
by the party responsible for compliance could void the
user’s authority to operate the equipment.
2

CONGRATULATIONS on your purchase of a top-quality Water Tech
product which has been thoroughly tested to meet our exacting
quality control standards.
The Pool Blaster vacuum is powered by Nickel-Metal Hydride bat
-
teries. These batteries will operate at their peak after the second
or third charge. A precise amount of space is left open in the Pool
Blaster body to properly ventilate and cool the batteries, seals and
drive system.
Please take care to tighten the On/Off knob when turning the unit
on and before you submerge the unit in water to prevent any water
from entering the motor box. From time to time, water may enter
the motor box. To drain any water that may enter the motor box,
allow all the water to drain from the exterior vacuum area than re-
move the On-Off Knob and turn the machine so the knob is towards
the floor and tilt side to side in all directions. The amount of water
may be very small or not noticed at all.
If water has entered the motor box area use a blow dryer on warm
setting to dry any moisture build-up on the inside of the motor box.
Water entering the Pool Blaster body presents no safety hazard and
should be drained occasionally to avoid any chance of long-term
corrosion. The batteries and motor in the Pool Blaster are long lasting
and proper care will help to prolong the life of your appliance.
These guidelines and safeguards help insure that your new Pool
Blaster operates effectively. Please read all instructions carefully be
-
fore using your Pool Blaster. Please take a few moments to review the
following IMPORTANT INFORMATION before using this tool.
Before Initial Use
3

SERVICE & IMPORTANT SAFEGUARDS
Service Information
WARNING: Any repairs requiring disassembly should
be performed by a Water Tech Authorized Service Cen-
ter. For repairs please go to www.watertechcorp.com for
more information or call 1-800-298-8800.
WARNING: To reduce the risk of fire, electrical shock,
injury, or damage to your machine:
Do not use if unit is damaged in any way.
Use this product only for its intended use as
described in this manual. Use only Water Tech
accessories and filters.
Never leave your Pool Blaster plugged in for long
term storage.
NEVER LEAVE YOUR Pool Blaster IN WATER WHEN IT
IS “OFF” OR HAS RUN OUT OF BATTERY POWER.
Do not use your Pool Blaster for pool openings;
the Pool Blaster is designed for general mainte
-
nance of your pool or spa.
The Pool Blaster is designed for underwater use
only. Do not attempt to use your Pool Blaster to
clean anything other than your pool or spa. It is
not intended for use as an all-purpose vacuum
cleaner.
Close supervision is necessary when used near
children. Do not allow this vacuum cleaner to
be used as a toy.
This vacuum creates suction. Keep hair, loose
clothing, fingers, and all parts of body away from
openings and moving parts.
Unit must be submerged in water to operate
properly.
When not in use, store the Pool Blaster indoors in
a clean, dry place. Do not leave underwater, in
direct sunlight, or exposed to extreme tempera
-
tures.
You can operate the Pool Blaster without its
vacuum head attachment, but when using the
vacuum head attachment, make sure that ei
-
ther the supplied wheels or brushes are inserted
in place.
Do not use without filter bag/seal ring and nose
cap in place.
Replace damaged filter bag/seal ring promptly.
Avoid picking up hard, sharp objects with the
vacuum. They may damage the vacuum and
the filter bag.
Do not use to pick up toxic substances, flam
-
mable or combustible liquids such as gasoline,
or operate in the presence of explosive or flam
-
mable fumes.
Never insert or drop any object into any opening
on the device. Keep all openings free of leaves,
rocks, or anything that may reduce water flow.
Do not use on or near hot surfaces.
Use extra care when cleaning on stairs.
Make sure the Pool Blaster is unplugged from
the
charger and in the “off” position before
clean-
ing, filter change or any other routine mainte
-
nance.
While Pool Blaster is charging, do not handle with
wet hands or without shoes.
Only use the charger supplied to recharge this
vacuum. Do not use the supplied charger with
any other appliance.
To protect against risk of electrical shock, do not
put charger in water or other liquid.
To avoid damage to the charger and cord,
never carry the charger by the cord or yank to
disconnect from an outlet. Instead, firmly grasp
the charger body and pull to disconnect. Do
not pull cord around sharp edges or corners.
Do not allow the cord to hang over the edge of a
table or counter or touch hot surfaces.
Do not operate with a damaged cord or char-
ger.
Do not use or store charger outdoors. Charge
your Pool Blaster indoors in a clean, dry place.
Do not expose charger to rain, or extreme tem
-
peratures.
For best results, operate the charger in a location
where the temperature is more than 50 degrees
F but less than 100 degrees F.
Disconnect charger from power supply when
not in use, and before any routine cleaning or
maintenance.
The use of extension cords is not recommended.
Plug the charger into a properly grounded stan
-
dard electrical outlet (120v/60Hz US, 240 volts,
50Hz International) only.
If vacuum cleaner is not working as it should,
or has been dropped or damaged in any way,
return it to a service center before using. Call
1-800-298-8800 for a center nearest you.
This product contains a sealed nickel-metal hy
-
dride battery. Do not incinerate battery as it will
explode at high temperatures. Always dispose
of the battery in accordance with your state law.
Leaks from a battery cell can occur under
extreme conditions. If the battery liquid gets
on the skin, wash immediately with water. If it
gets in your eyes, immediately flush your eyes
with a mild solution of baking soda and water
and seek medical attention.
4

ITEM No. DESCRIPTION PART No. QTY.
1 Vacuum Head PBA006 1
2 Vacuum Head Brushs PBW049 6
3 Vacuum Head Wheels PBW050 5
4 Nose Cap PBA002 1
5 All Purpose Filter Bag PBW022AP
1
w/ Seal Ring
6 Pool Blaster
PBA005 1
7 Battery Charger PBA099* 1
8 Spring Clip PBW041 1
ADDITIONAL PARTS AVAILABLE FOR PURCHASE
Sand & Silt bag (part No. PBW022SS)
Microfilter Bag (part No. PBW022MF), to be used in
conjunction with the Sand & Silt bag
Shallow Water Hose Attachment (part No. PBASHA)
* U.S. Charger (part No. PBA099L)
* European 230V Charger (part No. WT3843)
To purchase, contact your retailer or call us at
(800)298-8800 or see us on the web at
www.PoolBlaster.com
5

Charging the Battery Pack
PRECAUTIONS:
• Make sure power supply is normal household
voltage, 120 volts, 60 Hz
(240 volts, 50Hz International), AC only.
• Do not handle Pool Blaster while charging with
wet hands or without shoes.
• Do not use or store your charger outdoors.
Charge battery indoors in a clean dry place. For
best results, your Pool Blaster battery should be
charged in a location where the temperature is
above 50
o
F and below 100
o
F.
• Only use the charger supplied to recharge this
vacuum. Do not use the supplied charger with
any other appliance or damage may occur.
• Disconnect Pool Blaster from power charger
when not in use.
• Unplug the charger from outlet before any rou-
tine cleaning or maintenance.
• The use of extension cords is not recommended.
Plug the charger into a properly grounded stan
-
dard electrical outlet (120v/60Hz US, 240 volts,
50Hz International) only.
• To protect against risk of electrical shock, do not
put unit charger in water or other liquid.
• To avoid damage to the charger and cord,
never carry the charger by the cord or yank to
disconnect from an outlet. Instead, firmly grasp
the charger body and pull to disconnect. Do
not pull cord around sharp edges or corners.
• Do not allow the cord to hang over the edge of
a table or counter or touch hot surfaces. The
vacuum should be placed or mounted away
from such hot surfaces.
Charging The Battery Pack For The First Time
Only charge the Pool Blaster with the charger
provided with the unit. The charger provided is
specially designed for the Pool Blaster.
Please note that the Battery Pack for your Pool
Blaster has been shipped in a low voltage condition.
You must charge the Pool Blaster Battery Pack
for 12 Hours Before Initial Use
TO RECHARGE THE CLEANER
1.Turn the knob counterclockwise to remove the On-Off
Knob. This will expose the charging jack connection.
NOTE: When removing the On/Off knob it is normal to
hear air escaping. The air inside has simply expanded
from being heated by the motor.
2.
Connect the lead plug from the charger to the charging
jack on the Pool Blaster.
3. Connect the charger to the appropriate electrical outlet.
The Pool Blaster should be re-charged for 10 - 12 hours.
4. After charging, ensure that the On-Off knob is fully
secure and turned to the “On” position before attempt-
ing to use your Pool Blaster.
5. The ON-OFF knob should remain disconnected from the
unit and left hanging form the attached lanyard until the
unit is ready to be used.
Do Not leave the unit plugged into the charger for more
than 24 hours.
CAUTION: Replace the ON-OFF knob tightly before plac-
ing the Pool Blaster in water. Placing the Pool Blaster in
water without tightening the ON-OFF knob so that the unit
is “ON” will void your warranty.
BATTERY LIFE
• Your battery pack should give you many hours
of use. If the motor, batteries or charger stop
working, please review the warranty information
and/or read the Commonly Asked Questions.
• The batteries are factory sealed in the motor box,
and CANNOT BE REPLACED. Do not attempt in
any way to destroy or disassemble the motor box
or any of its components. Under no circumstanc
-
es should you attempt to open the battery pack
and replace the batteries yourself.
SETTING UP YOUR POOL BLASTER FOR USE CHARGING YOUR CLEANER
6

Inserting Wheels and Brushes in the Vacuum Head
Your Pool Blaster has been configured with wheels and
brushes at the factory in a manner which we have found
perform best in most swimming pool applications.
Should you wish to experiment with different configurations
you can refit the head with just wheels or just brushes with
the Front Wheel.
NOTE: Inserting the wheels into the vacuum head may
require a good deal of force. If you have trouble, you may
find it easier to insert them by placing the wheel on a hard
surface and pushing down on the head.
CAUTION: Wheels OR Brushes with Front Wheel
must be installed prior to use. Water Tech is NOT
responsible for damages to your pool if neither the
wheels nor brushes with Front Wheel are installed in
the vacuum head before use.
Inserting the Filter Bag and Nose Cap
• Place the Pool Blaster on its end on a stable and
secure surface.
• Place the filter bag/seal ring (part no.PBW022AP)
into the Pool Blaster, as shown in diagram. Make
sure the rubber seal ring sits on the funnel. All of
the filter bag must be inside the funnel to ensure
the head closes fully.
• Close the latch squeezing the filter bag/seal ring
in between.
• Never use the Pool Blaster without the filter bag
properly installed. This will damage the impeller
and void the warranty
NOTE: You should not need to apply excessive force in
order to close the latch. If you have trouble, make sure the
filter bag is not between the seal and the nose cap or fun-
nel and there are no other obstructions such as sand.
SETTING UP YOUR POOL BLASTER FOR USE
PREPARING THE VACUUM HEAD /
INSERTING THE FILTER BAG
Vac Head
with Wheels
only
Vac Head
with Brushes
and Front
Wheel only
Vac Head with Wheels
and Brushes as provided
with you Pool Blaster
7

HOW TO USE YOUR POOL BLASTER
CAUTION: The Pool Blaster is designed for under
water use only.
OPERATING TEMPERATURES
Unit must be submerged in water to operate properly.
Maximum operating temperature is between +5˚C (41˚F)
and+40˚C (104˚F). Maximum operating depth is (15 ft).
Your Pool Blaster is designed for use in 3 different ways to
vacuum your pool or spa:
A.
Vacuum using the handle and the vacuum head removed.
B. Vacuum using the handle and attached vacuum head,
with either wheel or brush attachments depending on
pool type.
C. Vacuum using a standard pool accessory pole (not
supplied) with the attached vacuum head.
Caution: Vacuum Head must be used when using a pole.
WARNING: Never use your Pool Blaster without
the filter bag/seal ring and nose cap properly in place.
Doing so will VOID the warranty.
Using a standard pool pole
The pole attachment on your Pool
Blaster is designed to accommodate
any standard pole. To attach a pole,
simply press down on the alignment
pins on the pole retaining spring clip.
Aligning the holes, slide the pole onto
the Pool Blaster and release the clip.
WARNING: Do not lean on pole or use pole to
support weight.
Once your Pool Blaster is set-up for use, you may put it in
your pool or spa.
• Bring your Pool Blaster to the side of the Pool or
Spa and turn it on by turning the
On-Off knob all the way to the “On” position. This
must be done outside of the
water before it is submerged.
• Once the Pool Blaster is “On” it can be com
-
pletely submerged in water and is ready for use.
• This appliance is designed to be in water only
when in the “ON” position and has battery power.
Excessive leaking can occur when not running
and void the warranty. Never leave your Pool
Blaster in the water when it is off.
NOTE: There are two ways to remove the unit from the
pool:
WHEN USING HANDLE: Lift from pool with the nose facing
up to allow the water to escape from the back and sides.
WHEN USING A POOL POLE: Remove the unit from the
pool with the bottom facing upwards and the handle fac-
ing down. This will allow the water to escape and keep the
dirt inside
Cleaning the reusable filter bags
For maximum cleaning efficiency the filter bag/seal ring
should be checked, emptied, and cleaned after each
use or whenever you notice the performance of you Pool
Blaster declining.
To clean the filter bag
• Unplug the Pool Blaster from the charging outlet
before changing the filter or performing any
other routine maintenance.
• Place the Pool Blaster on its end (remove the
vacuum pole, if attached).
• Unlatch the nose cap
• Remove the filter bag/seal ring by pulling it out of
the funnel.
• Invert the filter bag/seal ring, shsake out the large
debris and rinse with a garden hose or in a sink.
Note: Do not clean in a washing machine or
with detergent.
• Re-insert the filter bag when finished.
• Note: Your reusable filter bag should be re
-
placed if the seal ring is worn or if the bag is torn.
Choosing the Proper Filter Bag
Standard All-Purpose Filter Bag
The Pool Blaster, with its Standard Filter Bag is intended
for routine pool maintenance only. Should there be an
excessive amount of debris (ie. when opening the pool for
the season, cleaning following major storm activity or other
high level debris occurances) be aware that you will have
to empty the Fliter Bag much more often than normal. It
may take several cleaning and recharging cycles to clean
your pool.
Microfilter Bag
The Microfilter Bag should only be used to remove fine
sand, silt, algae and other small particles from your pool.
Be aware that due to the high degree of filtration that this
bag affords. It fills much more rapidly than the All-Purpose
bag and therefore must be emptied frequently during
pool cleaning to insure optimum performance.
8

MAINTENANCE
Important Tips:
• Store your Pool Blaster in a clean, dry place when not
in use. Do not leave it underwater, in direct sunlight, or
exposed to extreme heat or cold.
• You may clean the Pool Blaster body with soap and
water. Avoid using solvents when cleaning plastic
parts. Most plastics are susceptible to damage from
various types of commercial solvents and may be
damaged by their use. Use clean cloths or paper
towels to remove dirt, dust, oil, grease etc.
• The On-Off knob should be periodically lubricated with
a silicon-based grease
• The ON/OFF knob should remain disconnected from
the unit and left hanging from the attached lanyard
until the unit is ready to be used.
CAUTION: Do not at any time let brake fluids, gasoline, pe-
troleum-based products, penetrating oils, etc. come in contact
with plastic parts. They contain chemicals that can damage,
weaken, or destroy plastic.
WARNING: Do not attempt to modify this tool or create ac-
cessories not approved for use with this tool. Any such alteration
or modification is misuse and could result in a hazardous condi
-
tion leading to possible serious injury. The batteries and motor
are factory sealed in the motor box, and CANNOT BE REPLACED.
Do not attempt in any way to destroy or disassemble motor box
or any of its components. Instead, take your Pool Blaster to an
authorized service center. Failure to follow these instructions may
void your warranty agreement.
• General maintenance of your Pool Blaster requires you
occasionally clean off the O-rings on the “ON-OFF”
knob and add silicone lubricant/sealant. This will ensure
easier turning and a water-tight seal. This lubricant is
available at your local pool & spa or hardware retailer.
• In the Nose Cap (Part No. PBA002) there is a Flapper
Valve. To keep the Nose Cap Flapper Valve moving
freely, clean the valve after every use. This will help
to keep dirt inside the Pool Blaster after the cleaner is
removed from the pool.
Service Information
NOTE: Any repairs requiring disassembly must be performed by
a Water Tech Authorized Service Center. For the repair center
nearest you call us toll free at 1-800-298-8800. Unauthorized
repairs will void the warranty.
Storing the Pool Blaster
NOTE: State of the art Nickel-Metal Hydride batteries power the
Pool Blaster. These are the same batteries used in many portable
phones. In order to properly ventilate and cool the batteries
and drive system a certain amount of space is left open in the
Pool Blaster body. As a result, from time to time, water may enter
the unit. In order to allow for any water to be drained you should
remove the On-Off Knob after each use, turn the machine so the
knob is towards the floor and tilt side to side in all directions. The
amount of water may be very small or not noticed at all. After
removing any water use a blow dryer on warm setting to dry any
moisture build-up on the inside of the motor box. Water entering
the Pool Blaster body presents no safety hazard and should be
drained to avoid any chance of long-term corrosion. The batter
-
ies and motor in the Pool Blaster are long lasting and proper care
will help to prolong the life of your appliance.
NOTE: Remove Pool Blaster from charger before storage.
When not in use, your Pool Blaster should be stored indoors, in a
clean dry location sheltered from direct sunlight, extreme tem
-
peratures and rain. Do not store the Pool Blaster in a garage or
anywhere the unit could freeze. Storing the Pool Blaster in areas of
high humidity can affect battery performance over time.
The ON/OFF knob should remain disconnected from the unit and
left hanging from the attached lanyard until the unit is ready to
be used.
For your convenience the Pool Blaster has an oval opening in the
pool pole adaptor on which you can hang the unit.
Long Term Storage
Follow the above storage instructions and unplug the charger
from the electrical outlet.
Your Pool Blaster should be charged once a month during long-
term storage to maintain the battery pack. DO NOT leave the
Pool Blaster charging for a period of more than 24 hours.
When charging for the first time after long-term storage, your
Pool Blaster may take 2-3 uses before maximum performance is
achieved.
The ON/OFF knob should remain disconnected from the unit and
left hanging from the attached lanyard until the unit is ready to
be used.
9

LIMITED WARRANTY
Water Tech Corp (“WT”) warrants this product, including supplied accessories against defects in material or workmanship for the time periods as set
forth below. Pursuant to this Limited Warranty WT will, at its option (i) repair the product to the original specifications or (ii) replace the product with a
new or refurbished product. In the event of a defect, these are your exclusive remedies. For purposes of this Limited Warranty, “refurbished,” means
a product or part that has been returned to its original specifications.
All Pool Blaster Battery Powered Pool & Spa Vacuums. For a period of one (1) year from the original date of purchase of the product, WT will, at
its option, repair or replace with new or refurbished product or parts, any product or parts determined to be defective.
Accessories. Included accessories are covered by this Limited Warranty for a period of 90 Days.
Instructions. Please retain the original box and internal packaging materials. To obtain warranty service, you must comply with the following
requisite instructions:
(1) Visit Water Tech Corp’s Customer Support Department at www.wtrma.com. You will be guided through the correct process on how to obtain the
required RMA# (Return Merchandise Authorization Number.) All customers must obtain an RMA number before any product will be accepted for
warranty service. If you need additional assistance please contact us by telephone: (800-298-8800) or email: [email protected].
(2) Package the unit with all accessories properly and securely in the original box.
(3) Attach your RMA number and Bar-Code you received from the website to the outside of the package. If you could not print the RMA number and
bar-code from the website you must write your RMA number in thick black indelible marker on two sides of the box.
(4) Send the package by USPS or express courier of choice to: Water Tech Corp. 44 West Ferris Street, East Brunswick, New Jersey 08816; (WT
suggests you insure the contents of your package.) WT is not responsible for lost, stolen or damaged property in transit to WT.
Repair/Replacement Warranty. This Limited Warranty shall apply to any repair, replacement part or replacement product for the remainder of the
original Limited Warranty period or for ninety (90) days, whichever is longer. Any parts or products replaced shall become the property of WT.
This Limited Warranty covers only product issues caused by defects in material or workmanship during ordinary consumer use; it does not cover
product issues caused by any other reasons, including but not limited to product issues caused by commercial use, acts of God, misuse, abuse,
limitations in technology, or modification of or to any part of the WT product. This Limited Warranty does not cover WT products sold AS IS or WITH
ALL FAULTS or consumables (such as batteries). This Limited Warranty is invalid if the factory-applied serial number has been altered or removed
from the product. This Limited Warranty is valid only in the United States and Canada.
EXPRESS LIMITATION: THIS LIMITED WARRANTY ONLY APPLIES IF THE PRODUCT WAS PURCHASED FROM AN AUTHORIZED
WATER TECH DEALER; THIS WARRANTY IS NOT TRANSFERABLE.
LIMITATION ON DAMAGES. WT WILL NOT BE LIABLE FOR ANY INCIDENTAL OR CONSEQUENTIAL DAMAGES FOR BREACH OF EXPRESSED
OR IMPLIED WARRANTY ON THIS PRODUCT.
DURATION OF IMPLIED WARRANTIES. EXCEPT TO THE EXTENT PROHIBITED BY LAW APPLICABLE LAW, ANY IMPLIED WARRANTY OF
MERCHANTABILITY OR FITNESS FOR A PARTICULAR PURPOSE ON THIS PRODUCT IS LIMITED IN DURATION OF THIS WARRANTY.
Some states do not allow the exclusion or limitation of incidental or consequential damages, or allow limitations or how long an implied warranty
lasts, so the above limitations or exclusions may not apply to you. This Limited Warranty gives you specific legal rights and you may have other
rights, which vary from state to state.
10

COMMON QUESTIONS
Q: The ON-OFF knob has become difficult to turn. What can
I do?
A: Clean off the O-rings and add silicone lubricant/sealant. This
will ensure easier turning and a better water tight seal. Refer
to the maintenance section for more information.
Q: Can my Pool Blaster be run out of water?
A: Yes, for a short period of time when you turn it on before
submegring in your pool or spa or when removing it from
the pool or spa..
Q: When I am cleaning my pool how do I know when the
Pool Blaster is out of battery power?
A: Most people can feel the Pool Blaster is running through
vibration in the vacuum pole or handle. To be sure you can
lift it out of the water to hear if it is running or not.
Q: How often should I clean out my Pool Blaster filter bag?
A: You can clean your filter bag as often as you like with no
ill effects. The filter bag can then be turned inside out and
rinsed with a hose or in a sink. Do not wash it in a washing
machine or with detergent. For more detailed instructions,
see “Cleaning Your Pool Blaster” instructions in this manual.
For best results, do this after each use, or whenever you notice
the performance of your Pool Blaster declining.
Q: Is it normal for me to hear air escaping out of the Pool
Blaster when I open the On-Off knob?
A: Yes, the powerful motor heats the air in the motor box,
which then expands, creating the air sound.
Q: How can I stop dirt from coming out of the nozzle when I
take the cleaner out of the water?
A: There are two ways to remove the unit from the pool when
done cleaning:
WHEN USING HANDLE: Lift from pool with the nose facing up
to allow the water to escape from the back and sides.
WHEN USING A VACUUM POLE: Remove the unit from the
pool with the bottom facing upwards and the handle facing
down. This will allow the water to escape and keep the dirt
inside.
Q: How can I prevent sand and silt from escaping through
the filter bag?
A: The Pool Blaster comes standard with an all-purpose filter
bag. A Sand and Silt bag (Part No. PBW022SS) or a Microfilter
bags are available. To purchase contact your retailer or
see our website at www.PoolBlaster.com.
Q: What if I put the Pool Blaster in the pool without the On-Off
Knob in place?
A: Do not operate your Pool Blaster if water gets inside the
machine. Put the Pool Blaster on its side to drain the water
out of the knob hole and tilt side to side to get the water out.
Do not use for at least 24 hours. If possible, you can speed
the drying process with a blow dryer. To avoid serious injury
or damage, do not replace the knob or attempt to charge
or operate your Pool Blaster until it is completely dry.
Q: Can I leave my Pool Blaster on the charger all the time?
A: After charging is complete, the Pool Blaster and charger
should be removed from the outlet. This will prevent over
-
charging and prolong the life of your battery pack. IMPOR
-
TANT: Disconnect the charger before storing your Pool Blaster.
Q: Can I replace the batteries myself?
A: Under no circumstances should you attempt to open the
motor housing or battery housing. The batteries and motor
are factory installed and sealed, and your rechargeable
battery should give you many hours of use. If your motor,
batteries, or charger stop working, take the Pool Blaster to an
authorized service center.
Q: Where can I buy replacement parts?
A: Look for original Water Tech replacement parts at your local
retailer or on the web at www.PoolBlaster.com.
Q: Will my pool chemicals hurt the Pool Blaster?
A: The Pool Blaster is designed to withstand pool chemicals
during its usage period. However, it should be rinsed off
with fresh water after it is removed from the pool. This will
increase the life of the filter bag/seal ring.
Q: Can I leave the Pool Blaster in the pool when not in use?
A: No. The Pool Blaster should be removed from the pool
and stored in a clean, dry place when not in use. This will
increase the life of your Pool Blaster and its accessories.
Q: What do I do if my Pool Blaster does not vacuum?
A: Make sure your Pool Blaster is completely submerged in the
water and the air is out of the clear funnel. The cleaner is
only designed to vacuum water and will not vacuum air.
If that does not resolve your situation please check the fol
-
lowing:
• Make sure the filter bag is clear of debris that may be
obstructing the flow.
•
Make sure the Pool Blaster knob is in the 12 o’clock “ON” position.
• Charge your Pool Blaster for at least 12 hours.
If none of the above help resolve the situation,
please call our Customer Service Division at
1-800-298-8800.
or see us on the web at
www.PoolBlaster.com
11

Water Tech Corp
44 West Ferris St.
East Brunswick, NJ 08816
USA
Toll Free: 1-800-298-8800 (US only)
Email: support@WaterTechCorp.com
www.WaterTechCorp.com
IMPORTANT: DO NOT RETURN THIS PRODUCT TO THE STORE
Should you have any problems or questions concerning your product you
should contact Water Tech’s Customer Service Division toll free in the U.S. at
1-800-298-8800 or via fax at 1-800-488-0700
or via the web at www.PoolBlaster.com
/