Russell Hobbs 19270-56 User manual

Type
User manual
108
Read the instructions, keep them safe, pass them on if you pass the appliance on.
Remove all packaging before use.
A IMPORTANT SAFEGUARDS
Follow basic safety precautions, including:
1 This appliance must only be used by or under the supervision of a responsible adult. Use and
store the appliance out of reach of children.
2 Don’t put the base unit in liquid. Don’t use the appliance in a bathroom, near water,
or outdoors.
3 Don’t put frozen meat or poultry in the steamer – defrost fully before use.
4 Fill the reservoir to max (1.2l). If you overfill, it may spit boiling water and you may damage
the steamer.
5 Don’t touch the hot surfaces of the base unit, lid, baskets, rice bowl, or tray. Use oven gloves
or a cloth, and lift them only by the handles.
6 Don’t reach over the appliance, and keep hands, arms, face, etc. clear of the escaping steam.
7 This appliance must not be operated by an external timer or remote control system.
8 Don’t cover the appliance or put anything on top of it.
9 Don’t line the baskets with paper, foil, etc. – you’ll block the steam holes.
10 Unplug the appliance when not in use, before moving and before cleaning.
11 Let the appliance cool down fully before moving or cleaning.
12 Don’t use accessories or attachments other than those we supply.
13 Don’t use the appliance for any purpose other than those described in these instructions.
14 Don’t operate the appliance if its damaged or malfunctions.
15 If the cable is damaged, it must be replaced by the manufacturer, its service agent, or
someone similarly qualified, in order to avoid hazard.
household use only
C PREPARATION
1 Sit the appliance on a stable, level, heat-resistant surface.
2 Route the cable so it doesn’t overhang, and can’t be tripped over or caught.
3 Steam will escape. Don’t put the appliance near curtains, under shelves or cupboards, or near
anything that might be damaged by the escaping steam.
4 Have plates or a tray handy to put the baskets on afterwards, as they’ll drip. This would be a
good time to set out serving spoons, tongs, etc. for emptying the baskets. Don’t forget the
oven gloves.
C FILLING
5 Fill the reservoir to max (1.2l). This’ll give you about 60 minutes steaming, enough time for
most foods.
6 Don’t add anything to the water. Seasonings, marinades, etc. should be added to the food,
not the steaming water. They won’t circulate with the steam, they’ll just concentrate in the
reservoir, possibly damaging the surfaces of the reservoir and element.
7 Fit the steam tube round the element, so that the element is in its centre.
8 Sit the tray on the base unit.
9 The tray fits only one way round, to allow for the control panel. It prevents juices from the
food reaching the element and reservoir.
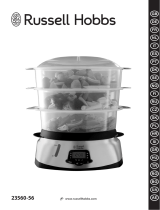
10 The basket handles are marked 1, 2, and 3. You may use 1, 2, or 3 baskets at a time.
a) Fit basket 1 on top of the tray
b) Put food in the basket.
c) Fit basket 2 on top of basket 1.
d) Put food in the basket.
109
e) Fit basket 3 on top of basket 2.
f) Put food in the basket.
g) Fit the lid.
be careful with flavours
11 Juices from the upper basket will drip into the basket below. Don’t put delicate flavours
below strong ones, or vegetables below greasy foods.
C CIRCULATION
12 To allow the steam to circulate:
a) pack food loosely in the baskets
b) whenever possible, use single layers of food
c) leave spaces between the pieces
d) when layering food in a basket, leave spaces between the pieces in each layer to let the
steam circulate through the layers
C UNIFORMITY
13 For uniform cooking:
a) Try to cut all pieces of food in a basket to roughly the same size.
b) Put larger pieces, or food with long cooking times, nearest the reservoir.
c) Put smaller pieces, or food with short cooking times, furthest from it.
C OVERCOOKING
14 Don’t worry too much about overcooking – steaming is a relatively gentle cooking method
and a few minutes extra generally won’t matter.
15 Don’t overcook fish – it’ll chew like rubber and taste like cardboard.
C COOKING
16 Put the plug into the power socket.
17 Turn the timer clockwise to the required time.
18 The light will glow.
19 Steam will start to fill the baskets.
20 When the timer returns to 0, a bell will sound, and the steamer will switch off.
C THE TIMER
21 The timer is clockwork, and it’s one-way only.
22 Don’t try to turn it anti-clockwise or you’ll break it.
23 It will continue to whirr till its spring has wound down.
24 Don’t worry about this – if the light is off, the element is off.
25 If you want to stop the appliance early, unplug it.
C FINISHED?
26 Unplug the appliance.
27 Everything will be hot – use oven gloves or a cloth – use the handles.
28 Steam and hot air will escape when you lift the lid. Tilt it slightly to direct the steam away
from you.
29 Put the lid on a plate or tray.
instructions
diagrams
4 vents
5 handle
6 lid
7 rice bowl
8 basket
9 tray
10 water
11 steam tube
12 element
13 pouring lip
14 reservoir
15 water level window
16 base unit
17 light
18 timer
110
30 Lift the baskets off and set them down on plates or a tray.
31 Remove the tray carefully – the juices will be hot, and they may stain if spilt.
32 Empty the reservoir via one of the pouring lips at the sides.
cooking times & food safety
33 These times are for a single layer of food. You'll need to experiment to find the times which
suit your favourite foods and food combinations.
34 Extend these times:
a) if 2 or 3 baskets are used – the steam has to heat more food
b) if food is layered within a basket
35 Generally, the further the food is from the element, the longer it’ll take to cook.
36 You’ll need to experiment to find the times and positions which suit your favourite foods and
food combinations.
37 Use these times purely as a guide.
38 Check that food is properly cooked before serving. If in doubt, cook it a bit more.
39 Cook meat, poultry, and derivatives (mince, burgers, etc.) till the juices run clear. Cook fish till
the flesh is opaque throughout.
40 You should cook leaf vegetables as little as possible, to keep them green and crisp. Plunging
them into iced water will stop the cooking process.
food (fresh) quantity time (minutes)
artichokes, fresh 2-3 40-45
asparagus 400g 10
green beans 400g 15-20
broccoli 400g 10
brussels sprouts 400g 15
cabbage (cored and quartered) 1 15
carrots (sliced) 400g 10-15
cauliflower 1 15
corn cobs 4 15
courgette (sliced) 400g 10
peas, shelled 400g 12
peppers, deseeded & sliced 1 8-10
potatoes (quartered) 900g 20
spinach 200g 6-8
mushrooms 200g 10-13
chicken (boneless) 400g 20-30
fish fillets 200g 10
fish steaks 200g 12-17
prawns 400g 6-8
lobster tail (frozen) 2 20-22
mussels 400g 10-15
, Don’t use mussels that are open prior to cooking. Steam until the shells open fully, and
discard any that aren’t open after cooking.
C THE RICE BOWL
41 Fill the rice bowl no more than half full with rice.
42 Add water to the rice bowl – one and a quarter times the volume of rice (the rice will absorb
some of the water).
43 Put the rice bowl in the topmost basket. If you put rice underneath other foods, juices from
those foods will alter the flavour of the rice, and the additional liquid may make it mushy.
44 Rice should take 15 to 20 minutes, depending on type, quantity, and personal taste.
45 Taste after 15 minutes, then cook for longer if necessary.
111
C OVER 60 MINUTES?
46 If you intend to steam for more than 60 minutes:
a) keep an eye on the water level and/or the timer, top up the reservoir with water at about
the half way mark, and reset the timer
or
b) set the timer for half the steaming time, then the bell will alert you to top up the reservoir
– don’t forget to reset the timer
topping up
c) Slowly pour water into one of the holes at the sides of the tray
d) Keep an eye on the water level – don’t let it get above max
C BOILING DRY
47 If the appliance boils dry, the thermostat will cut off power to the element.
48 The light will go off, but the timer will keep going.
49 The thermostat will cycle on and off till you remember to add water, or till the timer returns
to 0 and switches off.
50 Unplug the base unit, let it cool for a couple of minutes, then fill the reservoir with water and
start again.
51 When calculating the time needed, allow for the whole of the time already spent steaming,
and part of the time between running dry and restarting, as the cooking process won’t have
stopped immediately the reservoir ran dry.
52 If you watch the cooking process carefully, there’s no reason why the rescue operation
shouldn’t be 100% successful.
53 If it isn’t, then a piquant sauce should do the trick – try something with lemon or lime in it
first. If all else fails, ginger, garlic, or chilli will hide absolutely anything.
C STOPPING EARLY
54 Unplug the base unit from the power socket.
C CARE AND MAINTENANCE
55 Unplug the appliance and let it cool down before cleaning or storing away.
56 Wash the removable parts in warm soapy water, rinse well, drain, and air dry.
57 Wipe the base unit, inside and out, with a clean damp cloth.
58 Don’t put any part of the appliance in a dishwasher.
C DESCALING
59 Scale deposits may build up on the reservoir and element.
60 Ensure the kitchen is well ventilated, as heating vinegar causes an unpleasant smell.
61 Don’t fit the tray, baskets, rice bowl, or lid.
62 Fill the reservoir with 600ml white vinegar, plug it into the power socket, and set the timer to
20 minutes.
63 After the 20 minutes is up, leave it to cool completely, then pour out the vinegar and rinse the
reservoir several times with cold water, to remove all trace of the vinegar.
64 Dry the base unit thoroughly.
65 Don’t use anything other than white vinegar, and don’t use a proprietary descaler.
H ENVIRONMENTAL PROTECTION
To avoid environmental and health problems due to hazardous substances in electrical
and electronic goods, appliances marked with this symbol mustn’t be disposed of with
unsorted municipal waste, but recovered, reused, or recycled.
  • Page 1 1
  • Page 2 2
  • Page 3 3
  • Page 4 4
  • Page 5 5
  • Page 6 6
  • Page 7 7
  • Page 8 8
  • Page 9 9
  • Page 10 10
  • Page 11 11
  • Page 12 12
  • Page 13 13
  • Page 14 14
  • Page 15 15
  • Page 16 16
  • Page 17 17
  • Page 18 18
  • Page 19 19
  • Page 20 20
  • Page 21 21
  • Page 22 22
  • Page 23 23
  • Page 24 24
  • Page 25 25
  • Page 26 26
  • Page 27 27
  • Page 28 28
  • Page 29 29
  • Page 30 30
  • Page 31 31
  • Page 32 32
  • Page 33 33
  • Page 34 34
  • Page 35 35
  • Page 36 36
  • Page 37 37
  • Page 38 38
  • Page 39 39
  • Page 40 40
  • Page 41 41
  • Page 42 42
  • Page 43 43
  • Page 44 44
  • Page 45 45
  • Page 46 46
  • Page 47 47
  • Page 48 48
  • Page 49 49
  • Page 50 50
  • Page 51 51
  • Page 52 52
  • Page 53 53
  • Page 54 54
  • Page 55 55
  • Page 56 56
  • Page 57 57
  • Page 58 58
  • Page 59 59
  • Page 60 60
  • Page 61 61
  • Page 62 62
  • Page 63 63
  • Page 64 64
  • Page 65 65
  • Page 66 66
  • Page 67 67
  • Page 68 68
  • Page 69 69
  • Page 70 70
  • Page 71 71
  • Page 72 72
  • Page 73 73
  • Page 74 74
  • Page 75 75
  • Page 76 76
  • Page 77 77
  • Page 78 78
  • Page 79 79
  • Page 80 80
  • Page 81 81
  • Page 82 82
  • Page 83 83
  • Page 84 84
  • Page 85 85
  • Page 86 86
  • Page 87 87
  • Page 88 88
  • Page 89 89
  • Page 90 90
  • Page 91 91
  • Page 92 92
  • Page 93 93
  • Page 94 94
  • Page 95 95
  • Page 96 96
  • Page 97 97
  • Page 98 98
  • Page 99 99
  • Page 100 100
  • Page 101 101
  • Page 102 102
  • Page 103 103
  • Page 104 104
  • Page 105 105
  • Page 106 106
  • Page 107 107
  • Page 108 108
  • Page 109 109
  • Page 110 110
  • Page 111 111
  • Page 112 112
  • Page 113 113
  • Page 114 114
  • Page 115 115
  • Page 116 116

Russell Hobbs 19270-56 User manual

Type
User manual

Ask a question and I''ll find the answer in the document

Finding information in a document is now easier with AI