Milwaukee SM102 User manual
- Category
- Measuring, testing & control
- Type
- User manual

Milwaukee
Milwaukee
WARRANTY:
This instrument is warranted from all defects in
materials and manufacturing for a period of two
years from the date of purchase.
The probe is warranted for a period of six months.
If during this period the repair or replacement of
parts is required, where the damage is not due to
negligence or erroneous operation by the user, please
return the parts to either distributor or our office and
the repair will be effected free of change.
Note: We reserve the right to modify the design,
construction and appearance of our products without
advance notice.
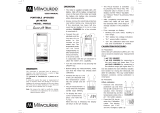
USER MANUAL
PORTABLE uP-BASED
pH METER
MODEL: SM102
Smart pH Meter
OPERATION:
• The meter is supplied complete with a
9V battery. Slide off the battery compart-
ment cover on the back of the meter
and install the battery while paying at-
tention to its polarity.
• Always remove the electrode protective
cap before taking any measurement. If
the electrode has been left dry, soak
the tip (bottom 2.5 cm) in rinse solution
(M10000B) for a few minutes to reacti-
vate it.
• Connect the pH
electrode and the
temperature probe
to the sockets on
the meter’s top.
The temperature
probe can be used
independently to
take temperature
measurements, or
it can be used in
conjunction with
the pH electrode to utilize the meter’s
ATC capability.
• Turn the instrument on by pressing the
ON/OFF key.
• Before taking any mea-
surements, make sure
that the meter has al-
ready been calibrated.
• Immerse the tip (2.5 cm)
of the pH electrode and
the temperature probe
into the sample and stir
gently.
• Take the pH reading when the hour-
glass symbol stops blinking.
• To display the mea-
sured temperature,
press and hold the
°C key.
When the key is released, the display
will return to the pH reading.
• The HOLD function is activated by
keeping pressed the HOLD key.
The measured value is frozen on
the display and the “HOLD” tag
lights up.
• After measurements, switch the
meter off and store the electrode
with a few drops of storage solu-
tion in the protective cap.
• Error message on display:
CALIBRATION PROCEDURE:
A) Preparation:
Reference solutions:
1. pH 7.01 (MA 9007)
2. pH 4.01 (MA 9004) for measuring
in the acid range (pH lower than 7)
or pH 10.01 (MA 9010) for measur-
ing in the alkaline range (pH higher
than 7).
Use two beakers for each reference so-
lution. One beaker for rinsing the
electrode, the other for calibration. This
way contamination between solutions
during calibration is minimized.
B) Procedure:
• Remove the electrode
protective cap and rinse
the tip with some
pH7.01 solution, then
immerse the electrode
and the temperature
probe into a pH7.01
buffer solution.
• Press the CAL key
to enter the Cali-
bration mode. The
display flashes
“pH 7.01” and the
hourglass lights up.
• Blinking full scale value: reading is
over range;
• “Eb”: battery low voltage indication;
• “Ec”: wrong buffer solution;
• “Clr”: the calibration data have been
lost and recalibration is needed.

Milwaukee
ISMIL102R1 01/2003
SPECIFICATIONS:
RANGE -2.00 to 16.00 pH
-5 to 70°C
RESOLUTION 0.01 pH / 0.1°C
ACCURACY (@25°C) ±0.02 pH / ±0.5°C
TYPICAL EMC DEV. ±0.02 pH / ±0.5°C
TEMPERATURE Automatic,
COMPENSATION 0 to 70°C
CALIBRATION Automatic, at 1 or 2 points
pH ELECTRODE MA911B/1 (included)
TEMPERATURE MA830R (included)
PROBE
ENVIRONMENT 0 to 50°C; RH 95% max.
BATTERY TYPE 1 x 9V alkaline (included)
BATTERY LIFE approx. 750 hours of use
AUTO-OFF after 8 minutes of non-use
DIMENSIONS 145 x 80 x 40 mm
WEIGHT 220 g (with battery)
Note: Pressing the CAL key again will
change the required buffer value,
making possible a single point cali-
bration at pH 4.01 or pH 10.01.
• Wait till the hourglass symbol on the
display turns off and the “pH” tag stops
blinking, then
press the CFM key
to confirm the off-
set calibration. “pH
4.01” will flash on
the LCD.
• Rinse the pH electrode
and the temperature
probe in the first pH4.01
beaker, then immerse
them into the second
pH4.01 beaker.
• Follow the same procedure if using the
pH10.01 solution; select the correct
buffer by pressing the CAL key.
• Wait till the hourglass symbol on the
LCD turns off, then press the CFM key
to confirm the slope calibration.
Notes:
• To exit the calibration mode, turn the
meter off by pressing the ON/OFF key.
• To perform a single point calibration
(offset) at pH7.01, press the ON/OFF
key when the second buffer is asked.
• After battery replacement, the meter dis-
plays the “Clr” message and
recalibration is needed.
BATTERY REPLACEMENT:
When the battery becomes so weak that
no reliable measurement can be guaran-
teed, the meter will display “Eb” for a while
and then turns off.
It is recommended to replace immediately
the battery.
Battery replacement must only take place
in a non-hazardous area using a 9V alka-
line battery.
Turn the meter off, slide
off the battery compart-
ment cover at the rear of
the meter and replace
the 9V battery with a new
one.
Make sure the battery
contacts are tight and
secure, seat the battery
in its compartment and
insert back the cover.
OPTIONAL ACCESSORIES:
MA9004 pH4.01 buffer solution,
220 mL bottle
MA9007 pH7.01 buffer solution,
220 mL bottle
MA9010 pH10.01 buffer solution,
220 mL bottle
MA9015 Electrode storage solu-
tion, 220 mL bottle
MA9016 General cleaning solu-
tion, 220 mL bottle
M10000B Rinse solution, 20 ml
sachet (25 pcs.)
MA911B/1 pH electrode with BNC
connector and 1 m
cable
MA830R Temperature probe
MA950 Portable meter wall fix-
ing kit
-
 1
1
-
 2
2


Milwaukee SM102 User manual
- Category
- Measuring, testing & control
- Type
- User manual
Ask a question and I''ll find the answer in the document
Finding information in a document is now easier with AI
Related papers
-
Milwaukee MW102 User manual
-
-
-
-
Milwaukee Tools MW101 User manual
-
-
-
-
-
Other documents
-
 Milwaukee Instruments MW102 User manual
-
Hanna Instruments HI9124,HI9125 Owner's manual
-
-
-
-
-
-
-
Hanna Instruments HI122-01 Owner's manual
-
