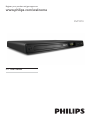
Philips DVP3310 lets you enjoy a wide range of media formats including DVDs, music CDs, photos, and videos from a USB flash drive. Progressive scan provides a more film-like, sharper picture. Connect this player to your home theater system or amplifier via coaxial digital audio out for surround sound.
Philips DVP3310 lets you enjoy a wide range of media formats including DVDs, music CDs, photos, and videos from a USB flash drive. Progressive scan provides a more film-like, sharper picture. Connect this player to your home theater system or amplifier via coaxial digital audio out for surround sound.


-
 1
1
-
 2
2
-
 3
3
-
 4
4
-
 5
5
-
 6
6
-
 7
7
-
 8
8
-
 9
9
-
 10
10
-
 11
11
-
 12
12
-
 13
13
-
 14
14
-
 15
15
-
 16
16
-
 17
17
-
 18
18
-
 19
19
-
 20
20
-
 21
21
-
 22
22
-
 23
23
-
 24
24
-
 25
25
-
 26
26
-
 27
27
-
 28
28
-
 29
29
-
 30
30
-
 31
31
-
 32
32


Philips DVP3310 lets you enjoy a wide range of media formats including DVDs, music CDs, photos, and videos from a USB flash drive. Progressive scan provides a more film-like, sharper picture. Connect this player to your home theater system or amplifier via coaxial digital audio out for surround sound.
Ask a question and I''ll find the answer in the document
Finding information in a document is now easier with AI
Related papers
-
Philips DVP3310/94 User manual
-
-
-
-
-
Philips HTS3377 User manual
-
Philips DVP3111/12 User manual
-
Philips hts6520 User manual
-
-
Other documents
-
Samsung DVD-P247A User manual
-
-
-
-
-
-
Samsung DVD-P345 User manual
-
Samsung DVD-P145 User manual
-
Denon DVD-1730 Operating Instructions Manual
-
 Musical Fidelity DVD-1 User manual
