Samsung B2230H User manual

Category
LED displays
Type
User manual
SyncMaster B2230H,B2330H,B2430H
LCD Monitor
User Manual
The color and the appearance may differ depending on the
product, and the specifications are subject to change
without prior notice to improve the performance.
Table Of Contents
MAJOR SAFETY PRECAUTIONS
Before You Start . . . . . . . . . . . . . . . . . . . . . . . . . . . . . . . . . . . . . . . . . . . 1-1
Custody and Maintenance . . . . . . . . . . . . . . . . . . . . . . . . . . . . . . . . . . . 1-2
Safety Precautions . . . . . . . . . . . . . . . . . . . . . . . . . . . . . . . . . . . . . . . . . 1-3
INSTALLING THE PRODUCT
Package Contents . . . . . . . . . . . . . . . . . . . . . . . . . . . . . . . . . . . . . . . . . 2-1
Installing the Stand . . . . . . . . . . . . . . . . . . . . . . . . . . . . . . . . . . . . . . . . 2-2
Removing the Stand . . . . . . . . . . . . . . . . . . . . . . . . . . . . . . . . . . . . . . . . 2-3
Installing the Stand for the Wall Mount . . . . . . . . . . . . . . . . . . . . . . . . 2-4
Connecting with a PC . . . . . . . . . . . . . . . . . . . . . . . . . . . . . . . . . . . . . . . 2-5
Connecting an HDMI cable . . . . . . . . . . . . . . . . . . . . . . . . . . . . . . . . . . 2-6
Kensington Lock . . . . . . . . . . . . . . . . . . . . . . . . . . . . . . . . . . . . . . . . . . 2-7
USING THE PRODUCT
Setting the Optimal Resolution . . . . . . . . . . . . . . . . . . . . . . . . . . . . . . 3-1
Standard Signal Mode Table . . . . . . . . . . . . . . . . . . . . . . . . . . . . . . . . . 3-2
Installing the Device Driver . . . . . . . . . . . . . . . . . . . . . . . . . . . . . . . . . . 3-3
Product Operating Buttons . . . . . . . . . . . . . . . . . . . . . . . . . . . . . . . . . . 3-4
Using the Screen Adjustment Menu (OSD: On Screen Display) . . . . 3-5
INSTALLING THE SOFTWARE
Natural Color . . . . . . . . . . . . . . . . . . . . . . . . . . . . . . . . . . . . . . . . . . . . . . 4-1
MagicTune . . . . . . . . . . . . . . . . . . . . . . . . . . . . . . . . . . . . . . . . . . . . . . . . 4-2
MultiScreen . . . . . . . . . . . . . . . . . . . . . . . . . . . . . . . . . . . . . . . . . . . . . . . 4-3
TROUBLESHOOTING
Monitor Self-Diagnosis . . . . . . . . . . . . . . . . . . . . . . . . . . . . . . . . . . . . . 5-1
Before Requesting Service . . . . . . . . . . . . . . . . . . . . . . . . . . . . . . . . . . 5-2
FAQ . . . . . . . . . . . . . . . . . . . . . . . . . . . . . . . . . . . . . . . . . . . . . . . . . . . . . 5-3
MORE INFORMATION
Specifications . . . . . . . . . . . . . . . . . . . . . . . . . . . . . . . . . . . . . . . . . . . . . 6-1
Power Saving Function . . . . . . . . . . . . . . . . . . . . . . . . . . . . . . . . . . . . . 6-2
Contact SAMSUNG WORLDWIDE . . . . . . . . . . . . . . . . . . . . . . . . . . . . . 6-3
Correct Disposal of This Product
(Waste Electrical & Electronic Equipment) - Europe only . . . . . . . . . 6-4
Major Safety Precautions 1-1
1 Major Safety Precautions
1-1 Before You Start
Icons used in this manual
Using this Manual
Make yourself fully aware of the safety precautions before using this product.
If a problem occurs, refer to the 'Troubleshooting' section.
Copyright Notice
The contents of this manual are subject to change without prior notice for performance improvement.
Copyright © 2009 Samsung Electronics Co., Ltd. All Rights Reserved.
The copyright of this manual is reserved by Samsung Electronics, Co., Ltd.
The contents of this manual may not be partially or in whole reproduced, distributed or used in any form without the written
permission of Samsung Electronics, Co., Ltd.
The SAMSUNG logo and SyncMaster are the registered trademarks of Samsung Electronics, Co., Ltd.
Microsoft, Windows and Windows NT are the registered trademarks of Microsoft Corporation.
VESA, DPM and DDC are the registered trademarks of the Video Electronics Standard Association.
The ENERGY STAR
®
logo is the registered trademark of the U.S. Environmental Protection Agency.
All other trademarks mentioned herein belong to their respective companies.
ICON NAME MEANING
Caution Indicates cases where the function may not work or the setting may be canceled.
Note Indicates a hint or tip to operate a function.
1-2 Major Safety Precautions
1-2 Custody and Maintenance
External Surface and Screen Maintenance
Securing the Installation Space
Keep the required distances between the product and other objects (e.g. walls) to ensure proper ventilation.
Failing to do so may result in fire or a problem with the product due to an increase in the internal temperature.
Install the product so the required distances shown in the figure are kept.
The appearance may differ depending on the product.
About persistent images
Displaying a still image for a long time may create a persistent image or stain on the screen. If you do not use the product for
a long time, set the power-saving mode or screen saver.
Due to technological constraints of the LCD Panel manufacturer, the images generated by this product may appear either
brighter or darker than normal by appr. 1ppm (parts per million) pixel.
The number of sub-pixels of an LCD panel by size: The number of Sub-Pixels = Max. Horizontal Resolution x Max. Vertical
Resolution x 3
Example) If the maximum resolution is 1920 x 1080, the number of sub-pixels is 1920 x 1080 x 3 = 6,220,800.
Clean the product with a soft dry cloth.
Do not clean the product with an inflammable substance such
as benzene or thinner or with a wet cloth. This may result in a
problem with the product.
Do not scratch the screen with your fingernails or a sharp
object.
This may result in scratches or damage to the product.
Do not clean the product directly by spraying water onto the
product.
If water enters the product, it may result in fire, electric shock or
a problem with the product.
A white stain may be generated on the surface of the high-
glossy model due to the inherent characteristics of the material,
if a supersonic humidifier is used.
The appearance and the color may differ depending on the
model.
When installing the product with a stand When installing the product with a wall-mount
Major Safety Precautions 1-3
1-3 Safety Precautions
Icons used for safety precautions
Meaning of Signs
Power Related
The following images are for your reference and may differ depending on models and countries.
Warning
ICON NAME MEANING
Warning
Failing to follow the precautions marked with this sign, may result in a serious injury or
even a fatality.
Caution
Failing to follow the precautions marked with this sign, may result in a personal injury or
property damage.
Do not perform. Must be followed.
Do not disassemble.
The power plug must be unplugged from the
wall outlet.
Do not touch. Must be grounded to prevent electric shock.
Avoid using a damaged power cord or plug
or a loose power outlet.
Otherwise, it may result in electric shock
or fire.
Avoid connecting multiple electric appli-
ances to a single wall outlet.
Otherwise, it may result in fire due to
overheating of the wall outlet.
Avoid plugging in or unplugging the power
supply with wet hands.
Otherwise, it may result in electric
shock.
Plug the power plug in firmly.
Otherwise, it may result in fire.
Make sure to connect the power cord to a
grounded wall outlet (for insulation class 1
equipment only).
Otherwise, it may result in electric shock
or injury.
Avoid bending or twisting the power cord
excessively and avoid placing heavy objects
on the cord.
Otherwise, it may result in electric shock
or fire due to a damaged power cord.
Keep the power cord and the product away
from a heater.
Otherwise, it may result in electric shock
or fire.
If the pins of the power plug or the wall out-
let are covered in dust, clean it using a dry
cloth.
Otherwise, it may result in fire.
1-3 Major Safety Precautions
Caution
Installation Related
Warning
Avoid unplugging the power plug while the
product is operating.
Otherwise, it may damage the product
due to electric shock.
Make sure to use only the power cord sup-
plied by our company. In addition, do not
use the power cord of another electric appli-
ance.
Otherwise, it may result in electric shock
or fire.
When unplugging the power plug from the
wall outlet, make sure to hold it by the plug
and not by the cord.
Otherwise, it may result in electric shock
or fire.
Connect the power plug to a wall outlet that
can be easily reached.
When a problem occurs with the
product, you must unplug the power
plug to cut the power off completely. You
cannot cut the power off completely
using only the power button on the
product.
Avoid placing burning candles, mosquito-
repellent or cigarettes on the product and
installing the product near a heater.
Otherwise, it may result in fire.
Ask an installation engineer or relevant
company to install the product onto the wall.
Otherwise, it may result in injury.
Make sure to use the specified wall
mount.
Avoid installing the product in a badly-venti-
lated location such as inside a bookshelf or
closet.
Otherwise, it may result in fire due to
internal over-heating.
Keep a distance of at least 10 cm from the
wall when installing the product for ventila-
tion.
Otherwise, it may result in fire due to
internal over-heating.
Keep the plastic bags used to pack the
product away from children.
If children place the plastic bags over
their heads, they may suffocate.
Avoid installing the product in a location that
is unstable or exposed to excessive vibra-
tions such as on an unstable or slanted
shelf.
The product may fall and this may result
in damage to the product or injury.
If you use the product in a location
exposed to excessive vibrations, it may
result in a problem with the product or
fire.
Major Safety Precautions 1-3
Caution
Cleaning Related
Avoid installing the product in a location
exposed to dust, moisture (sauna), oil,
smoke or water (rain drops) and installing it
within a vehicle.
This may result in electric shock or fire.
Avoid installing the product in a location
exposed to direct sunlight and installing the
product near a heat source such as a fire or
heater.
This may shorten the product life cycle
or cause fire.
Avoid installing the product at an easily
reachable height where children may reach
it.
If a child touches the product, the
product may fall and this may result in
injury.
Since the front part is heavier, install the
product on a flat and stable surface.
Do not let the product drop while moving it.
This may result in a problem with the
product or injury.
Do not place the product face down on the
floor.
This may damage the panel of the
product.
When installing the product on a console or
shelf, make sure that the front of the product
does not protrude out of the console or
shelf.
Otherwise, this may cause the product
to fall off and result in a malfunction or
injury.
Make sure to use a cabinet or shelf
suitable to the size of the product.
When putting the product down, handle it
gently.
Otherwise, it may result in a problem
with the product or injury.
If the product is installed in a location where
the operating conditions vary considerably,
a serious quality problem may occur due to
the surrounding environment. In this case,
install the product only after consulting one
of our service engineers about the matter.
Places exposed to microscopic dust,
chemicals, too high or low temperature,
high humidity, such as airports or
stations where the product is
continuously used for a long time and so
on.
Since using a surfactant, which contains a large amount of alcohol, solvent or other strong chemicals, may result
in the discoloration or cracking of the product exterior or the panel surface coming off, be sure to use the recom-
mended cleansing agent only.
You can purchase the recommended cleansing agent from a service center.
1-3 Major Safety Precautions
Caution
Usage Related
Warning
Before cleaning the product, unplug the
power cord.
Otherwise, it may result in electric shock
or fire.
When cleaning the product, do not spray
water directly over the product parts.
Make sure that water does not enter the
product.
Otherwise, it may result in fire, electric
shock or a problem with the product.
Avoid spraying cleansing agent directly onto
the product.
This may result in discoloration or
cracking of the exterior of the product or
the panel coming off.
When cleaning the product, disconnect the
power cord and clean the product with a soft
dry cloth.
Avoid using chemicals such as wax,
benzene, alcohol, thinner, mosquito-
repellent, fragrance, lubrication or
cleansing agent when cleaning the
product.
This may result in the exterior being
deformed or the print being removed.
Use a soft, damp cloth with a "monitor-
exclusive cleansing agent" and wipe the
product with it.
If no monitor-exclusive cleansing agent
is available, dilute a cleansing agent
with water at a ratio of 1:10 before
cleaning the product.
Since the exterior of the product is easily
scratched, be sure to use a proper cleans-
ing cloth. Use the cleansing cloth with a
small amount of water. However, if the cloth
is contaminated by alien substances, it may
result in scratches to the exterior; therefore
shake off any alien substances from the
cloth before using it.
Since a high voltage runs through the prod-
uct, never disassemble, repair or modify the
product yourself.
Otherwise, it may result in fire or electric
shock.
If the product needs to be fixed, contact
a service center.
When cleaning the product, do not spray
water directly over the product parts.
Make sure that water does not enter the
product.
Otherwise, it may result in fire, electric
shock or a problem with the product.
If the product generates a strange noise, a
burning smell, or smoke, unplug the power
plug immediately and contact a service cen-
ter.
Otherwise, it may result in electric shock
or fire.
Avoid letting children to hang or climb onto
the product.
Otherwise, it may result in the product
falling and this may result in injury or
death.
If you drop the product or the case is dam-
aged, turn the power off and unplug the
power cord. Contact a service center.
Otherwise, it may result in fire or electric
shock.
Avoid placing objects such as toys and
cookies on top of the product.
If a child hangs over the product to grab
an object, the object or the product may
fall and this may result in injury or even
death.
Major Safety Precautions 1-3
Caution
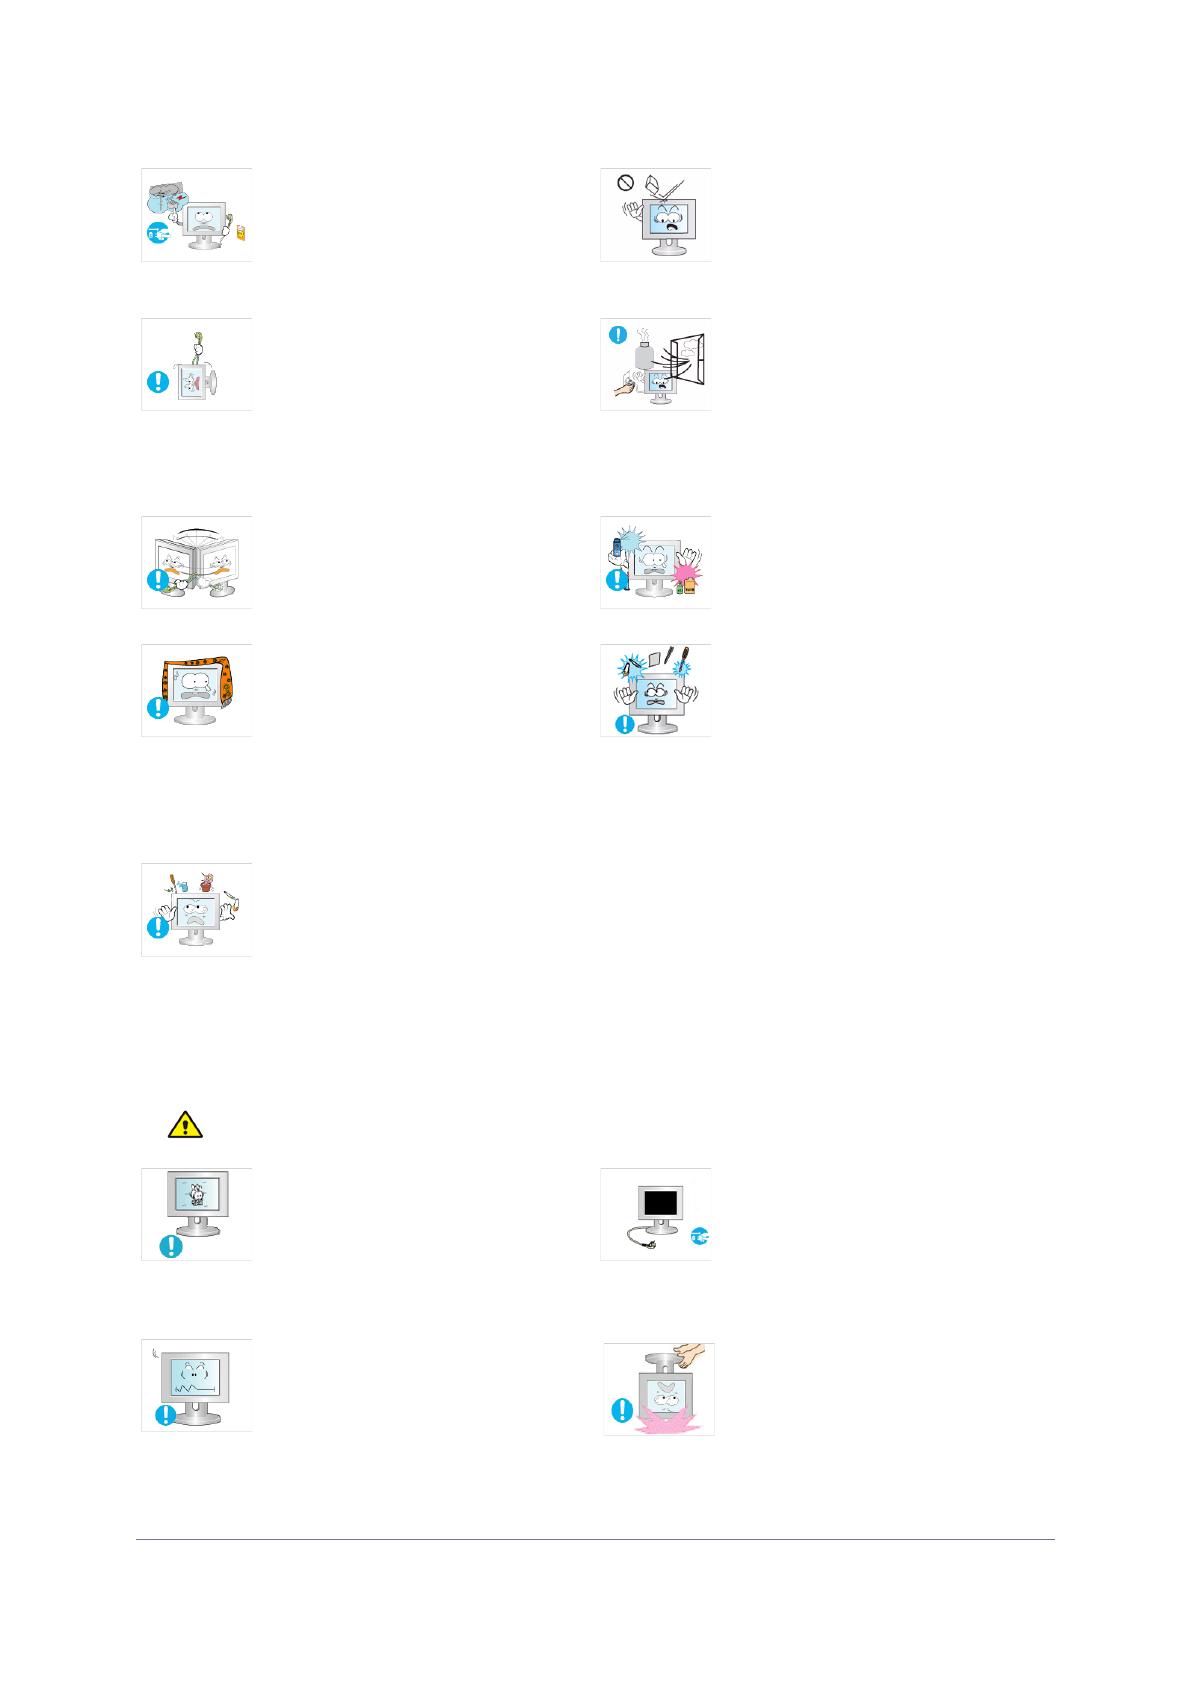
When thunder or lighting occurs, unplug the
power cord and under no circumstance
touch the antenna cable as this is danger-
ous.
Otherwise, it may result in electric shock
or fire.
Avoid dropping an object over the product
or cause impact to the product.
Otherwise, it may result in electric shock
or fire.
Avoid moving the product by pulling the
power cord or antenna cable.
Otherwise, it may result in electric
shock, fire or a problem with the product
due to damage to the cable.
When a gas leak occurs, do not touch the
product or the power plug and ventilate
immediately.
A spark may result in an explosion or
fire.
During a thunder or lighting storm, do
not touch the power cord or antenna
cable.
Avoid lifting up or move the product by hold-
ing only the power cord or signal cable.
Otherwise, it may result in electric
shock, fire or a problem with the product
due to damage to the cable.
Avoid using or placing inflammable spray or
objects near the product.
This may result in an explosion or fire.
Take care not to block the vent by a table
cloth or curtain.
Otherwise, it may result in fire due to
internal overheating.
Avoid inserting metal objects such as a
chopsticks, coins or hairpins, or inflamma-
ble objects into the product (the vents,
ports, etc).
If water or an alien substance enters the
product, turn the power off, unplug the
power cord and contact a service center.
Otherwise, it may result in a problem
with the product, electric shock or fire.
Avoid placing a liquid container such as a
vase, flowerpot, beverage, cosmetics or
drugs, or a metal object over the product.
If water or an alien substance enters the
product, turn the power off, unplug the
power cord and contact a service
center.
Otherwise, it may result in a problem
with the product, electric shock or fire.
Displaying a still image for a long time may
create a persistent image or stain on the
screen.
If you do not use the product for a long
time, use the power-saving mode or set
the screensaver to the moving picture
mode.
When not using the product for a long time
such as leaving your home, unplug the
power cord from the wall outlet.
Otherwise, it may cause dust
accumulation and result in fire caused
by overheating or short circuit or result in
an electric shock.
Set the appropriate resolution and fre-
quency for the product.
Otherwise, it may result in eye strain.
Avoid turning the product upside down or
move the product holding only the stand.
This may cause the product to fall
resulting in damage to the product or
injury.
1-3 Major Safety Precautions
Maintaining the Correct Posture when Using this Product
Watching the product from too close a dis-
tance continuously may damage your eye-
sight.
Avoid using a humidifier or cooker near the
product.
Otherwise, it may result in electric shock
or fire.
It is important to give your eyes some rest (5
minutes every hour) when viewing the prod-
uct screen for long periods of time.
This will alleviate any eye strain.
Since the display panel is hot after using it
for a long time, do not touch the product.
Keep small accessories away from the chil-
dren.
Take care when adjusting the angle of the
product or the height of the stand.
If your hand or finger is caught, you may
be injured.
If the product is tilted excessively, the
product may fall and this may result in
injury.
Avoid placing a heavy object over the prod-
uct.
Otherwise, it may result in a problem
with the product or injury.
Maintain the correct posture when using this product.
Straighten your back.
Keep a distance of 45~50 cm from your eyes to the screen. Look down at the screen and
face the screen forwards.
Maintain the correct posture when using this product.
Adjust the angle of the product so that light is not reflected onto the screen.
Keep your elbow at a right angle and keep your arm level with the back of your hand.
Keep your elbow at a right angle.
Place your heels flat on the ground while keeping your knees at an angle of 90 degrees or
higher and maintain the position of your arm so that your arm is below your heart.
Installing the Product 2-1
2 Installing the Product
2-1 Package Contents
Unpack the product and check if all of the following contents have been included.
Store the packaging box in case you need to move the Product at a later stage.
Monitor
The cleaning cloth is supplied with black high-glossy models only.
CONTENTS
Installation Manual Product Warranty
(Not available in all locations)
User Manual D-Sub Cable
(Not available in all locations)
Power Cord Cleaning Cloth Stand Connector Stand
OPTIONAL PARTS
HDMI Cable DVI Cable
2-2 Installing the Product
2-2 Installing the Stand
Before assembling the product, place the product down on a flat and stable surface so that the screen is facing downwards.
Insert the Stand Connector into the Stand in the direction shown by the figure.
Check if the Stand Connector is firmly connected.
Turn the connecting screw at the bottom of the stand fully so that it is completely fixed.
Place a soft cloth over the table to protect the product and place the product onto the cloth
so that the front of the product is facing downwards.
Hold the main body of the product with your hand as shown by the figure.
Push the assembled stand into the main body in the direction of the arrow as shown in the
figure.
Installing the Product 2-2
- Caution
Avoid lifting the product holding only the stand.
2-3 Installing the Product
2-3 Removing the Stand
Before removing the stand, place the product down on a flat and stable surface so that the screen faces downwards.
Place a soft cloth over the table to protect the product and place the product onto the
cloth so that the front of the product faces downwards.
Hold the main body of the product with your hand as shown by the figure.
Pull the stand in the direction of the arrow as shown in the figure to separate it.
Turn the connecting screw at the bottom of the stand to separate it.
Take the Stand Connector out of the Stand by pulling it in the direction of the arrow as
shown in the figure.
Installing the Product 2-4
2-4 Installing the Stand for the Wall Mount
This product provides a stand mount of 75 mm x 75 mm(3.0 x 3.0 inches) that complies with the VESA specifications.
1. Turn the product off and unplug the power cord from the wall outlet.
2. Place a soft cloth or cushion on a flat surface to protect the panel and place the product down on the cloth so that the front of
the product faces downwards.
3. Separate the stand.
4. Align the groove of the part of the product that is to be connected to the stand with the groove in the stand (desk-top stand,
wall mount stand or another stand) and firmly fix the stand by fastening the screw.
If you use a screw that is longer than the standard specifications, the inside of the product may be damaged.
For wall mounts that are not compatible with the standard VESA specifications, the length of the screw may differ
depending on the corresponding specifications.
Do not use screws that are incompatible with the standard VESA specifications and do not assemble them using
excessive force.
This may result in damage to the product or injury due to the product falling.
The company shall not be held liable for any damage or injury.
The company shall not be held liable for any damage to the product or injury caused by using a stand that is not
compatible with the specified specifications or due to an installation not performed by an authorized installation
engineer.
When installing the product using a wall mount, purchase a wall mount that provides at least 10 cm of space from the
wall.
The company shall not be held liable for any problems caused by using a stand that is not compatible with the specified
specifications.
Use the wall mount according to the international specifications.
Stand Mount
Stand (Optional)
2-5 Installing the Product
2-5 Connecting with a PC
The connecting part may differ depending on the product model.
1. Connect the product to a PC depending on the video output supported by the PC.
When the graphics card provides D-Sub (<Analog>) output
Connect the [RGB IN] port of the product to the [D-Sub] port of the PC with the D-Sub cable.
When the graphics card provides DVI(<Digital>) output
Connect the [DVI IN] port of the product to the [DVI] port of the PC with the DVI cable.
2. Connect one end of the power cord to the [POWER] port of the product and connect the other end of the power cord to the
220V or 110V wall outlet.
(The input voltage is switched automatically.)
When the product is connected to a PC, you can turn the product on and use it.
When both the DVI (<Digital>) and D-Sub (<Analog>) cables are connected, you can select the input signal <Analog/
Digital> by pressing the [ ] button.
Installing the Product 2-6
2-6 Connecting an HDMI cable
1. Connect the HDMI output port of your digital output device to the [HDMI IN] port of the product using the HDMI cable.
2. Connect a speaker to the [AUDIO OUT] port of the product.
This product won't make any sound when only the HDMI cable is connected without a speaker connected.
When all the connections are complete, you can turn on and use the product and your DVD player (or digital output
device).
Press the [ ] button and select <HDMI> as an input signal.
2-7 Installing the Product
2-7 Kensington Lock
Kensington Lock
A Kensington Lock is an anti-theft device that enables users to lock the product so that they can safely use it in public locations.
Since the shape and usage of the locking device may differ depending on the model and the manufacturer, for more information,
refer to the User Manual supplied with the locking device. You have to purchase an additional locking device.
Locking the product
1. Insert the locking part of the locking device into the hole of the Kensington lock of the product( ) and turn it in the locking
direction( ).
2. Connect the Kensington lock cable.
3. Tie the Kensington lock cable to a desk or heavy object.
You can purchase the locking device from an electronics store, an online shop, or our service center.
Using the product 3-1
3 Using the product
3-1 Setting the Optimal Resolution
If you turn the power on after purchasing the product, a message regarding the optimal resolution setting appears on the screen.
Select a language and the optimal resolution.
The message appears up to 3 times if the resolution has not been set to the optimal resolution.
To set the resolution to the optimal resolution
When the PC is turned off, connect the product and the PC and turn the power on.
Right-click over the Desktop and select 'Properties' from the pop-up menu.
In the 'Settings' tab, set the resolution to the optimal resolution.
/ : You can select a language with these buttons.
MENU : If you press this button, the message disappears.
3-2 Using the product
3-2 Standard Signal Mode Table
The LCD monitor has one optimal resolution for the best visual quality depending on the screen size due to the inherent
characteristics of the panel, unlike for a CDT monitor.
Therefore, the visual quality will be degraded if the optimal resolution is not set for the panel size. It is recommended setting
the resolution to the optimal resolution of the product.
If the signal from the PC is one of the following standard signal modes, the screen is set automatically. However, if the signal from
the PC is not one of the following signal modes, a blank screen may be displayed or only the Power LED may be turned on.
Therefore, configure it as follows referring to the User Manual of the graphics card.
B2230H
B2330H
DISPLAY MODE
HORIZONTAL
FREQUENCY (KHZ)
VERTICAL
FREQUENCY (HZ)
PIXEL CLOCK (MHZ)
SYNC POLARITY (H/
V)
IBM, 640 x 350 31.469 70.086 25.175 +/-
IBM, 720 x 400 31.469 70.087 28.322 -/+
MAC, 640 x 480 35.000 66.667 30.240 -/-
MAC, 832 x 624 49.726 74.551 57.284 -/-
MAC, 1152 x 870 68.681 75.062 100.000 -/-
VESA, 640 x 480 31.469 59.940 25.175 -/-
VESA, 640 x 480 37.861 72.809 31.500 -/-
VESA, 640 x 480 37.500 75.000 31.500 -/-
VESA, 800 x 600 35.156 56.250 36.000 +/+
VESA, 800 x 600 37.879 60.317 40.000 +/+
VESA, 800 x 600 48.077 72.188 50.000 +/+
VESA, 800 x 600 46.875 75.000 49.500 +/+
VESA, 1024 x 768 48.363 60.004 65.000 -/-
VESA, 1024 x 768 56.476 70.069 75.000 -/-
VESA, 1024 x 768 60.023 75.029 78.750 +/+
VESA, 1152 x 864 67.500 75.000 108.000 +/+
VESA, 1280 x 800 49.702 59.810 83.500 -/+
VESA, 1280 x 800 62.795 74.934 106.500 -/+
VESA, 1280 x 960 60.000 60.000 108.000 +/+
VESA, 1280 x 1024 63.981 60.020 108.000 +/+
VESA, 1280 x 1024 79.976 75.025 135.000 +/+
VESA, 1440 x 900 55.935 59.887 106.500 -/+
VESA, 1440 x 900 70.635 74.984 136.750 -/+
VESA, 1600 x 1200 75.000 60.000 162.000 +/+
VESA, 1680 x 1050 65.290 59.954 146.250 -/+
VESA, 1920 x 1080 67.500 60.000 148.500 +/+
  • Page 1 1
  • Page 2 2
  • Page 3 3
  • Page 4 4
  • Page 5 5
  • Page 6 6
  • Page 7 7
  • Page 8 8
  • Page 9 9
  • Page 10 10
  • Page 11 11
  • Page 12 12
  • Page 13 13
  • Page 14 14
  • Page 15 15
  • Page 16 16
  • Page 17 17
  • Page 18 18
  • Page 19 19
  • Page 20 20
  • Page 21 21
  • Page 22 22
  • Page 23 23
  • Page 24 24
  • Page 25 25
  • Page 26 26
  • Page 27 27
  • Page 28 28
  • Page 29 29
  • Page 30 30
  • Page 31 31
  • Page 32 32
  • Page 33 33
  • Page 34 34
  • Page 35 35
  • Page 36 36
  • Page 37 37
  • Page 38 38
  • Page 39 39
  • Page 40 40
  • Page 41 41
  • Page 42 42
  • Page 43 43
  • Page 44 44
  • Page 45 45
  • Page 46 46
  • Page 47 47
  • Page 48 48
  • Page 49 49
  • Page 50 50

Samsung B2230H User manual

Category
LED displays
Type
User manual

Ask a question and I''ll find the answer in the document

Finding information in a document is now easier with AI