Whirlpool WED7800XW User manual
- Category
- Electric laundry dryers
- Type
- User manual
This manual is also suitable for

www.whirlpool.com
www.whirlpool.ca
QUICK START GUIDE/
D
RYER USE............PG. 4
www.whirlpool.ca
GUIDE DE DÉMARRAGE RAPIDE/
UTILISATION DE LA SÉCHEUSE....PG. 18
®
®
TABLE OF CONTENTS
Page
DRYER SAFETY...........................................................................................2
CHECK YOUR VENT SYSTEM FOR GOOD AIR FLOW ...........................4
QUICK START GUIDE/DRYER USE ..........................................................4
Drying and Cycle Tips............................................................................... 6
Cycles .......................................................................................................6
Additional Features................................................................................... 8
Status Lights .............................................................................................8
Changing Cycles, Modifiers, an
d Options................................................ 9
Drying Rack Option................................................................................... 9
DRYER CARE.............................................................................................10
Cleaning the Dryer Location...................................................................10
Cleaning the Lint Screen.........................................................................10
Cleaning the Dryer Interior......................................................................10
Removing Accumulated Lint ..................
................................................10
Vacation, Storage, and Moving Care .....................................................11
Special Instructions for Steam Models ..................................................11
Changing the Drum Light........................................................................11
TROUBLESHOOTING ...............................................................................12
WARRANTY ...............................................................................................15
ASSISTANCE AND SERVICE................................................BACK COVER
TABLE DES MATIÈRES
Page
SÉCURITÉ DE LA SÉCHEUSE................................................................. 16
CONTRÔLE DU CIRCUIT D'ÉVACUATION
POUR UNE BONNE VENTILATION ......................................................... 18
GUIDE DE DÉMARRAGE RAPIDE/UTILISATION DE LA SÉCHEUSE.. 18
Conseils pour le séchage et les programmes
........................................ 20
Programmes ........................................................................................... 20
Caractéristiques supplémentaires......
.................................................... 22
Témoins lumineux................................................................................... 23
Changement des programmes, modificateurs et
options..................... 23
Option de grille de séchage.................................................................... 24
ENTRETIEN DE LA SÉCHEUSE............................................................... 25
Nettoyage de l'emplacemen
t de la sécheuse........................................ 25
Nettoyage du filtre à charpie .................................................................. 25
Nettoyage de l'intérieur de la sécheuse................................................. 25
Retrait de la charpie accumulée............................................................. 25
Précautions à prendre avant les vacances,
un entreposage ou un déménagement.................................................. 25
Instructions spécifiques pour les modèles vapeur
................................ 26
Changement de l'ampoule d'éclairage d
u tambour .............................. 26
DÉPANNAGE ............................................................................................. 27
GARANTIE.................................................................................................. 30
W10305227B
W10315012A - SP
ASSISTANCE OU SERVICE............................... COUVERTURE ARRIÈRE
ELECTRONIC DRYER
Use & Care Guide
For questions about features, operation/performance, parts, accessories, or
service, call: 1-800-253-1301
or visit our website at...
In Canada, call: 1-800-807-6777
or visit our website at...
SÉCHEUSE ÉLECTRONIQUE
Guide d'utilisation et d'entretien
Pour assistance, installation, ou service, composez le : 1-800-807-6777
ou visitez notre site internet à..

2
DRYER SAFETY
You
You can be killed or seriously injured if you don't immediately
can be killed or seriously injured if you don't
follow
All safety messages will tell you what the potential hazard is, tell you how to reduce the chance of injury, and tell you what can
happen if the instructions are not followed.
Your safety and the safety of others are very important.
We have provided many important safety messages in this manual and on your appliance. Always read and obey all safety
messages.
This is the safety alert symbol.
This symbol alerts you to potential hazards that can kill or hurt you and others.
All safety messages will follow the safety alert symbol and either the word “DANGER” or “WARNING.”
These words mean:
follow instructions.
instructions.
DANGER
WARNING

IMPORTANT: The gas installation must conform with local codes, or in the absence of local codes, with the National Fuel Gas
Code, ANSI Z223.1/NFPA 54.
The dryer must be electrically grounded in accordance with local codes, or in the absence of local codes, with the National
Electrical Code, ANSI/NFPA 70.
WARNING: For your safety, the information in this manual must be followed to minimize
the risk of re or explosion, or to prevent property damage, personal injury, or death.
– Do not store or use gasoline or other ammable vapors and liquids in the vicinity of this
or any other appliance.
– WHAT TO DO IF YOU SMELL GAS:
•
Do not try to light any appliance.
•
Do not touch any electrical switch; do not use any phone in your building.
•
Immediately call your gas supplier from a neighbor's phone. Follow the gas supplier's
instructions.
•
If you cannot reach your gas supplier, call the re department.
– Installation and service must be performed by a qualied installer, service agency, or
the gas supplier.
•
Clear the room, building, or area of all occupants.
WARNING: Gas leaks cannot always be detected by smell.
Gas suppliers recommend that you use a gas detector approved by UL or CSA.
For more information, contact your gas supplier.
If a gas leak is detected, follow the “What to do if you smell gas” instructions.
3

4
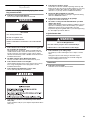
CHECK YOUR VENT SYSTEM FOR GOOD AIR FLOW
Good air flow
Along with heat, dryers require good air flow to efficiently dry
laundry. Proper venting will reduce your drying times and improve
your energy savings. See Installation Instructions.
The venting system attached to the dryer plays
a big role in
good air flow.
WARNING
Fire Hazard
Use a heavy metal vent.
Do not use a plastic vent.
Do not use a metal foil vent.
Failure to follow these instructions can result in death
or re.
Service calls caused by improper venting are not covered by the
warranty and will be paid by the customer, regardless of who
installed the dryer.
Maintain good air flow
■ Cleaning your lint screen before each load.
■ Replace plastic or foil vent material with 4" (102 mm) diameter
heavy, rigid vent material.
■ Use the shortest length of vent possible.
■ Use no more than four 90° elbows in a vent system; each
bend and curve reduces air flow.
Good Better
■ Remove lint and debris from the exhaust hood.
■ Remove lint from the entire length of the vent system at least
every 2 years. When cleaning is complete, be sure to follow
the Installation Instructions supplied with your dryer for final
product check.
■ Clear away items from the front of dryer.
QUICK START GUIDE/DRYER USE
WARNING
Explosion Hazard
Keep ammable materials and vapors, such as
gasoline, away from dryer.
Do not dry anything that has ever had anything
ammable on it (even after washing).
Failure to follow these instructions can result in death,
explosion, or re.
WARNING
Fire Hazard
No washer can completely remove oil.
Do not dry anything that has ever had any type of oil on
it (including cooking oils).
Items containing foam, rubber, or plastic must be dried
on a clothesline or by using an Air Cycle.
Failure to follow these instructions can result in death
or re.
For a summary of how to use your dryer following installation, see the QUICK START GUIDE on the next page.

WARNING: To reduce the risk of re, electric shock, or injury to persons, read the IMPORTANT SAFETY INSTRUCTIONS
before operating this appliance. The following is a guide to using your dryer.
Please refer to specic sections of this manual for more detailed information.
NOTE: This Use and Care Guide covers several different models. Your dryer may not have all of the cycles and features described.
QUICK START GUIDE
START
1. Clean the lint screen before each load.
2. Place laundry in dryer and shut door.
3. Press POWER.
4. Select AUTOMATIC or MANUAL cycle.
5. Select OPTIONS and/or CYCLE SIGNAL, if desired.
See “Additional Features.”
6. Press and Hold START/PAUSE to begin.
MANUAL CYCLES
Use Manual Cycles to set a drying time
and temperature.
1. Press POWER.
2. Turn knob to desired Manual Cycle.
3. Press TIME ADJUST up or down arrow buttons until the
desired drying time is displayed.
4. Press TEMP until the desired temperature illuminates.
NOTE: During the Manual Cycle, you can change the
settings for Time, Temp, the WRINKLE SHIELD™ feature,
and Cycle Signal.
5. Press and Hold START/PAUSE.
TIMED DRY - Use this cycle if items are still damp after an
Auto cycle.
QUICK DRY (on some models) - Use this cycle for drying
small loads or items requiring a short drying time.
TOUCH UP (on some models) - Use this cycle to help
smooth out wrinkles from clean, dry clothes.
Automatic Cycles match the cycle setting to the type
of load, and adjust Dryness Level for optimal performance.
See “Automatic Preset Cycle Settings Chart.”
1. Press POWER.
2. Turn knob to desired Automatic Cycle.
3. Select DRYNESS LEVEL to adjust how dry you
want the load.
4. Select OPTIONS.
5. Press and Hold START/PAUSE.
To make changes to the Dryness Level:
NOTE: Dryness selections can be made only while using
Automatic Cycles.
1. Press START/PAUSE once.
2. Select DRYNESS LEVEL.
3. Press and Hold START/PAUSE.
AUTOMATIC CYCLES
STOPPING, PAUSING, OR RESTARTING
To stop or pause
Open the door or press START/PAUSE once.
Press START/PAUSE twice to cancel a cycle.
To restart
Close the door. Press and Hold START/PAUSE.
STEAM CYCLES
(Steam models only)
Steam Cycles use water and heat to reduce
wrinkles and odors in dry items. See “Cycles”
for more details on each cycle.
1. Press POWER.
2. Select ENHANCED TOUCH UP or QUICK REFRESH 1-4
or 5-8 Garments cycle.
3. Press TIME ADJUST up or down until the desired drying
time is displayed (only on Enhanced Touch Up Cycle).
4. Press TEMP until the desired temperature illuminates.
5. Press and Hold START/PAUSE.
5

6
Drying and Cycle Tips
Select the correct cycle and dryness level or temperature for
your load. If an Automatic Cycle is running, the disp
lay shows
the estimated cycle time when your dryer is automatically
sensing the dryness level of your lo
ad. If a Manual Cycle is
running, the display shows the exact number of minutes
remaining in the cycle.
Cool Down tumbles the load without h
eat during the last few
minutes of all cycles. Cool Down makes the loads easier to handle
and reduces wrinkling. The length of the Cool Down depends on
the load size and dryness level.
Drying tips
■ Follow care label directions when they are available.
■ If desired, add a fabric softener sheet. Follow package
instructions.
■ To reduce wrinkling, remove the load from the dryer as soon
as tumbling stops. This is especially important for permanent
press, knits, and synthetic fabrics.
■ Avoid drying heavy work clothes together with lighter fabrics.
This could cause overdrying of lighter fabrics and lead to
increased shrinkage or wrinkling.
Cycle tips
■ Dry most loads using the preset cycle settings.
■ Refer to the Automatic or Manual Cycle Settings chart (in the
“Cycles” section) for a guide to drying various loads.
■ Drying temperature and dryness level are preset when
you choose an Automatic Cycle. You can select a
different dryness level, depending on your load, by
pressing Dryness Level and choosing More, Normal,
Less, or Damp.
NOTE: Time adjust and changing Temperature setting is
not available with Automatic Cycles. You cannot use the
Time Adjust and you cannot choose a Temperature with
the Automatic Cycles.
■ If you wish to adjust the cycle length of a Manual Cycle,
press the Time Adjust up or down arrows. Adjust the
temperature of a Manual Cycle by pressing Temp until the
desired temperature is selected.
NOTE:
You cannot choose a dryness level with Manual
Cycles. Changing the Dryness Level setting is not
available with Manual Cycles.
Cycles
Select the drying cycle that matches the type of load you
are drying. See the Automatic, Ste
am, or Manual Cycle
Settings Charts.
Steam models
Non-Steam models
Cycle Control knob
Automatic Cycles
Automatic Cycles allow you to match the cycle to the load you are
drying. See the following Automatic Preset Cycle Settings chart.
Each cycle dries certain fabrics at the recommended temperature.
A sensor detects the moisture in the load and automatically
adjusts the drying time for optimal drying.
NOTE: Not all
cycles are available on all models.
Automatic Preset Cycle Settings
Automatic Cycles
Load Ty
pe
Temperature
HEAVY DUTY
Heavyweight mixed loads, cottons,
and jeans
High
BULKY ITEMS
Blankets and comforters
Medium
NORMAL
Sturdy fabrics such as corduroys
and work clothes
Medium
ECO NORMAL
Designed for average size loads of
medium weight items
Medium
CASUAL
Perm Press
No-iron fabrics, such as sports shirts,
casual business clothes, permanent
pr
ess, and synthetics
Low
TOWELS
Cotton
Towel s
High
DELICATE
Lingerie, blouses, or washable
knit fabrics
Extra-Low

7
Steam Cycles (on some models)
Use Steam Cycles to help smooth out wrinkles from dry items,
such as clothes that have been worn or clothes that have been
left in the dryer too long. When a Steam Cycle is selected, the
estimated time remaining display shows the actual time remaining
in the cycle.
NOTE: Results may vary dep
ending on fabric. 100% cotton
garments with wrinkle-free finish may yield better results than
those without.
Use of a fabric softener sheet is not r
ecommended with steam
cycles as it may cause temporary staining on the clothes.
Quick Refresh
This cycle is best for smoothing out wrinkles and reducing
odors from loads consisting of wrinkle-free cotton, cotton-
polyes
ter blend, common knits and synthetic garments. In this
cycle a small amount of water is sprayed into the dryer drum
after several minutes of tu
mbling with heat. The dryer will continue
to tumble with heat followed by a brief cool down. The heat level
and cycle time are not adjustable.
Enhanced Touch Up
This cycle is best for touching up clothes that have been left in
the dryer too long. In this cycle
, a small amount of water is
sprayed into the dryer drum after several minutes of tumbling
with heat. The dryer will continue to tumble with heat followed
by a brief cool down. The dry time and temperatu
re can be
adjusted for this cycle.
NOTE: Overlo
ading the dryer may not yield the same results.
Steam Preset Cycle Settings
Timed Cycles
Load Ty
pe
Temperature*
Minimum/
Maximum
Time
(Minutes)*
Minimum/
Maximum
QUICK REFRESH
1-4 Garments
Helps to smooth out
wrinkles and r
educe odors.
Medium 15
40
QUICK REFRESH
5-8 Garments
Helps to smooth out
wrinkles and reduce odors.
Medium 22
40
ENHANCED TOUCH UP
Helps to smooth out
wrin
kles in loads left in the
dryer for an extended
period.
Medium
Hi
gh
Medium
High
28
40
20**
40
*Temperature and Time Adjust are selectable only for the
Enhanced Touch Up Cycle.
**NOTE: If yo
ur dryer defaults to 20 minutes then your minimum
dry time is 15 minutes.
Manual Cycles (Non-Steam)
Use Manual Cycles to select a specific amount of drying time
and a drying temperature. When a Manual Cycle is selected,
the Estimated Time Remaining display shows the actual time
remaining in your cycle. You can change the actual time in the
cycle by pressing the Time Adjust up or down arrows. See
“Changing Cycles, Modifiers, and Options.”
NOTE: Ma
nual Cycles may also be used with the dryer rack.
See “Dryer Rack.”
Timed Dry
Use this cycle to complete drying if items are still damp after an
Automatic Cycle. Lightweight garments, such as exercise wear,
can be dried using Timed Dry on a low temperature setting.
Timed Preset Cycle Settings
Timed Cycle
Load Ty
pe
Default
Te
mperature
Default Time
(Minutes)
TOUCH UP
(on some models
)
Helps to smooth out
wrinkles for cloth
es
packed in the suitcase or
left in the dryer too long.
Medium 20
TIMED DRY
Use if items are still damp
a
fter an automatic cycle.
Heavyweight, bulky items,
bedspreads, and work
clothes.
High 40
QUICK DRY
(on some models
)
Small loads or short
drying
time.
High 23

8
Additional Features
Automatic Cycle Modifiers
Use the Dryness Modifier to select dryness levels for the
Automatic Cycles. Press DRYNESS LEVEL until the desired
Dryness Level setting illuminates.
Depending on your load, you may select different drying levels.
Press the DRYNESS LEVEL button and select either, More,
Normal (Default), Less or damp. Once the dryness level has been
achieved, dryer will automatically shut off.
NOTE: Once dryness
level has been set, it cannot be changed
without stopping cycle and cannot be used on Manual cycles.
Timed Cycle Modifiers
Use the Temperature Modifier to select temperatures for
the Timed Cycles. Press TEMP until the desir
ed temperature
setting illuminates.
NOTE: T
emperature modifiers cannot be used with the Auto
Dry Cycles.
Air Only
Use the Air Only Modifier for items that require drying without heat
such as rubber, plastic and heat-sensitive fabrics. This table
shows examples of items that can be dried using Air Only.
Type of Load Time*
(Minutes)
Foam rubber - pillows, padded bras, stuffed toys 20 - 30
Plastic - Shower curtains, tablecloth
s 20 - 30
Rubber-backed rugs 40 - 50
Olefin, polypropylene, sheer nylon 10 - 20
*Reset cycle to complete drying, if needed.
When using Air Only:
■ Check that coverings are securely stitched.
■ Shake and fluff pillows by hand periodically during the cycle.
■ Dry item completely. Foam rubber pillows are slow to dry.
NOTE: Air On
ly is not available with Automatic Cycles.
Drum Light Option
On some models, select Drum Light to turn on the light inside
the dryer drum. During a cycle, if Drum Light is selected, the
drum light turns on and will r
emain on until DRUM LIGHT is
pressed again, the door is opened and closed, or will turn off
after 5 minutes.
When the dryer is not running, the
drum light will turn on when
DRUM LIGHT is pressed or the dryer door is opened, and it will
remain on until the dryer door has been open for 5 minutes, the
dryer door is closed or DRUM LIGHT is pressed again.
Press DRUM LIGHT at any t
ime to turn the drum light ON or OFF.
WRINKLE SHIELD™ Setting Option
The WRINKLE SHIELD™ setting helps keep wrinkles from forming
when you cannot unload the dryer promptly at the end of a cycle.
During this option, the dryer stops tumbling and then tumbles
again for a brief period.
■ Press the WRINKLE SHIELD™ setting to get up to
120 minutes of heat-free, perio
dic tumbling at the end
of a cycle.
■ Stop the WRINKLE SHIELD™ setting at any time by pressing
WRINKLE SHIELD™ setting or opening the dryer door.
■ For the Perm Press/Casual Cycle, the WRINKLE SHIELD™
setting is preset to ON. The other Automatic Cycles will retain
the WRINKLE SHIELD™ setting. For example, if you select the
WRINKLE SHIELD™ setting in the Normal cycle, the
WRINKLE SHIELD™ setting will be on the next time you
select the Normal cycle.
NOTE: If
you do not select the WRINKLE SHIELD™ setting, the
dryer stops after cool down.
Damp Dry Signal Option
Select the Damp Dry Signal to alert you that your clothes are
approximately 80% dry. This is useful when you want to remove
lightweight items in a mixed load to avoid overdrying or remove
partially dry items that may need ironing.
The Damp Dry Signal is useful when dry
ing bedsheets/linens in
a mixed load. When the signal goes of
f, open the door to stop
the dryer, rearrange the load inside the dryer, close the door and
r
estart the dryer to finish the drying cycle. Rearranging the load
will aid in the drying process.
NOTE: Th
e Damp Dry Signal is available only with the
Automatic Cycles.
Cycle Signal Option
The Cycle Signal produces an audible sound when the drying
cycle is finished. Promptly removing clothes at the end of the
cycle reduces wrinkling.
Press CYCLE SIGNAL until the desir
ed volume (Loud, Soft, or Off)
is selected.
NOTE: Wh
en the WRINKLE SHIELD™ setting is selected and the
Cycle Signal is on, a tone sounds every 5 minutes until the clothes
are removed, or the WRINKLE SHIELD™ setting ends.
Status Lights
Follow the progress of your dryer with the drying Status indicator
lights.
Sensing
The beginning of a cycle and turns off 5 minutes into
the cycle.
Eco Monitor
The Eco Monitor shows your estimated energy usage compared
to the other cycles and options.

9
Changing Cycles, Modifiers, and Options
You can change Automatic and Manual Cycles, Modifiers, and
Options anytime before pressing Start.
■ Three short tones sound if an unavailable combination is
selected. The last selection will not be accepted.
Changing Cycles after pressing Start/Pause
1. Press START/PAUSE twice.
2. Select the de
sired cycle and options.
3. Press START/PAUSE. The dryer starts at the beginning of the
new cycle.
NOTE: If yo
u do not press Start within 5 minutes of selecting the
cycle, the dryer automatically shuts off.
Changing Modifiers and Options after pressing
Start/Pause
You can change an Option or Modifier anytime before the selected
Option or Modifier begins.
1. P
ress START/PAUSE once.
2. Select the n
ew Option and/or Modifiers.
3. Press START/PAUSE to continue the cycle.
NOTE: If you happen to press START/PAUSE twice, the program
clears and your dryer shuts down. Restart the selection process.
Changing the Preset Dryness Level Settings
If all of your loads on all Automatic cycles are consistently not as
dry as you would like, you may change the preset Dryness Level
settings to increase the dryness. This change will affect all of your
Automatic cycles.
Your Dryness Level settings can be adjusted to adapt to different
installations, envir
onmental conditions or personal preference.
There are 3 drying settings: 1 (factory preset dryness level),
2 (slightly dryer clothes, approximately 15% mor
e drying time),
and 3 (much dryer clothes, approximately
30% more drying time).
1. The Dryness Level settings cannot be changed while the dryer
is running.
2. Pr
ess and hold the DRYNESS LEVEL button for 5 seconds.
The dryer will beep, and “CF” will be displayed for 1 second
followed by the current drying setting.
3. T
o select a new drying setting, press the DRYNESS
LEVELbutton again until the desired drying setting is shown.
NOTE: Wh
ile cycling through the settings, the current setting
will not flash, but the other settings will flash.
4. Pr
ess START/PAUSE to save the drying setting.
5. The dry
ing setting you selected will become your new preset
drying setting for all Automatic cycles.
Drying Rack Option
Use the Drying Rack to dry items such as sweaters and
pillows without tumbling. The drum tur
ns, but the drying rack
does not move.
If your model does not have a drying rack, you may be able to
pur
chase one for your model. To find out whether your model
allows drying rack usage and for information on ordering, please
refer to the front page of the manual or contact the dealer from
whom you purchased your dryer.
NOTE: The drying
rack must be removed for normal tumbling.
Do not use the automatic cycle with the drying rack.
To use the drying ra
ck
1. Open dryer door.
A
A. Front edge
2. Place drying rack inside dryer drum, positioning the back wire
on the ledge of the inner dryer back panel. Push down on front
edge of drying rack to secure at the front of the dryer.
A
B
A. Drying rack front edge
B. Dryer back panel
3. Put the wet items on top of the drying rack. Leave space
between the items so air can reach all the surfaces.
NOTE: Do n
ot allow items to hang over the edge of the
drying rack.
4. Cl
ose the door.
5. Pr
ess the POWER button.
6. Select Man
ual Cycle and select a temperature (see following
chart). Items containing foam, rubber or plastic must be dried
on a clothesline or by using the Air Only temperature setting.
7. Y
ou must select a time by pressing TIME ADJUST Up or
Down. Reset time as needed to complete drying. Refer to the
following table.
8. Press (and hold) START/PAUSE button (about 1 second).

10
This chart shows examples of items that can be rack dried and
the suggested cycle, temperature setting and drying time. Actual
drying time will depend on the amount of moisture items hold.
Rack Dry Setting Temp. Time*
Wool Sweaters
Block to shape and lay flat on
th
e drying rack.
Timed
Dry
Low 60
Stuffed toys or pillows
Cotton or polyester fiber filled
Timed
Dry
Low 60
Stuffed toys or pillows
Foam rubber filled
Timed
Dry
Air Only
(no heat)
90
Sneakers or canvas shoes Timed
Dr
y
Air Only
(no heat)
90
*(Minutes) Reset time to complete dry
ing, if needed.
DRYER CARE
Cleaning the Dryer Location
Keep dryer area clear and free from items that would obstruct the
flow of combustion and ventilation air.
Cleaning the Lint Screen
Clean the lint screen before each load. A screen blocked by lint
can increase drying time.
IMPORTANT:
■ Do not run the dryer with the lint screen loose, damaged,
blocked, or missing. Doing so can cause overheating and
damage to both the dryer and fabrics.
■ If lint falls off the screen into the dryer during removal, check
the exhaust hood and remove the lint.
Every load cleaning
The lint screen is located in the door opening of the dryer. A
screen blocked by lint can increase drying time.
To clean:
1. Pu
ll the lint screen straight up. Roll lint off the screen with your
fingers. Do not rinse or wash screen to remove lint. Wet lint is
hard to remove.
2. Push the lint screen firmly back into place.
As needed cleaning
1. Roll lint off screen with your fingers.
2. Wet both sides of lint screen with hot water.
3. Wet a nylon brush with hot water and liquid detergent. Scrub
lint screen with the brush to remove residue buildup.
4. Rinse sc
reen with hot water.
5. Thoroughly dry lint screen with a clean towel. Insert lint screen
back into dryer.
Cleaning the Dryer Interior
1. Apply a liquid, nonflammable household cleaner to the
stained area of the drum and rub with a soft cloth until sta
in
is removed.
2. Wip
e drum thoroughly with a damp cloth.
3. T
umble a load of clean cloths or towels to dry the drum.
NOTE: Garme
nts that contain unstable dyes, such as denim blue
jeans or brightly colored cotton items, may discolor the dryer
interior. These stains are not harmful to your dryer and will not
stain future loads of clothes. Dry unstable dye items inside out to
avoid transfer of dye.
Removing Accumulated Lint
From Inside the Dryer Cabinet
Lint should be removed every 2 years, or more often, depending
on dryer usage. Cleaning should be done by a qualified person.
From the Exhaust Vent
Lint should be removed every 2 years, or more often, depending
on dryer usage.

11
Vacation, Storage, and Moving Care
Install and store your dryer where it will not freeze. Because some
water may stay in the hoses, freezing can damage your dryer. If
storing or moving your dryer during freezing weather, winterize it.
Vacation or Storage Care
Operate your dryer only when you are at home. If you will be on
vacation or not using your dryer for an extended period of time,
you should:
1. Unplug dryer or disconnect power
.
2. Gas Models: Close shutoff valve in gas supply line.
3. Clean lint screen. See “Cleaning the Lint Screen.”
4. Steam Models Only: T
urn off the water supply to the dryer.
This helps to avoid unintended flooding (due to a water
pressure surge) while you are away.
Moving care
For power supply cord-connected dryers:
1. Unplug the power supply cord.
2. Steam models only: Shut off water faucet.
3. Steam models only: Disconnect the water inlet hose from
faucet, then drain the hose. Transport hose separately.
4. Make sur
e leveling legs are secure in dryer base.
5. Use masking tape to secure dryer door.
For direct-wired dryers:
WARNING
Electrical Shock Hazard
Disconnect power before servicing.
Replace all parts and panels before operating.
Failure to do so can result in death or electrical shock.
1. Disconnect power.
2. D
isconnect wiring.
3. Steam models
only: Shut off water faucet.
4. Steam models
only: Disconnect the water inlet hose from
faucet, then drain the hose. Transport hose separately.
5. Make sur
e leveling legs are secure in dryer base.
6. Use masking tape to secu
re dryer door.
Reinstalling the dryer
Follow the “Installation Instructions” to locate, level, and connect
the dryer.
Special Instructions for Steam Models
Water Inlet Hoses
Replace inlet hoses and hose screen after 5 years of use to
reduce the risk of hose failure. Periodically inspect and replace
inlet hoses if bulges, kinks, cuts, wear, or leaks are found.
When replacing your inlet hoses, r
ecord the date of replacement.
To winterize dryer
1. Unplug dryer or disconnect power.
2. Shut off water faucet.
3. Disconnect water inlet hose from faucet and drain.
To use dryer again
1. Flush water pipes. Reconnect water inlet hose to faucet. Turn
on water faucet.
2. Plu
g in dryer or reconnect power.
Changing the Drum Light
The dryer light automatically turns on inside the dryer drum when
you open the door.
To change the drum light
1. Unplug dryer or disconnect power.
2. Open
the dryer door. Locate the light bulb cover on the back
wall of the dryer. Remove the screw located in the lower right
corner of the cover. Remove the cover.
3. Turn bulb counterclockwise. Replace the bulb with a
10-watt appliance bulb only
. Replace the cover and
secure with the screw.
4. Plu
g in dryer or reconnect power.
NOTE: On
some models, an LED drum light is used. The LED
lights should not require changing; however, if replacement is
needed, please contact a qualified person.

12
TROUBLESHOOTING
First try the solutions suggested here or visit our website and reference FAQs (Frequently Asked Questions)
to possibly avoid the cost of a service call...
In U.S.A www.whirlpool.com/help - In Canada www.whirlpool.ca
Dryer Operation
Dryer will not run
■ Is the dryer door firmly closed?
■ Was the Start button firmly pressed?
Large loads may require pressing and holding the Start/Pause
button for 2-5 seconds.
■ Has a household fuse blown, or has a circuit breaker
tripped?
There may be 2 household fuses or circuit breakers for the
dryer. Check that both fuses are intact and tight, or that both
circuit breakers have not tripped. Replace the fuse or reset the
circuit breaker. If the problem continues, call an electrician.
■ Is the correct power supply available?
Electric dryers require 240-volt power supply. Check with a
qualified electrician.
■ Was a regular fuse used?
Use a time-delay fuse.
Unusual sounds
■ Has the dryer had a period of non-use?
If the dryer hasn’t been used for a while, there may be a
thumping sound during the first few minutes of operation.
■ Is a coin, button, or paper clip caught between the drum
and front or rear of the dryer?
Check the front and rear edges of the drum for small objects.
Clean out pockets before laundering.
■ Is it a gas dryer?
The gas valve clicking is a normal operating sound.
■ Are the four legs installed, and is the dryer level front to
back and side to side?
The dryer may vibrate if not properly installed. See the
Installation Instructions.
■ Is the clothing knotted or balled up?
When balled up, the load will bounce, causing the dryer to
vibrate. Separate the load items and restart the dryer.
No heat
■ Has a household fuse blown, or has a circuit breaker
tripped?
The drum may be turning, but you may not have heat. Electric
dryers use 2 household fuses or circuit breakers. Replace the
fuse or reset the circuit breaker. If the problem continues, call
an electrician.
■ Is the valve open on the gas supply line on gas models?
Dryer displaying code message
■ “PF” (power failure), check the following:
Was the drying cycle interrupted by a power failure?
Press and hold START/PAUSE to restart the dryer.
■ “F” Variable (F1, F2, F20, etc.) service codes:
Call for service.
■ “L2” Diagnostic Code (low or no line voltage condition):
The drum will turn, but there may be a problem with your
home power supply keeping the dryer’s heater from turning
on. The dryer will continue to run when this diagnostic code is
present. Press any key to clear the code from the display and
return to the estimated time remaining.
Try the following:
Check to see if a household fuse has blown or circuit breaker
has tripped. Electric dryers use two household fuses or
breakers. Replace the fuse or reset the circuit breaker.
In the U.S.A., Confirm the power cord is properly installed.
Refer to “Electrical Connection” in the Installation Instructions
for details.
Select a Timed Dry heated cycle, and restart the dryer.
If the message persists, consult a qualified electrician.
■ “AF” (low airflow condition):
The dryer will continue to run when this diagnostic code is
present. Press any key to clear the code from the display and
return to the estimated time remaining.
Try the following:
Clean lint screen.
Check to see if the vent run from the dryer to the wall is
crushed or kinked.
Confirm the vent run from the dryer to the wall is free of lint
and debris.
Confirm the exterior vent exhaust hood is free of lint and
debris.
Confirm your vent system falls withing the recommended run
length and number of elbows for the type of vent you are
using. Refer to “Plan Vent System” in the Installation
Instructions for details.
Select a Timed Dry heated cycle, and restart the dryer.
If the message persists, have your entire home venting run
cleaned.

13
Dryer Results
Clothes are not drying satisfactorily, drying times are too
long, or load is too hot
■ Is the lint screen clogged with lint?
Lint screen should be cleaned before each load.
WARNING
Fire Hazard
Use a heavy metal vent.
Do not use a plastic vent.
Do not use a metal foil vent.
Failure to follow these instructions can result in death
or re.
■ Is the exhaust vent or outside exhaust hood clogged with
lint, restricting air movement?
Run the dryer for 5-10 minutes. Hold your hand under the
outside exhaust hood to check air movement. If you do not
feel air movement, clean exhaust system of lint or replace
exhaust vent with heavy metal or flexible metal vent. See the
Installation Instructions.
■ Are fabric softener sheets blocking the grille?
Use only one fabric softener sheet, and use it only once.
■ Is the exhaust vent the correct length?
Check that the exhaust vent is not too long or has too many
tur
ns. Long venting will increase drying times. See the
Installation Instructions.
■ Is the exhaust vent diameter the correct size?
Use 4" (102 mm) diameter vent material.
■ Is the dryer located in a room with temperature below
45ºF (7ºC)?
Proper operation of dryer cycles requires temperatures above
4
5ºF (7ºC).
■ Is the dryer located in a closet?
Closet doors must have ventilation
openings at the top and
bottom of the door. The rear of the dryer requires 5" (127 mm)
of a
irspace, and the sides and front of the dryer require a
minimum of 1" (25 mm). See the Installati
on Instructions.
■ Has the Air Only modifier been selected?
Select the right temperature for the types of garments being
dried. See “Additional Features.”
■ Is the load too large and heavy to dry quickly?
Separate the load to tumble freely.
■ Are clothes coming out of the Quick Refresh cycle with
damp or wet spots?
Under certain environmental or installation conditions you may
expereince underdrying. Select the Timed Dry cycle (20 min.
default time), which can be customized by choosing
temperature by pressing TEMP and/or cycle time by pressing
the Time Adjust up or down buttons.
Cycle time too short
WARNING
Excessive Weight Hazard
Use two or more people to move and install dryer.
Failure to do so can result in back or other injury.
■ Is the automatic cycle ending early?
The load may not be contacting the senso
r strips. Level the
dryer.
Change the dryness level settin
g on Automatic Cycles.
Increasing or decreasing the dryness level will change the
amount of drying time in a cycle.
Lint on load
■ Is the lint screen clogged?
Clean lint screen. Check fo
r air movement.

14
Stains on load or drum
■ Was dryer fabric softener properly used?
Add dryer fabric softener sheets at the beginning of the cycle.
Fabric softener sheets added to a partially dried load can stain
your garments.
Drum stains are caused by dyes in clothing (usually blue
jeans). This will not transfer to other clothing.
Loads are wrinkled
■ Was the load removed from dryer at the end of the cycle?
For Steam Dryers select Enhanced Touch Up Cycle to tumble
the load with water and heat to help smooth out wrinkles from
a load left in the dryer.
■ Was the dryer overloaded?
Dry smaller loads that can tumble freely. Smaller loads of one
to four garments yield best results with Quick Refresh Cycle.
Results may also vary depending on fabric type. This cycle is
best for reducing wrinkles and odors from loads consisting of
wrinkle-free cotton, cotton polyester blends, common knits,
and synthetics.
■ Loads are still wrinkled following Steam cycle on Steam
models?
Make sure water is connected to the dryer. Check that water
inlet hose is connected to both the faucet and dryer’s water
inlet valve. Check that the water supply is turned on. This
cycle is best for smoothing out wrinkles and reducing odors
from loads consisting of wrinkle-free cotton, cotton polyester
blends, common knits, and synthetic garments.
NOTE: Refer to garment care label instructions. Dry clean only
garments are not recommended.
Odors
■ Have you recently been painting, staining, or varnishing in
the area where your dryer is located?
If so, ventilate the area. When the odors or fumes are gone
from the area, rewash and dry the clothing.
■ Is the dryer being used for the first time?
The new electric heating element may have an odor. The odor
will be gone after the first cycle.
■ Is water connected to the dryer for Steam models?
Check that water inlet hose is connected to both the faucet
and dryer’s water inlet valve. Check that the water supply is
turned on.
■ To remove odors left in garments after wearing, select Steam
Cycle. These cycles are best for reducing odors from loads
consisting of wrinkle-free cotton, cotton polyester blends,
common knits, and synthetics.

15
WHIRLPOOL CORPORATION LAUNDRY WARRANTY
LIMITED WARRANTY
For one year from the date of purchase, when this major appliance is operated and maintained according to instructions attached to or
furnished with the product, Whirlpool Corporation or Whirlpool Canada LP (hereafter “Whirlpool”) will pay for Factory Specified Parts
and repair labor to correct defects in materials or workmanship that existed when this major appliance was purchased. Service must be
provided by a Whirlpool designated service company. YOUR SOLE AND EXCLUSIVE REMEDY UNDER THIS LIMITED WARRANTY
SHALL BE PRODUCT REPAIR AS PROVIDED HEREIN. This limited warranty is valid only in the United States or Canada and applies
only when the major appliance is used in the country in which it was purchased. Proof of original purchase date is required to obtain
service under this limited warranty.
ITEMS EXCLUDED FROM WARRANTY
This limited warranty does not cover:
1. Replacement parts or repair labor if this major appliance is used for other than normal, single-family household use or when it is
used in a manner that is inconsistent to published user or operator instructions and/or installation instructions.
2. Service calls to correct the installation of your major appliance, to instruct you on how to use your major appliance, to replace or
repair house fuses, or to correct house wiring or plumbing.
3. Service calls to repair or replace appliance light bulbs, air filters or water filters. Consumable parts are excluded from warranty
coverage.
4. Damage resulting from accident, alteration, misuse, abuse, fire, flood, acts of God, improper installation, installation not in
accordance with electrical or plumbing codes, or use of products not approved by Whirlpool.
5. Cosmetic damage, including scratches, dents, chips or other damage to the finish of your major appliance, unless such damage
results from defects in materials or workmanship and is reported to Whirlpool within 30 days from the date of purchase.
6. Pick up and delivery. This major appliance is intended to be repaired in your home.
7. Repairs to parts or systems resulting from unauthorized modifications made to the appliance.
8. Expenses for travel and transportation for product service if your major appliance is located in a remote area where service by an
authorized Whirlpool servicer is not available.
9. The removal and reinstallation of your major appliance if it is installed in an inaccessible location or is not installed in accordance
with Whirlpool’s published installation instructions.
10. Replacement parts or repair labor on major appliances with original model/serial numbers that have been removed, altered, or
cannot be easily determined.
DISCLAIMER OF IMPLIED WARRANTIES
IMPLIED WARRANTIES, INCLUDING ANY IMPLIED WARRANTY OF MERCHANTABILITY OR IMPLIED WARRANTY OF FITNESS FOR
A PARTICULAR PURPOSE, ARE LIMITED TO ONE YEAR OR THE SHORTEST PERIOD ALLOWED BY LAW. Some states and provinces
do not allow limitations on the duration of implied warranties of merchantability or fitness, so this limitation may not apply to you. This
warranty gives you specific legal rights, and you also may have other rights that vary from state to state or province to province.
LIMITATION OF REMEDIES; EXCLUSION OF INCIDENTAL AND CONSEQUENTIAL DAMAGES
YOUR SOLE AND EXCLUSIVE REMEDY UNDER THIS LIMITED WARRANTY SHALL BE PRODUCT REPAIR AS PROVIDED HEREIN.
WHIRLPOOL SHALL NOT BE LIABLE FOR INCIDENTAL OR CONSEQUENTIAL DAMAGES. Some states and provinces do not allow
the exclusion or limitation of incidental or consequential damages, so these limitations and exclusions may not apply to you. This
warranty gives you specific legal rights, and you also may have other rights that vary from state to state or province to province.
If outside the 50 United States and Canada, contact your authorized Whirlpool dealer to determine if another warranty applies.
If you think you need repair service, first see the “Troubleshooting” section of the Use & Care Guide. If you are unable to resolve the
problem after checking “Troubleshooting,” additional help can be found by checking the “Assistance or Service” section or by calling
Whirlpool. In the U.S.A., call 1800253-1301. In Canada, call 18008076777.7/08
Keep this book and your sales slip together for future
reference. You must provide proof of purchase or installation
date for in-warranty service.
Write down the following information about your major appliance
to better help you obtain assistance or service if you ever need it.
You will need to know your complete model number and serial
number. You can find this information on the model and serial
number label located on the product.
Dealer name____________________________________________________
Address ________________________________________________________
Phone number__________________________________________________
Model number __________________________________________________
Serial number __________________________________________________
Purchase date __________________________________________________
Page is loading ...
Page is loading ...
Page is loading ...
Page is loading ...
Page is loading ...
Page is loading ...
Page is loading ...
Page is loading ...
Page is loading ...
Page is loading ...
Page is loading ...
Page is loading ...
Page is loading ...
Page is loading ...
Page is loading ...
Page is loading ...

ASSISTANCE OR SERVICE
Before calling for assistance or service, please check “Troubleshooting” or visit www.whirlpool.com/help.
It may save you the cost of a service call. If you still need help, follow the instructions below.
When calling, please know the purchase date and the complete model and serial number of your appliance.
This information will help us to better respond to your request.
Whirlpool Corporation
Customer eXperience Center
553 Benson Road
Benton Harbor, MI 49022-2692
Customer eXperience Centre
Whirlpool Canada LP
1901 Minnesota Court
Mississauga, Ontario L5N 3A7
You can write with any questions or concerns at:
Whirlpool Corporation Customer eXperience Center
1-800-253-1301 www.whirlpool.com
1-800-442-9991 (Accessories)
www.whirlpool.com/accessories
Whirlpool Canada LP
Customer eXperience Centre
1-800-807-6777
www.whirlpool.ca
Our consultants provide assistance with
Please include a daytime phone number in your correspondence.
If you need replacement parts or to order accessories
We recommend that you use only FSP
®
Factory Specied Parts.
These parts will t right and work right because they are made with the same precision
used to build every new WHIRLPOOL
®
appliance.
To locate FSP
®
replacement parts, assistance in your area, or accessories:
or call your nearest designated service center or refer to your Yellow Pages telephone directory.
In the U.S.A.
Features and specications on our full line of appliances.
N
Installation information.
N
Specialized customer assistance (Spanish speaking,
N
hearing impaired, limited vision, etc.).
In the U.S.A. and Canada
Use and maintenance procedures.
N
Accessory and repair parts sales.
N
Referrals to local dealers, repair parts distributors,
N
and service companies. Whirlpool designated service
technicians are trained to fulll the product warranty
and provide after-warranty service, anywhere in the
United States and Canada.
ASSISTANCE OU SERVICE
Avant de faire un appel pour assistance ou service, veuillez vérier la section “Dépannage” ou consulter
www.whirlpool.com/help. Cette vérication peut vous faire économiser le coût d'une visite de réparation.
Si vous avez encore besoin d'aide, suivre les instructions ci-dessous.
Lors d'un appel, veuillez connaître la date d'achat et les numéros au complet de modèle et de série de votre appareil.
Ces renseignements nous aideront à mieux répondre à votre demande.
Si vous avez besoin de pièces de rechange ou pour commander des accessoires
Si vous avez besoin de commander des pièces de rechange, nous vous recommandons d'utiliser seulement des pièces
spéciées par l'usine FSP
®
. Ces pièces conviendront et fonctionneront bien parce qu'elles sont fabriquées selon les mêmes
spécications précises utilisées pour construire chaque nouvel appareil WHIRLPOOL
®
.
Pour trouver des pièces de rechange FSP
®
, de l'aide ou des accessoires dans votre région :
Whirlpool Canada LP Centre pour l'eXpérience de la clientèle
1-800-807-6777 www.whirlpool.ca
ou contacter votre centre de réparation désigné le plus proche, ou encore consulter les Pages Jaunes.
Pour plus d'assistance
Vous pouvez nous soumettre toute question ou problème en
écrivant à l'adresse ci-dessous :
Centre pour l'eXpérience de la clientèle
Whirlpool Canada LP
1901 Minnesota Court
Mississauga, Ontario L5N 3A7
Dans votre correspondance, veuillez indiquer un numéro
de téléphone où on peut vous joindre dans la journée.
Nos consultants fournissent
l'assistance pour :
Procédés d'utilisation et d'entretien.
N
Vente d'accessoires et de pièces de rechange.
N
Les références aux concessionnaires, compagnies
N
de service de réparation et distributeurs de pièces de
rechange locaux. Les techniciens de service désignés
par Whirlpool sont formés pour remplir la garantie des
produits et fournir un service après la garantie, partout
au Canada.
W10305227B
W10315012A - SP
© 2010 Whirlpool Corporation.
All rights reserved.
Tous droits réservés.
® Registered Trademark/TM Trademark of Whirlpool, U.S.A., Whirlpool Canada LP Licensee in Canada
® Marque déposée/TM Marque de commerce de Whirlpool, U.S.A., emploi sous licence par Whirlpool Canada LP au Canada
2/10
Printed in U.S.A.
Imprimé aux É.-U.
-
 1
1
-
 2
2
-
 3
3
-
 4
4
-
 5
5
-
 6
6
-
 7
7
-
 8
8
-
 9
9
-
 10
10
-
 11
11
-
 12
12
-
 13
13
-
 14
14
-
 15
15
-
 16
16
-
 17
17
-
 18
18
-
 19
19
-
 20
20
-
 21
21
-
 22
22
-
 23
23
-
 24
24
-
 25
25
-
 26
26
-
 27
27
-
 28
28
-
 29
29
-
 30
30
-
 31
31
-
 32
32


Whirlpool WED7800XW User manual
- Category
- Electric laundry dryers
- Type
- User manual
- This manual is also suitable for
Ask a question and I''ll find the answer in the document
Finding information in a document is now easier with AI
in other languages
- français: Whirlpool WED7800XW Manuel utilisateur
Related papers
-
Whirlpool WED95HEXW User manual
-
-
-
-
-
-
-
-
-
Other documents
-
Maytag MEDB200VQ - Bravos Series 29-in Electric Dryer User manual
-
Maytag MEDC700VW - Centennial Series-27 Inch Electric Dryer User guide
-
-
-
-
-
-
-
-