Page is loading ...


Magnum Premium 48V 500W E-bike Manual
Table of Contents
Introduction ............................................................................................................... 3
Display Functions ................................................................................................... 4-8
Riding Your Bike ....................................................................................................... 9
Adjusting the Seat & Handlebar .............................................................................. 9
Kickstand & Lights .................................................................................................. 10
Lubrication & Maintenance Schedule ..................................................................... 11
Service checklist ....................................................................................................... 12
Folding your bike ..................................................................................................... 13
Installing & Charging the Battery ........................................................................... 14
Battery Info & Safety Instructions .......................................................................... 15
Safety Recommendations ........................................................................................ 16
Maintenance ............................................................................................................. 17
Manufacturer’s Warranty ....................................................................................... 18

1.
Your Magnum Premium 48V
1.1
Introduction
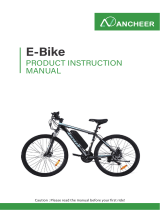
Congratulations on the purchase of your new Magnum Premium 48v folding E-Bike.
This bike is equipped with pedals and an auxiliary electric motor. It can be propelled
by means of the Pedal-Assist (PAS) function and/or the auxiliary electric motor
directly with the throttle. You will thoroughly enjoy riding this new, electrically
assisted folding bike.
Riding an e-bike is the future of personal mobility allowing for fun green ecologically
responsible transportation.
For your safety and for the safety of others, we recommend that you obey all road
regulations and wear a protective helmet while riding.
For optimal, safe and enjoyable use of your e-bike, make sure you thoroughly read this
user guide before your first use.
Have a pleasant ride !


3.0 Using Your Bike
3.1 Riding your bike
Before riding, make sure that you activate
the battery by switching the key to the ON
position.
The LED lights located on top of the battery
indicate its current charge level.
Turn on the display unit that is on the
handlebars (see 1.3).
Select your desired level of assistance and begin to pedal.
You’ll find that the motor will engage as soon as you start pedaling.
WARNING: Turning the pedals one half of a rotation will immediately engage the motor. Beware
not to turn the pedals while the unit is powered on when not riding.
When you use the brakes, the electronic brake sensor located on the brake levers will
immediately cut the power to the motor for added safety.
The left brake lever controls the front brake while the right brake lever controls the rear
brake.
You can also use your bike without any electric assistance by turning off the battery
(switching the key to OFF) or by adjusting the assistance level on your LCD display
to 0. The motor will then feature zero resistance and you’ll be freewheeling. Select the
appropriate mechanical gear by activating the 7 speed gear lever located on the right
hand side of the handlebar.
3.2 Adjusting the height of the seat and handlebar
The height of your seat can be adjusted:
Release or open the lever, adjust the seat height to the desired
position without ever exceeding the mark carved onto the
seat’s tube then close the lever returning it tightly to the locked
position. The seat’s height should be set so that your legs can be
extended comfortably when the corresponding pedal is in the
lowest position.

Handlebar Height
Maximum comfort is usually obtained when the handlebar height is equal to the height of
the seat. You may wish to try different heights to find the most comfortable position
without ever exceeding the mark carved onto the tube.
3.3 Propping up the bike on its kickstand
The bike is equipped with a lateral kickstand. Always
prop up the bike upon its kickstand on a flat and stable
surface.
3.4 Lights
The front LED headlight has its own
autonomous power supply using AA
batteries.
The light can be turned on and off
using the switch located on top of it.
The LED lightbulb has a lifespan
lasting several years.
Please see your dealer to obtain a
replacement when necessary.
Verify that the brakes and the front and rear lights are working properly
before each use. Also check the pressure of the tires to ensure they are correctly
inflated.
Be sure to lock the folding frame and stem of your bike tightly into place before
use.
If you ride your bike on a regular basis, the tension of the hinges’ adjustment and
locking systems can loosen slightly with time. Whenever necessary, adjust the
tension of the various joints screws and folding mechanisms on your bike.
This bike is not designed for rough usage, such as jumping, riding up or off of
sidewalks, or riding on unpaved roads and bumpy terrain.
For your own safety, no modifications should be made to the bike.
Please note: If you use your bike frequently, it is recommended that you inspect the
state of the fork, the frame, the suspension and the fasteners. The materials and
components may be subject to wear and tear with regular usage and exposure to
the elements. If you have any doubts about the integrity of your bike please
contact your dealer who will proceed with the necessary inspections.

3.5
Recommended Lubrication
Schedule
Frequency Component Lubricant How to Lubricate
Weekly
Chain
Derailleur Pulleys
Derailleurs
Brake Calipers
Brake Levers
Chain Lube or Light Oil
Chain Lube or Light Oil
Oil
Oil
Oil
Brush On or Squirt
Brush On or Squirt
Oil Can
3 drops from oil can
2 drops from oil can
Monthly Shift Levers Lithium Based Grease Disassemble
Every Six Months Freewheel
Brake Cables
Oil
Lithium Based Grease
2 squirts from oil can
Disassemble
Yearly
Bottom Bracket Lithium Based Grease Disassemble
Pedals Lithium Based Grease Disassemble
Derailleur Cables Lithium Based Grease Disassemble
Wheel Bearings Lithium Based Grease Disassemble
Headset Lithium Based Grease Disassemble
Seat Post Lithium Based Grease Disassemble
Note
: The frequency of maintenance should increase with use in wet or dusty conditions. Do
not over lubricate - remove excess lubricant to prevent dirt build up. Never use a degreaser to
lubricate your chain
3.6 Routine maintenance
1. Recommended values of the nut torque.
Front Wheel Nuts
22-27 Newton Meters 16.2 - 19.8 ft.-lb.
Rear Wheel Nuts
24-29 Newton Meters 17.5- 21.3 ft.-lb.
Seat Binder Nut
12- 17 Newton Meters 8.8- 12.5 ft.-lb.
Seat Pillar Clamp Nut
15- 19 Newton Meters 11.0-14.0 ft.-lb.
Brake Anchor Nut
7- 11 Newton Meters 5.1- 8.1 ft.-lb.
Crank Cotter Pin Nuts
9-14
Newton Meters
6.6- 10.3 ft.-lb.
Brake Centre Bolt
2-17 Newton Meters 1.5- 12.5 ft.-lb.

2. Service Checklist
Frequency Task
Before every ride Be sure batteries are fully charged
Check tire pressure
Check brake operation
Check wheels for loose spokes
After every ride Be sure to fully charge batteries
Quick wipe down with damp
Weekly Lubrication as per schedule2.6
Monthly
Inspect wires
Inspect connectors
Check derailleur adjustment
Check brake adjustment
Check brake and gear cable adjustment
Check tire wear and pressure
Check wheels are true and spokes tight
Check hub, head set and crank bearings for looseness
Check pedals are tight
Check handlebars and stem are tight
Check seat and seat post are tight and comfortably adjusted
Check frame and fork for trueness
Lubrication as per schedule2.6
Perform safety check
Every six months Lubrication as per schedule 2.6
Check all points as per monthly service
Check and replace brake pads, if required
Check chain for excess play or wear
Yearly Lubrication as per schedule 2.6

3.
Folding your bike
Folding is completed in several steps as below, and only takes a few seconds.
3.1
Folding the handlebars’ shaft
Remove the plastic cover;
Untighten the lever and free the
hinge; Press the lock button;
Fold the handlebar.
3.2
Folding the pedals
Push the pedals inward, and then push down
to fold them while holding the crank arm for
stability.
3.3
Folding the frame
Pull the lever outward loosening and freeing
the hinge; Remove the lever from its hinge by
swinging it outward toward the bicycle crank
then pull upward.
You will then hear the safety pin release and
disengage from the frame.
You can now fold the frame in half.
… Your bike is now folded!
Note:
While it isn’t necessary to remove the battery during the folding process the bike will be
easier to transport without it.

4.
The Battery
4.1
Installing and removing the battery
To remove the battery, turn the key to the unlock position so
that the lock disengages from the battery guide rail.
Fold your seat up by pressing on the lever beneath the
saddle. Remove the battery by pulling it upward along the
guide rail. The battery must remain vertical when removing it
from the track.
When reinserting the battery be sure to hold it all the while. Do
not let it fall into its socket, this may damage the
connecting pins below.
4.2
Charging the battery
Never let a battery be charged unattended.
The battery’s voltage level is indicated by the LED lights located on top of the battery,
as well as on the display unit located on the handlebars. Your battery must be
charged in an ambient temperature, on a non-flammable and dry surface, and away
from any sources of heat, humidity or flammable materials. The battery and charger
must never be covered while charging.
Here are the steps to follow when charging your battery:
Step 1 Turn the battery off by switching the key to the OFF position.
Step 2 Plug the charger into the wall socket and then insert the
charger’s plug into the battery.
Step 3
The charger’s LED indicator while light up in the following manner:
• The red LED light on indicates: the battery is being charged. (A)
• The red LED light turning green (B) indicates:
The battery is fully charged and you can now unplug the charger.
(A) (B)
It takes 6.5 hours for the battery to be fully charged when using the standard charger
that’s supplied with your e-bike.

4.3
Battery range and lifespan
4.3.1 Range
The bike’s range per charge ranges from 35 to 55 miles, as it depends on a
variety of factors (degree of assistance used, topology, rider’s weight, frequent
stops/start-ups, hills, tire pressure, etc…)
4.3.2
Battery
Your battery is of Lithium-NCM composite. It contains a limited amount of energy,
which diminishes as it is being used. The battery has a rated 700 life cycle lifespan and
can be fully charged and discharge 700 times before reaching a working efficiency of
80%.
Optimal conditions to extend the lifespan of the battery suggest keeping the battery at
20-80% capacity. Depleting the battery entirely and overcharging it can decrease the
lifespan of the battery.
Maintenance
If you don’t use your bike for a period of time exceeding 2 months, store it in a
dry non humid area to protect the electronic components and make sure that the
battery is not completely discharged.
Note:
Never store a completely discharged battery as it might result in permanent damage.
During the winter or long storage periods, it is recommended that you
recharge
the battery every 3 months. Don’t forget to switch it off. Store your
battery at a temperature of 60° - 80°f.
4.4 Battery safety instructions
The battery is an electric component made up of chemical elements. For your safety,
it is imperative that you obey the following rules:
Always handle with great care
Always keep away from children
Do not disassemble, drop hit, pierce or
submerge it
Keep away from temperatures exceeding 120°f
Do not touch the positive and negative contacts
located at the bottom of the battery
Don’t sleep near a battery that is charging
Only use the charger provided by the manufacturer
Do not use if damaged

Safety and
Maintenance
4.5 Safety recommendations
Helmet
Always wear a bicycle helmet while riding to ensure your safety.
Tires
Inspect the wear of your tyres on a regular basis and verify the tire pressure at
least once a month. Tire pressure is recommended to be 40-65 PSI depending
on the weight of the user. Please check the recommended PSI on your tire as
well.
Brakes
Be sure to check the brakes and brake levers before riding.
Important : The required braking distance will increase on a wet or
slippery surface
Seat- post
The shock absorbing spring on the seat post should
be covered if a child-seat is fitted onto the bike in
order to prevent injury to the child’s fingers.
Reflector
When luggage is attached to the rear carrier be
sure it does not cover the reflectors and/ or
bicycle lights.
Gears
The chain derailleur and crank must be kept clean and well lubricated at all times.
If the chain. If you hear a grinding or clicking noise coming from the derailleur or
the gears take care to adjust and lubricate them properly before riding.
Carrier
The maximum load allowed on the rear carrier is 50Lbs. This luggage carrier is not
designed to pull a trailer or carry a heavy child. The bicycle may react differently
(particularly with regard to steering and braking) when carrying a heavy load, please
use caution to ensure stability at all times.
Ensure that any luggage fitted to the luggage carrier is secured in place and no
loose straps that can get caught in any of the wheels are exposed. Be sure to
distribute luggage evenly between the two sides of the luggage carrier.
WARNING: As with all mechanical components, your bicycle is subject to wear and tear.
Different components may react to wear and tear and fatigue in different ways. If the life
of a component has been exceeded, it may suddenly fail possibly causing injuries to the
rider. Any cracks, scratches or change of coloring in highly stressed areas indicate that the
life of the component has been reached and it should be immediately replaced.

5.2 Maintenance
Caution:
Bike maintenance and repair require specific skills and the appropriate tools. Do
not repair your bike or change any of its settings if you have any doubt
regarding your ability to correctly proceed with such work. Contact a local
dealer or professional if needed. Any adjustments or repairs that are not properly
done can damage the bike and lead to accidents resulting in extensive injuries
and will void the manufacturer’s warranty. Use only original replacement parts for
all safety-critical components.
Cleaning
Always remove the battery when cleaning. Use soapy water to rinse and clean
with a damp sponge when necessary. Do not use a high pressure washer!
Maintenance
Your bike is safe for the environment. Used parts must be disposed of in
appropriate selective sorting recycling bins. A battery that no longer works must
be returned to your dealer so that he may pass it on to a recycling company.
Motor:
The motor does not require any sort of maintenance.
Chain :
It is recommended that you lubricate the bike’s 7 speed gearwheels and chain on
a regular basis using appropriate products (ask your dealer for advice).

7. Warranty
You are provided with a one year limited manufacturer’s warranty from the date of
purchase. Details regarding the warranty coverage and registration of your product
can be viewed on the Magnum Bikes webpage below
http://www.magnumbikes.com/warranty/
Thank you for choosing Magnum Bikes
Have a safe and pleasant ride!
/