Page is loading ...

Included,
AD1-0008,
ALCOHOL PREP
PAD, 2 pcs
A) Gauges must be installed in the triple gauge pod prior to installation.
B) Auto Meter only approves installing the triple gauge pod according to these written instructions with the hardware
provided. WARNING: Failure to install according to these instructions will void the warranty. This includes, but is
not limited to using alternative installation methods, hardware, or materials. DO NOT USE: Loctite, SuperGlue, or similar
products on the hardware.
C) Fit: Verify the t of the triple gauge pod. (Some ling, sanding, or cutting may be necessary to ensure proper t).
D) Painting: (Optional) if paint is desired it must be done prior to installing triple gauge pod on dash. Clean outer surface with a good grade
degreaser. DO NOT USE LACQUER THINNER OR ENAMEL REDUCER AS A DEGREASER. Wipe outer surface thoroughly with a
tack rag prior to paint. Application of plastic adhesion promoter for TPO plastic as per your paint system manufacturer’s recommendations
is required. Paint triple gauge pod using a high quality enamel, or polyurethane automotive paint.
STEP 1 – PRIOR TO INSTALLATION
2650-1694-00
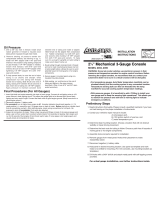
INSTALLATION INSTRUCTIONS
JEEP JK TRIPLE GAUGE POD
2007 TO 2010
Jeep JK Triple Gauge Pod Installation Procedures
Using the supplied alcohol wipe, clean area where
part will be placed. NOTE: Temperature should be
between 60°F and 110°F for proper tape adhesion.
2
Clean all dirt and debris from dash. Dry t the pod on
the dash, and determine how you will run your gauge
wiring. This pod can be used with or without gauge
brackets. If no brackets are used, you can leave the
gauges out until the pod is mounted, however wiring
must already be in place and easily reachable. If
you chose to use gauge brackets must already be
mounted and wired before mounting the pod.
Note: Before permanently securing gauge pod to
the dash it is recommended that gauges be
tested to ensure they are functioning properly.
1

Apply rm pressure for 30 seconds on each section
of the part to ensure proper adhesion.
It is recommended that you align the part on the dash
an equal distance between the front and the back
edges. NOTE: Alignment between front and back
edges is adjustable based on customer discretion.
Gauges must be installed in the triple gauge pod
prior to installation. Before placing the part on the
vehicle, take the tabs for the line of 1/2” tape on the
front and back of the part and fold it out as shown.
5 6
34
Pull liner of lower 1/2” tape strip. Press down on entire
length of the part again applying rm pressure to the
taped areas. NOTE: The tape reaches maximum
adhesive bond after 24 hours of contact.
12 MONTH LIMITED WARRANTY
Auto Meter Products, Inc. warrants to the consumer that all Auto Meter High Performance products will be free from defects in material and workmanship for a period of twelve (12)
months from date of the original purchase. Products that fail within this 12 month warranty period will be repaired or replaced at Auto Meter’s option to the consumer, when it is
determined by Auto Meter Products, Inc. that the product failed due to defects in material or workmanship. This warranty is limited to the repair or replacement of parts in the Auto
Meter instruments. In no event shall this warranty exceed the original purchase price of the Auto Meter instruments nor shall Auto Meter Products, Inc. be responsible for special,
incidental or consequential damages or costs incurred due to the failure of this product. Warranty claims to Auto Meter must be transportation prepaid and accompanied with dated
proof of purchase. This warranty applies only to the original purchaser of product and is non-transferable. All implied warranties shall be limited in duration to the said 12 month
warranty period. Breaking the instrument seal, improper use or installation, accident, water damage, abuse, unauthorized repairs or alterations voids this warranty. Auto Meter
Products, Inc. disclaims any liability for consequential damages due to breach of any written or implied warranty on all products manufactured by Auto Meter.
SERVICE
For service send your product to Auto Meter in a well packed shipping carton. Please include a note explaining what the problem is along with your phone number. If you are sending
product back for Warranty adjustment, you must include a copy (or original) of your sales receipt from the place of purchase.
FOR SERVICE SEND TO: AUTO METER PRODUCTS, INC. 413 W. Elm St., Sycamore, IL 60178 USA (866) 248-6357
Email us at [email protected]
2650-1694-00 9/20/12
© 2012 Auto Meter Products, Inc.
/