Page is loading ...

JKS OE Replacement Rear Trackbar Bracket Installation PN OGS168 Page 1 of 2
Installation
Instructions
Product: OE Replacement Rear Trackbar Bracket
Part Number: PN OGS168
Application: Jeep Wrangler JK, 2007+ (rear)
Welcome
CONGRATULATIONS on your purchase
of a new JKS OE Replacement Rear Trackbar
Bracket! At JKS Manufacturing, we are
committed to providing you with the best
products available and your satisfaction is our
first priority.
PLEASE READ these Installation Instructions
carefully, and save them for future reference,
as they contain important installation and
maintenance information.
Important
INSTALLATION REQUIRES WELDING by a
qualified welder or metal fabricator.
Tools Required
Metric/Standard Socket Wrench Set
Torque Wrench
Tape Measure
Die Grinder with Cut-Off Wheel
(for removing factory brackets)
Grinding Wheel
6” Clamp or larger (or similar tool to hold
bracket in place during welding)
Welding Equipment
Satin Black Spray Paint
Angle Measuring Tool
Anti-Seize Lubricant *
Factory Service Manual (recommended)
* Asterisk denotes tools that are not required for some
applications. Thoroughly read instructions first to
determine which tools will be required for your
application.
Recommended Upgrade
For maximum strength of the Replacement Brackets and
to prevent future damage from occurring, we strongly
recommend the installation of our optional Rear Trackbar
Brace PN OGS169.
Installation
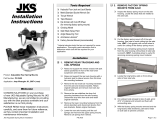
1. REMOVE REAR TRACK BAR
Remove the rear track bar mounting hardware
from the axle and chassis brackets per the
factory service manual instructions for your
vehicle. Retain original hardware.
Remove rear track bar from vehicle.
2. REMOVE FACTORY TRACK BAR
BRACKET FROM AXLE
Inspect the factory track bar bracket on the rear
axle housing. Locate the areas that are welded
to the axle tube.
Cut the factory track bar bracket off of the axle
housing. Use care to avoid cutting into the axle
tube. HINT: A die grinder with cut-off wheel is
useful for cutting off the factory bracket.
Remove any remnants of the bracket or factory
welds from the axle housing until surface of axle
tube is smooth. HINT: A grinding wheel is
useful for removing remaining bracket material.

JKS OE Replacement Rear Trackbar Bracket Installation PN OGS168 Page 2 of 2
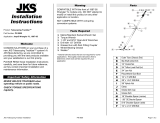
3. WELD OE REPLACEMENT TRACK
BAR BRACKET TO AXLE HOUSING
IMPORTANT: The OE Replacement Bracket
must be welded to bare metal. Remove any
residual paint, rust or other contaminants
before welding.
When installed correctly, the track bar mounting
hole on the OE Replacement Bracket will be in
the exact same position as the factory bracket
mounting hole. Use the following
measurements to ensure your bracket is
positioned correctly before welding.
 Distance from center of track bar mounting
hole to edge of factory bump stop pad is
exactly 3.375”.
 Top of OE Replacement Bracket is
positioned at the same angle as the top of
factory bump stop pad.
Position the Replacement Bracket on the axle
housing as instructed and temporarily clamp in
the desired mounting location.
With the Replacement Bracket correctly
positioned, tack weld the bracket to the axle
housing.
Next, fillet weld Replacement Bracket to the
axle housing.
IMPORTANT: Avoid overheating axle tube
by allowing the surface to cool off regularly.
Once all welding is complete, spray paint the
entire Replacement Bracket and any bare metal
on the axle housing to prevent corrosion. All
exposed metal must be complete covered.
4. REINSTALL REAR TRACK BAR
Apply anti-seize lubricant to bolt threads of
original track bar mounting hardware.
Insert axle end of track bar into the
Replacement Bracket first. Loosely install the
original mounting hardware.
Mount chassis end of track bar and loosely
install the original mounting hardware.
IMPORTANT: The vehicle must be on level
ground and the coil springs supporting the
full vehicle weight before the mounting
hardware is tightened.
Using a torque wrench, tighten mounting
hardware at both ends of track bar to 125 ft-lbs.
Maintenance
Check torque specifications regularly.
© 2009 JKS Manufacturing, Inc & Aftermarketing, LLC
Revision Date 1/10/2009
/


