18 19
FONCTIONNEMENT DES MODÈLES
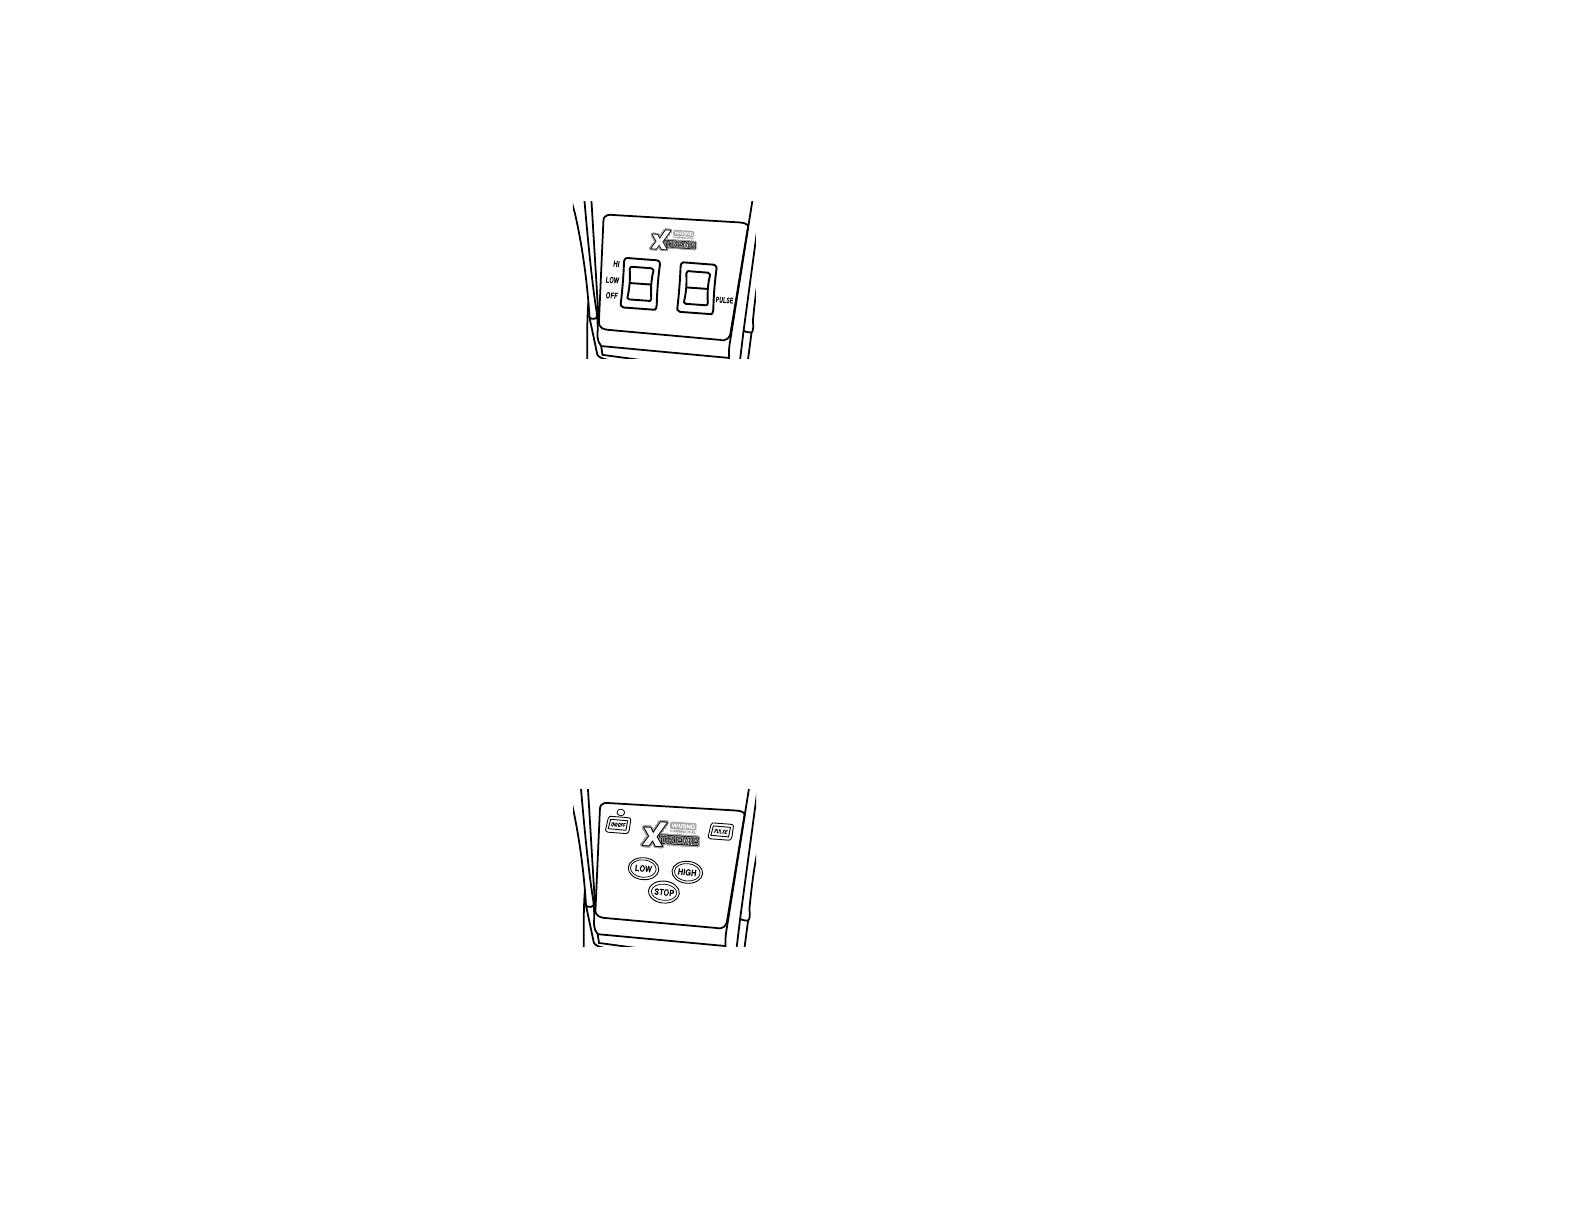
MX1000XTX/MX1000XTP/MX1000XTS
1. Vérifier que l'appareil est débranché.
2. Placer le bol/récipient sur le socle, après avoir vérifié que l'interrupteur
est à la position arrêt (OFF). S'assurer que le bol/récipient est
correctement installé et que l'accouplement avec l'arbre moteur est bien
engagé. Brancher l'appareil.
3. Mettre les ingrédients dans le bol/récipient et fermer
le couvercle. Ne pas remplir au-delà de la ligne
MAX.
4. L'appareil a deux vitesses : Rapide (HI) et lente
(LOW). Mettre l'interrupteur à la position voulue pour
mettre l'appareil en marche. Remarque : Utiliser la
vitesse rapide pour piler la glace.
5. Pour arrêter l'appareil, mettre l'interrupteur à la position arrêt (OFF).
6. Une fonction "pulse" est également disponible. Pour l'utiliser, actionner
l'interrupteur vers le bas (PULSE). L'appareil fonctionnera à vitesse
rapide jusqu'à ce que vous relâchiez l'interrupteur.
7. Attendre que le moteur se soit complètement arrêté avant de retirer le
bol/récipient. Ne jamais placer ou retirer le bol/récipient alors que le
moteur tourne.
8. Tenir le bol/récipient d'une main lors du démarrage et pendant le
fonctionnement.
Ne pas utiliser l'appareil sans le couvercle.
9. Laver et sécher le bol/récipient après usage. Suivre les instructions de
nettoyage et de désinfection.
FONCTIONNEMENT DES MODÈLES
MX1050XTX/MX1050XTP/MX1050XTS
Suivre les étapes 1–3 de la section ci-dessus.
1. L'appareil est équipé d'un contrôle électronique
tactile où figurent les touches ON/OFF (marche/
arrêt), LOW (vitesse lente), HIGH (vitesse rapide),
STOP (pause) et PULSE (fonction "pulse").
2. Appuyer sur le bouton ON/OFF pour mettre l'appareil
sous tension. Le voyant vert s'allumera. Pour allumer
l'appareil, appuyer sur le bouton HIGH ou LOW.
Pour arrêter, appuyer sur le bouton STOP. Pour faire
fonctionner en intermittence, appuyer sur le bouton PULSE ; le moteur
tournera à vitesse rapide jusqu'à ce que vous relâchiez le bouton.
REMARQUE : L'appareil est équipé du système de démarrage lent Slow
Start
™
. Lorsque vous appuyez sur la touche HIGH, l'appareil se met en
marche à basse vitesse, pour n'atteindre la vitesse voulue qu'au bout de
2 secondes. Cela produit des résultats plus homogènes.
3. Attendre que le moteur se soit complètement arrêté avant de retirer le
bol/récipient. Ne jamais placer ou retirer le bol/récipient alors que le
moteur tourne.
4. Tenir le bol/récipient d'une main lors du démarrage et pendant le
fonctionnement. Ne pas utiliser l'appareil sans le couvercle.
5. Laver et sécher le bol/récipient après usage. Suivre les instructions de
nettoyage et de désinfection.
6. Pour éteindre l'appareil complètement, appuyer sur le bouton ON/OFF.
Le voyant vert s'éteindra.
FONCTIONNEMENT DES MODÈLES
MX1100XTX/MX1100XTP/MX1100XTS
Suivre les étapes 1–3 de la section "Fonctionnement - Modèle MX1000XTX".
1. L'appareil est équipé d'un contrôle électronique tactile où figurent les
touches ON/OFF (marche/arrêt), LOW (vitesse lente), HIGH (vitesse
rapide), STOP (pause), PULSE (fonction "pulse") et les deux flèches de
réglage de la minuterie.
2. Appuyer sur le bouton ON/OFF pour mettre l'appareil sous tension.
Le voyant vert s'allumera. L'écran numérique indiquera 10 secondes (le
temps par défaut). Pour régler la minuterie, appuyer à plusieurs reprises
sur les flèches. L'écran numérique indiquera le temps programmé,
jusqu'à 30 secondes, en incréments de 5 secondes. Une fois la minuterie
réglée, appuyer sur le bouton HIGH ou LOW pour mettre l'appareil en
route. La minuterie s'arrêtera une fois le temps programmé écoulé. Pour
arrêter l'appareil, y compris avant la fin du temps programmé, appuyer
sur le bouton PULSE, STOP ou ON/OFF.
REMARQUE : Pour changer le temps programmé pendant le
fonctionnement, appuyer sur les flèches. Cela modifiera le temps restant,
en incréments de 5 secondes.
3. Si l'appareil n'est pas mis en route dans les cinq secondes qui suivent,
la minuterie s'éteindra. Pour la réactiver, appuyer sur une des flèches.
La minuterie se remettra en marche et affichera le temps programmé
total. Remarque: Après avoir éteint ou débranché l'appareil, la minuterie
affichera le temps par défaut, soit 10 secondes.
4. Pour allumer l'appareil, appuyer sur le bouton HIGH ou LOW. Pour
arrêter, appuyer sur le bouton STOP. Pour faire fonctionner l'appareil en
intermittence, appuyer sur le bouton PULSE. L'appareil fonctionnera à
vitesse rapide jusqu'à ce que vous relâchiez le bouton.
REMARQUE : L'appareil est équipé du système de démarrage lent
Slow Start
™
. Lorsque appuyez sur la touche HIGH, l'appareil se met en
marche à basse vitesse, pour n'atteindre la vitesse voulue qu'au bout de
2 secondes. Cela produit des résultats plus homogènes.
5. Attendre que le moteur se soit complètement arrêté avant de retirer le
bol/récipient. Ne jamais placer ou retirer le bol/récipient alors que le
moteur tourne.
6. Laver et sécher le bol/récipient après usage. Suivre les instructions de
nettoyage et de désinfection.
7. Pour éteindre l'appareil complètement, appuyer sur le bouton ON/OFF.
Le voyant vert s'éteindra.


