Page is loading ...

FOR OUTDOOR USE ONLY
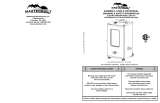
THIS IS YOUR ASSEMBLY, CARE & USE MANUAL
WITH IMPORTANT WARNING & SAFETY INFORMATION.
PLEASE SAVE THESE INSTRUCTIONS.
Approximate assembly time: 30 minutes
Tools needed for assembly: Phillips head screwdriver
For Models
D4015SSC / D4015BC
and D4015RC
Digital Electric Smoker
with Cabinet

• Do not leave smoker unattended.
• Do not cover cooking racks with metal foil. This will trap heat and cause severe damage to the electric smoker.
• Drip tray is only for the bottom of electric smoker. Do not put drip tray on cooking rack as this may
damage the electric smoker.
• The wood chip tray is HOT when electric smoker is in use. Use caution when handling or adding wood.
• To disconnect, turn control panel “OFF” then remove plug from outlet.
• Unplug from outlet when not in use and before cleaning. Allow unit to cool completely before
adding/removing grates, wood chip tray or water pan.
• Dispose of cold ashes by placing them in aluminum foil, soaking with water and discarding in a
non-combustible container.
• Do not store the electric smoker with HOT ashes inside unit. Store only when all surfaces are cold.
• Accessory attachments or parts not supplied by Outdoor Leisure Products, Inc. are not recommended
and may cause injury.
•
Never use the electric smoker for anything other than its intended purpose. This unit is not for commercial use.
• Always use the electric smoker in accordance with all applicable local, state and federal re codes.
• Longer, detachable power-supply cords or extension cords are available and may be used if care is
exercised in their use, based on the following requirements.
• If a longer, detachable power-supply cord or extension cord is used, the marked electrical rating of
the cord set or extension cord should be at least as great as the electrical rating of the appliance.
• The extension cord must be a grounding -type 3-wire cord.
• Outdoor extension cords must be used with outdoor use products and are marked with sux “W” and
with the statement “Suitable for Use with Outdoor Appliances.”
•
CAUTION- To ensure continued protection against risk of electric shock, connect to properly grounded outlets only.
• CAUTION - To reduce the risk of electric shock, keep extension cord connection dry and o the ground.
• Do not clean this product with a water sprayer or the like.
• Do not use wood pellets or wood chunks.
• Store products indoors when not in use - out of reach of children.
IMPORTANT SAFEGUARDS
READ ALL INSTRUCTIONS
THIS MANUAL CONTAINS IMPORTANT INFORMATION NECESSARY FOR THE PROPER AND SAFE
USE OF THIS UNIT. READ AND FOLLOW ALL WARNINGS AND INSTRUCTIONS BEFORE USING
SMOKER AND DURING USE.
FAILURE TO FOLLOW THESE WARNINGS AND INSTRUCTIONS PROPERLY
COULD RESULT IN PERSONAL INJURY OR DEATH.
BURNING WOOD CHIPS GIVES OFF CARBON MONOXIDE, WHICH HAS NO ODOR AND CAN
CAUSE DEATH. DO NOT BURN WOOD CHIPS INSIDE HOMES, VEHICLES, TENTS, GARAGES
OR ANY ENCLOSED AREAS. USE ONLY OUTDOORS WHERE IT IS WELL VENTILATED.
WARNING
CARBON MONOXIDE HAZARD
CONTINUED ON
NEXT PAGE...
2

When using electrical appliances, basic safety precautions
should always be followed including the following:
• For outdoor use only. Do not operate in an enclosed areas (example, porch or garage).
•
Unit MUST be on the ground. Do not place unit on tables or counters. Do NOT move unit across uneven surfaces.
• Do not lift unit by rear handle.
• Do not plug in the electric smoker until fully assembled and ready for use.
• Use only an approved grounded electrical outlet.
• Do not use during an electrical storm.
• Do not expose the electric smoker to rain or water at anytime.
•
CAUTION- To ensure continued protection against risk of electric shock, connect to properly grounded outlets only.
• To protect against electrical shock do not immerse cord, plug or control panel in water or other liquid.
• Do not operate any appliance with a damaged cord or plug, or after appliance malfunctions or has
been damaged in any manner. Contact OLPI Customer Service for assistance at 1-866-475-5180.
• Keep a re extinguisher accessible at all times while operating the electric smoker.
• Do not let cord touch hot surfaces.
• Do not place on or near a hot gas or electric burner, or in a heated oven.
• Keep children and pets away from electric smoker at all times. Do not allow children to use electric smoker.
Close supervision is necessary should children or pets be in area where the electric smoker is being used.
• Fuel, such as charcoal briquettes or heat pellets, are not to be used in the electric smoker.
• Never use the electric smoker as a heater (READ CARBON MONOXIDE HAZARD ON PAGE 2).
• Use the electric smoker only on a level, stable surface to prevent tipping.
• The electric smoker is HOT while in use and will remain HOT for a period of time afterwards. Use caution.
• Do not touch HOT surfaces. Use handles or knobs.
• Do not allow anyone to conduct activities around the electric smoker during or following its use until
the unit has cooled.
• The use of alcohol, prescription or non-prescription drugs may impair the user’s ability to
properly assemble or safely operate the electric smoker.
• Avoid bumping or impacting the electric smoker.
• Never move the electric smoker when in use. Allow the smoker to cool completely before moving or storing.
• Be careful when removing food from the electric smoker. All surfaces are HOT and may cause burns.
Use protective gloves or long, sturdy cooking tools.
• Avoid using the smoker on wooden or ammable surfaces.
• Store products indoors when not in use - out of reach of children.
WARNING
IMPORTANT SAFEGUARDS
SAVE THESE
INSTRUCTIONS
CALIFORNIA PROPOSITION 65
This product contains, or the use of this product releases, chemicals
known to the State of California to cause cancer and birth defects or other
reproductive harm. For more information go to www.P65Warnings.ca.gov.
3

Congratulations
on your purchase of your new
Smoke Hollow® Digital Electric Smoker.
With proper set-up, operation and maintenance, this appliance will
provide you with years of delicious food and cooking enjoyment.
IMPORTANT
When you un-pack your smoker, remove all parts and
packaging material from the box and inside the smoker.
Make sure you have all the items on the parts list. Carefully
check the unit and make sure there is no damage.
IF YOU HAVE ANY PROBLEMS WITH THIS PRODUCT OR THERE ARE MISSING OR DAMAGED PARTS ,
PLEASE CALL CUSTOMER SERVICE TOLL FREE 1-866-475-5180 (Monday–Friday, 8:30 am–4:30 pm, CST).
NOTE : DO NOT RETURN UNIT TO THE STORE BEFORE CALLING THE TOLL FREE NUMBER.
Do not dispose of your cartons until you are completely satised with your new Smoke Hollow smoker.
Warning: Changes or modications to this unit not expressly approved by the party responsible for compliance could void the
user’s authority to operate the equipment.
NOTE: This equipment has been tested and found to comply with the limits for a Class B digital device, pursuant to Part 15 of the
FCC Rules. These limits are designed to provide reasonable protection against harmful interference in a residential installation. This
equipment generates uses and can radiate radio frequency energy and, if not installed and used in accordance with the instructions,
may cause harmful interference to radio communications. However, there is no guarantee that interference will not occur in a
particular installation. If this equipment does cause harmful interference to radio or television reception, which can be determined
by turning the equipment o and on, the user is encouraged to try to correct the interference by one or more of the following
measures:
• Reorient or relocate the receiving antenna.
• Increase the separation between the equipment and receiver.
• Connect the equipment into an outlet on a circuit dierent from that to which the receiver is connected.
• Consult the dealer or an experienced radio/TV technician for help.
THIS DEVICE COMPLIES WITH PART 15 OF THE FCC RULES
4

Parts and Tool List
Tools needed for assembly:
Phillips head screwdriver
12
34
12
34
5

Parts and Tool List
Note: For assistance, including missing or damaged parts, call
toll free 1- 866-475-5180 from 8:30 am - 4:30 pm Central Time, Monday - Friday
Part #
Part Name Quantity
D4015SSC D4015BC D4015RC
1 35 67 Smoker Door 1
2 2 2 Smoker Body 1
3 3 62 Door Handle 1
4 69 69 Door Latch 1
5 5 5 Controller 1
6 36 68 Control Panel 1
7 37 65 Wood Chip Tray Assembly 1
8 8 8 Wood Chip Tray Lid 1
9 38 64 Grease Tray 1
10 10 10 Rear Handle 1
11 11 11 Rear Vent 1
12 12 12 Rear Vent Knob 1
13 13 13 Wheel Assembly 2
14 14 14 / -
15 15 15 Cooking Rack Support 8
16 16 16 Cooking Rack 4
17 27 27 Water Pan 1
18 18 18 Wood Chip Tray Cover 1
19 19 19 Reector Plate Rail 2
20 20 20 Meat Probe 1
21 21 21 Heating Element - Smoke 1
22 22 22 Heating Element - Main 1
23 23 23 Wood Chip Tray Track 2
24 24 24 Power Circuit Board 1
25 25 25 Bottom Panel 1
26 26 26 Rear Panel 1
27 27 27 LED Light 1
28 28 28 Lens - LED Light 1
29 29 29 Water Pan - Door 1
30 30 30 Water Pan - Spout 1
31 39 66 Wood Chip Tray Lower Panel 1
32 40 63 / 1
33 33 33 High Temp Limiter 1
34 34 34 / -
41 41 41 Cabinet Back Panel 1
42 42 42 Cabinet Right Panel 1
43 43 43 Cabinet Bottom Panel Assembly 1
44 50 70 Cabinet Right Door 1
45 45 45 Cabinet Top Cross Brace Assembly 1
46 46 46 Cabinet Left Panel 1
47 51 71 Cabinet Left Door 1
48 52 48 Cabinet Door Handle 2
49 53 72 Grease Tray 1
54 54 54 Hardware Pack 1
6

Smoker Assembly
Locate:
• (1) Cabinet Bottom Panel
Assembly
• (2) Wheel Mounting Brackets
• (10) M6 x 20 bolts
Tools Needed:
Phillips Screwdriver
Locate:
• (1) Cabinet Bottom Panel
Assembly
• (2) Wheel Assembly
• (8) M6 x 20 bolts
Tools Needed:
Phillips Screwdriver
Procedure:
Use (8) M6 x 20 bolts to assemble
the (2) Wheel Assembly to the
Cabinet Bottom Panel Assembly
as shown.
Step 1
Step 2
Procedure:
Use (10) M6 x 20 bolts to assemble the (2) Wheel Mounting
Brackets to the Cabinet Bottom Panel as shown.
7

Smoker Assembly
Locate:
• (1) Cabinet Bottom Panel
Assembly
• (2) Front Pads
• (2) M8 x 30 bolts
• (2) M8 Washers
• (2) M8 Nuts
Tools Needed:
Phillips Screwdriver
Locate:
• (1) Cabinet Bottom Panel
Assembly
• (2) M3 x 10 bolts
• (1) Cabinet Door Magnet
• (2) Cabinet Door Pivots
Tools Needed:
Phillips Screwdriver
Procedure:
Use (2) M3 x 10 bolts to assemble
the (1) Cabinet Door Magnet and
assemble the (2) Cabinet Door
Pivots to the Cabinet Bottom
Panel Assembly as shown.
Step 3
Step 4
Procedure:
Use (2) M8 x 30 bolts, (2) M8 Washers and (2) M8 Nuts to assemble
the (2) Front Pads to the Cabinet Bottom Panel as shown.
8

Smoker Assembly
Locate:
• Cabinet Left Panel
• Cabinet Back Panel
• Cabinet Right Panel
• (4) M6 x 20 bolts
Tools Needed:
Phillips Screwdriver
Locate:
• Cabinet Panel Assembly
• Cabinet Top Cross Brace
Assembly
• (4) M4 x 12 bolts
Tools Needed:
Phillips Screwdriver
Procedure:
Use (4) M4 x 12 bolts to assemble
the Cabinet Top Cross Brace
Assembly as shown.
Step 5
Step 6
Procedure:
Use (4) M6 x 20 bolts to
assemble the Cabinet Left
Panel, Cabinet Back Panel and
Cabinet Right Panel as shown.
9

Smoker Assembly
Locate:
• Cabinet Left Panel
• Cabinet Back Panel
• Cabinet Right Panel
• (4) M6 x 20 bolts
Tools Needed:
Phillips Screwdriver
Locate:
• Cabinet Left Door
• Cabinet Right Door
• (2) Cabinet Door Handle
• (4) M4 x 8 bolts
Tools Needed:
Phillips Screwdriver
Procedure:
Use (4) M4 x 8 bolts to assemble
the (2) Cabinet door Handles to
the Cabinet Left Door and right
Door as shown.
Step 7
Step 8
Procedure:
Use (4) M6 x 20 bolts to
assemble the Cabinet Left
Panel, Cabinet Back Panel and
Cabinet Right Panel as shown.
10

Smoker Assembly
Locate:
• Cabinet Assembly
• (10) M6 x 20 bolts
Tools Needed:
Phillips Screwdriver
Procedure:
Turn the Smoker Cabinet upside down.
Use (10) M6 x 20 bolts to assemble the
Cabinet Assembly to the bottom of the
smoker body as shown. Return Smoker
Body to upright position.
Note: (2) bolts screw through the two
ears from the outside as shown here.
Step 9
11

Smoker Assembly
Locate:
• Rear Handle
• Rear Vent Knob
• (2) M6 x 20 bolts
Tools Needed:
Phillips Screwdriver
Locate:
• Door Handle
• (2) M5 x 40 bolts
Tools Needed:
Phillips Screwdriver
Procedure:
Use (2) M6 x 20 bolts to assemble the
Rear Handle to the smoker cabinet.
Screw the Vent Knob to the Rear Vent
as shown.
Note: Hand tighten knob.
Procedure:
Use (2) M5 x 40 bolts to assemble
the Door Handle as shown.
Door
Handle
Rear
Handle
Rear Vent
Knob
Step 10
Step 11
12

Smoker Assembly
Locate:
• Wood Chip Tray Cover
• Water Pan
Tools Needed:
None
Procedure:
Position the wood chip tray cover over
the (2) wood chip tray rails inside the
smoker. The dimples on the side of the
wood chip tray cover should sit into the
recesses in the wood chip tray rails.
Position the water pan onto the reector
plate rails on the sides of the smoker
as shown. The tabs on the sides of the
water pan will t into the slots in the
reector rails as shown.
Step 12
Wood Chip Tray Rails
Water Pan
Wood Chip Tray Cover
13

Smoker Assembly
Locate:
• Water Pan-Spout
• (8) Rack Supports
Tools Needed:
None
Procedure:
Assemble (4) rack supports in the
holes in the left side of the smoker.
Repeat the procedure for the right
side making sure the rack supports
on the left side and right side are
at the same height so the cooking
racks are level.
Assemble the water pan-spout
to the water pan-door as shown
below.
Cooking
Rack
Supports
Step 13
Water Pan
Fill Spout
14

Step 14
Step 15
Smoker Assembly
Locate:
• (4) Cooking Racks
Tools Needed:
None
Locate:
• Wood Chip Tray Assembly
• Grease Tray
Tools Needed:
None
Procedure:
Place the (4) cooking racks into
the cooking rack supports as
shown. Make sure the angled
portion of the rack is slid in rst.
Procedure:
Slide the wood chip tray assembly
and grease tray into the rails in
smoker body as shown.
Cooking
Racks
15

ASSEMBLY OF YOUR SMOKER IS NOW COMPLETE.
FOR YOUR SAFETY, FOLLOW ALL SAFE GUARDS
AND INSTRUCTIONS.
Smoker Assembly
16

SEASON YOUR SMOKER PRIOR TO ITS FIRST USE.
A BURNT GREASE SMELL MAY OCCUR DURING THIS TIME. THIS IS
NORMAL DURING THE SEASONING PROCESS.
1. Make sure water pan is in place without water.
2. Set the temperature to 275°F, set the time for 3 hours and turn the smoker on.
3. To complete the seasoning process, add wood chips to the wood chip tray for the last 45 minutes.
Caution: Never overll the wood chip tray. Make sure the wood chip tray cover is completely closed.
4. Turn o the unit and allow to cool down.
1. Before starting the unit, ll the wood chip tray with wood chips.
Caution: Never overll the wood chip tray. Make sure the wood chip tray lid closes completely on the
wood chip tray.
2. Never use wood chunks or wood pellets in the wood chip tray.
3. Insert the wood chip tray into place.
4. Check the wood chip tray periodically to see if the wood chips have burned down by sliding the wood
chip tray out about half way and look through the slots in the wood chip tray cover.
5. If the wood chips have completely burned in the wood chip tray, remove the tray from the smoker.
Caution: The wood chip tray and lid will be HOT, even if the handle is not.
6. Dump the burned wood chips from the wood chip tray into a metal pan with water. The wood chip
tray lid will stay attached to the wood chip tray during this process.
7. Repeat step 1.
Caution: Never overll the wood chip tray. Make sure the wood chip tray lid closes completely on the
wood chip tray.
CAUTION:
Always keep smoker door closed
when removing or adding wood chips.
Seasoning Instructions
How to Use Wood Chip Tray
A FLARE UP MAY OCCUR WHEN YOU PULL OUT
THE WOOD CHIP TRAY. IMMEDIATELY PUSH
TRAY BACK IN AND WAIT FOR WOOD CHIPS
TO BURN DOWN BEFORE OPENING THE DOOR
AGAIN. DO NOT SPRAY WITH WATER.
CAUTION
17

• Maximum temperature setting is 290°F (143°C).
• Do NOT move unit across uneven surfaces.
• Rear handle is NOT for lifting.
• Wood chip tray lid MUST be in place when using smoker. This minimizes the chance of wood flare ups.
• Wood chips must be used in order to produce smoke and create the smoke flavor.
• Check grease tray often during cooking. Empty grease tray before it gets full. Grease tray may need to
be emptied periodically during cooking.
• Do not open smoker door unless necessary. Opening smoker door causes heat to escape and may
cause wood to flare up. Closing the door will re-stabilize the temperature and stop flare up.
•
If a flare up occurs in your wood chip tray, leave the door closed and close the lower air intake vent until flare
up stops. If the flare up continues for 10 or more minutes, shut the smoker off to allow the flare up to stop.
• Do not leave old wood ashes in the wood chip tray. Once ashes are cold, empty tray. Tray should be
cleaned out prior to, and after each use to prevent ash buildup.
• Glass in door is tempered and will not break under normal operation.
• This is a smoker. There will be a lot of smoke produced when using wood chips. Some smoke may
escape through seams and turn the inside of smoker black. This is normal. To minimize smoke loss
around
door, the door latch can be adjusted to further tighten door seal against body.
• Opening smoker door during cooking process may extend cooking time due to heat loss.
• When outside temperature is cooler than 65°F (18°C) and/or altitude is above 3,500 feet (1067m),
additional cooking time may be required. To ensure that meat is completely cooked use a
meat thermometer to test internal temperature.
• To adjust door latch, loosen hex nut on door latch. Turn hook clockwise to tighten. Secure hex nut firmly
against door latch.
•
For the rack tracks, cooking racks, water pan and grease drip pan, use a mild dish detergent. Rinse and dry thoroughly.
• For the wood chip tray, clean frequently to remove ash build up, residue and dust.
• Dispose of cold ashes by placing them in aluminum foil, soaking with water and discarding in a
non-combustible container.
• For the interior (glass in door and meat probe) and exterior of the smoker, simply wipe down with a damp cloth
Do not use a cleaning agent. Make sure to dry thoroughly.
• Door seal and inside seam that seal attaches to MUST be cleaned with a damp cloth after each use to
keep seal in proper working condition.
WARNING
ALWAYS MAKE SURE UNIT IS UNPLUGGED AND COOL
TO THE TOUCH BEFORE CLEANING AND STORING.
Important Facts for Using Smoker
How to Clean Smoker
18

Operating Instructions
Cold Smoking
Operating between 50°F and 125°F.
Common for smoking cheese and sh.
Power
Powers on unit.
Up Arrow
For setting time
and temperature
Down Arrow
For setting time
and temperature
Light
Powers on work light
Bluetooth Pairing
Lights and ashes when connected and pairing
Fast Smoking
Used to increase or create smoke
fast when changing out wood
chips.
Hot Smoking
The most common operation for
temp. ranges from 125°F to 290°F
Large Digital LED Screen
Displays Temp., Time and Instructional
Messages. Top lights indicate display
mode and element operation.
Set Time, Temp or Probe
Sets time and temp. for operation of
the cooking programs. Can set to stop
cooking for time, temp. or meat temp.
The POWER button powers the unit on. When the power cord is plugged in, the blue LED light will flash indicating the
unit has power. When the POWER button is pushed the unit will turn on and the light will stay on.
The BLUETOOTH PAIRING button has a blue LED indicator light that will flash during the pairing operation and will
remain solid lit when paired. (The Bluetooth will pair when the unit is plugged in). If for any reason the unit does not go
into pair mode the Bluetooth button can be pushed to place the unit into pairing mode.
When the COLD SMOKE button is pressed, the LED light will flash during the program set up. When the program is in
operation, the LED light will be on solid. The COLD SMOKE button allows you to operate between the temperatures of
50°F and 125°F. You are able to set your smoking time, smoking temperature and probe temperature after the COLD
SMOKE button is pushed. Outside temperatures may affect your ability to cold smoke. If your internal temperature in your
smoker is higher than 125°F, the LED screen will inform you that your unit is too hot by displaying “2-hot”.
When the FAST SMOKE button is pressed the LED will light solid while the program is in operation. The FAST SMOKE
button serves (2) functions. The first is to get the wood chips smoking faster when you are in either of the smoking
programs. The second is to get the wood chip drawer with new wood chips started faster after dumping burned up wood
chips. The FAST SMOKE can be used anytime after the initial 20 minutes during the smoking functions. The FAST SMOKE
mode will be on for 20 minutes. You will see the LED display show the 20 minutes counting down to zero. Your current
smoking program is still running in the background during the 20 minutes the FAST SMOKE is in use. After the 20 minutes
the smoking program will resume. You can stop the FAST SMOKE at any time during the running of the program by
pressing the FAST SMOKE button again.
When the HOT SMOKE button is pressed, the LED light will flash during the program set up. When the program is in
operation the LED light will be on solid. The HOT SMOKE button allows you to operate between the temperatures of
125°F and 290°F. You are able to set your smoking time, smoking temperature and probe temperature after the HOT
SMOKE button is pushed. Outside temperatures may affect your internal temperatures during the hot smoke program.
CAUTION: If the smoker’s internal temperature reaches higher than 302°F, the smoker will automatically shut off until the
temperature is below 290°F.
Control Panel Operations
Control Panel Functions
19

The SET/CHECK TIME button allows you to set your smoking time from 1 hour to 99 hours. You are also able to check
the time left to smoke during any smoke program by pressing the SET/CHECK TIME button once. Your time will change
in 1 hour increments with pressing the SET/CHECK TIME button one time. After you have set your hours, if you press the
SET/CHECK TIME button again you will be able to set the minutes for your smoking cycle. Your minutes will change in 10
minute increments.
The SET/CHECK TEMP button allows you to set your desired smoking temperature in the smoking programs. You will
be able to set your temperature range in the Cold Smoking program between 50°F and 125°F and in the Hot Smoking
program between 125°F and 290°F. You are able to check your internal temperature inside the smoker at any time
during any of the smoking programs by pressing the SET/CHECK TEMP button once. Your temperature will change in 5°F
increments when setting the internal smoker temperature.
The SET/CHECK PROBE button allows you to set your desired meat probe temperature in the smoking programs. You will
be able to set your meat probe temperature range in both Smoking programs between 50°F and 300°F. If you chose not
to use the meat probe, you can press the SET/CHECK PROBE button and when you reach the lowest temperature the next
setting will shut the probe OFF. You are able to check your meat probe temperature at any time during any of the smoking
programs by pressing the SET/CHECK PROBE button once. Your temperature will change in 5°F increments when setting
the meat probe temperature. Once the meat probe reaches the set temperature, there will be an alert sound for 3 seconds
to notify you that the meat probe has reached the set temperature. The probe will not disengage the elements.
The ARROW CONTROL buttons allow you to change the time and temperature up and down accordingly. When
you press the UP/DOWN ARROW button, the time will change in 1 hour increments or 10 minute increments and the
temperature will change in 5°F increments. If you push and hold the UP/DOWN ARROW button for 3 seconds or more, the
time and temperature will scroll at a faster rate.
When the LIGHT button is pressed the LED light under the control panel will power on. When the button is pressed a
second time the LED light will power off. The LED light will be operational during any status, including the stand by status.
The DIGITAL LED SCREEN is your information center for the smoker.
The LED screen will display your Time, Temperature and Meat Probe
Temperatures you have set. When you have chosen a smoking mode
and set your information, the LED screen will scroll between Time,
Temperature and Meat Probe Temperature during the smoking cycle.
There are 5 displays above the LED screen, Time, Temp, Probe, Smoke
and Heat. When these modes are operational, the individual display will
be lit to indicate they are operating.
1. The “TIME” will be lit on the controller when you are setting the time in the program modes and when the LED screen is
scrolling and the remaining time appears on the screen.
2. The “TEMP” will be lit on the controller when you are setting the temperature in the program modes and when the
LED screen is scrolling and the temperature appears on the screen.
3. The “PROBE” will be lit on the controller when you are setting the meat probe temperature in the program modes and
when the LED screen is scrolling and the meat probe temperature appears on the screen.
4. The “SMOKE” will be lit on the controller when the smoke element is turned on during the program modes and when
the “FAST SMOKE” is on.
5. The “HEAT” will be lit on the controller when the heat element is turned on during the program modes.
Operating Instructions
20
/