Electrolux EW30IS80RS Owner's manual

Category
Cookers
Type
Owner's manual
Use and care gUide
EN ELECTRIC SLIDE-IN RANGE
A00539701 rev. A (15/01)
2
Finding Information
©2015 Electrolux Home Products, Inc. All rights reserved. Printed in U.S.A.
Table of contents
Thank you for choosing Electrolux, the new pre-
mium brand in home appliances. This Use & Care
Guide is part of our commitment to customer satis-
faction and product quality throughout the service
life of your new appliance.
We view your purchase as the beginning of a
relationship. To ensure our ability to continue serv-
ing you, please use this page to record important
product information.
Keep a record for quick
reference
Please read & save this guide
Questions?
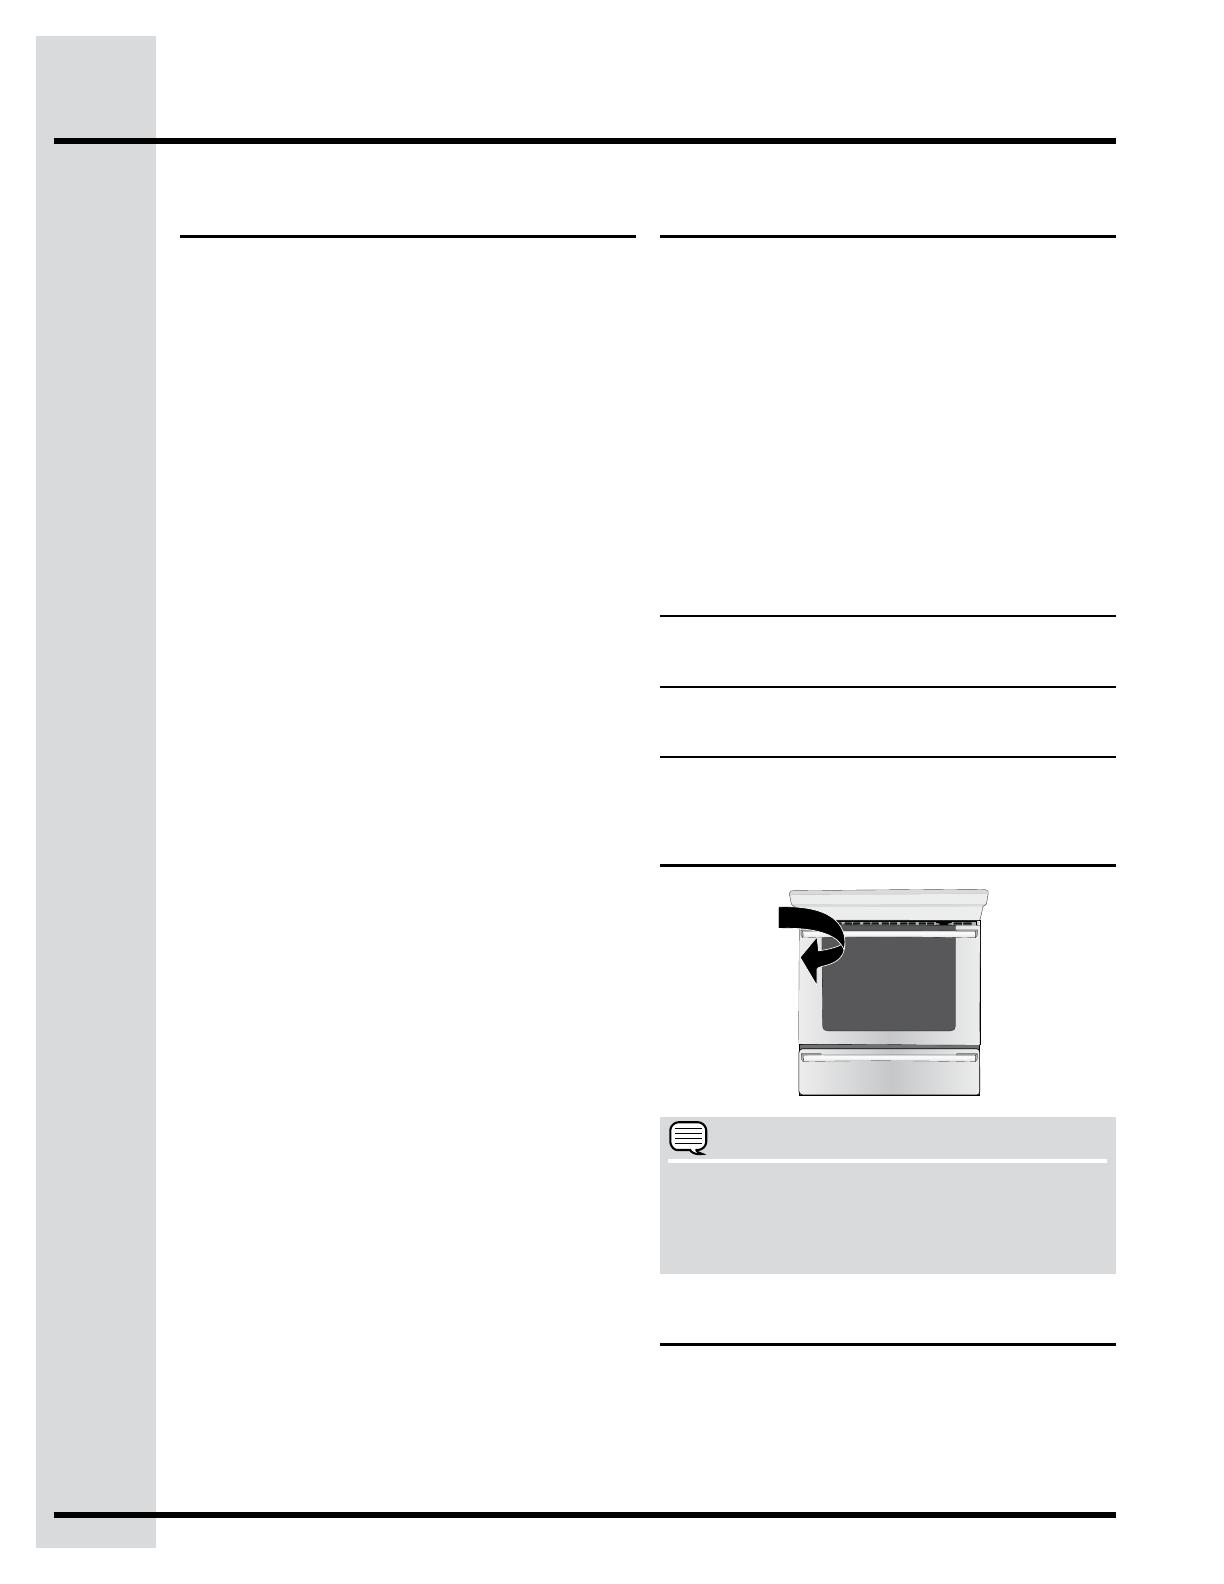
Serial plate location
For toll-free telephone support in the U.S. and
Canada:
1-877-4ELECTROLUX (1-877-435-3287)
NOTE
Registering your product with Electrolux enhances
our ability to serve you. You can register online
at www.electroluxappliances.com or by dropping
your Product Registration Card in the mail.
Purchase date
Electrolux model number
Electrolux serial number
For online support and Internet production information
visit http://www.electroluxappliances.com
Finding information ....................................................... 2
Important safety instructions ...................................3-6
Grounding instructions .................................................7
Features.....................................................................8-11
  ......................................................8
  ...........................................8
  ....................................9-11
Getting Started ........................................................12-13
  ...........................................12
  ......................................12
  ......................................... 12
  ...................................................................12
  ................................................................13
  ...........................................13
Surface cooking......................................................14-16
  ...............................14
  ................................... 14
  ................................14
 ......................................15
  .....................16
Setting Surface Controls .......................................17-18
 .....................................................17
  ..........................................17
  ...........................................17
  ........................................17
  ............................18
  .......................................18
  ........................................................18
Setting the Lower Oven ..............................................19
Before setting the oven controls ..........................20-21
  ...........................................20
  .................................................... 20
  .................................................... 20
  ............................................................20-21
Regular rack ...................................................................20
Glide rack ........................................................................21
Setting Oven Controls ............................................22-35
  ........................................................................22
  ...................................................................23
  .....................................................................23
  ...................................................... 24
 .....................................................25
  ............................................................. 25
 ....................................................26
  .......................................................................27
  ..................................................... 28
  .................................................................29
  ...................................................................29
  ................................................................30
  ...................................................................30
  ............................................................ 31
  .............................................................31
  .....................................................32
  ..................................................................33
  .................................................................. 34
  .......................................................... 35
Setting your preferences .......................................36-38
Setting self-clean cycle ..........................................39-40
Care & Cleaning ......................................................41-46
Solutions to Common Problems ...........................47-50
 .......................................................47
Solutions ..............................................................48-50
Warranty Information ..................................................51
3
Important Safety Instructions
    
which, if not avoided, may result in death or
serious injury.
Denitions
Read all instructions before using this appliance.
This manual contains important safety symbols and instructions. Please pay attention to these

you have read the safety precautions in this manual.
This is the safety alert symbol. It is used

Obey all safety messages that follow this

attempt to install or operate your appliance until
you have read the safety precautions in this
manual. Safety items throughout this manual
are labeled with a WARNING or CAUTION
statement based on the risk type.
-
tion, maintenance or valuable information


which, if not avoided, may result in minor or
moderate injury.
Save these instructions for future reference.
This unit has been tested and found to comply with the

of the FCC rules. These limits are designed to provide
reasonable protection against harmful interference
in a residential installation. This unit generates,
uses and can radiate radio frequency energy and,
if not installed and used in accordance with the
instructions, may cause harmful interference to radio
communications. However there is no guarantee that
interference will not occur in a particular installation.
If this unit does cause harmful interference to radio
or television reception, which can be determined by
turning the unit off and on, the user is encouraged to
try to correct the interference by one or more of the
following measures:
Reorient or relocate the receiving antennae.
Increase the distance between the unit and receiver.
Connect the unit into an outlet or a circuit different
from that to which the receiver is connected.
• Removeall tapeand packagingwrap before
using the appliance. Destroy the carton and
plastic bags after unpacking the appliance.
Never allow children to play with packaging
material.
Tip Over Hazard
 A child or adult can tip the
range and be killed.
 Verify the anti-tip device has

 
or wall when the range is moved.
 
device in place and engaged.
 Failure to follow these instructions can result in
death or serious burns to children and adults.
To check if the anti-tip bracket is
installed properly, use both arms
and grasp the rear edge of range
back. Carefully attempt to tilt range
forward. When properly installed,
the range should not tilt forward.
Refer to the anti-tip bracket installation
instructions supplied with your range for proper
installation.
4
Storage in or on Appliance—Flammable
materials should not be stored in an oven, near
surface units or in the drawer (if equipped).
This includes paper, plastic and cloth items, such
as cookbooks, plasticware and towels, as well
      
such as aerosol cans, on or near the appliance.
Flammable materials may explode and result in

Important Safety Instructions
Never use your appliance for warming or heating
the room.
Do not store items of interest to children in
the cabinets above the appliance. Children
climbing on the range to reach items could be
seriously injured.
• Donotleavechildrenalone.Childrenshouldnot
be left alone or unattended in the area where
an appliance is in use. They should never be
allowed to sit or stand on any part of the appliance.
• DO NOT TOUCH SURFACE UNITS, AREAS
NEAR THESE UNITS, OVEN HEATING
ELEMENTSORINTERIORSURFACESOFTHE
OVEN OR WARMER DRAWER (if equipped).

be hot even though they are dark in color. Areas
near surface units may become hot enough to



cool. Among these areas are the cooktop, surfaces
facing the cooktop, the oven vent openings and
surfaces near these openings, oven door and
window.
• WearProperApparel—Loose-ttingorhanging
garments should never be worn while using the
appliance. 
materials contact hot surfaces.
• DoNotUseWaterorFlouronGreaseFires—
Smothertherewithapanlid,orusebaking
soda, a dry chemical or foam-type extinguisher.
• Whenheatingfatorgrease,watchitclosely.

too hot.
 Do not use the oven or warmer drawer (if
equipped) for storage.
 Stepping, leaning or sitting on the door
or drawer of this appliance can result
in serious injuries and may also cause
damage to the appliance. 
children to climb or play around the appliance.
The weight of a child on an open door may
cause the appliance to tip, resulting in serious
burns or other injury. An open drawer, when
hot, may cause burns.
Persons with a pacemaker or similar medical
device should exercise caution using or standing
near an induction unit while it is in operation, as

of the pacemaker or similar medical device.
       
or the pacemaker or similar medical device
manufacturer about your particular situation.
ProperInstallation—Besureyourapplianceis
properlyinstalledandgroundedbyaqualied
technicianinaccordanceintheUnitedStates
withNationalElectricalCodeANSI/NFPANo.
70—latesteditionandlocalcoderequirements,
andinCanadawithCSAC22.1PART1—latest
edition and local code requirements. Install
only per installation instructions provided in the
literature package for this appliance.
Ask your dealer to recommend a qualified

how to disconnect the electrical power to the
range at the circuit breaker or fuse box in case of
an emergency.
• User Servicing—Do not repair or replace
anypartoftheapplianceunlessspecically
recommended in the manuals. All other servicing

reduce the risk of personal injury and damage to
the appliance.
Never modify or alter the construction of a
range by removing leveling legs, panels, wire
covers,anti-tipbrackets/screws,oranyother
part of the product.
Save these instructions for future reference.
5
• Use Only Dry Potholders—Moist or damp
potholders on hot surfaces may result in burns
from steam. 
heating surface units or interior oven elements.

a potholder.
DoNotHeatUnopenedFoodContainers—Build
up of pressure may cause the container to burst
and result in injury.
Remove the oven door from any unused
appliance if it is to be stored or discarded.
• IMPORTANT—Do not attempt to operate the
oven during a power failure. If the power fails,
always turn the oven off. If the oven is not turned
off and the power resumes, the oven may begin to
operate again. Food left unattended could catch

• Be sure to have an appropriate foam-type
re extinguisher available, visible, and easy
accessible located near the appliance.
Important Safety Instructions
Electronic controllers can be damaged by cold
temperatures. When you use your appliance
forthersttime,orifithasnotbeenusedfor
a long period of time, make sure that it has
beenexposedtoatemperatureabove0°C/32°F
for at least 3 hours before connecting it to the
power supply.
IMPORTANT INSTRUCTIONS FOR
USINGYOURCOOKTOP
• Knowwhichkeyscontroleachsurfacecooking
zone. Place pan with food on the cooking zone
before turning it on. Turn the cooking zone off
before removing food.
• UseProperPanSize—This appliance is equipped


Save these instructions for future reference.

utensils will expose a portion of the surface heating
unit to direct contact and may result in ignition
of clothing. Proper relationship of utensil to the

UtensilHandlesShouldBeTurnedInwardand
Should Not Extend Over Adjacent Surface
Units—To reduce the risk of burns, ignition
      
unintentional contact with the utensil. The handle
of the utensil should be positioned so that it is
turned inward, and does not extend over adjacent
surface unit.
Never Leave Surface Units Unattended

may ignite, or a pan that has boiled dry may melt.
• Protectiveliners
line oven bottom or any other part of the appliance.
Only use aluminum foil as recommended for baking
if used as a cover placed on the food. Any other
use of protective liners or aluminum foil may result

• Glazed Cooking Utensils—Only certain types
of glass, glass/ceramic, ceramic, earthenware,

service without breaking due to the sudden
change in temperature. Check the manufacturer’s
recommendations for cooktop use.
Do Not Use Decorative Surface Element
Covers. If an element is accidentally turned on,
the decorative cover will become hot and possibly


• Whenamingfoodsunderaventilatinghood,
turn on the fan.
FORGLASSCOOKTOPSONLY
• Do Not Clean or Operate a Broken Cooktop
If cooktop should break, cleaning solutions and
spillovers may penetrate the broken cooktop and

technician immediately.
• Clean Cooktop Glass with Caution—If a wet
sponge or cloth is used to wipe spills on a hot
cooking area, be careful to avoid a steam burn.
Some cleaners can produce harmful fumes if
applied to a hot surface.
• Avoidscratchingthecooktopglasswithsharp
objects.
Never cover any slots, holes, or passages in
the oven bottom or cover an entire oven rack
withmaterialssuchasaluminumfoil.Alumi-
numfoilliningsmaytrapheat,causingare
hazard.
6
Important Safety Instructions
IMPORTANT INSTRUCTIONS FOR
USINGYOUROVEN
• UseCareWhenOpeningDoororDrawer—Stand
to the side of the appliance when opening the door
of a hot oven. Let hot air or steam escape before
you remove or replace food in the oven/warmer
drawer.
• Keep Oven Vent Ducts Unobstructed. The
oven is vented at the front above the oven door
(ceramic glass cooktop models) or through the right
rear element (coil element models). Touching the
surfaces in this area when the oven is operating
may cause severe burns. Also, do not place plastic
or heat-sensitive items on or near the oven vent.
These items could melt or ignite.
Placement of Oven/Warmer Drawer (if
equipped) Racks. Always place oven racks in
desired location while oven/drawer (if equipped)
is cool. Remove all utensils from the rack before
removing rack. If rack must be moved while oven
is hot, use extreme caution. Use potholders and

not let potholders contact the hot oven element or
interior of the oven/warmer drawer (if equipped).
• Donotuseabroilerpanwithoutitsinsert.The
broiler pan and grid allow dripping fat to drain and
be kept away from the high heat of the broiler.
Do not cover your broiler or warmer drawer (if
equipped) grid with aluminum foil. Exposed fat
and grease could ignite.
• Donottouchahotlightbulbwithadampcloth.

the appliance or turn off the power to the appliance
before removing and replacing light bulb.
• Donotcookfoodontheovenbottom.Always
cook in proper bakeware and always use the
oven racks.
Important safety notice

Enforcement Act requires the Governor of California
to publish a list of substances known to the state
to cause cancer, birth defects or other reproductive
harm, and requires businesses to warn customers of
potential exposure to such substances.
The health of some birds is extremely sensitive
to the fumes given off during the self-clean
cycle of any range. Move birds to another well
ventilated room.
Save these instructions for future reference.
IMPORTANT INSTRUCTIONS FOR
CLEANINGYOURRANGE
• Cleantherangeregularlytokeepallpartsfree
of grease that could catch re. Exhaust fan



hood manufacturer’s instructions for cleaning.
Cleaners/aerosols—Always follow the
manufacturer’s recommended directions for use.

aerosols may ignite causing damage and/or injury.
SELF-CLEANINGOVENS
• Cleanintheself-cleaningcycleonlytheparts
of the oven listed in this owners guide. 
self-cleaning the oven, remove all utensils stored
in the oven.
• Do not clean the oven door gasket. The door
gasket is essential for a good seal. Care should
be taken not to rub, damage or move the gasket.
• Ovenracks. Oven racks may be damaged if not
properly used and maintained. See the Self-Clean
and Care and Cleaning section for information on
how to properly care for your oven racks.
• Donotuseovencleaners. No oven cleaner or
oven liner protective coating of any kind should be
used in or around any part of the oven.
7
Grounding Instructions
ELECTRIC MODELS WITH NO
FACTORY-SUPPLIEDPOWER
CORD
(USAelectric,international,etc)


death.
For personal safety, this appliance must be
properly grounded. For maximum safety, the power
cord must be plugged into an electrical outlet that

properly grounded in accordance with local codes.
It is the personal responsibility of the consumer
to have the appropriate outlet with the correct,
properly grounded wall receptacle installed by


installer to assure that the electrical installation
is adequate and is in conformance with all local
codes and ordinances.
See the installation instructions packaged with this
appliance for complete installation and grounding
instructions.
CANADIANELECTRICMODELS
For models factory-equipped with a power cord:


death.
For personal safety, this appliance must be
properly grounded. For maximum safety, the power
cord must be plugged into an electrical outlet that

properly grounded in accordance with local codes.
Power supply
cord with 4-prong
grounding plug
240V grounded
wall receptacle
It is the personal responsibility of the consumer
to have the appropriate outlet with the correct,
properly grounded wall receptacle installed by a

See the installation instructions packaged with this
appliance for complete installation and grounding
instructions.
8

Oven Rack Support




Oven vent
Convection
Roasting rack
Lower oven rack
Ceramic glass cooktop
Touch activated
glass control panel
Large metal
handle
Glass oven door
Lower oven
door
Features
Yourrangefeatures
The Cooking Zones may appear to be cool while turned ON
and after they have been turned OFF. The glass surface may
be HOT from residual heat transferred from the cookware and
burns may occur.
7” Induction
element
6” Induction
element
8” Induction
element
10” Induction
element
ACOOLERCOOKTOP- A unique feature of the Induction
Cooktop is whether turned ON or OFF, the cooktop surface
remains cooler than standard ceramic cooktops.
MAGNETICDETECTOR- The coil sensor automatically detects
whether the pan is magnetic and eliminates accidental “turn-ONs.”
PANSIZEDETECTION- The pan recognition sensor automatically

EFFICIENT- Induction cooking heats faster while using less energy.
Induction power levels are quick to boil and delicate when simmering.
READTHESEINSTRUCTIONSCAREFULLYBEFORE
USINGTHECOOKTOP
Induction cooktop features
9
1. Light Pad- Used to turn the oven light on and
off.
2. Bake Pad- Used to enter the normal baking
mode temperature.
3. Broil Pad- Used to select the variable broil
mode.
4. Convection Bake Pad- Used to select the
convection baking mode.
5. Convection Roast Pad- Used to select the
convection roasting mode.
6. Convection Broil Pad- Used to select the
convection broil mode.
7. Keep Warm Pad- Used to select the keep
warm mode.
8. Slow Cook Pad- Used to select the slow cook
mode.
9. Perfect Turkey Pad- Used to select the perfect
turkey cooking mode.
10. Control Lock Pad- Used to disable all oven
function.
Oven control pad functions
1
10
2
11
3
12
4
13
5
14
6
15
7
16
8
17
9
Features
11. Multi Stage Pad- Used to enter up to three
subsequent modes.
12. Cook Options Pad- Used to light up the
cooking options pads.
13. Cook Time Pad- Used to set a cooking
duration time.
14. End Time Pad- Used to select the time at
which the cooking will end.
15. Probe Pad- Used to activate the meat probe
mode.
16. Rapid Preheat Pad- Used to preheat the oven
to the desired temperature.
17. Convection Convert Pad- Used to convert
a standard temperature to a convection
temperature.
10
18. Defrost Pad- Used to select the defrost mode.
19. Dehydrate Pad- Used to select the dehydrate
mode.
20. Bread Proof Pad- Used to select the bread
proof mode.
21. Clean Pad- Used to select the self-cleaning
mode.
22. My Favorite 1 Pad- Used to save or recall the
favorite 1 cooking mode.
23. My Favorite 2 Pad- Used to save or recall the
favorite 2 cooking mode.
24. My Favorite 3 Pad- Used to save or recall the
favorite 3 cooking mode.
25 Lite Pad- Used to start a 2 hours self-clean
cycle.
26. Med Pad- Used to start a 3 hours self-clean
cycle.
27. Heavy Pad- Used to start a 4 hours self-clean
cycle.
Oven control pad functions
Features
18
22
19
23
20
24
21
25
26
27
28
32
32
34
29
30 33
35 36
31
28. UpperOvenPad- Used to activate the upper
oven for cooking operation.
29. Lower Oven Pad- Used to activate the lower
oven for cooking operation.
30. UserPreferencePad- Used to bring the user
preference menu in the display.
31. Cancel Pad- Used to cancel any function
previously entered except the time of day
and minute timer. Push Cancel pad to stop
cooking.
32. Timer Pads- Used to set or cancel the minute
timer. The minute timer does not start or stop
cooking.
33. Start Pad- Used to start all oven functions.
34. 0 Thru 9 Number Pads- Used to enter
temperature and times.
35. - lo Pad- Used to lower the temperature and
times.
36. + hi Pad- Used to raise the temperature and
times.
11
37. ON/OFFPad- Used to toggle ON and OFF
the associated induction element.
38. HI + Pad
temperature or raise the temperature currently
displayed.
39. MED Pad- Used to select the medium
temperature.
40. LO - Pad- Used to select the lowest
temperature or lower the temperature currently
displayed.
41. Pan Detection Indicator Ring- Will light up
when a pan made of magnetic material is

Oven control pad functions
Features
37
39
40
41
42
43
44
45
38
42. LeftFrontZoneControlsandDisplay- Used

43. LeftRearZoneControlsandDisplay- Used

44. RightFrontZoneControlsandDisplay-

levels.
45. RightRearZoneControlsandDisplay-

levels.
12
Getting Started
Setting clock at power up
Control panel display modes
Temperature visual display

supply to the range has been interrupted, the timer in
“12:00”. The clock cannot
be set when the oven is on. If an invalid time of day
is entered, the control will triple beep to prompt you
to re-enter a valid time of day.
To set the clock (example for 1:30):
1. Press 1 3 0 pads to set the time of day to 1:30.
The pads hi or lo can also be pressed to raise
or lower the actual time displayed.
2. Press START to accept the changes or CANCEL
to start with a time of 12:00.
Sleep Mode:
Your control will remain in a sleep mode when not in
use. Only the clock will display during this mode. You
will need to wake the control to begin any function.
Your oven is equipped with a temperature visual
display for each oven. When a cooking mode is set,
the actual temperature will be shown in the display
and will rise as the unit preheats. When the unit has
reached its target temperature, a chime will sound
to remind you to place the food in the oven. This
feature will be active with some cooking modes;
bake, convection bake, convection roast and perfect
turkey. The cooking modes which does not feature
the temperature visual display will be noted in their
descriptions.
NOTE: The lowest temperature that can be displayed
is 100°F.
Wake Mode:
To wake the control, touch within the display panel.
After 2 minutes without activity the control will chime
and go back into sleep mode.
To start a cooking feature you must select either the
upper oven or the lower oven. User preferences will
be available during this mode as well as timers, oven
light and the control lock.
Oven light
Your appliance includes a “theater” style oven lighting
feature that gradually lights both the upper and lower
oven interiors to full brightness. The upper oven is
equipped with 2 halogen lights and the lower oven is
equipped with 1 halogen light. The oven lights will turn
on automatically when the oven door is opened. The
oven light may be turned on when the door is closed
by using the oven light pad located on the control
panel. The oven light key will toggle the lights in both
ovens at the same time at full intensity.
NOTE: For best results, keep the oven light turned
OFF during baking. Remember to turn the light OFF
after checking food.
To toggle the Oven Lights ON and OFF:
1. Press OVENLIGHT .
13
Setting the kitchen timers
See example below to set the timer for 5 minutes:
       
serves as extra timers in the kitchen that will chime
when the set time has run out. It does not start or stop
cooking. The Timer feature can be used during any of
the other oven control functions and cooking modes
To cancel the Timer before the set time has run
out:
Press TIMER
. The display will return to the time
of day.
Example
Step Press
1. Press TIMER. “00:00” will appear
in the display.
2. Enter 5 minutes. The pads hi or
lo can also be pressed to raise or
lower the actual time displayed.
3. Press TIMER. to accept and start
the countdown.
4. When the set time has run out,
00:00” will be displayed and the
TIMER

will sound a chime that will be
repeated at regular intervals until
the TIMER
pad is pressed.
NOTE
The timer(s) will not affect the cooking process.
Getting Started
Control lock
The Control Lock feature automatically locks the
upper oven door, control panel and the cooktop. The
Control Lock is only allowed when the oven and the



Loc message will appear in the upper display and “- -


To toggle the Control Lock ON and
OFF:
1. CONTROL LOCK pressed for 3 seconds.
14
NOTE: Pan bottom
should not exceed
1/2” (13mm) from
Cooking Zone
(Induction) longer
marking.
The ceramic cooktop has inductor elements located
below the surface of the glass. The design of the
ceramic cooktop outlines the area of the inductor
element underneath. Make sure the diameter of the


Heat may be transferred from the cookware to the
ceramic glass and the areas surrounding the elements
may become hot enough to cause burns. The type

in use and the settings, are all factors that will affect
the amount of heat that will spread to areas beyond
the surface elements
The magnetic Cooking Zone sensors located below
the cooktop surface require the use of cookware
made with magnetic material in order to start the
heating process on any of the Cooking Zones.


cooktops. If you are not sure, use a magnet to test
whether the cookware type will work. If a magnet
sticks to the bottom of the cookware, the material
type is correct for Induction cooking.
It is recommended to always use heavier high quality
stainless steel cookware on your Induction Cooktop
surface. This will greatly reduce the possibility of
developing scratches on the ceramic surface.
Even quality cookware can scratch the cooktop
surface, especially if cookware is slid over the ceramic
cooktop surface without being lifted up. Over time
sliding ANY type of cookware over the ceramic
cooktop will likely alter the overall appearance of the
cooktop. Eventually the buildup of scratches will make

appearance of the cooktop.
USE THE CORRECT SIZE COOKWARE - The
Cooking Zones available on the Induction Cooktop
require a MINIMUM       
location. The shorter marking of each Cooking Zone

pan bottom must FULLY cover the inner ring for
proper cooking to occur.
The longer marking at each Cooking Zone is helpful to
determine the pan MAXIMUM
cookware on the cooktop, make sure the cookware
does not extend more than 1/2” beyond the longer
marking on the Cooking Zone. The pan must make
FULL contact on the glass surface without the bottom
of the pan touching the metal cooktop trims.
NOTE: If a pan made of the correct material is
centered properly on any of the active Cooking Zones

of the display will stay off and the pan will not heat.
Surface Cooking
Abouttheceramicglass
cooktop
Usethecorrectcookware
type
Minimum pan size
requirements
15
PLEASE NOTE-ANY one of the incorrect conditions listed above in Fig. 1 may be detected by
the sensors located below the ceramic cooktop surface. If the cookware does not meet any of
theseconditions,oneormoreoftheCookingZoneswillnotheatindicatedbytheturnedoffcircle
surrounding the digital display for that affected zone. Correct the problems before attempting to
reactivate the cooktop.
INCORRECT
CORRECT
Cookware not centered on Cooking
Zone surface.
Cookware centered correctly on
Cooking Zone surface.
Curved or warped pan bottoms or
sides.
Flat pan bottom & straight sides.
Pan does not meet the minimum

used.
     

Cooking Zone.
Pan bottom rests on cooktop trim
or does not rest completely on the
cooktop surface.
Pan rests completely on the Cooktop
surface.
Heavy handle tilts pan. Pan is properly balanced.
Fig. 1
Surface Cooking
Cookware recommendations
16
The cookware used with the Induction Cooktop
       
with the entire surface of the Cooking Zone. Check


recommendations for using cookware.
Fig. 1
 
the recommended cooktop cleaning creme to the
       
pad. This will make cleaning easier when soiled from
cooking. The special cooktop cleaning cream leaves a

and abrasions.
Surface Cooking
The Cooking Zones may appear to be cool while
turned ON and after they have been turned OFF.
The glass surface may be HOT from residual
heat transferred from the cookware and burns
may occur.
DONOTTOUCHHOTCOOKWAREorPANS
directly with hands. Always use oven mitts or
pot holders to protect hands from burns.
DO NOT SLIDE Cookware across the cooktop
surface.
appearance of the ceramic cooktop.
Usequalitycookwareingood
condition
Home Canning
Alsorememberto:
Use cookware made with the correct material
type for Induction Cooking.
Use quality cookware with heavier bottoms for
better heat distribution allowing for more even
cooking results.

being prepared.
• Donotletpansboildry.This may cause
permanent damage in the form of breakage,
fusion, or marring that can affect the ceramic
cooktop. (This type of damage is not covered by
your warranty).

Always use pans that are easy to clean after
cooking.


purpose, such as a griddle.

points when home canning with your appliance.


all the information they have available as well as
follow their recommendations for home canning
procedures.
 
canning. Use a straight-edge to check canner
bottom (see See “Use quality cookware in good
condition).
 
ridges that radiate from the bottom center when
home canning using a range with a ceramic
glass cooktop.
 

markings.
 
canners on ranges with ceramic glass or open
coil electric cooktops.
 
more quickly.

the water to a boil. Once boiling is achieved,
reduce heat to lowest possible setting to
maintain that boil.
IMPORTANT! Never place or straddle cookware

at the same time. This will cause uneven heating
results and could cause the ceramic cooktop to
fracture. The only exception is when using large
cookware or the griddle with the bridge elements
activated.
17
The hi+ and lo- keys provide incremental adjustments
for more precise control when changing settings
between the lower heat levels (Lo to 3.0 power levels).
Higher heat level setting changes (between 3.0 to HI)
will change much faster.
 The ON OFF key pad is used to power-up or

 The hi+ 
ON
OFF key is pressed. It can also be used during
cooking to raise the power setting.
 The med 
at 5.0 (Fig. 2).
 The lo- 
at Lo (Fig. 1) if used after the ON OFF key pad.
It can also be used at any moment to lower the

Fig. 1
Fig. 2
Fig. 4
Fig. 3
Fig. 5
Setting the cooktop
Availablecooktopsettings
The cooktop control provides 4 digital display windows

on the cooktop. These settings work the same way as
normal knob settings except the settings are displayed

Your control provides 23 different settings for each
Lo
(1%) Fig. 1, 5.0 (medium 50%) Fig. 2, Hi (100%) Fig.
3, Pb Fig. 4.
 
   ON OFF key for the desired heating

   hi+, med or
lo-) or for more precise level settings use the hi+
or lo-
Setting cooktop elements
Hot element (HE) message
After using any of the

the ceramic cooktop will
become very hot from
heat transferred by the
cookware. Even after
turning the control off, the
cooktop will remain hot for
some time.
The cooktop control
monitors the temperature
of the cooktop surface
and displays a message
HE” (hot element) when
the cooktop is still too hot to touch -Fig. 5-. If
the HE

cooking.
Setting Surface Controls
Display Settings Changes
Setting/Power Incremental change
Lo to 3.0 (1-30%) 0.2
3.0 to 7.0 (30-70%) 0.5
7.0 to Hi (70-100%) 1.0
18
Setting Surface Controls
Use the chart below to determine the suggested
setting for the type of food you are preparing when
using the cooktop.
Your induction cooktop is equipped with a Power


water or food to cooking temperature at the fastest

you up to 139% power output for a maximum of 10
minutes.
To Turn ON the Power Boost Feature:
- Press the ON OFF

- Press the “hi +” key pad and the PB will be shown

Recommended surface setting chart
Setting Type of Cooking
POWER

Start most foods; bring water to a
boil and pan broiling.
HIGH (8-HI) Continue a rapid boil; frying,
deep fat frying.
 
sauces and gravies; steaming
vegetables..

LOW (4- 5)

and stewing.
LOW (Lo-3) 
simmering.
Suggested cooktop power
settings
Setting power boost feature
Heat may be transferred from the cookware to
the ceramic glass and the areas surrounding the
elements may become hot enough to cause burns.
The Hot Element Message Light will turn ON and
will continue to glow until the glass cooktop
has cooled down to a moderate level. The glass
surface may still be hot and burns may occur if
the glass surface is touched before the indicator
light has turned OFF.
Do not place plastic items such as salt and
pepper shakers, spoon holders or plastic
wrappings on top of the range when it is in
use. These items could melt or ignite. Potholders,

too close to the surface elements.
Figure 1
 hi +

The electronic processes involved with Induction
Cooking create some unusual background noises.
These noises are normal and part of the Induction
Cooking process.
Please note that these noises are more noticeable

noises are not part of normal Induction Cooking.
Operational noises
19
Lower Oven Tips:
         

placed with the down turned sides into the drawer.
This will provide for some air space between the
drawer and the food.
 
baking sheet or pan with 4 raised sides to prevent
food from sliding off.
 DONOTLINETHEOVENDRAWERWITHFOIL
ORCOVERTHEOVENRACKWITHFOIL.This
may result in damage to your oven.
 
may be used in the lower oven is 4”. The maximum
width is 15”. Pay close attention to foods that
have potential to rise beyond the recommended
4” maximum height.
 
food and any juices created from the cooking
process.
NOTE: The lower oven will not operate when the
upper oven is set for self-cleaning or if the control
lockout feature is active.
The lower oven provides three basic modes, baking,
slow cooking and warming. The lower oven is ideal


warm feature to keep hot cooked foods at serving
temperature. The lower oven can only be used with

Warm (read their sections for precise instructions).
Lower oven operation
Setting the Lower Oven
Always use oven mitts when removing food from
the lower oven. The lower oven rack, compartment,
cookware/plates may be hot.
KEEPCHILDRENAWAYFROMTHELOWER
OVENWHENHOT.FAILURETODOSOCAN
RESULTINBURNS.


DO NOT

 Do not use plastic wrap to cover food. Plastic
may melt onto the drawer or surrounding areas
andbeverydifculttoclean.Use a lid or aluminum
foil instead. Use only utensils and cookware in the
oven drawer that are recommended for oven use
in the upper oven.
   

loss. Repeated opening of the drawer during the
cooking process may increase cooking times and
produce uneven cooking results. The cooking times
for the lower oven may vary slightly from the upper
oven.
20
OvenVent
WarmAir
Oven racksAircirculationintheoven
Oven vents location
Oven rack positions
Regular rack
This model comes with lubricated porcelain oven
racks, which can remain in the oven during the

oil lubrication off the racks. It is important that
the sides of the oven racks always have a light
coating of vegetable oil. To maintain optimal rack
performance, re-apply a thin layer of vegetable oil
to the sides of the rack after every self-clean cycle

For best air circulation and baking results allow 2-4"
(5-10 cm) around the cookware for proper air circulation
and be sure pans and cookware do not touch each other,
the oven door, sides or back of the oven cavity. The
hot air must circulate around the pans and cookware
in the oven for even heat to reach around the food.
Alwaysusepotholdersor oven mitts when
removing food or adjusting the oven racks. Wait
until the oven has completely cooled if possible.
Oven racks may be HOT and may cause burns.
Regular oven
rack
The regular oven rack may be used in all of the
rack position.
NOTE
Always use caution when removing food from the oven.
Rack
positions
Before Setting the Oven Controls
The oven is vented above the door. When the
oven is on, warm air is released through the vents.
This venting is necessary for proper air circulation
in the oven and good baking results.
Steam and moisture may appear near the oven
vent. This is normal.
Removing,replacing,andarrangingat
or offset oven racks
•Toarrange- Always arrange the oven racks when
the oven is cool (prior to operating the oven).
•Toremove- Pull the oven rack straight forward until
it reaches the stop position. Lift up the front of the
oven rack slightly and slide out.
•Toreplace- Place the oven rack on the rack guides
on both sides of oven walls. Tilt the front of oven rack
upward slightly and slide the oven rack back into

  • Page 1 1
  • Page 2 2
  • Page 3 3
  • Page 4 4
  • Page 5 5
  • Page 6 6
  • Page 7 7
  • Page 8 8
  • Page 9 9
  • Page 10 10
  • Page 11 11
  • Page 12 12
  • Page 13 13
  • Page 14 14
  • Page 15 15
  • Page 16 16
  • Page 17 17
  • Page 18 18
  • Page 19 19
  • Page 20 20
  • Page 21 21
  • Page 22 22
  • Page 23 23
  • Page 24 24
  • Page 25 25
  • Page 26 26
  • Page 27 27
  • Page 28 28
  • Page 29 29
  • Page 30 30
  • Page 31 31
  • Page 32 32
  • Page 33 33
  • Page 34 34
  • Page 35 35
  • Page 36 36
  • Page 37 37
  • Page 38 38
  • Page 39 39
  • Page 40 40
  • Page 41 41
  • Page 42 42
  • Page 43 43
  • Page 44 44
  • Page 45 45
  • Page 46 46
  • Page 47 47
  • Page 48 48
  • Page 49 49
  • Page 50 50
  • Page 51 51
  • Page 52 52

Electrolux EW30IS80RS Owner's manual

Category
Cookers
Type
Owner's manual

Ask a question and I''ll find the answer in the document

Finding information in a document is now easier with AI