Panasonic CQC9800U Operating instructions
- Type
- Operating instructions
This manual is also suitable for
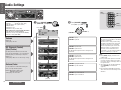
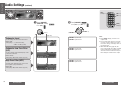
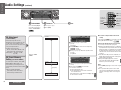
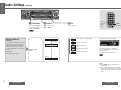
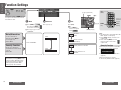
The Panasonic CQC9800U car audio system offers a wide range of features to enhance your in-car entertainment experience. With its customizable audio settings, you can tailor the sound to your personal preferences. It allows you to adjust the volume, balance, and fade of the audio, as well as the bass and treble levels. Additionally, you can tweak the sound further with the Dynamic Control (DC) feature, which lets you fine-tune the sound quality for different genres of music.
The Panasonic CQC9800U car audio system offers a wide range of features to enhance your in-car entertainment experience. With its customizable audio settings, you can tailor the sound to your personal preferences. It allows you to adjust the volume, balance, and fade of the audio, as well as the bass and treble levels. Additionally, you can tweak the sound further with the Dynamic Control (DC) feature, which lets you fine-tune the sound quality for different genres of music.


-
 1
1
-
 2
2
-
 3
3
-
 4
4
-
 5
5
-
 6
6
-
 7
7


Panasonic CQC9800U Operating instructions
- Type
- Operating instructions
- This manual is also suitable for
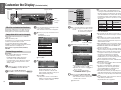
The Panasonic CQC9800U car audio system offers a wide range of features to enhance your in-car entertainment experience. With its customizable audio settings, you can tailor the sound to your personal preferences. It allows you to adjust the volume, balance, and fade of the audio, as well as the bass and treble levels. Additionally, you can tweak the sound further with the Dynamic Control (DC) feature, which lets you fine-tune the sound quality for different genres of music.
Ask a question and I''ll find the answer in the document
Finding information in a document is now easier with AI
Related papers
-
Panasonic CQC9700U Operating instructions
-
-
-
Panasonic C9700U User manual
-
-
-
-
-
-