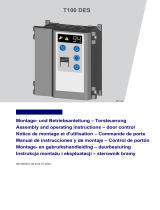
Comfort 860

Marantec Comfort 860, Comfort 860 DIY, Comfort 861, Comfort 861 DIY Owner's manual

  • Hello! I am an AI chatbot trained to assist you with the Marantec Comfort 860 Owner's manual. I’ve already reviewed the document and can help you find the information you need or explain it in simple terms. Just ask your questions, and providing more details will help me assist you more effectively!
  • What is the required procedure to assemble the engine unit?
    What is the process to program the bi·linked remote control?
    What steps are involved in programming the Multi-Bit remote control?
    How do I check the OPEN final position?
    How do I check the CLOSED final position?
    How do I check the unlocking mechanism?
Montageanleitung für den Zusammenbau des Motor-Aggregats
Bei der Montage ist die Anleitung des Antriebs unbedingt zu berücksichtigen.
Besonders die Sicherheitshinweise sind zu beachten!
D
Assembly instructions for assembling the engine unit
When mounting please observe by all means the installation instructions of the operator.
Pay special attention to the safety advice!
GB
Notice de montage pour l‘assemblage du module de moteur
Lors du montage, il faut absolument tenir compte des instructions concernant l’opérateur.
Il est particulièrement important de respecter les consignes de sécurité!
F
Montagehandleiding voor de montage van de motor-aggregaat
Bij de montage moet de montage- bedieningshandleiding van de aandrijving in acht worden genomen.
In het bijzonder dienen de veiligheidsinstructies te worden opgevolgd!
NL
Istruzioni di montaggio per il montaggio del gruppo motore
Per i lavori di montaggio osservare sempre le istruzioni di montaggio fornite in dotazione con la motorizzazione.
Osservare in particolare gli avvisi di sicurezza!
I
Instrukcja montażu dla złożenia agregatu silnikowego
Podczas montażu należy koniecznie przestrzegać instrukcji napędu,
a w szczególności wskazówek bezpieczeństwa!
PL
Comfort 860, 861
04.2018
2 Montageanleitung, Comfort 860, 861 (#158540 – D)
D
Das Motor-Aggregat muss nach den Vorgaben dieser Anleitung
zusammengebaut werden, um die Konformität zu gewährleisten!
GB
The engine unit must be assembled according to the specications of
these instruction to ensure conformity!
F
Le module de moteur doit être assemblé selon les indications de cette
notice an de garantir la conformité !
NL
De motor-aggregaat moet volgens de beschrijving in deze handleiding
worden gemonteerd om de conformiteit te garanderen!
I
Il gruppo motore deve essere assemblato secondo le prescrizioni
riportate in queste istruzioni, al ne di garantirne la conformità!
PL
Agregat silnikowy należy zmontować zgodnie z wytycznymi niniejszej
instrukcji, aby zapewnić jego zgodność!
1 / 1
5,5x50 M6x18 U6,4 U5,3 M4x405,5x16 40x10
6x 8x 8x 6x 2x 4x 4x 4x 12x 12x1x
U5,3
1 / 2
1. 2.
2 / 1
298
360
150
105
6x
6x
2 / 2
6,5 Nm
5,5x50
(SW8)
2 / 3
U5,3
Montageanleitung, Comfort 860, 861 (#158540 – D) 3
2 / 4
2 / 5
6,5 Nm
5,5x16
(SW8)
2 / 6
2,0 Nm
M4x40
(Torx 20)
2 / 7
4 Montageanleitung, Comfort 860, 861 (#158540 – D)
2 / 8
2 / 9
1,0 Nm
40x10
2 / 10
2 / 11
2 / 12
Montageanleitung, Comfort 860, 861 (#158540 – D) 5
2 / 13
1,5 Nm
M6x18
(SW 10)
U6,4
2 / 14
8,0 Nm
M6x18
(SW10)
U6,4
6 Montageanleitung, Comfort 860, 861 (#158540 – D)
2 / 15
2 / 16
Montageanleitung, Comfort 860, 861 (#158540 – D) 7
2 / 17
2 / 18
8 Montageanleitung, Comfort 860, 861 (#158540 – D)
2 / 19
2 / 20
2 / 21
2 / 22
Montageanleitung, Comfort 860, 861 (#158540 – D) 9
B. Programmierung der Fernsteuerung bi·linked
Programmiertaste im
Handsender betätigen.
Handsender loslassen.
P
Fernsteuerung speichern.
Ende der
Schnellprogrammierung.
Steuerung bendet sich im
Betriebsmodus.
Prüfen der Endlage AUF
Betätigen Sie den Handsender 1x.
Der Antrieb fährt in Selbsthaltung in die Position AUF.
Während der Fahrt blinkt das TOR AUF Symbol.
Führen Sie den Referenzmagneten am Sensor vorbei.
Die Anzeige 1 leuchtet ca. 1 Sekunde.
Bei Erreichen der Endlage leuchtet das Symbol TOR AUF.
Prüfen der Endlage ZU
Betätigen Sie den Handsender 1x.
Der Antrieb fährt in Selbsthaltung in die Position ZU.
Während der Fahrt blinkt das TOR ZU Symbol.
Führen Sie den Referenzmagneten am Sensor vorbei.
Die Anzeige 1 leuchtet ca. 1 Sekunde.
Bei Erreichen der Endlage leuchtet das Symbol TOR ZU.
Prüfen der Entriegelung
Entriegeln Sie den Antrieb mit dem Sechskantstiftschlüssel SW5.
Prüfen sie die Entriegelung auf Leichtgängigkeit.
Verriegeln Sie den Antrieb.
Rasten Sie den Antrieb ein.
Die Funktionsprüfung ist beendet.
Entfernen Sie alle Testeinrichtungen, Verkabelungen und Dummys.
Führen Sie die notwendige Bestückung der Klemmleiste durch.
D
Das Motor-Aggregat muss nach der Montage einer Stückprüfung
gemäß EN 60335-1 unterzogen werden. Dazu zählen die Prüfung auf
Spannungsfestigkeit und eine Funktionsprüfung.
VERWEIS
Beim Anschluss an die Steuerung ist die jeweilige zugehörige
Dokumentation zu beachten.
Für die Funktionsprüfung werden benötigt:
Handsender
Referenzpunktmagnet
Start Funktionsprüfung / Schnellprogrammierung:
Stecken Sie den Funkempfänger in die Buchse XB 70.
Schalten sie die Netzspannung ein.
Starten Sie die Schnellprogrammierung.
Steuerung bendet sich im
Betriebsmodus.
P
P > 3 Sek. < 10 Sek.:
Beginn der
Schnellprogrammierung.
P
2x drücken.
A. Programmierung der Fernsteuerung Multi-Bit
Handsender betätigen.
Handsender loslassen.
P
Fernsteuerung speichern.
Ende der
Schnellprogrammierung.
Steuerung bendet sich im
Betriebsmodus.
10 Montageanleitung, Comfort 860, 861 (#158540 – D)
GB
The engine unit must be subjected to a part inspection according
to EN60335-1 after assembly. This includes inspection of correct
tensioning and a function test.
REFERENCE
During connection to the controls, observe the associated
documentation.
The function test requires:
Hand transmitter
Reference point magnet
Start function test/quick-start programming:
Insert the radio receiver into socket XB 70.
Switch on the mains voltage.
Start the quick-start programming.
The control system is in
operating mode.
P
P > 3 sec. < 10 sec.:
Start express programming.
P
Press 2 times.
A. Programming the remote control Multi-Bit
Press the hand transmitter
button.
Release the hand transmitter
button.
P
Save the remote control
setting.
End express programming.
The control system is in
operating mode.
B. Programming the remote control bi·linked
Press the programming button
on the hand transmitter.
Press the hand transmitter
button.
Release the hand transmitter
button.
P
Save the remote control
setting.
End express programming.
The control system is in
operating mode.
Check the OPEN nal position
Press the hand transmitter 1 time.
The drive moves to the self-supporting OPEN position.
The OPEN GATE symbol ashes during movement.
Move the reference magnets past the sensor.
Display 1 glows approx. 1 second.
After reaching the nal position, the OPEN GATE symbol glows.
Check the CLOSED nal position
Press the hand transmitter 1 time.
The drive moves to the self-supporting CLOSED position.
The CLOSE GATE symbol ashes during movement.
Move the reference magnets past the sensor.
Display 1 glows approx. 1 second.
After reaching the nal position, the CLOSE GATE symbol glows.
Check unlocking
Unlock the drive with the SW5 hexagonal key.
Check that unlocking functions smoothly.
Lock the drive.
Engage the drive.
The function check is complete.
Remove all of the test equipment, cables, and dummies.
Complete the necessary conguration for the terminal strip.
Montageanleitung, Comfort 860, 861 (#158540 – D) 11
F
Après le montage, le module de moteur doit être soumis à un contrôle
des pièces conformément à EN 60335-1. Le contrôle de la rigidité
diélectrique et du fonctionnement en fait partie.
RÉFÉRENCE
Respecter la documentation correspondante lors du raccordement à
la commande.
Le contrôle du fonctionnement nécessite :
Un émetteur manuel
Un aimant de point de référence
Démarrage du contrôle de fonctionnement / programmation
rapide :
Brancher le récepteur radio dans la douille XB 70.
Activer la tension d‘alimentation.
Démarrer la programmation rapide.
La commande est en mode de
service.
P
P > 3 sec. < 10 sec.:
Début de la programmation
rapide
P
Appuyer 2x.
A. Programmation de la télécommande Multi-Bit
Actionner l‘émetteur portable.
Lâcher l‘émetteur portable.
P
Mémoriser la télécommande.
Fin de la programmation
rapide.
La commande est en mode de
service.
B. Programmation de la télécommande bi·linked
Appuyer sur la touche de
programmation de l‘émetteur
portable.
Actionner l‘émetteur portable.
Lâcher l‘émetteur portable.
P
Mémoriser la télécommande.
Fin de la programmation
rapide.
La commande est en mode de
service.
Contrôle de la position nale OUVERTE
Activer l‘émetteur manuel 1x.
L‘entraînement se déplace en position OUVERTE en mode auto-
maintien.
Le symbole PORTE OUVERTE clignote pendant le déplacement.
Approcher les aimants de référence du capteur.
L‘afchage 1 s‘allume pendant env. 1 seconde.
Le symbole PORTE OUVERTE s‘allume lorsque la position nale est
atteinte.
Contrôle de la position nale FERMÉE
Activer l‘émetteur manuel 1x.
L‘entraînement se déplace en position FERMÉE en mode auto-
maintien.
Le symbole PORTE FERMÉE clignote pendant le déplacement.
Approcher les aimants de référence du capteur.
L‘afchage 1 s‘allume pendant env. 1 seconde.
Le symbole PORTE FERMÉE s‘allume lorsque la position nale est
atteinte.
Contrôle du déverrouillage
Déverrouiller l‘entraînement avec une clé Allen de 5.
Contrôler la mobilité du déverrouillage.
Verrouiller l‘entraînement.
Enclencher l‘entraînement.
Le contrôle du fonctionnement est terminé.
Retirer l‘ensemble des dispositifs de test, des câblages et des
éléments factices.
Effectuer l‘équipement nécessaire du bornier.
12 Montageanleitung, Comfort 860, 861 (#158540 – D)
NL
De motor-aggregaat moet na de montage aan een controle conform
EN 60335-1 worden onderworpen. Daartoe behoren de controle op
elektrisch vermogen en een functiecontrole.
INFORMATIE
Bij de aansluiting op de besturing moet de desbetreffende
bijbehorende documentatie in acht worden genomen.
Voor de functiecontrole is benodigd:
Handzender
Referentiepunt-magneet
Start functiecontrole / snelprogrammering:
Steek de radio-ontvanger in de bus XB 70.
Schakel de netspanning in.
Start de snelprogrammering.
Besturing bevindt zich in de
Bedrijfsmodus.
P
P > 3 sec. <10 sec.:
Begin van de
snelprogrammering.
P
2x drukken.
A. Programmering van de afstandsbediening Multi-Bit
Handzender bedienen.
Handzender loslaten.
P
Afstandsbediening opslaan.
Einde van de
snelprogrammering.
Besturing bevindt zich in de
bedrijfsmodus.
B. Programmering van de afstandsbediening bi·linked
Programmeerknop in de
handzender indrukken.
Handzender bedienen.
Handzender loslaten.
P
Afstandsbediening opslaan.
Einde van de
snelprogrammering.
Besturing bevindt zich in de
bedrijfsmodus.
Controleren van de eindpositie OPEN
Bedien de handzender 1x.
De aandrijving schuift in de stopstand in de positie OPEN.
Tijdens de rit blinkt het symbool DEUR OPEN.
Leidt de referentiemagneten tot voorbij de sensor.
De aanduiding 1 brandt ca. 1 seconde.
Bij het bereiken van de eindpositie brandt het symbool DEUR OPEN.
Controleren van de eindpositie DICHT
Bedien de handzender 1x.
De aandrijving schuift in de stopstand in de positie DICHT.
Tijdens de rit blinkt het symbool DEUR DICHT.
Leidt de referentiemagneten tot voorbij de sensor.
De aanduiding 1 brandt ca. 1 seconde.
Bij het bereiken van de eindpositie brandt het symbool DEUR
DICHT.
Controleren van de ontgrendeling
Ontgrendel de aandrijving met de inbus-pinsleutel SW5.
Controleer de ontgrendeling op soepele werking.
Vergrendel de aandrijving.
Klik de aandrijving vast.
De functiecontrole is beëindigd.
Verwijder alle testinrichtingen, kabels en dummy‘s.
Voer de noodzakelijke bezetting van de aansluitklemmen uit.
Montageanleitung, Comfort 860, 861 (#158540 – D) 13
I
Il gruppo motore, dopo l‘installazione, deve essere sottoposto ad una
prova individuale in base alla EN 60335-1. Questo comprende la prova
di rigidità dielettrica e una prova di funzionamento.
RIMANDO
Per il collegamento all‘unità di comando, è necessario osservare la
rispettiva documentazione.
Per la prova di funzionamento, è necessario:
Trasmettitore manuale
Magnete del punto di riferimento
Avvio prova di funzionamento / programmazione rapida:
Collegare il ricevitore radio alla presa XB 70.
Inserire la tensione di rete.
Avviare la programmazione rapida.
La centralina è in modalità di
funzionamento.
P
P > 3 sec. < 10 sec.:
Inizio della programmazione
rapida.
P
Premere 2 volte.
A. Programmazione del radiocomando Multi-Bit
Premere il tasto del
radiocomando.
Lasciar andare il tasto del
radiocomando.
P
Memorizzare il radiocomando.
Fine della programmazione
rapida.
La centralina è in modalità di
funzionamento.
B. Programmazione del radiocomando bi·linked
Azionare il tasto di
programmazione sul
radiocomando.
Premere il tasto del
radiocomando.
Lasciar andare il tasto del
radiocomando.
P
Memorizzare il radiocomando.
Fine della programmazione
rapida.
La centralina è in modalità di
funzionamento.
Controllo della posizione necorsa APERTA
Premere il trasmettitore manuale 1 volta.
L‘azionamento si sposta automaticamente in posizione APERTA.
Durante la corsa, l‘icona PORTA APERTA lampeggia.
Passare il magnete di riferimento davanti al sensore.
L‘indicatore 1 si illumina per circa 1 secondo.
Quando viene raggiunta la posizione di necorsa, l‘icona PORTA
APERTA si illumina.
Controllo della posizione necorsa CHIUSA
Premere il trasmettitore manuale 1 volta.
L‘azionamento si sposta automaticamente in posizione CHIUSA.
Durante la corsa, l‘icona PORTA CHIUSA lampeggia.
Passare il magnete di riferimento davanti al sensore.
L‘indicatore 1 si illumina per circa 1 secondo.
Quando viene raggiunta la posizione di necorsa, l‘icona PORTA
CHIUSA si illumina.
Controllo dello sblocco
Sbloccare l‘azionamento con la chiave esagonale SW5.
Controllare la facilità di movimento dello sblocco.
Bloccare l‘azionamento.
Innestare l‘azionamento.
La prova di funzionamento è completata.
Rimuovere tutte le apparecchiature di prova, i cavi e i dummy.
Eseguire il necessario assemblaggio della morsettiera.
14 Montageanleitung, Comfort 860, 861 (#158540 – D)
PL
Po montażu należy poddać agregat silnikowy kontroli części zgodnie z
EN 60335-1. Przedmiotowa kontrola obejmuje kontrolę wytrzymałości
napięciowej i kontrolę działania.
ODSYŁACZ
Podczas podłączania do sterownika należy przestrzegać odpowiedniej
dokumentacji.
Narzędzia potrzebne do kontroli działania:
Nadajnik ręczny
Magnes punktu odniesienia
Rozpoczęcie kontroli działania / Szybkie programowanie:
Umieścić odbiornik radiowy w gnieździe XB 70.
Włączyć napięcie sieciowe.
Uruchomić szybkie programowanie.
Sterownik znajduje się w trybie
pracy.
P
P > 3 sekund < 10 sekund:
Rozpoczęcie szybkiego
programowania.
P
Nacisnąć 2 razy.
A. Programowanie sterowania zdalnego Multi-Bit
Nacisnąć na ręczny nadajnik
sterowania ręcznego.
Puścić nadajnik sterowania
ręcznego.
P
Zapisać sterowanie zdalne
Koniec szybkiego
programowania.
Sterownik znajduje się w trybie
pracy.
B. Programowanie sterowania zdalnego bi·linked
Nacisnąć przycisk
programowania w nadajniku
ręcznym.
Nacisnąć na ręczny nadajnik
sterowania ręcznego.
Puścić nadajnik sterowania
ręcznego.
P
Zapisać sterowanie zdalne
Koniec szybkiego
programowania.
Sterownik znajduje się w trybie
pracy.
Kontrola położenia krańcowego OTW.
Uruchomić 1 raz nadajnik ręczny.
Napęd przejeżdża z samopodtrzymaniem do pozycji OTW.
Podczas jazdy migocze symbol BRAMA OTWARTA.
Przesunąć magnes referencyjny przy czujniku.
Wskazanie 1 świeci się przez ok. 1 sekundę.
W momencie osiągnięcia położenia krańcowego świeci się symbol
BRAMA OTWARTA.
Kontrola położenia krańcowego ZAM.
Uruchomić 1 raz nadajnik ręczny.
Napęd przejeżdża z samopodtrzymaniem do pozycji ZAM.
Podczas jazdy migocze symbol BRAMA ZAMKNIĘTA.
Przesunąć magnes referencyjny przy czujniku.
Wskazanie 1 świeci się przez ok. 1 sekundę.
W momencie osiągnięcia położenia krańcowego świeci się symbol
BRAMA ZAMKNIĘTA.
Kontrola odblokowania
Odblokować napęd kluczem kołkowym z gniazdem sześciokątnym
RK5.
Sprawdzić odblokowanie pod kątem swobody poruszania.
Zablokować napęd.
Zatrzasnąć napęd.
Kontrola działania jest zakończona.
Usunąć przyrządy testowe, okablowanie i elementy atrapowe.
Wykonać niezbędne wyposażenie listwy zaciskowej.
Montageanleitung, Comfort 860, 861 (#158540 – D) 15
DEUTSCH Originalanleitung, Urheberrechtlich geschützt.
Nachdruck, auch auszugsweise, nur mit unserer
Genehmigung.
Änderungen, die dem technischen Fortschritt dienen,
vorbehalten.
ENGLISH Original instructions, Copyright.
No part of this manual may be reproduced without
our prior consent.
Subject to changes which are in the interest of
technical improvements.
FRANÇAIS Notice originale, Copyright.
Toute reproduction même partielle est interdite sans
notre autorisation.
Tous changements de constructions permis par
l‘évolution des techniques réservés.
NEDERLANDS Originele Gebruiksaanwijzing. Door de auteurswet
beschermd.
Niets uit deze uitgave mag worden verveelvoudigd
en/of openbaar gemaakt door middel van druk,
fotocopie, microlm of op welke andere wijze dan
ook zonder voorafgaande toestemming van de
uitgever.
Technische wijzigingen voorbehouden.
ITALIANO Istruzioni d’uso originali. Diritti d‘autore riservati.
Riproduzione, anche parziale, previa solo nostra
autorizzazione.
La Ditta si riserva la facoltà di apportare modiche al
prodotto in base al progresso tecnologico.
POLSKI Instrukcja oryginalna. Chroniona prawem autorskim.
Przy wykonywaniu przedruku, także fragmentów,
konieczne jest uzyskanie naszej zgody.
Zastrzegamy sobie prawo do wprowadzenia zmian
wynikających z postępu technicznego.
1 - 360451 - M - 0.5 - 0217
/