Page is loading ...

1
DLE
-
170
Specifications
170cc [10.37 cu. in.]
17.5 HP/ 9,000 RPM
1,10 0 R P M
Electronic Ignition
30
u
12, 32
u
10
CM6
(Gap) 0.018in.– 0.020 in. [0.45 mm – 0.51mm]
2.06 in. [52mm]
u
1.19 in. [ 3 0 m m ]
9.5:1
(1) DLE with Manual Choke
Main Engine − 7.83lbs [3,552 g]
Mufflers (2) − 13.8 oz [391 g]
Electronic Ignition (1) − 5.2 oz [148 g]
Engine Mount Standoffs (4) − 1.4 oz [41g]
87− 93 Octane Gasoline with a 30:1
gas/2-stroke (2-cycle) oil mixture
Displacement:
Performance:
Idle speed:
Ignition Style:
Recommended Propellers:
Spark Plug Type:
Diameter x Stroke:
Compression Ratio:
Carburetor:
Weight:
Fuel:
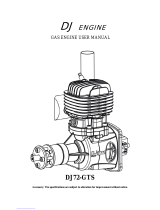
Operator’s Manual
© 2010 Hobbico
®
, Inc. DLEG0170 Mnl
™

2
Parts List
(1) DLE-170cc Gas Engine w/ DLE carburetor
(2) DLE (CM-6 size) Spark plugs
(2) Muffl ers w/(2) gaskets
(4) 5x20mm SHCS (muffl er mounting)
(1) Electronic Ignition Module w/additional tachometer lead
(4) 20mm Engine Mounting Standoffs
(6) 6x55mm SHCS with 6mm lock washers & 6mm fl at washers
(propeller mounting)
(2) Silicone Pick-up Wire Cover/Ignition Wire Cover
(1) Red Three Pin Connector Lead w/ Pig Tail (ignition switch)
(2) Three Pin Connector Securing Clips
(1) DLE-170 Decal Sheet
(2) Brass Pressure Fittings (smoke system use/not included)
Safety Tips and Warnings
● This engine is not a toy. Please place your safety and the safety
of others paramount while operating. DLE will not be held
responsible for any safety issues or accidents involving this engine.
● Operate the engine in a properly ventilated area.
● Before starting the engine, please make sure all components
including the propeller and the engine mount are secure and
tight. It is strongly recommended that a screw sealant is used
(Great Planes Threadlocker GPMR6060) during engine installation.
● During the break-in period, it is recommended that the engine be
installed on the aircraft or a test stand with an appropriate shock

3
absorber. Otherwise it is probable that vibration could rebound
back to the engine and serious damages may occur during the
break-in period.
● For your safety and the safety of others, please do not stand in
front or in line with the propeller when the engine is running.
Keep onlookers away from the running engine, especially
small children.
● Always use a balanced spinner and a balanced propeller. An
unbalanced spinner and/or propeller combination will cause high
levels of vibration and may cause the propeller shaft to break.
Always use a high-quality lightweight spinner on your engine.
Lightweight spinners are considered to be those with a cone
wall of 1mm or less. Heavy spinners could cause the propeller
shaft to break. Securely tighten the spinner and propeller on the
engine to prevent them from being thrown off while running.
● Never use a propeller that has impacted the ground. Even though
it may look good from the outside, it may have internal damage
which could cause it to disintegrate while in use. Do not use a
nicked, cracked or split propeller.
● Keep foreign objects away from the propeller. Make sure that
nothing can be “sucked in” by the propeller.
● Never start the engine on loose gravel or sand.
● Do not attempt to stop the engine by throwing anything into the
path of the propeller.
● Make sure the fuel line is well-secured to the engine and to the
fuel tank so that it won’t come off in fl ight.
● Do not use silicone fuel line because it will be dissolved by the
fuel. Use only gasoline approved rubber fuel line. Always secure
the fuel line away from the cylinder head. The engine’s heat can
damage the fuel line.
● Never touch the engine or muffl er immediately after a run. The
engine will be hot.
● Before transporting your model, remove all the fuel from the
fuel tank and fuel lines.
● Always use high-quality oil intended for 2-stroke (2-cycle) engines.
It's a good idea to use a petroleum-based 2-cycle motor oil like
Lawn Boy All Season - Ashless, Generation II oil for the break-in
period. Break-in should be considered about the fi rst 3-5 gallons
you run in the engine. A high quality synthetic 2-cycle oil is
recommended for optimum performance and a longer engine
life. Synthetic 2-cycle oils leave fewer combustion byproducts
than natural oils, which can foul the engine and exhaust ports,
resulting in reduced performance. Synthetic oils also better
reduce friction and provide more fl uidity at low temperatures.

4
● For optimum performance please use fresh or recently purchased
87 octane gasoline with a 30:1 gas/oil mixture.
GAS/OIL Mixing Guide
1 Gallon Gasoline (128 fl oz/3.78L)/2-Cycle Oil
(4.26 fl oz/125.68ml)=30:1 ratio
● Always install an ignition system kill switch on the aircraft used.
● Do not install your throttle servo or kill switch servo inside the
engine compartment. Doing so could cause radio interference.
Install all electronic radio devices at least 12" [305mm] away
from the engine.
● The throttle and choke pushrods should be non-metallic.
● If the engine is not to be used for more than a month, drain the
fuel tank and remove any fuel from inside the carburetor. Do this
by running the engine at idle until it quits by running out of fuel.
Keeping gasoline inside the carburetor over an extended period of
time will damage the diaphragm valve and clog passages inside
the carburetor. Due to the carburetor being more complicated
than those used in glow engines, keep the fuel clean by using an
on-board fuel fi lter. Use a fi lter intended to be used with gasoline
engines. Metal fi lters intended for glow engine are too coarse
and will not screen out fi ner particles.
● Always fi lter your fuel by using an appropriate fi lter before putting
it into the airplane’s fuel tank.
● Gasoline is extremely fl ammable. Keep it away from an open
fl ame, excessive heat or sources of sparks.
● Do not smoke near the engine or the fuel tank.
● This engine was designed for use in a model aircraft. Do not
attempt to use it for any other purpose.
● Caution: Running the engine with a lean gas mixture will cause
the engine to overheat and burn the electrode of the spark plug.
Pay close attention to the High-speed Needle adjustment. Running
the engine with the proper gas mixture will cause the spark plugs
to appear slightly yellow at the ignition point.
● Excessive running of the engine at idle speed can result in
seriously carbonized spark plugs.
● Keep the surface of the engine clean to ensure proper heat
dissipation. Ensure proper cooling/ventilation around both
cylinders with adequate air exhaust. A 1:3 ratio of air intake to
air exhaust is recommended for proper engine cooling.

5
● To avoid permanent damage to the electronic ignition system,
NEVER rotate the propeller on your DLE engine with the electronic
ignition system switched on and the plugs not installed in the
plug caps.
● If you elect to not use a smoke system with your engine and
aircraft, the two included brass fi ttings must be installed in the
muffl er and then obstructed to prevent exhaust from leaking
into the cowling. To do this use two short segments of neoprene
fuel line and two (GPMQ4166) fuel-line plugs (not included).
Installation Instructions
Prepare the Engine for Installation
Before beginning installation, it’s a good idea to plan the location
of the various components of the engine. Many of the following
steps may need to be completed in a different order than listed.
1. Check to see that all screws and bolts are tight. Check carefully for
any cracks, broken or missing parts. Tighten or replace any damaged
or missing parts before proceeding.
2. Install the silicone wire cover over the pick up lead coming from
the engine (cut the excess silicon wire covers) and connect the lead
to the pick–up lead from the Electronic Ignition Module. Secure
the connection with the included three pin connector securing clip.

6
3. Connect the ignition kill switch lead to the red connector from
the ignition control module using the lead from the kill switch or
with the included three pin connector with pig tail. Use the included
three pin securing clip to secure the connection.
4. Connect the ignition module battery to the kill switch. Any 4.8-
6.0V, 1000mAh and above capacity battery will work well for this.
Use heat shrink tubing to secure this connection.
5. Install the silicone ignition wire cover over the ignition wires to
the spark plugs.
6. Install the spark plugs into the engine cylinders (7-8lbs Torque).

7
Ignition Wires
(To Spark Plugs)
Ignition Control
Switch Wire
(To On/Off Switch)
Pick-Up
Sensor Wire
(To Sensor On Engine)
Tachometer
Lead/
RPM
Signal
Out-Put
ELECTRONIC IGNITION
SYSTEM
Battery Lead
Charge Lead
Switch
(Not included)
Optional
Tachometer
(Not included)
7. Use the above diagram to install the Electronic Ignition Module
to the engine.
8. Install a 2-56 ball links (not
included) to the throttle & choke
control arms. Use a 2-56 lock nut
to secure the ball links or use (2)
2-56 nuts and thread locker to secure
the links. Once the links are secure,
exercise the throttle and choke levers
to ensure that no binding occurs.

8
Installing the DLE-170 on Your Airplane
Note: The DLE-170 must be installed on at least a 3/8" [9.5mm]
fi rewall. The fi rewall must be securely glued to the airplane. Use
triangle stock and pin the fi rewall with hardwood dowels to
reinforce the fi rewall glue joints. Never install the DLE-170 onto
a fi rewall thinner than specifi ed because it may fail due to the
power of the engine.
Note: The distance from the fi rewall to the propeller washer is
8.34" [212mm].
1. Use the supplied template (on the back cover of this manual) to
drill the engine mounting bolt holes.
2. Install (4) 6mm blind nuts or tee
nuts (not included) into the back
side (non-engine side) of the fi rewall.
Install the engine to the fi rewall
using (4) 6x45mm SHCS with 6mm
lock washers and fl at washers (not
included) with the included standoffs. Use some threadlocking
compound, such as Great Planes
®
Pro
™
Threadlocker (GPMR6060)
on the screws where the threads enter the blind nuts.
3. Install the fuel tank in the airframe. Use only gasoline-safe fuel
lines and a gasoline safe stopper.
Drain/Vent Pressure Relief Line
Route to top-front of fuel tank interior,
to prevent siphoning.
T-Fitting
Carb
Clunk Line
Fuel Tank
Filler Cap
or Plug
Supply Line
to T-Fitting
Make connection line
between T-Fitting and
Carburetor as short
as possible.
Fuel fill line
This line must be extended
to exit the bottom of the aircraft.
2-LINE SET UP
Drain/Vent Pressure Relief Line
Route to top-front of fuel tank
interior, to prevent siphoning.
Carb
Clunk Lines
Fuel Tank
Carburetor Fuel Inlet
Plug
Supply Line
to Carburetor
Fuel fill line
This line must be
extended to exit the
bottom of the aircraft.
3-LINE SET UP

9
One line should go to the carburetor via a gasoline approved
T- fi tting and the other is to be used as a vent (a vent line is simply
an open ended fuel line from the fuel tank which exits the engine
compartment or the fuselage, most vent lines exit at the bottom of
the fi rewall).You can fi ll the tank by using the carburetor line as fi ll
line if you have access to it or install a third line to be used as fi ll
line. Installing a third line is the cleanest and easiest way to add
fuel. Be sure to use a fi ller plug with either a 2-line or 3-line set-up.
It’s a good idea to add an extension to the vent line as shown, that
goes up and to the rear of the tank. This helps to avoid draining fuel
from the tank when the model is pointed down.
4. Install the ignition kill switch on the aircraft so that it is easily
accessible from the outside of the plane.
5. Install the throttle servo and choke servos at least 12" [305mm]
away from the engine. Make sure that you get the throttle and
choke’s full range of rotation with your servos travel. Be sure to use a
non-metallic linkage for both the throttle and choke linkage. A high-
torque heavy duty metal gear servo is recommended to operate the
throttle on the DLE-170. (Components for the non-metallic linkage
can be purchased through your local hobby shop.)
6. Install the ignition module securely in the airplane forward area. It
is recommended that a thin piece of foam rubber is placed between
the module and the mounting surface, and that Velcro
™
is used to
hold the module in place.
7. Secure any unsecure connections with heat shrink tubing (Not included).

10
8. Connect the ignition wires from ignition module to the spark plugs.
9. Install the muffl ers onto the engine with the included gaskets.
Tighten the two bolts on each muffl er evenly to ensure a proper
seal. Be sure to use thread locker.
10. Cut all necessary clearance, carburetor adjustment, cooling, and
exhaust holes in the cowl. A 1:3 ratio of air intake-to-air exhaust
area is recommended for proper engine cooling.
11. Make sure the cowl is secured to the airplane and that the spinner
to cowl clearance is at least 1/8" [3.2mm].
Drill and Install the Propeller
The easiest way to drill the propeller to fi t the hub is to use a drill
guide. If you do not have a drill guide, you can use the following
method to drill your propellers.
1. Remove the cowling from the aircraft. Use the included propeller
washer to mark the centering hole on the propeller
2. Once the location is established, use a drill press with a 13/32"
(0.406/10.31mm) drill bit. In order to achieve a clean hole opening
on both sides of the propeller, drill only half way through the
propeller with the 13/32" (0.406/10.31mm) drill bit. Then fl ip the
propeller over and drill completely through the hole.
3. Next, set the engine
near the beginning of the
compression stroke. Note
the position of the ignition
magnet with engine
inverted.
4. Place the propeller on
the crankshaft at the one
o’clock position.

11
5. Mark the location of
one of the outer holes on
the propeller. Use a GPM
Dead Center Hole Locator
(GPMR8130) to center and
start the hole.
6. Remove the propeller
from the engine and drill
the outer hole on the
drill press using a #35
(.110"/2.81mm) drill bit as
a pilot hole. Next use a
1/4" (6.28mm) drill bit to
fi nish the hole. In order to
achieve a clean fi nish on
both sides of the propeller
drill only half way through
the propeller with the fi nishing drill bit. Then fl ip the propeller over
and drill completely through the hole.
7. Use one of the 6
55mm SHCS with 6mm lock washers and fl at
washers to align the propeller washer on the propeller and use the
Dead Center Hole Locator to mark the position of the remaining holes.
8. Drill the remaining fi ve holes in the propeller using the same
technique on step 6.
9. Mount the propeller to the engine using the 6
55mm SHCS with
6mm lock washers and fl at washers. Be sure to use threadlocker.
Adjustment of the Engine
Each DLE-170 has been factory preset. However, higher elevations will
infl uence the performance of the carburetor. To obtain optimum output
of the engine slight adjustment of the carburetor may be necessary.
Engine Functions & Adjustments
1. Choke Control (the choke control should
be used when the engine is cold)
2. Throttle
3. Idle Adjustment Screw (adjust the
idle speed)
4. (H) High-speed Needle (adjusts the
fuel/air mixture at high speeds)
5. (L) Low-speed Needles(adjusts the
fuel/air mixture at low speeds)

12
Idle Adjustment
Turning the Idle Adjustment Screw (No.3) clockwise will increase the
idle speed. Turning the Idle Screw counter-clockwise will decrease
the idle speed.
Low Speed Needle Adjustment
Turning the Low-speed Needle (No.5) clockwise will lean the fuel/air
mixture at low speeds. Turning the Low-speed Needle (No.5) counter-
clockwise will richen the fuel/air mixture at low speeds. (The default
or factory setting of the Low-speed Needle is as follows; turn the
needle to the fully stop/closed position and then turn back 1.5 turns).
High Speed Needle Adjustment
Turning the High-speed Needle (No.5) clockwise will lean the fuel/
air mixture at high speeds. Turning the low-speed Needle (No.5)
counter-clockwise will richen the fuel/air mixture at high speeds. (The
default or factory setting of the High-speed Needle is as follows;
turn the needle to the fully stop/closed position and then open the
needle 1.25-1.5 turns). It is recommended that the High-speed needle
be adjusted by the use of a tachometer to obtain maximum speed.
Smooth acceleration and deceleration is an indicator of proper
engine performance.
Ignition Timing Adjustment
The ignition timing is preset on the DLE-170 at 43° before top dead
center (TDC). The ignition timing can be advanced or retarded by
loosening the (2) ignition sensor Phillips head screws and sliding
the sensor to the full extent clockwise (44° advancing the ignition)
or counter clockwise (42° retarding the ignition). Be sure to retighten
the Phillips head screws after adjusting the ignition timing.
Advancing the timing causes combustion to occur earlier resulting in higher
performance of the engine. However, advancing the timing also causes
higher engine temperatures and can cause premature wear of internal
engine components.
Carburetor Adjustment Troubleshooting
Problem:
If The engine hesitates when accelerated rapidly.
or The rpm increases at idling.
or The engine stops when the throttle is moved from high to low.
Solution:
The low-speed needle “L” is too lean. Open it up about 1/8 of a
turn and try again.

13
Problem:
If The idle is not steady.
Solution:
The low-speed needle “L” valve is too rich. Close it 1/8 of a turn
and try again.
Problem:
If Engine stops at full throttle.
or Engine hesitates when accelerated rapidly.
or The engine will not come up to full rpm at full throttle.
Solution:
The high-speed needle valve “H” is too lean. Open it up 1/8 of
a turn and try again.
Problem:
If Your engine does not reach full rpm.
or Carbon build-ups appear consistently on your spark plug.
Solution:
The high-speed needle valve “H” is too rich. Close it up 1/8 turn
and try again.
Starting Procedures
If starting the engine the first time and during break-in it’s
recommended that you run the engine without the cowling. Also
for safety reasons do not make adjustments to the carburetor while
the engine is running.
There are two recommended ways to start the DLE-170.
A. Manual Starting
Note: When hand starting the DLE-170, use a thick glove or heavy
duty starter stick to protect your hand.
1. The propeller should be installed on the drive washer at the
one o’clock position and near the beginning of the compression
stroke so that it’s comfortable to fl ip it through compression.
2. Have someone help you hold the airplane while you start the
engine.
3. Close the choke on the carburetor and open the throttle slightly
from the idle position.
4. Switch the ignition switch to ON.
5. Flip the propeller counter clockwise several times briskly, until a
popping sound is heard. This indicates that the engine is fi ring.

14
6. Move the choke lever to the OPEN position.
7. Set the throttle to a high idle. Set the propeller so that it is near
the beginning of the compression stroke.
8. Flip the propeller through compression rapidly. If this is done
properly, the engine will start after several brisk fl ips of the prop.
9. After starting, let the engine idle for 30 to 45 seconds. Open
and close the throttle slowly until the engine runs smoothly at
idle and at full throttle. Acceleration should also be smooth. If
acceleration is not smooth, adjustments to the carburetor may
be necessary (see Adjustments of the Engine pages 11-13).
10. If your engine does not start, repeat the procedure.
B. Electric Starter Starting
A 24V electric starter is recommended to start the DLE-170.
1. Make sure you use a good quality, lightweight aluminum spinner.
2. Have someone help you hold the airplane while you start it.
3. Close the choke on the carburetor and open the throttle slightly
from the idle position.
4. Switch the ignition to ON and use the electric starter to turn the
engine through compression until a popping sound is heard.
This indicates that the engine is fi ring.
5. Open the choke.
6. Set the throttle to high idle and use your electric starter to turn
over the engine until it starts.
7. After starting, let the engine idle for 30 to 45 seconds. Open
and close the throttle slowly until the engine runs smoothly at
idle and at full throttle. Acceleration should also be smooth. If
acceleration is not smooth, adjustments to the carburetor may
be necessary (see Adjustments of the Engine on pages 11–13).
8. If your engine does not start, repeat the procedure.
Engine Troubleshooting
If your engine fails to start after the starting procedures please
check the following.

15
Symptom Diagnosis Fix
Engine
does not
fire
Ignition battery low Charge or replace battery
Engine starts,
then rpm
increases till
engine cuts out
Fuel not reaching
engine
Check for:
a) fuel in tank
b) fuel tubing cut,
blocked, or kinked
c) carburetor clogged
Battery wires faulty
or loose
Replace wires or
Re-connect/check
connections
Faulty spark plug
or not firing
Replace spark plug
or check for spark *
Engine flooded
Remove plug, rotate
prop to remove fuel
* This can be done by removing the spark plugs from the cylinders of
the engine and contacting the plugs on the outside of the crankcase.
Have an assistant turn the engine over while checking this and be
sure to have the spark plugs fi rmly plugged into the ignition wires.
Warning: The high voltage from the ignition can cause bodily harm,
especially when checking for spark in this manner.
Optional Digital Tachometer (not included)
An optional digital
tachometer is available that
can be directly connected to
the ignition and display the
RPMs of the engine. This unit
can be installed on the
aircraft or used to spot check
the Engine RPMs. Do not install or uninstall the Digital Tachometer
while the engine is running.
Many of the DLE Ignition
modules have an additional
lead to plug into the optional
tachometer. If your ignition
module does not have this
additional lead, the digital
tachometer can still be used.
Simply use the Y-harness
(included with the Digital Tachometer) to connect to the pick-up lead
from the engine. Be sure to secure all connections and to secure
the Digital Tachometer or leads on the aircraft used.

16
Engine Maintenance
Please clean the fuel fi lter in the DLE Carburetor periodically. Failure
to do so may result in miss-calibration of the needle adjustments. In
order to do this it is necessary to remove the Phillips head screws
which secure the carburetor fi lter cover and the carburetor fi lter gasket.
Use only carburetor cleaner to spray around the opening of the fi lter.

17
Warranty Information
The DLE-170 has a two year limited warranty through Hobby Services
beginning at date of purchase. Please retain your receipt as your
proof of purchase.
Hobby Services Tel: 217-398-8970
3002 N. Apollo Drive Suite #1 Fax: 217-398-7721
Champaign, Il 61822
E-mail: enginesuppor[email protected]
124 mm
90 mm
212 mm
20 mm
288 mm
80 mm

18
29
6
32
10
10
20
23
24
12
3
13
19
18
17
22
24
20
23
4
5
25
1
31
7
20
13
2
20
4
5
25
1
31
7
30
15
26
9
33
11
27
16
28
8
3
21

19
Key Numbers
#1 Cylinder
#2 Crankshaft w/Rods
#3 Crankcase
#4 Piston
#5 Ring
#6 Electronic Ignition System
#7 Left Muffl er (one external mounting hole)
#7 Right Muffl er (two external mounting holes)
#8 Carburetor Complete
#9 Engine Mount
#10 Spark Plug
#11 Reed Valve
#12 Inner Bearing
#13 Front & Rear Bearing
#15 Carburetor Heat Block
#16 Carburetor Base
#17 Prop Washer
#18 Crankshaft Extension
#19 Prop Hub
#20 Piston Pin Retainer
#21 Screw Set
#22 Woodruff Key
#23 Piston Pin
#24 Needle Bearing
#25 Cylinder/Crankcase Gasket
#26 Carburetor Heat Block/Reed Valve Gasket
#27 Carburetor Base/Reed Valve Gasket
#28 Carburetor/Carburetor Base Gasket
#29 Ignition Sensor
#30 Carburetor Heat Block/Crankcase Gasket
#31 Muffl er Gasket
#32 Spark Plug Caps
#33 Engine Mounting Standoffs
Optional Parts (Not Pictured)
DLE G5525 Onboard Digital Tachometer

DLE-170 Mounting Pattern
3.15 in.
[80 mm]
3.54 in.
90 mm
/