Vacmaster VOC1218PF Original Instructions Manual
- Category
- Vacuum cleaners
- Type
- Original Instructions Manual
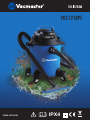
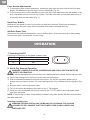
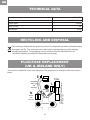
The Vacmaster VOC1218PF is a versatile and powerful wet and dry vacuum cleaner, designed to tackle both liquids and dry materials with ease. It features a 1250W motor for impressive suction power, and a 18L capacity tank for extended cleaning sessions. With its IPX4 rating, it can withstand water splashes, making it ideal for outdoor use. The included accessories, such as the artificial grass tool and hard floor nozzle, allow for efficient cleaning of various surfaces.
The Vacmaster VOC1218PF is a versatile and powerful wet and dry vacuum cleaner, designed to tackle both liquids and dry materials with ease. It features a 1250W motor for impressive suction power, and a 18L capacity tank for extended cleaning sessions. With its IPX4 rating, it can withstand water splashes, making it ideal for outdoor use. The included accessories, such as the artificial grass tool and hard floor nozzle, allow for efficient cleaning of various surfaces.


-
 1
1
-
 2
2
-
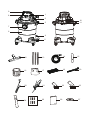 3
3
-
 4
4
-
 5
5
-
 6
6
-
 7
7
-
 8
8
-
 9
9
-
 10
10
-
 11
11
-
 12
12
-
 13
13
-
 14
14
-
 15
15
-
 16
16


Vacmaster VOC1218PF Original Instructions Manual
- Category
- Vacuum cleaners
- Type
- Original Instructions Manual
The Vacmaster VOC1218PF is a versatile and powerful wet and dry vacuum cleaner, designed to tackle both liquids and dry materials with ease. It features a 1250W motor for impressive suction power, and a 18L capacity tank for extended cleaning sessions. With its IPX4 rating, it can withstand water splashes, making it ideal for outdoor use. The included accessories, such as the artificial grass tool and hard floor nozzle, allow for efficient cleaning of various surfaces.
Ask a question and I''ll find the answer in the document
Finding information in a document is now easier with AI
Related papers
-
Vacmaster VOC1218PF Operating instructions
-
Vacmaster VQ1220PFC Operating instructions
-
-
Vacmaster VQ1530SFDC Operating instructions
-
Vacmaster VQ1530SIWDC User manual
-
Vacmaster VOC809pf User manual
-
-
-
Vacmaster CVQ607SFD User manual
-
Other documents
-
 FolkArt 5068 User guide
-
 FolkArt 5105 User guide
-
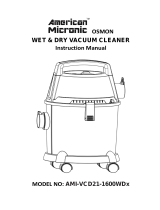 American Micronic AMI-VCD21-1600WDx User manual
-
Premier AS-4779 User manual
-
Parkside PNTS 1400 G3 Owner's manual
-
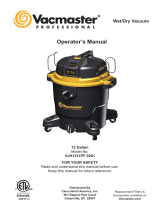 Vacmaster Professional VJH1211PF 0201 Operating instructions
-
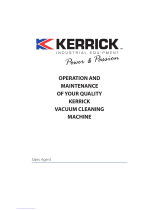 Kerrick VH203MEC Operation and Maintenance Manual
-
 Vacmaster Professional VFB511B 0201 Operating instructions
-
Sealey PC380M Operating instructions
-
Hitachi RP 150YB Handling Instructions Manual


