Roland JUPITER-50 Owner's manual

Type
Owner's manual
2
Navigating Between Screens . . . . . . . . . . . . . . . . . . . . . . . . . . . . . . . . . . . . . 3
Top Screen . . . . . . . . . . . . . . . . . . . . . . . . . . . . . . . . . . . . . . . . . . . . . . . . . . . . . . 3
REGISTRATION Screen . . . . . . . . . . . . . . . . . . . . . . . . . . . . . . . . . . . . . . . . . . . 4
LIVE SET (UPPER) Screen . . . . . . . . . . . . . . . . . . . . . . . . . . . . . . . . . . . . . . . . . 5
LIVE SET EFFECTS screen. . . . . . . . . . . . . . . . . . . . . . . . . . . . . . . . . . . . . . . . .6
Parameter List . . . . . . . . . . . . . . . . . . . . . . . . . . . . . . . . . . . . . . . . . . . . . . . . . . . 8
REGISTRATION screen . . . . . . . . . . . . . . . . . . . . . . . . . . . . . . . . . . . . . . . . . . .8
REGISTRATION COMMON screen . . . . . . . . . . . . . . . . . . . . . . . . . . . . . . . . . 9
REGISTRATION CONTROL screen . . . . . . . . . . . . . . . . . . . . . . . . . . . . . . . .10
REGISTRATION PERC/LOWER EDIT screen,
REGISTRATION SOLO EDIT screen . . . . . . . . . . . . . . . . . . . . . . . . . . . . . . .13
REGISTRATION EXT PART Screen . . . . . . . . . . . . . . . . . . . . . . . . . . . . . . . .16
REGISTRATION EFFECT Screen . . . . . . . . . . . . . . . . . . . . . . . . . . . . . . . . . .16
LIVE SET (UPPER) Screen . . . . . . . . . . . . . . . . . . . . . . . . . . . . . . . . . . . . . . . .17
LIVE SET COMMON Screen . . . . . . . . . . . . . . . . . . . . . . . . . . . . . . . . . . . . . .17
LIVE SET LAYER Screen . . . . . . . . . . . . . . . . . . . . . . . . . . . . . . . . . . . . . . . . . .18
LIVE SET EFFECTS Screen . . . . . . . . . . . . . . . . . . . . . . . . . . . . . . . . . . . . . . .22
TONE MODIFY Screen (SuperNATURAL Acoustic Tones) . . . . . . . . . .23
TONE MODIFY Screen (SuperNATURAL Synth Tones) . . . . . . . . . . . . .31
TONE BLENDER Screen . . . . . . . . . . . . . . . . . . . . . . . . . . . . . . . . . . . . . . . . .34
SYNTH EDIT Screen . . . . . . . . . . . . . . . . . . . . . . . . . . . . . . . . . . . . . . . . . . . . .35
Multi-Eects Parameters (MFX) . . . . . . . . . . . . . . . . . . . . . . . . . . . . . . . . .42
Reverb Parameters . . . . . . . . . . . . . . . . . . . . . . . . . . . . . . . . . . . . . . . . . . . . .79
Appendix . . . . . . . . . . . . . . . . . . . . . . . . . . . . . . . . . . . . . . . . . . . . . . . . . . . . . . .80
Control Change Assign List . . . . . . . . . . . . . . . . . . . . . . . . . . . . . . . . . . . . .80
About Note . . . . . . . . . . . . . . . . . . . . . . . . . . . . . . . . . . . . . . . . . . . . . . . . . . . .86
Contents
The Parameter Guide (this document) presents a detailed explanation of each parameter.
Explanations of parameters and notes regarding the settings are provided for each screen shown in the screen owchart (p. 3–p. 6).
Refer to this guide when you want to learn more about the parameters, or to get tips for creating sounds.
Copyright © 2012 ROLAND CORPORATION
All rights reserved. No part of this publication may be reproduced in any form without the written permission of ROLAND CORPORATION.
Roland, COSM, and SuperNATURAL are either registered trademarks or trademarks of Roland Corporation in the United States and/or other countries.
3
Navigating Between Screens
On the JUPITER-50, you can switch screens by moving the cursor to one of the areas enclosed in a box in the illustration below and pressing the
[ENTER] button.
The explanations in this manual include illustrations that depict what should typically be shown by the display. Note, however, that your unit may
incorporate a newer, enhanced version of the system (e.g., includes newer sounds), so what you actually see in the display may not always match
what appears in the manual.
The explanations of the parameters are organized by screen. The parameters shown in each screen are described on the page indicated like this:
p. xx
.
Top Screen
This is the main screen that appears when you turn on the power. It shows the name of the currently selected Registration, the sound and volume of
each Part, and the split status.
A list will appear when you move the cursor to the number of a Registration, Live Set, or Tone and then press the [ENTER] button.
1. REGISTRATION LIST screen
Select a Registration from a list.
2. TONE LIST screen (PERC/LOWER)
Select the Tone for the Percussion/Lower Part.
3. TONE LIST screen (SOLO)
Select the Tone for the Solo Part.
4. LIVE SET LIST screen (UPPER)
Select the Live Sets for the Upper Part.
Navigating Between Screens
4
REGISTRATION Screen
From the top screen, hold down the [SHIFT] button and press the [F1] (REG) button to access the REGISTRATION screen.
Here you can view the volume of the Registration, and the volume and pan settings of each Part.
Registration Level window
Specify the overall volume of the entire registration.
REGISTRATION COMMON screen
Make overall settings for the Registration.
REGISTRATION SOLO EDIT screen
Edit the settings of the Solo Part.
REGISTRATION CONTROL screen
Edit the controller settings.
REGISTRATION EFFECT screen
Edit the eect settings for the Registration.
REGISTRATION PERC/LOWER EDIT screen
Edit the settings of the Percussion/Lower Part.
REGISTRATION EXT PART screen
Edit Part settings for an external MIDI device.
2. 3. 4.
p. 8
p. 8
p. 9
p. 10
p. 13
p. 13
p. 16
p. 16
Navigating Between Screens
5
LIVE SET (UPPER) Screen
From the top screen, hold down the [SHIFT] button and press the [F5] (UPPER) button to access the LIVE SET (UPPER) screen.
View the name and volume of the Tones assigned to each layer of the Live Set.
TONE MODIFY screen
Edit the sound of each layer.
SuperNATURAL Acoustic Tone
SuperNATURAL Synth Tone
Level window
Specify the volume of each layer.
TONE LIST screen (UPPER)
Select the Tone for each layer.
LIVE SET EFFECTS screen
Edit the eect settings for the Live Set.
LIVE SET COMMON screen
Make overall settings for the Live Set.
LIVE SET LAYER screen
Edit the settings of each layer.
TONE BLENDER screen
Simultaneously edit multiple parameters of the Live Set.
p. 34
SYNTH EDIT screen
Edit a SuperNATURAL synth tone.
p. 17
p. 17 p. 22
p. 23
p. 23
p. 31
p. 35
p. 17
p. 17
p. 18
Navigating Between Screens
6
LIVE SET EFFECTS screen
Edit the eect settings for the Live Set.
REVERB screen
Edit the reverb parameters.
Current Layer window
Select the layer that you want to edit.
MFX Type window
Select the type of MFX.
MFX 1–4 screen
Edit the parameters of each multi-eect.
Reverb Type window
Select the type of reverb.
EFFECT SWITCH window
Turn the eects or reverb on/o.
p. 22
p. 22
p. 42
p. 79
p. 42
p. 79
Navigating Between Screens
7
List of Shortcuts
By holding down the [SHIFT] button and pressing another button, you can edit the settings of the button you pressed; i.e., this is a shortcut to the
corresponding editing screen.
Shortcut Description Page
[SHIFT] + [ASSIGNABLE] Accesses the D Beam Assign setting screen. p. 11
[SHIFT] + [S1] (or [S2]) Accesses the Switch S1 Assign (or Switch S2 Assign) setting screen. p. 11
[SHIFT] + [HOLD]
[SHIFT] + ARPEGGIO [LOWER]
[SHIFT] + ARPEGGIO [UPPER]
Accesses the arpeggiator setting screen. p. 9
[SHIFT] + [HARMONY INTELLIGENCE] Accesses the Harmony Type setting screen. p. 10
[SHIFT] + [SPLIT] Accesses the Lower Split Point setting screen. p. 10
[SHIFT] + [SOLO SPLIT] Accesses the Solo Split Point setting screen. p. 10
[SHIFT] + UPPER [PIANO]
Accesses the LIVE SET TONE MODIFY screen for layer 1–4 of the Live Set assigned to the Upper Part.
p. 23,
p. 31
[SHIFT] + UPPER [E. PIANO/CLAV]
[SHIFT] + UPPER [COMBO ORGAN]
[SHIFT] + UPPER [CLASSIC ORGAN]
[SHIFT] + UPPER [BASS]
Accesses the SYNTH EDIT screen for layer 1–4 of the Live Set assigned to the Lower Part. p. 35
[SHIFT] + UPPER [PAD/CHOIR]
[SHIFT] + UPPER [STRINGS]
[SHIFT] + UPPER [SYNTH STRINGS]
[SHIFT] + UPPER [SYNTH LEAD] Accesses the LIVE SET COMMON screen of the Upper Part. p. 17
[SHIFT] + UPPER [VIBES/MARIMBA] Accesses the LIVE SET LAYER screen of the Upper Part. p. 18
[SHIFT] + UPPER [OTHER] Accesses the LIVE SET EFFECTS screen of the Upper Part. p. 22
[SHIFT] + rotate the [C1] (or [C2]) knobs Accesses the Knob 1 Assign (or Knob 2 Assign) screen. p. 11
The following are for the Top screen
[SHIFT] + [F1] Accesses the REGISTRATION screen. p. 8
[SHIFT] + [F2] Accesses the REGISTRATION PERC/LOWER EDIT screen. p. 13
[SHIFT] + [F3] Accesses the REGISTRATION SOLO EDIT screen. p. 13
[SHIFT] + [F4] Accesses the REGISTRATION EFFECT screen. p. 16
[SHIFT] + [F5] Accesses the LIVE SET (UPPER) screen. p. 17
[SHIFT] + [F6] Accesses the LIVE SET TONE BLENDER screen. p. 34
8
The following icons indicate how the parameters are saved.
Registration
: Saved as Registration parameters.
Live Set
: Saved as Live Set parameters.
Tone
: Saved as Synth Tone parameters.
REGISTRATION screen
Parameter Value Explanation
REG LVL (Registration Level) 0–127 Volume of the registration. Use this to adjust the volume balance between registrations.
Part Switch OFF, ON
Part on/o switch.
Part Switch
Live Set Number -
Assigns a sound to the part. A Live Set is assigned to the upper part, and a Tone is assigned to
the solo part and the percussion/lower part.
Live Set Number
Tone Number
Tone Number
* The SuperNATURAL acoustic tone 0028:TW Organ can’t be assigned to the solo part or
percussion/lower part.
Tone Number -
LEVEL 0–127 Part volume. This is used mainly to adjust the volume balance between parts.
PAN L64–0–63R Part panning (left/right position).
OCTAVE -3–+3
Part (keyboard) pitch in one-octave steps.
This can’t be specied for a part to which manual percussion is assigned.
Registration
Parameter List
Parameter List
9
REGISTRATION COMMON screen
Parameter Value Explanation
GENERAL tab
Registration Level Described in the REGISTRATION screen’s “REG LVL (Registration Level)” (p. 8).
Tempo 20–250 Tempo for the arpeggio, LFO, eects, metronome, etc.
Transpose Switch OFF, ON
Species the keyboard pitch in semitone steps.
Transpose Value -5 (G)–+6 (F#)
Octave Shift -3–+3 Species the keyboard pitch in octave steps.
ARP tab
Upper Sw OFF, ON Turns the arpeggiator on/o for the upper part.
Lower Sw OFF, ON Turns the arpeggiator on/o for the lower part.
Style P001–P128, U001–U016
Species the basic style of the arpeggio.
You can create your own original arpeggio style by importing an SMF into an arpeggio style.
For details, refer to JUPITER-50 Owner’s Manual “Creating an Arpeggio Style from a MIDI File
(Import).
Hold OFF, ON Turns the arpeggio hold function on/o.
Variation 1–
Each arpeggio style provides several variations (patterns). Here you can select the variation
number. The number of variations will depend on the arpeggio style.
Motif
Choose one of the following to specify the order in which the notes of the chord you play will be sounded.
UP The notes will be sounded from the lowest to the highest note you play.
DOWN The notes will be sounded from the highest to the lowest note you play.
UP&DOWN
The notes will be sounded from the lowest to the highest note, and then back down to the
lowest note.
RANDOM The notes you play will be sounded in random order.
NOTE ORDER
The notes you play will be sounded in the order you played them. You can create a melody line
by playing the notes in the appropriate order. The order of up to 128 notes can be remembered.
GLISSANDO
A chromatic glissando will be sounded upward and then downward repeatedly between the
lowest and highest notes you played. Play two notes; the lowest and highest desired notes.
CHORD All of the notes you play will sound simultaneously.
AUTO1
The timing at which each note will sound is assigned automatically, starting at the lowest note
you play.
AUTO2
The timing at which each note will sound is assigned automatically, starting at the highest note
you play.
PHRASE
Play only one key; a phrase based on the pitch of that key will be sounded. If you play more than
one key, the last key you play will take priority.
Velocity
REAL,
1–127
Species the loudness at which the notes you play will be sounded. If you want the notes to be
sounded at the velocity with which you actually struck the key, choose “REAL. If you want the
notes to be sounded at a xed velocity regardless of how strongly you struck the key, specify
that value (1–127).
Oct Range -3–+3
Species the range in octaves in which the arpeggio will be sounded. Choose “0” if you want
only the notes you play to be sounded.
Choose “+1” if you want the notes of the chord you played as well as the same notes one octave
higher to be sounded. Choose “-1” if you want the notes of the chord you played as well as the
notes one octave lower to be sounded.
Accent 0–100%
Modies the groove of the performance by adjusting the strength of the accents and the
duration of the notes. The “100%” setting produces the strongest sense of groove.
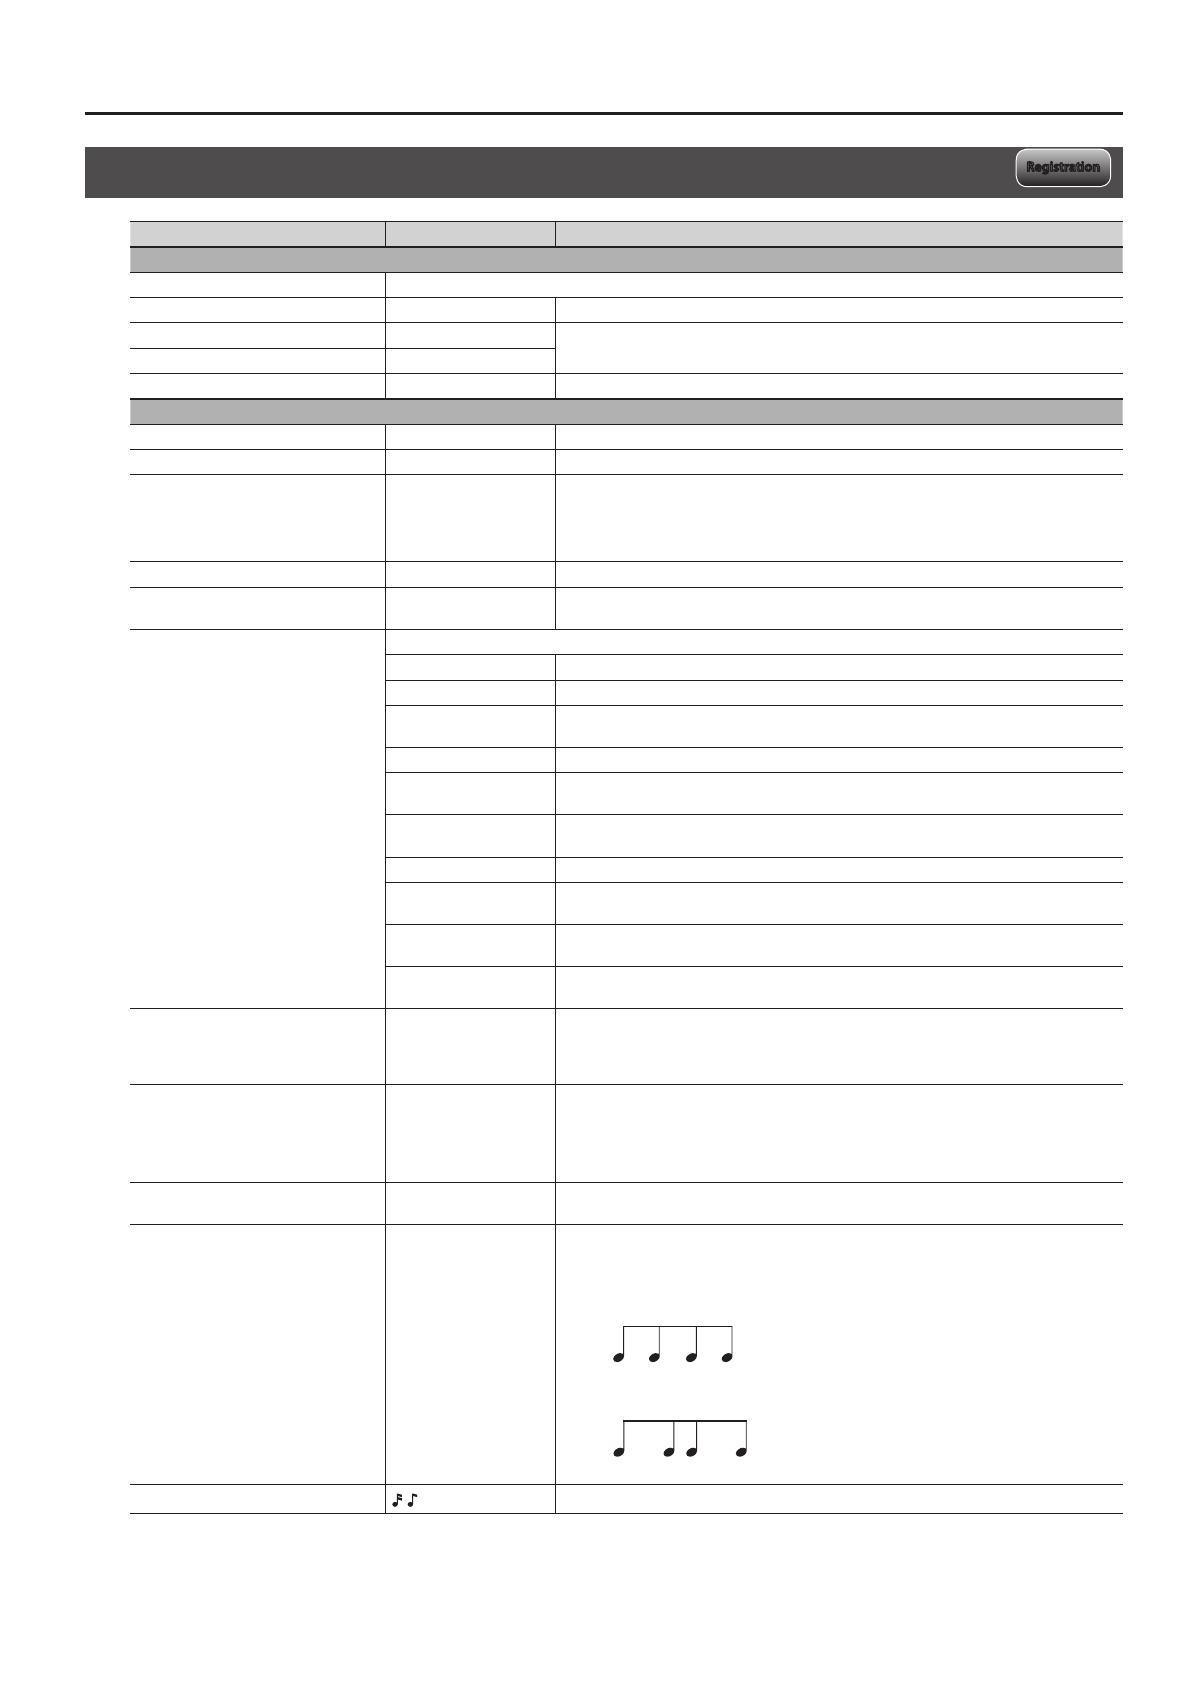
Shue Rate 0–100%
Produces a shue rhythm by adjusting the timing of the notes.
With the “50%” setting, notes will be sounded at equal intervals. As this value is increased, the
result will be more like dotted notes.
50 5050 50
90 10 90 10
Shue Rate=50%
Shue Rate=90%
Shue Resolution
,
Species the timing (as a note value) at which the notes will be heard.
Registration
Parameter List
10
Parameter Value Explanation
HARMONY tab
Harmony Switch OFF, ON
Turns the harmony intelligence on/o.
Harmony Type
ORGAN Harmony appropriate for organ sounds will be produced.
BIG BAND
Harmony typical of big band jazz will be produced.
This is appropriate for brass sounds.
STRINGS Harmony typical of a string ensemble will be produced. This is appropriate for string sounds.
BLOCK
Block chord harmony will be produced.
This is appropriate for piano or mallet sounds.
HYMN
Harmony appropriate for hymns will be produced.
This is appropriate for choir sounds.
TRADITIONAL Two notes of harmony will be added to the notes you play.
DUET
Simple duet harmony will be produced.
This is appropriate for brass sounds.
COMBO
Combination harmony will be produced.
This is appropriate for brass or wind sounds.
COUNTRY
Open chord harmony will be produced.
This is appropriate for guitar sounds.
BROADWAY
Flamboyant show-type harmony will be produced.
This is appropriate for organ sounds.
GOSPEL
Gospel harmony will be produced.
This is appropriate for organ or choir sounds.
OCTAVE1 The note you play will be layered with a note one octave lower.
OCTAVE2 The note you play will be layered with a note two octaves lower.
1NOTE One note of harmony will be added to the note you play.
2NOTES Two notes of harmony will be added to the note you play.
3NOTES Three notes of harmony will be added to the note you play.
4NOTES Four notes of harmony will be added to the note you play.
REGISTRATION CONTROL screen
Parameter Value Explanation
KBD tab
Solo Split
Solo Split OFF, ON
If this is on, the sound of the solo part will be sounded by keys to the right of the solo split
point, and the sound of the upper part will be sounded by those to the left.
The solo split point key will be the lowest note of the solo part (it will be included in the solo
part).
Solo Split Point F1–G7 Species the solo split point.
Perc/Lower Split
Lower Split OFF, ON
If this is on, the sound of the upper part will be sounded by keys to the right of the lower split
point, and the sound of the lower part will be sounded by those to the left.
The lower split point key will be the highest note of the lower part (it will be included in the
lower part).
Lower Split Point E1–F#7 Species the lower split point.
PEDAL tab
Pedal 1 Assign
Pedal 2 Assign
These select the functions that are controlled by pedals connected to the FOOT PEDAL CTRL 1 and 2 jacks.
Control Pedal 1 Assign and Control Pedal 2 Assign settings are enabled when the system parameters Control Pedal 1 Assign
Source or Control Pedal 2 Assign Source are set to REGISTRATION.
OFF No function is assigned.
CC01–31, 33–95 Controller numbers 1–31, 33–95
AFTERTOUCH Aftertouch
BEND UP The same eect as when the pitch bend lever is moved to the right.
BEND DOWN The same eect as when the pitch bend lever is moved to the left.
Registration
Parameter List
11
Parameter Value Explanation
D-BEAM tab
D-BEAM Assign
This selects the function thats controlled when the D-BEAM controller’s ASSIGNABLE button is on.
OFF No function is assigned.
CC01–31, 33–95 Controller numbers 1–31, 33–95
AFTERTOUCH Aftertouch
BEND UP The same eect as when the pitch bend lever is moved to the right.
BEND DOWN The same eect as when the pitch bend lever is moved to the left.
KNOB tab
Knob 1 Assign
Knob 2 Assign
These select the functions that are assigned to [C1] or [C2] knob.
No Assign No function is assigned.
Cuto
Adjust the Live Set Common Cuto of the upper part, or the Cuto Oset of the solo or
percussion/lower part.
Resonance
Adjust the Live Set Common Resonance of the upper part, or the Resonance Oset of the solo
or percussion/lower part.
Attack Oset
Adjust the Live Set Layer Attack Time Oset of the upper part, or the Attack Time Oset of the
solo or percussion/lower part.
Decay Oset
Adjust the Live Set Layer Decay Time Oset of the upper part, or the Decay Time Oset of the
solo or percussion/lower part.
Release Oset
Adjust the Live Set Layer Release Time Oset of the upper part, or the Vibrato Rate of the solo or
percussion/lower part.
Vib Rate
Adjust the Live Set Layer Vibrato Rate of the upper part, or the Release Time Oset of the solo or
percussion/lower part.
Vib Depth
Adjust the Live Set Layer Vibrato Depth of the upper part, or the Vibrato Depth of the solo or
percussion/lower part.
Vib Delay
Adjust the Live Set Layer Vibrato Delay of the upper part, or the Vibrato Delay of the solo or
percussion/lower part.
CC05 (Porta Time)
Transmit the corresponding control change.
CC07 (Volume)
CC10 (Pan)
CC16 (Modify-1)
CC17 (Modify-2)
CC18 (Modify-3)
CC19 (Modify-4)
CC65 (PortamentoSw)
CC71 (Resonance)
CC72 (Release Time)
CC73 (Attack Time)
CC74 (Cuto)
CC75 (Decay Time)
CC76 (Vib Rate)
CC77 (Vib Depth)
CC78 (Vib Delay)
CC79 (Tone Blender)
CC80 (Variation-1)
CC81 (Variation-2)
CC82 (Variation-3)
CC83 (Variation-4)
CC91 (Reverb)
Parameter List
12
Parameter Value Explanation
S1/S2 tab
Switch S1 Assign
Switch S2 Assign
These select the functions that are assigned to the [S1]/[S2] buttons.
Some SuperNATURAL acoustic tones allow you to use control changes to modify the tone character of the sound or switch to
a dierent variation sound. For details, refer to”Control Change Assign List” (p. 80).
OFF
CC01 (Modulation)
Transmit a control change.
CC02 (Breath)
CC03
CC04 (Foot Type)
CC11 (Expression)
CC12
CC13
CC14
CC15
CC16 (Modify-1)
Transmit a control change.
If a SuperNATURAL acoustic tone is selected, a specic eect will be applied (p. 80).
CC17 (Modify-2)
CC18 (Modify-3)
CC19 (Modify-4)
CC20
Transmit a control change.
CC21
CC22
CC23
CC24
CC25
CC26
CC27
CC28
CC29
CC30
CC31
CC64 (Hold-1)
CC65 (PortamentoSw)
CC66 (Sostenuto)
CC67 (Soft)
CC68 (Legato Sw)
CC69 (Hold-2)
CC79 (Tone Blender)
CC80 (Variation-1)
Transmit a control change.
If a SuperNATURAL acoustic tone is selected, a specic eect will be applied (p. 80).
CC81 (Variation-2)
CC82 (Variation-3)
CC83 (Variation-4)
AFTERTOUCH Transmit aftertouch.
MONO/POLY Transmit a control change.
Switch S1 Type
Switch S2 Type
LATCH Switch the setting on/o each time you press the button.
MOMENTARY The setting will be on while the button is held down, and o when released.
Parameter List
13
Parameter Value Explanation
CTRL SW tab
BEND (Bender)
OFF, ON
For each controller, you can specify whether MIDI messages will be transmitted to the part (ON)
or not transmitted (OFF).
If INTERNAL is set for “EXT Switch (p. 16), these settings also apply to the MIDI output.
MOD (Modulation)
S1 (Switch S1)
S2 (Switch S2)
HOLD (Hold Pedal)
PDL1 (Control Pedal 1)
PDL2 (Control Pedal 2)
BEAM (D-BEAM)
C1 (Knob C1)
C2 (Knob C2)
REGISTRATION PERC/LOWER EDIT screen,
REGISTRATION SOLO EDIT screen
Parameter Value Explanation
PITCH tab
Octave Shift *6 -3–+3 Pitch of the part sound (in 1-octave units)
Coarse Tune -48–+48 Pitch of the part sound (in semitones, +/-4 octaves)
Fine Tune -50–+50 Pitch of the part sound (in 1-cent steps; one cent is 1/100th of a semitone)
Pitch Bend Range
0–24
Amount of pitch change in semitones (2 octaves) that will occur when the Pitch Bend Lever is
moved. The amount of change when the lever is tilted is set to the same value for both left and
right sides.
TONE The pitch bend range setting of the tone assigned to the part will be used.
Portamento Switch *6, *9
OFF Portamento will not be applied.
ON Portamento will be applied.
TONE The portamento switch setting of the tone assigned to the part will be used.
Portamento Time *6
0–127 Time over which the pitch change will occur when using portamento
TONE The portamento time setting of the tone assigned to the part will be used.
OUTPUT tab
PERC Part
SOLO Part
REV
Level, Pan
Output Level
Reverb Send Level
Level 0–127 Volume of the part.
Pan L64–0–63R Part panning.
Output Level 0–127 Volume at which the parts sound is sent to the eect.
Reverb Send Level 0–127 Volume at which the part’s sound is sent to the reverb.
Registration
Parameter List
14
Parameter Value Explanation
KBD tab
Keyboard Range Lower
Keyboard Range Upper
Keyboard Fade Width Lower
Keyboard Fade Width Upper
Level
Pitch
Keyboard Fade Width Upper *5 0–127
Determines what will happen to the part level when a note that’s higher than Key Range Upper
is played. If you don’t want the layer to sound at all, set this parameter to “0.
Keyboard Range Upper *5
(Keyboard Range
Lower)–G9
Species the highest note that the layer will sound for each part.
Keyboard Range Lower *5
C-–(Keyboard Range
Upper)
Species the lowest note that the layer will sound for each part.
Keyboard Fade Width Lower *5 0–127
Determines what will happen to the part level when a note that’s lower than Key Range Lower is
played. If you don’t want the layer to sound at all, set this parameter to “0.
OFFSET tab
Cuto Oset *2 -64–+63 Cuto frequency of the part
Resonance Oset *2 -64–+63 Resonance of the part
Attack Time Oset *2 -64–+63 Amp/Filter Envelope of the part Attack Time
Decay Time Oset *7 -64–+63 Amp/Filter Envelope of the part Decay Time
Release Time Oset *2 -64–+63 Amp/Filter Envelope of the part Release Time
VIBRATO tab
Vibrato Rate -64–+63 For each part, adjust the vibrato speed
Vibrato Depth -64–+63 For each part, this adjusts the depth of the vibrato eect
Vibrato Delay -64–+63 For each part, this adjusts the time delay until the vibrato
VELOCITY tab
Level
Velocity Range Lower
Velocity Range Upper
Velocity Fade Width Lower
Velocity Fade Width Upper
Velocity
Velocity Fade Width Lower 0–127
Determines what will happen to the tones level when the tone is played at a velocity lower than
Velo Range Lower. If you don’t want the tone to sound at all, set this parameter to “0.
Velocity Range Lower 1–(Velocity Range Upper) Species the lowest velocity at which the part will sound.
Velocity Range Upper
(Velocity Range
Lower)–127
Species the highest velocity at which the part will sound.
Velocity Fade Width Upper 0–127
Determines what will happen to the tones level when the tone is played at a velocity greater
than Velo Range Upper. If you don’t want the tone to sound at all, set this parameter to “0.
Velocity Sens Oset -63–+63 Adjusts the velocity sensitivity. The higher the value, the greater the sensitivity.
Velocity Curve Type OFF, 1–4
Velocity curve for each part.
Selects for each part one of the four following Velocity Curve types that best matches the touch
of the keyboard. Set this to “OFF” if you are using the keyboard’s own velocity curve.
21 3 4
Parameter List
15
Parameter Value Explanation
MISC tab
Mono/Poly *6
MONO
The tone assigned to the part will only play monophonically. The most recently played note will
take priority.
POLY Chords can be played on the tone assigned to the part.
TONE The mono/poly setting of the tone assigned to the part will be used.
SOLO 1 The tone assigned to the part will only play monophonically. The highest note will take priority.
SOLO 2 The tone assigned to the part will only play monophonically. The lowest note will take priority.
Legato Switch *6
Legato refers to playing smoothly without a perceptible break between notes.
OFF Legato will not be applied to the part.
ON Legato will be applied to the part when you play single notes.
TONE The legato setting of the tone assigned to the part will be used.
Voice Reserve 0–31, FULL
This setting species the number of voices that will be reserved for each part when more than
128 voices are played simultaneously.
RX FLTR tab
Receive Bender
OFF, ON
Species whether the part will receive messages of a specic MIDI part (ON) or will not receive
them (OFF).
Receive Polyphonic Key Pressure *6
Receive Channel Pressure *6
Receive Modulation (CC01) *6
Receive Expression (CC11)
Receive Hold-1 (CC64)
Receive Breath Type (CC02) *8
Receive Foot Type (CC04) *8
Receive Portamento (CC05, CC65) *6
Receive Filter Oset (CC71, CC74)
Receive Envelope Oset (CC72, CC73,
CC75)
Receive Reverb Send (CC91)
Receive Modify (CC16–19) *6
Receive Variation (CC80–83) *6
*2 This has no eect on the SuperNATURAL acoustic tones Concert Grand (0001)–Honky-tonk (0009) and TW Organ (0028). Also, the eect may be dicult to
notice for some SuperNATURAL acoustic tones.
*5 This has no eect if a manual percussion sound is assigned. Manual percussion is played using the leftmost fteen notes of the keyboard.
*6 This has no eect if a manual percussion or Drums sound is assigned.
*7 This has no eect on SuperNATURAL acoustic tones other than Vibraphone (0026), Marimba (0027), Timpani (0049), Steel Drums (0077), APS Vibraphone
(0078), APS Marimba (0079), APS Timpani (0094), and APS Steel Drums (0117).
*8 This has no eect if a SuperNATURAL synth tone, manual percussion, or Drums sound is assigned.
*9 This has no eect on the SuperNATURAL acoustic tones TW Organ (0028), Timpani (0049), and APS Timpani (0094).
Parameter List
16
REGISTRATION EXT PART Screen
Parameter Value Explanation
CH1–4 tab, CH5-8 tab, CH9–12 tab, CH13–16 tab
EXT Switch
MIDI output settings
OFF (INTERNAL) MIDI output will occur according to the part settings.
ON (EXTERNAL)
MIDI output will occur according to the settings in the Registration External Part screen.
This is convenient when using the JUPITER-50 as a master keyboard.
KB (Keyboard Switch) OFF, ON MIDI channels that are turned on will be output.
MSB (External Bank Select MSB)
0–127, ---
If you want a bank select number and program change number to be transmitted when you
switch registrations, specify the desired values here.
If you don’t want these to be transmitted, choose “---”.
LSB (External Bank Select LSB)
PC (Program Change) 1–128, ---
OCT (Octave Shift) -3–+3 Species the pitch of each channel in steps of an octave.
KL (Keyboard Range Lower) C-–(KU) Species the bottom key of the key range for each channel.
KU (Keyboard Range Upper) (KL)–G9 Species the top key of the key range for each channel.
VL (Velocity Range Lower) 1–(VU) Species the lower limit of the velocity range for each channel.
VU (Velocity Range Upper) (VL)–127 Species the upper limit of the velocity range for each channel.
LVL (External Level) 0–127, ---
If you want a volume message to be transmitted when you switch registrations, specify its value
here. If you don’t want these to be transmitted, choose “---”.
PAN (External Pan) L64–0–63R, ---
If you want a pan message to be transmitted when you switch registrations, specify its value
here. If you don’t want these to be transmitted, choose “---”.
REGISTRATION EFFECT Screen
Output Level
Reverb Send Level
Parameter Value Explanation
Output Level Described in “Output Level” (p. 13) for the REGISTRATION PERC/LOWER EDIT screen and REGISTRATION SOLO EDIT screen.
Reverb Send Level Described in “Reverb Send Level” (p. 13) for the REGISTRATION PERC/LOWER EDIT screen and REGISTRATION SOLO EDIT screen.
Registration
Registration
Parameter List
17
LIVE SET (UPPER) Screen
Parameter Value Explanation
Level 0–127
Volume of each layer. This settings main purpose is to adjust the volume balance between layer.
Layer Switch OFF, ON
Layer on/o setting
Tone Type
SNAc (SuperNATURAL
Acoustic), SNSyn (SuperNATU-
RAL Synth)
Selects the type of tone.
Tone Number 0001–
Selects the tone.
* The SuperNATURAL acoustic tone 0028:TW Organ can be assigned only to layer 1 of the upper
part.
LIVE SET COMMON Screen
Parameter Value Explanation
Common Level 0–127 Adjusts the overall volume of the live set.
LiveSet Category
No assign, Ac.Piano, Pop
Piano, E.Grand Piano,
E.Piano1, E.Piano2, E.Organ,
Pipe Organ, Reed Organ,
Harpsichord, Clav, Celesta,
Accordion, Harmonica, Bell,
Mallet, Ac.Guitar, E.Guitar,
Dist.Guitar, Ac.Bass, E.Bass,
Synth Bass, Plucked/Stroke,
Solo Strings, Ensemble
Strings, Orchestral, Solo
Brass, Ensemble Brass,
Wind, Flute, Sax, Recorder,
Vox/Choir, Scat, Synth Lead,
Synth Brass, Synth Pad/
Strings, Synth Bellpad,
Synth PolyKey, Synth FX,
Synth Seq/Pop, Phrase,
Pulsating, Beat&Groove,
Hit, Sound FX, Drums,
Percussion, Stack, Zone,
Distorted
Selects the category of the live set.
Cuto *2 -64–+63 Species the cuto frequency for the entire live set.
Resonance *2 -64–+63 Species the resonance for the entire live set.
Phase Lock *3 OFF, ON
Turn this “ON” if you want to align the timing at which each layer produces sound.
If this is “ON, all layers will sound simultaneously when all are ready.
This means that in some cases, it might take a moment from when the note message is received
until the sound is heard.
Turn this “ON” if necessary.
*2 This has no eect on the SuperNATURAL acoustic tones Concert Grand (0001)–Honky-tonk (0009) and TW Organ (0028). Also, the eect may be dicult to
notice for some SuperNATURAL acoustic tones.
*3 This has no eect on the SuperNATURAL acoustic tone TW Organ (0028).
Live Set
Live Set
Parameter List
18
LIVE SET LAYER Screen
Parameter Value Explanation
Sw (Layer Switch) OFF, ON
Layer on/o setting
This is shown at the far left of all the tabs in the LIVE SET LAYER screen.
LV&PAN tab
Level 0–127 Volume of each layer. This settings main purpose is to adjust the volume balance between layer.
Pan L64–0–63R Left/right position of each layer
Assign (Output Assign)
MFX Output in stereo via the MFX.
L+R Output in stereo from the OUTPUT jacks without passing through MFX.
Output (Output Level) 0–127 Level of the signal that is sent to the output destination specied by Output Assign
KBD tab
Level
Pitch
Range Lower
Range Upper
Fade Lower
Fade Upper
K.L (Key Range Lower) C-– (K.U) Species the lowest note that the layer will sound for each layer.
K.U (Key Range Upper) (K.L)–G9 Species the highest note that the layer will sound for each layer.
F.L (Key Fade Lower) *3 0–127
Determines what will happen to the layer’s level when a note that’s lower than Key Range Lower
is played. If you don’t want the layer to sound at all, set this parameter to “0.
F.U (Key Fade Upper) *3 0–127
Determines what will happen to the layer’s level when a note that’s higher than Key Range
Upper is played. If you don’t want the layer to sound at all, set this parameter to “0.
EFXSEND tab
MFX1 (Layer MFX1 Send Level)
0–127 Level of the signal sent from the layer to MFX 1–4
MFX2 (Layer MFX2 Send Level)
MFX3 (Layer MFX3 Send Level)
MFX4 (Layer MFX4 Send Level)
Reverb (Reverb Send Level) 0–127 Level of the signal sent from the layer to reverb
PITCH tab
Octave (Octave Shift) -3–+3 Pitch of the layer’s sound (in 1-octave units)
Coarse (Coarse Tune) -48–+48 Pitch of the layer’s sound (in semitones, +/-4 octaves)
Fine (Fine Tune) *3 -50–+50 Pitch of the layer’s sound (in 1-cent steps; one cent is 1/100th of a semitone)
Bend (Pitch Bend Range)
0–24
Amount of pitch change in semitones (2 octaves) that will occur when the Pitch Bend Lever is
moved. The amount of change when the lever is tilted is set to the same value for both left and
right sides.
TONE The bend range setting specied by the tone will be used.
Porta (Portamento Switch) *9
OFF Portamento will not be applied.
ON Portamento will be applied.
TONE The portamento switch setting of the tone assigned to the layer will be used.
Time (Portamento Time) *9
0–127 Time over which the pitch change will occur when using portamento
TONE The portamento time setting of the tone assigned to the layer will be used.
Live Set
Parameter List
19
Parameter Value Explanation
VIBRATO tab
Vib Rate (Vibrato Rate) *3 -64–+63 For each layer, adjust the vibrato speed
Depth (Vibrato Depth) *3 -64–+63 For each layer, this adjusts the depth of the vibrato eect
Delay (Vibrato Delay) *3 -64–+63 For each layer, this adjusts the time delay until the vibrato
OFFSET tab
Cuto (Cuto Oset) *2 -64–+63 Cuto frequency
Reso (Resonance Oset) *2 -64–+63 Resonance
Attack (Attack Time Oset) *2 -64–+63 Amp/Filter Envelope of the layer Attack Time
Decay (Decay Time Oset) *7 -64–+63 Amp/Filter Envelope of the layer Decay Time
Release (Release Time Oset) *2 -64–+63 Amp/Filter Envelope of the layer Release Time
VELOCITY tab
Level
Range Lower
Range Upper
Fade Lower
Fade Upper
Velocity
Sns (Velocity Sens Oset) *1 -63–+63 Adjusts the velocity sensitivity. The higher the value, the greater the sensitivity.
Crv (Velocity Curve Type) OFF, 1–4
Velocity curve for each layer
Selects for each layer one of the four following Velocity Curve types that best matches the touch
of the keyboard. Set this to “OFF” if you are using the keyboard’s own velocity curve.
21 3 4
V.L (Velocity Range Lower) *3 1–(V.U) Species the lowest velocity at which the layer will sound.
V.U (Velocity Range Upper) *3 (V.L)–127 Species the highest velocity at which the layer will sound.
F.L (Velocity Fade Lower) *3 0–127
Determines what will happen to the tones level when the tone is played at a velocity lower than
Velo Range Lower. If you don’t want the tone to sound at all, set this parameter to “0.
F.U (Velocity Fade Upper) *3 0–127
Determines what will happen to the tones level when the tone is played at a velocity greater
than Velo Range Upper. If you don’t want the tone to sound at all, set this parameter to “0.
MISC tab
Mono/Poly *3
MONO
The tone assigned to the layer will only play monophonically. The most recently played note will
take priority.
POLY Chords can be played on the tone assigned to the layer.
TONE The mono/poly setting of the tone assigned to the layer will be used.
SOLO 1 The tone assigned to the layer will only play monophonically. The highest note will take priority.
SOLO 2 The tone assigned to the layer will only play monophonically. The lowest note will take priority.
Legato (Legato Switch) *1
Legato refers to playing smoothly without a perceptible break between notes.
OFF Legato will not be applied to the layer.
ON Legato will be applied to the layer when you play single notes.
TONE The legato setting of the tone assigned to the layer will be used.
LayerSec (Layer Section Switch) OFF, ON
If this is on, you’ll be able to play the layer as part of a Section. By assigning wind or string
instruments to multiple layers, you can create the impression of a brass section or string section.
For details on how this works, refer to “Layer Section examples” (p. 21).
This parameter is valid for SuperNATURAL Acoustic wind instruments and string instruments
(with the exception of some ethnic sounds).
VoiceRsv (Voice Reserve) 0–63, FULL
This setting species the number of voices that will be reserved for each layer when more than
128 voices are played simultaneously.
It is not possible for the settings of all layers to total an amount greater than 64. The remaining
number of available voices will be displayed at (rest=). Pay attention to this readout as you make
Voice Reserve settings.
Parameter List
20
Parameter Value Explanation
RXFLTR1 tab
Bend (Receive Bender) *3
OFF, ON Turn reception of specic MIDI messages on/o for each layer
P.Aft (Receive Poly Key Press) *3
C.Aft (Receive Channel Press) *3
Mod (Receive Modulation: CC01) *3
Exp (Receive Expression: CC11)
*3
Hold (Receive Hold-1: CC64) *3
RXFLTR2 tab
Brth (Receive Breath Type: CC02) *4
OFF, ON Turn reception of specic MIDI messages on/o for each layer
Foot (Receive Foot Type: CC04) *4
Port (Receive Portamento: CC05, CC65)
*3
Fltr (Receive Filter Oset: CC71, CC74) *3
Env (Receive Envelope Oset: CC72,
CC73, CC75) *3
Rev (Receive Reverb Send: CC91)
Mod (Receive Modify: CC16–19)
Vari (Receive Variation: CC80–83)
*1 This has no eect on SuperNATURAL acoustic tones other than Concert Grand (0001) through Honky-tonk (0009).
*2 This has no eect on the SuperNATURAL acoustic tones Concert Grand (0001)–Honky-tonk (0009) and TW Organ (0028).
Also, the eect may be dicult to notice for some SuperNATURAL acoustic tones.
*3 This has no eect on the SuperNATURAL acoustic tone TW Organ (0028).
*5 This has no eect on the SuperNATURAL acoustic tone TW Organ (0028) or on SuperNATURAL synth tones.
*7 This has no eect on SuperNATURAL acoustic tones other than Vibraphone (0026), Marimba (0027), Timpani (0049), Steel Drums (0077), APS Vibraphone
(0078), APS Marimba (0079), APS Timpani (0094), and APS Steel Drums (0117).
*9 This has no eect on the SuperNATURAL acoustic tones TW Organ (0028), Timpani (0049), and APS Timpani (0094).
  • Page 1 1
  • Page 2 2
  • Page 3 3
  • Page 4 4
  • Page 5 5
  • Page 6 6
  • Page 7 7
  • Page 8 8
  • Page 9 9
  • Page 10 10
  • Page 11 11
  • Page 12 12
  • Page 13 13
  • Page 14 14
  • Page 15 15
  • Page 16 16
  • Page 17 17
  • Page 18 18
  • Page 19 19
  • Page 20 20
  • Page 21 21
  • Page 22 22
  • Page 23 23
  • Page 24 24
  • Page 25 25
  • Page 26 26
  • Page 27 27
  • Page 28 28
  • Page 29 29
  • Page 30 30
  • Page 31 31
  • Page 32 32
  • Page 33 33
  • Page 34 34
  • Page 35 35
  • Page 36 36
  • Page 37 37
  • Page 38 38
  • Page 39 39
  • Page 40 40
  • Page 41 41
  • Page 42 42
  • Page 43 43
  • Page 44 44
  • Page 45 45
  • Page 46 46
  • Page 47 47
  • Page 48 48
  • Page 49 49
  • Page 50 50
  • Page 51 51
  • Page 52 52
  • Page 53 53
  • Page 54 54
  • Page 55 55
  • Page 56 56
  • Page 57 57
  • Page 58 58
  • Page 59 59
  • Page 60 60
  • Page 61 61
  • Page 62 62
  • Page 63 63
  • Page 64 64
  • Page 65 65
  • Page 66 66
  • Page 67 67
  • Page 68 68
  • Page 69 69
  • Page 70 70
  • Page 71 71
  • Page 72 72
  • Page 73 73
  • Page 74 74
  • Page 75 75
  • Page 76 76
  • Page 77 77
  • Page 78 78
  • Page 79 79
  • Page 80 80
  • Page 81 81
  • Page 82 82
  • Page 83 83
  • Page 84 84
  • Page 85 85
  • Page 86 86

Roland JUPITER-50 Owner's manual

Type
Owner's manual

Ask a question and I''ll find the answer in the document

Finding information in a document is now easier with AI