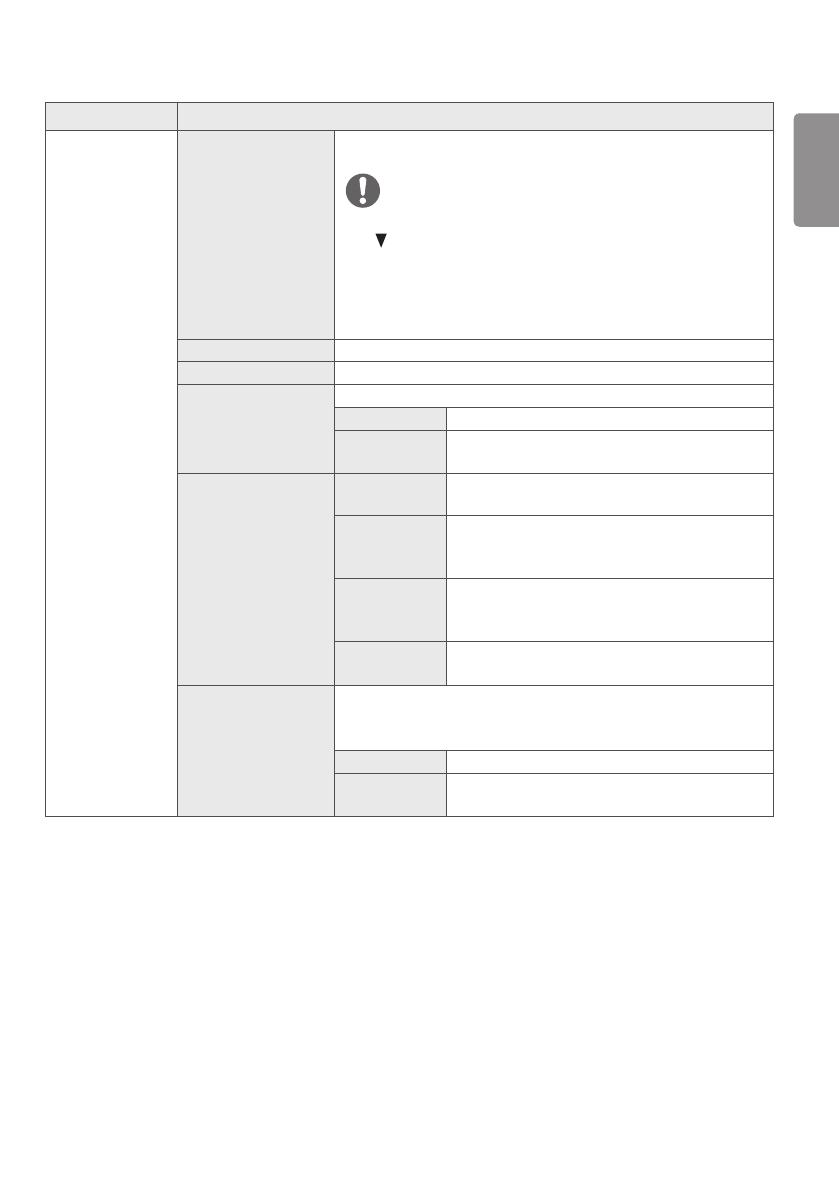
LG 27HJ710S Owner's manual

Type
Owner's manual

This manual is also suitable for

LG 27HJ710S-W monitor offers a range of features for various use cases. With its IPS LED display technology, it delivers accurate and vivid colors, making it ideal for professional photo editing, graphic design, and video production. The monitor's high resolution of 2560 x 1440 pixels ensures sharp and detailed images, enhancing productivity and visual clarity. Additionally, the monitor's adjustable stand allows for ergonomic positioning, reducing neck and eye strain during prolonged use.

LG 27HJ710S-W monitor offers a range of features for various use cases. With its IPS LED display technology, it delivers accurate and vivid colors, making it ideal for professional photo editing, graphic design, and video production. The monitor's high resolution of 2560 x 1440 pixels ensures sharp and detailed images, enhancing productivity and visual clarity. Additionally, the monitor's adjustable stand allows for ergonomic positioning, reducing neck and eye strain during prolonged use.

OWNER’S MANUAL
27HJ710S
IPS LED
MONITOR
(LED Monitor*)
Please read this manual carefully before operating
your set and retain it for future reference.
* LG LED Monitor applies LCD screen with LED backlights.
www.lg.com
Copyright 2019 LG Electronics Inc. All Rights Reserved.
ENGLISH
2
TABLE OF CONTENTS
ON CLEANING ------------------------ 3
LICENSE ------------------------------- 3
ASSEMBLY AND PREPARING -------- 4
SETTINGS ---------------------------- 13
TROUBLESHOOTING ---------------- 25
PRODUCT SPECIFICATIONS -------- 27
EXTERNAL CONTROLLER SETUP -- 31
ENGLISH
3
ON CLEANING
Recommended Cleaning Chemicals
Isopropanol 100%
Ethanol 70%
Cidex® OPA
0.9% NaCl solution
How to Use Cleaner
Prior to cleaning, turn off the monitor and remove the power cable.
Soak a soft cloth in a recommended cleaner, then lightly rub the screen with no more than 1 N of force.
The cleaner could cause serious damage if it leaks inside the monitor while cleaning.
Do not clean the screens LCD panel as it may be damaged. Clean the other parts of the monitor.
Do not use benzene, thinner, acids or alkaline cleaners or other such solvents.
Cleaning guidelines for displays must only be carried out by medical professionals (doctors or nurses) and must not
be handled by patients.
LICENSE
Each model has different licenses. Visit www.lg.com for more information on the license.
The terms HDMI and HDMI High-Definition Multimedia Interface, and the HDMI
logo are trademarks or registered trademarks of HDMI Licensing LLC in the United
States and other countries.
VESA, VESA logo, DisplayPort compliance logo and DisplayPort compliance logo for
dual-mode source devices are all registered trademarks of the Video Electronics
Standards Association.
The SuperSpeed USB Trident logo is a registered trademark of USB Implementers
Forum, Inc.
ENGLISH
4
ASSEMBLY AND PREPARING
Product Composition
Please check whether all the components are included in the box before using the product. If there are any missing
components, contact the retailer where you purchased the product. Note that the product and related components
may look different from those shown here.
CD (Owner’s Manual / Software /
Guides) / Cards
Power Cord AC/DC Adaptor
DisplayPort Cable
HDMI Cable
CAUTION
Always use genuine LG components to ensure safety and product performance.
The product warranty will not cover damage or injury caused by the use of unauthorized components.
It is recommend that use the supplied components.
If you use generic cables not certified by LG, the screen may not display or there may be image noises.
ENGLISH
5
NOTE
The components may look different from those illustrated here.
Without prior notice, all product information and specifications contained in this manual are subject to change to
improve the performance of the product.
To purchase optional accessories, visit an electronics store or an online shopping site, or contact the retailer from
which you purchased the product.
The power cord provided may differ depending upon the region.
Supported Drivers and Software
Check the drivers and software supported by your product and refer to the manuals on the CD enclosed in the product
package.
Drivers and Software Installation Priority 27HJ710S
Monitor Driver Recommended O
True Color Pro Optional O
Required and Recommended: You can download and install the latest version from the enclosed CD or from the LGE
website (www.lg.com).
Optional: You can download and install the latest version from the LGE website (www.lg.com).
ENGLISH
6
Product and LED Control buttons
9
1 2 5 7 8 3 6 4
ENGLISH
7
LED Control button Functions
1
Input Selects the input mode.
2
PIP/PBP Displays the screens of two input modes on one monitor.
3
Hotkey 1, 2 Opens the Hot key Settings menu.
4
Brightness Adjusts the screen brightness.
5
OK Selects menus or options and confirms.
6
Contrast Adjusts the screen contrast.
7
Menu Displays LED Control buttons on the front panel and opens the menu mode.
8
Power
indicator
The green indicator illuminates if the power is on. The arrow indicates the position of the
power switch.
9
Power switch Turns the power on/off.
NOTE
The Power button is located at the bottom right on the front of the monitor.
If the Control Key LED is turned off, press the Control Key [Menu] button to turn the Control button LED on. When
the Control Key LED is turned on, you can control the Control Key functions.
ENGLISH
8
Connectors
1 2 3 4 5 6
7
9 8
1
Potential Equalization Conductor
- Connect an equipotential plug.
2
DC-IN (19 V ) Connector
- Connect the AC/DC adaptor.
3
RS-232C Connector
- Connect to an external device through the RS-232C connector and control the monitor.
4
SDI IN / SDI OUT Connector
- Receives or transmits serial digital component signals.
5
DVI-D IN / DVI-D OUT Connector
- Receives or transmits digital video signals.
6
HDMI IN Connector
- Receives digital video signals.
- DVI to HDMI/DP (DisplayPort) to HDMI cables may cause compatibility issues.
Make sure to use certified cables that bear the HDMI logo. If you do not use a certified HDMI cable, the
screen may not display, or a connection error may occur.
Recommended HDMI cable types
- High-speed HDMI
®
/
TM
cables
- High-speed HDMI
®
/
TM
Ethernet cables
ENGLISH
9
7
DP IN / DP OUT Connector
- Receives or transmits digital video signals.
- There may be no video output depending on the DP (DisplayPort) version of your PC.
- A cable with DisplayPort 1.2 specifications is recommended when using a Mini DP to DP (Mini DisplayPort
to DisplayPort) cable.
8
SERVICE ONLY Connector
- The USB port is used for service only.
9
5 V 0.9 A (USB Connector)
- Used for HW Calibrator (Optional Accessory) connection.
- A keyboard, mouse or USB device can be connected.
CAUTION
Precautions for Using USB Storage Devices
A USB storage device installed using an automatic recognition program or its own driver may not be
recognizable.
Some USB devices may not be supported or may not work properly.
It is recommended that you use a USB hub or hard disk drive with power supplied. (If insufficient power is
supplied, the USB storage device may not be detected properly)
5 V 0.9 A / (USB Connector)
- Connect your accessory to the USB input port.
- To use USB 3.0, connect a USB 3.0 Type A-B cable to your PC.
NOTE
All signal OUT connectors (SDI, DVI, DP) output signals when the monitor's power switch is on. Signals are not output
when the power switch is off.
This monitor supports the *Plug and Play feature.
* Plug and Play: A feature that allows you to add a device to your computer without having to reconfigure anything or
install any manual drivers.
The standard of the DVI and the SDI output terminals for transmitting a screen
- DVI OUT: Connect a 5-meter cable to transmit a copied screen to a monitor.
- SDI OUT: Connect a 100-meter cable (BELDEN 1694) to transmit a copied screen to a monitor.
ENGLISH
10
Installing the Monitor
Cable connection and organize
Before connecting the connectors, remove the back
door as shown below.
1 Remove the back door by lifting it in the direction
of the arrow.
The back door is held in place with a magnet.
2 After installing the cables, tidy them up using the
cable holders.
3 After tidying the cables, attach the back door and
use the product.
CAUTION
When the back door is attached to the monitor, the
monitor meets water resistance standards. Do not
use the monitor with the back door detached, as the
water resistance capability is not guaranteed without
the door.
ENGLISH
11
Installing on the Wall
Install the monitor at least 100 mm away from the
wall on each side of the monitor to ensure sufficient
ventilation. Detailed installation instructions can be
obtained from your local dealer. Please refer to the
manual to install and set up a tilting wall mounting
bracket.
100 mm
100 mm
100 mm
100 mm
To install the monitor to a wall, attach a wall mount
plate (optional) to the back of the monitor.
Make sure that the wall mount plate (optional) is
securely fixed to the monitor and to the wall.
1 Using screws longer than the standard length may
damage the inside of the product.
2 A non-VESA standard screw may damage
the product and cause the monitor to fall. LG
Electronics is not liable for any accidents relating to
the use of non-standard screws.
Wall Mount (mm)
100 x 100 200 x 100
Standard screw
M4 x L10 M4 x L10
Required screws
4 4
Wall Mount Plate
(optional)
RW120 RW240
NOTE
The screws (M4 x L10) can be found fastened in the
wall mount screw holes on the back of the monitor.
Use the screws specified by VESA standards.
The wall mount kit includes an installation manual and
the necessary parts.
The wall mount plate is an optional item. You can
obtain additional accessories from your local dealer.
The length of screws may differ depending on the wall
mount. Be sure to use the proper length.
For more information, please refer to the manual for
the wall mounting bracket.
ENGLISH
12
CAUTION
Disconnect the power cord first. Then move or install
the monitor. There is risk of electric shock.
Installing the monitor on the ceiling or on a slanted
wall may result in the monitor falling off, which could
lead to injury. Use an authorized LG wall mount and
contact the local dealer or qualified personnel.
Applying excessive force when tightening screws may
damage the monitor. Such damage is not covered by
the product warranty.
Use the wall mounting bracket and screws that
confirm to VESA standards. Damage caused by the
use or misuse of inappropriate components is not
covered by the product warranty.
When measured from the back of the monitor, the
length of each installed screw must be 8 mm or less.
Wall mount plate
Back of the
monitor
Screw
specifications
: M4 x L10
Wall mount plate
Back of the monitor
Max. 8 mm
Precautions for Connecting the Power Cord
100-240 V ~
Make sure to use the power cord that is provided in
the product package. Connect the cord to a grounded
power outlet.
If you need another power cord, please contact your
local dealer or the nearest retail store.
ENGLISH
13
SETTINGS
Activate Main Menu
1 Press the [Menu] button to activate the LED Control button. Pressing the [Menu] button while the LED Control
button is activated brings up the OSD menu.
2 Use the [ Brightness ] left/right and [ Contrast ] up/down LED Control buttons to navigate.
3 Press the [Menu] or [ Brightness] LED Control button to exit the OSD menu.
CAUTION
The actual On Screen Displays (OSD) that appear on your monitor may differ from those shown in this manual.
QUICK SETTINGS
Quick Settings
Quick Settings
Brightness 100 >
Contrast 70 >
Input
Hot key Settings >
User Preset >
Picture
General
: Exit
/ : Move
/ : Ok
ENGLISH
14
The following settings are available.
Quick Settings Description
Brightness
Adjusts the brightness of the screen.
NOTE
You can turn the Brightness Stabilization to On/ Off by pressing the button in the
Brightness menu.
When the Brightness Stabilization is On, Brightness menus becomes disabled.
When the Brightness Stabilization is On, SMART ENERGY SAVING and DFC menus
become disabled.
Contrast
Adjusts the color contrast of the screen.
Hot key Settings Assigns hotkeys for picture settings. Once configured, the assigned menu is activated when
a hotkey is pressed. (PIP Size, Mono, Color Temp, Gamma, Black Stabilizer, Screen Zoom,
Off)
Hotkey 1 Assigns a function to Hotkey 1.
Hotkey 2 Assigns a function to Hotkey 2.
ENGLISH
15
Quick Settings Description
User Preset User Preset allows the user to save or load up to 10 picture quality settings for multiple
connected devices in each preset.
NOTE
You can use User Preset to import or save items in Picture Adjust and Color Adjust of the
Picture menu.
User Name Allows the user to change and register a user name (Preset
1 ~ Preset 3, User 1 ~ User 7) as the user wants.
The user can enter a user name to be registered by using the
screen keyboard.
Preset 1 ~ Preset 3 are factory-set user names as samples
and the user can change the names.
Load User Settings Allows the user to change the picture quality settings by
loading the User Preset settings.
Save User Settings Saves the current picture quality settings in the
corresponding User Preset.
Preset 1 ~ Preset 3 are factory-set values as samples and
the user can change the values.
Preset 1: Use this preset for bluish colour.
Preset 2: Use this preset for greenish colour and brighter
low-gradation.
Preset 3: Use this preset to soften the red tone.
User 1 ~ User 7: Initial values are the same as the factory
settings.
Default User Settings Loads the initial basic picture settings.
User Preset Reset Initializes User Preset settings.
Initializes the existing user name and user settings to be
restored to factory settings (Preset 1 ~ Preset 3, User 1
~ User 7).
ENGLISH
16
INPUT
<Default screen> <Main screen and sub screen>
Input
Quick Settings
DisplayPort
Input
Picture
Main Input List DisplayPort >
Aspect Ratio Full Wide >
General
PBP / PIP >
PIP Size Small >
Main/Sub Screen Change
: Exit
/ : Move
/ : Ok
Input
Quick Settings
DisplayPort
MAIN
DVI-D
Input
Picture
Input List >
Aspect ratio >
General
PBP / PIP >
PIP Size Small >
Main/Sub Screen Change
: Exit
/ : Move
/ : Ok
The following settings are available.
Input Description
Main Input List
Selects the input mode.
Input List
Aspect Ratio Adjusts the aspect ratio of the screen. (Full Wide, Original, 1:1)
NOTE
The display may look the same for Full Wide, Original, and 1:1 options at the
recommended resolution (3840 x 2160).
Main Aspect
Ratio
Full Wide Displays the video to fit the PBP / PIP screen,
regardless of the video signal input.
Original Displays the video in the aspect ratio of the video
signal input on the PBP / PIP screen.
Sub Aspect
Ratio
Full Wide Displays the video to fit the PBP / PIP screen,
regardless of the video signal input.
Original Displays the video in the aspect ratio of the video
signal input on the PBP / PIP screen.
ENGLISH
17
Input Description
PBP / PIP
Displays the screens of two input modes on one monitor.
PIP Size
Adjusts the PIP size. (Small, Medium, Large)
Main/Sub Screen
Change
Toggles between the main screen and the sub screen in PBP / PIP mode.
NOTE
When there is no Sub Screen signal, PIP Size and Main/Sub Screen Change are disabled.
ENGLISH
18
PICTURE
Picture
Quick Settings
Picture Mode Custom >
Picture Adjust >
Input
Color Adjust >
Picture Reset >
Picture
General
: Exit
/ : Move
/ : Ok
The following settings are available.
Picture Description
Picture Mode
Custom Allows the user to adjust each element. The color mode of the main
menu can be adjusted.
Mono Mono (black and white) color mode.
sRGB A standard RGB color mode for the monitor and printer.
EBU A standard TV PAL color mode for broadcasts.
REC709 A standard HDTV color mode for broadcasts.
SMPTE-C A standard TV NTSC color mode for broadcasts.
DICOM A mode optimized for viewing medical images.
You can brighten the screen in the OSD menu.
Calibration 1 Adjusts to the last calibrated screen.
Calibration 2 Adjusts to the previously calibrated screen.
NOTE
Brightness Stabilization function can be enabled in Custom mode.
If the Picture Mode is changed in the DisplayPort (DP) input, the screen may flicker or the
resolution of your PC screen may be affected.
Calibration 2: This menu is enabled if you install the TRUE COLOR PRO program and perform
a calibration.
ENGLISH
19
Picture Description
Picture Adjust
Brightness
Adjusts the brightness of the screen.
NOTE
You can turn the Brightness Stabilization to On/ Off by pressing
the button in the Brightness menu.
When the Brightness Stabilization is On, Brightness menus
becomes disabled.
When the Brightness Stabilization is On, SMART ENERGY
SAVING and DFC menus become disabled.
Contrast Adjusts the color contrast of the screen.
Sharpness Adjusts the sharpness of the screen.
Brightness
Stabilization
Maintains the brightness configured of the screen.
On Adjusts the brightness automatically.
Off Deactivates the function, and allows the user to
configure the brightness.
SUPER RESOLUTION+ High Select this option for crystal clear images. Best for
high-definition video or games.
Middle The optimized picture quality is displayed when a
user wants images between low and high modes for
comfortable viewing. Best for UCC or SD video.
Low The optimized picture quality is displayed when a
user wants smooth and natural images. Best for
still images with less movement.
Off Select this option for the normal user experience.
Disables SUPER RESOLUTION+.
Black Level Sets the offset level. (HDMI only)
Offset: A reference for video signals. Offset is the darkest color that
the monitor can display.
High Keeps the current contrast ratio of the screen.
Low Lowers the black levels and raises the white levels
from the current contrast ratio of the screen.
ENGLISH
20
Picture Description
Picture Adjust HDMI ULTRA HD Deep
Color
Provides sharper images when connected to a device supporting
ULTRA HD Deep Color.
NOTE
If the connected device does not support ULTRA HD Deep Color, the
feature may not work properly.
If you experience a problem, set HDMI ULTRA HD Deep Color to
Off.
Formats supported at 4K@ 60 Hz
1)
Resolution
Frame rate
(Hz)
Deep color / chroma sampling
8-bit 10-bit
3840 x 2160
59.94
60.00
YCbCr 4:2:0
YCbCr 4:2:2
YCbCr 4:4:4 -
RGB 4:4:4 -
1) Supported when HDMI ULTRA HD Deep Color is set to ON.
DFC On Adjusts the brightness automatically according to
the screen.
Off Disables the DFC feature.
Response Time Sets the response time for displayed pictures based on the speed of
the screen.
For a normal environment, Normal is recommended. For a fast-moving
picture, Fast is recommended. Setting the response time to Fast may
cause image sticking.
Fast Sets the response time to fast.
Normal Sets the response time to normal.
Slow Sets the response time to slow.
Off Does not use the response time improvement
feature.
Black Stabilizer Objects can be seen more clearly in dark screen picture by adjusting
the black level.
Increasing the Black Stabilizer value brightens the low gray levels on
the screen. (You can easily distinguish objects on a dark game screen.)
Reducing the Black Stabilizer value darkens the low gray levels and
increases the dynamic contrast on the screen.
  • Page 1 1
  • Page 2 2
  • Page 3 3
  • Page 4 4
  • Page 5 5
  • Page 6 6
  • Page 7 7
  • Page 8 8
  • Page 9 9
  • Page 10 10
  • Page 11 11
  • Page 12 12
  • Page 13 13
  • Page 14 14
  • Page 15 15
  • Page 16 16
  • Page 17 17
  • Page 18 18
  • Page 19 19
  • Page 20 20
  • Page 21 21
  • Page 22 22
  • Page 23 23
  • Page 24 24
  • Page 25 25
  • Page 26 26
  • Page 27 27
  • Page 28 28
  • Page 29 29
  • Page 30 30
  • Page 31 31
  • Page 32 32
  • Page 33 33
  • Page 34 34
  • Page 35 35
  • Page 36 36
  • Page 37 37
  • Page 38 38
  • Page 39 39
  • Page 40 40
  • Page 41 41
  • Page 42 42
  • Page 43 43
  • Page 44 44

LG 27HJ710S Owner's manual

Type
Owner's manual
This manual is also suitable for

LG 27HJ710S-W monitor offers a range of features for various use cases. With its IPS LED display technology, it delivers accurate and vivid colors, making it ideal for professional photo editing, graphic design, and video production. The monitor's high resolution of 2560 x 1440 pixels ensures sharp and detailed images, enhancing productivity and visual clarity. Additionally, the monitor's adjustable stand allows for ergonomic positioning, reducing neck and eye strain during prolonged use.

Ask a question and I''ll find the answer in the document

Finding information in a document is now easier with AI