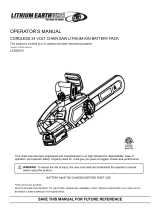
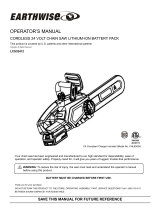
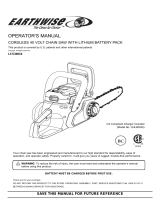
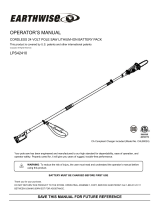
CHAIN SAW SAFETY WARNINGS
Causes and operator prevention of kickback:
Kickback may occur when the nose or tip of the guide bar
touches an object, or when the wood closes in and pinches
the saw chain in the cut.
Tip contact in some cases may cause a sudden reverse
reaction, kicking the guide bar up and back towards the
operator.
Pinching the saw chain along the top of the guide bar may
push the guide bar rapidly back towards the operator.
Either of these reactions may cause you to lose control of
the saw which could result in serious personal injury. Do not
rely exclusively upon the safety devices built into your saw.
As a chain saw user, you should take several steps to keep
your cutting jobs free from accident or injury.
Kickback is the result of tool misuse and/or incorrect
operating procedures or conditions and can be avoided by
taking proper precautions as given below:
It is possible to tie the extension cord and power
cord in a knot to prevent them from becoming
disconnected during use. Make the knot as
shown, then connect the plug end of the power
cord into the receptacle end of the extension
cord. This method can also be used to tie two
extension cords together.
WARNING: CALIFORNIA PROPOSITION 65 This product
contains chemicals known to the State of California to cause
cancer and birth defects or other reproductive harm.
WARNING: Some dust and debris created by this product
could contain chemicals known to the State of California to
cause cancer, birth defects or other reproductive harm. Some
examples of these chemicals are:
-chemicals in fertilizers
-compounds in insecticides, herbicides and pesticides
-arsenic and chromium from chemically treated lumber
Your risk from exposure to these chemicals varies, depending
on how often you do this type of work. To reduce your
exposure, work in a well ventilated area and with approved
safety equipment, such as dust masks that are specially
designed to filter out microscopic particles.
WARNING: Cancer and Reproductive Harm -
www.P65Warnings.ca.gov.
DOUBLE INSULATION – Double Insulation is a concept in
safety in electric power tools, which eliminates the need for
the usual three-wire grounded power cord. All exposed
metal parts are isolated from the internal metal motor
components with protecting insulation. Double insulated
tools do not need to be grounded.
NOTE: The double insulated system is intended to protect
the user from shock resulting from a break in the tool’s
internal insulation. Observe all normal safety precautions to
avoid electrical shock.
POLARIZED PLUGS – To reduce the risk of electric shock,
this equipment has a polarized plug (one blade is wider than
the other). This equipment must be used with a suitable
polarized 2 wire or 3 wire extension cord. Polarized
connections will fit together only one way. Make sure that
the receptacle end of the extension cord has large and small
blade slot widths. If the plug does not fit fully into the
extension cord, reverse the plug. If it still does not fit, obtain
a suitable extension cord. If the extension cord does not fit
fully into the outlet, contact a qualified electrician to install
the proper outlet. Do not change the tool plug or extension
cord in any way.
WARNING: Use outdoor extension cords marked SW-A,
SOW-A, STW-A, STOW-A, SJW-A, SJTW-A, or SJTOWA.
These cords are rated for outdoor use and reduce the risk of
electric shock.
EXTENSION CORD. Make sure your extension cord is in
good condition. When using an extension cord be sure it is
heavy enough to carry the current your product will draw. An
undersized extension cord will cause a drop in line voltage
resulting in loss of power and overheating. The following
table shows the correct size to use depending on cord
length and nameplate ampere rating. If in doubt, use the
next heavier gage. The smaller the gage number, the
heavier the cord.
• Maintain a firm grip, with thumbs and fingers
encircling the chain saw handles, with both hands on
the saw and position your body and arm to allow you
to resist kickback forces. Kickback forces can be
controlled by the operator, if proper precautions are taken.
Do not let go of the chain saw.
• Do not overreach and do not cut above shoulder
height. This helps prevent unintended tip contact and
enables better control of the chain saw in unexpected
situations.
• Only use replacement bars and chains specified by
the manufacturer. Incorrect replacement bars and chains
may cause chain breakage and/or kickback.
• Follow the manufacturer’s sharpening and
maintenance instructions for the saw chain.
Decreasing the depth gauge height can lead to increased
kickback.
Minimum Gage for Cord Sets
Volts Total Length of cord in Feet
120V 0-25 26-50 51-100 101-150
Ampere Rating
More Not More American wire Gage
Than Than
0 - 6 18 16 16 14
6 - 10 18 16 14 12
10 - 12 16 16 14 12
12 - 16 14 12 Not Recommended
4