Page is loading ...

1
1
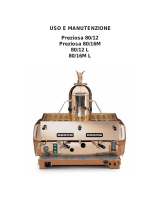
LIBRETTO ISTRUZIONI USO E MANUTENZIONE
EROGATORE AUTOMATICO CAFFÉ
Revisione Luglio 2011 Cod. MC457TR00IT
INSTRUCTION AND MAINTENANCE BOOKLET
AUTOMATIC COFFEE DISPENSER
Revision July 2011 Cod. MC457TR00EN

8
INDEX
GENERAL PRECAUTIONS 9
DECLARATION OF CONFORMITY 9
FOR YOUR SAFETY 9
Child safety 9
Safety during use 9
Safety during cleaning and maintenance 9
Disposal – Packaging 10
Directive 2002/96/CE 10
CUSTOMER ASISTANCE SERVICE 10
INSTALLATION 11
Precautions for the installation 11
Installation and first use 11
APPLIANCE DESCRIPTION 11
Instructions for use 12
Turning on the device 12
Preparation of coffee serving 12
User programming 12
“ENERGY SAVING” MODE 13
Alarms 13
PERIODIC MAINTENANCE 13
Cleaning and maintenance 13
DRAWINGS 14
Sizes and holes 14
Connections 15
8

9
PRESENTATION
Congratulations! You have purchased an appliance for automatic dispensing espresso coffee using coffee to
be ground in the grinder, and steam (for the preparation of hot beverages such as tea, cappuccino, etc.), like
a professional machine. The entire system is managed by a microprocessor that controls its functions and
safety.
GENERAL PRECAUTIONS
The instruction booklet is an integral part of this
device. It is very important that you keep the
instruction booklet together with the device for
future reference.
Should the device be sold or transferred to a third
party, please ensure that the booklet is given to
the new user, so that he/she can learn how to use
the machine and know the precautions.
Please read all this manual carefully before using
the device.
The information and rules contained within are
essential for correct installation and use by users.
DECLARATION OF CONFORMITY
The device complies with:
the provisions of the EEC Dir. 89/109 and
implementing Leg. Decree no.108 of 25/01/92 for
the parts destined to come into contact with food
substances;
as provided for by Community Directives
2006/95/EC (Low voltage), 2004/10/EC
(Electromagnetic Compatibility).
Attention: the validity of the CE marking is subject
to the integrity of the product and compliance with
the assembly and use conditions stated in the
installation, use and maintenance manual.
Any unauthorised modification will void the CE
marking.
FOR YOUR SAFETY
These precautions have been drawn up for our
safety and the safety of those using your new
appliance. Hence, we advice you to carefully read
them prior to installing and using the device.
Child safety
This appliance is not intended to be used by
persons (including children) with reduced mental
and mobility capacity or by inexperienced and
knowledge persons, unless the presence of a
safety responsible person.
Children should be supervised to ensure that they
don’t play with the machine.
Safety during use
The appliance is intended only for home use.
Avoid using it for any other purpose. Any other
use is considered inappropriate.
The manufacturer declines any responsibility for
any damage caused by improper or incorrect use.
Ensure good circulation of air around the
appliance. Avoid obstructing the side air vents and
the rear cooling vents.
Safety during cleaning and
maintenance
Before performing any routine and/or special
maintenance, check that the unit has been
disconnected from the electrical power supply.
Always keep the appliance clean and sterilised in
the parts that come into contact with or dispense
coffee.
Pay special attention when using spray cleaning
products: always avoid directing the spray
towards the air vents.
If there are any problems with the appliance, do
not attempt to repair it yourself.
If the power cable is damaged, it must be
replaced by the manufacturer, by its service or by
a person with similar qualifications, in order to
prevent any risk.
Repairs carried out by unskilled people will
instantly void the guarantee and may cause
damage or accidents.
Consult the content in this booklet. If you do not
find the information you need, contact the nearest
assistance centre.
The appliance must be serviced by an authorized
service centre. Do not try to have repairs carried
out by non-specialized personnel.
Always use original spare parts.
Only the use of original spare parts guarantees
the functional reliability and optimal performance
of the device.
9

10
Disposal – Packaging
All the materials are environmentally friendly and
can be recycled.
Please play your part in protecting the
environment by using suitable recycling centres.
Directive 2002/96/EC
This appliance is marked in
compliance with European Directive
2002/96/CE concerning waste from
electrical and electronic devices
(WEEE).
By ensuring that this product is disposed of
correctly, you will help avoid any negative
consequences for the environment and the health
of people that, in case of neglect, could occur due
to an improper treatment of this product at the end
of its useful life.
The symbol on the product indicates that this
device can not be treated as normal domestic
waste.
It must be delivered to the nearest recycling point
for electrical and electronic devices.
Disposal must be carried out in accordance with
the environmental rules in force for the disposal of
waste.
For more information on the treatment, recovery
and recycling of this product, please contact the
nearest citizens advice bureau (ecology and
environment department), or your residential
waste collection service, or the shop where you
bought the product.
Prior to scrapping the dispenser cut the power
cord and make it unusable.
CUSTOMER ASISTANCE SERVICE
Prior to calling the Technical Assistance service in
case the device is not working, we advise you to:
make sure that the plug is connected properly to
the socket;
should the cause of malfunction not be identified:
turn off the device, do not tamper with it and call
the Technical Assistance Service.
GUARANTEE CERTIFICATE:
what to do?
Your product is guaranteed, under the conditions
and terms stated in the certificate provided with
the product and based of the provisions of
legislative decree 24/02, for 24 months from the
date of delivery. Please keep the guarantee
certificate, duly filled in, to be shown to the
Authorised Technical Assistance Service in case
of need, together with a fiscally valid document
issued by the retailer at the time of purchase
(delivery bill, invoice, fiscal receipt, etc...) which
reports the name of the retailer, the delivery date,
the identification details of the product and the
price paid. Having checked the validity of the
guarantee, the Authorised Technical Assistance
Service will provide all the work required at the
premises and the spare parts completely free of
charge.
ANOMALIES AND MALFUNCTIONS:
who should I contact?
For any query the authorised assistance centre is
at your complete disposal to provide you with all
the necessary explanations; in any case, should
your device display anomalies or malfunctions,
prior to contacting the Authorised Assistance
Service, we strongly advise making the checks
describedabove.
PRODUCT SERIAL NUMBER.
Where is it?
It is important that you tell the Authorised
Technical Assistance Service the product initial
and serial number that you will find in the
guarantee certificate. In this way you can
contribute to avoiding pointless journeys by our
technicians, thus saving money as well.
10

11
INSTALLATION:
Precautions for the installation
Installation must always comply with current laws.
Check that the electrical system complies with
standards and can support the load of the
appliance (refer to the serial tag). The
manufacturer shall not be held liable if safety
standards are not observed.
The installation of the appliance and the
connection to the electric mains, including any
necessary modification to the domestic systems,
must only be carried by qualified personnel.
Install the machine in a horizontal position.
Suitably fix the unit containing the device to the
wall to avoid the risk of the unit falling forward
when extracting the device.
The appliance is heavy, move it with caution.
Carefully move the appliance taking care never to
turn it upside down.
Modifying or attempting to change the
characteristics of the appliance is forbidden.
The manufacturer declines any responsibility for
any damage caused to people or objects due to
modifications, accessories or devices of any type
applied to the appliance and not expressly
mentioned in this manual.
Ensure good circulation of air around the
appliance: make sure that the air vents provide a
good exchange and are not obstructed.
Installation and first use
Attention: it is necessary that these operations
are carried out by qualified technical
personnel.
Attention: For direct connection to the
network, you need a device that ensures the
network disconnection with a contacts
opening distance allow the complete
disconnection in the conditions of overvoltage
category III, according to the rules of
installation.
Attention: is necessary allow disconnection
device from the network after installation. The
disconnection can be obtained leaving free
access to the plug "M" or incorporating a
switch in the network according to the
installation rules.
For the installation follow the procedure indicated
below referring to the figures at the end of the
manual: (Fig. 1-2-3-7) Insert the plug “M” in the
socket and turn the main switch “G” to position 1
(ON). The buttons on the keypad will light up for
about 3 seconds to check that all signals are
working properly.
At the end of this phase, LEDS T5 and T6 will
start flashing until the boiler has reached the
optimal temperature for dispensing of coffee.
When used for the first time, or after a long period
of disuse, the pipes and dispensing assemblies
(run the machine without coffee) to get rid of any
impurities or encrustations in the pipes, in order to
ensure proper hygiene. You should also throw
away the first coffees as they may have an
unpleasant taste.
APPLIANCE DESCRIPTION
Legend:
A) Coffee bean container
B) Coffee grinding adjustment knob
C) Steam nozzle
D) Removable drawer for pods
E) Water tank
F) Coffee dispenser
G) ON/OFF main switch
H) Guide for appliance extraction
I) Cup shelf with built-in water tank
L) Softening filter
M) Electrical plug
Control panel:
T1) No water in tank
T2) Emptying drawer for pods
T3) Steam boiler activation
T4) Steam or water dispensing
T5) Single coffee dispensing
T6) Double coffee dispensing
T7) Decrease coffee dose
T8) Increase coffee dose
T1 T2 T3 T4 T5 T6 T7 T8
11

12
INSTRUCTIONS FOR USE
Turning on the device
Turn the appliance on using the main switch “N”
(Fig. 4 - refer to the figure at the end of the
manual). The buttons of the keypad will light up
for about 3 seconds to verify proper operation of
all signals. At the end of this phase, leds T5 and
T6 will start flashing until the boiler has reached
the optimal temperature for dispensing of coffee.
Extract the machine from the cabinet by sliding it
all the way out on the guides.
Take the intake pipe out of the water tub. It has a
softener filter on the end which needs to be
changed every two thousand servings.
Take the tub out of the compartment and fill it with
2 l of water.
Attention: always take the tub out of its
housing to fill it.
Pout coffee beans into container “A” located
above the machine.
Push the machine into the cabinet.
Now, with water present, the machine is ready to
dispense coffee.
Preparation of coffee servings
To dispense coffee
Place the cup under the dispensing spouts and
briefly press the key T5 to start dispensing coffee.
Press the key T5 again to stop dispensing once
the correct serving size has been reached.
If the machine is programmed, it stopped
automatically.
To dispense steam
The machine can dispense steam for the
preparation of tea, cappuccino, or any other hot
beverage. To obtain steam, start the boiler by
pressing key “T3 start steam boiler” . The LED will
start flashing for about one minute, then it will stay
on steady to show that the boiler is ready to
dispense. One press of the key “T4 steam”
activates the dispensing solenoid valve and pump.
Pressing the key “T4 steam” again turns off the
solenoid valve.
The boiler goes off after about 10 minutes.
To turn off the boiler, press the key “T3 steam
boiler start” again. The LED and the boiler will
switch off.
ITAL
IANO
User programming
Adjustment of grinding:
by means of knob “B” which is found on the back
side of the machine. Turn it clockwise for finer,
stronger coffee. Turn it counter-clockwise for
coarser, weaker coffee.
Programming type of coffee (long or short):
it is possible to modify the amount of water using
keys T7 and T8, obtaining either a long or short
coffee.
The following table summarizes the flow rates:
Table 1 - Coffee types
T7 T8 Flow rate
Coffee
types
Minimum Very short
Medium Medium
Maximum Long
The value set each time the machine is turned on
is the maximum.
If water runs out during dispensing, the cycle is
interrupted immediately.
User programming
The machine is programmed for home use only
with medium coffee roaster
Programming coffee dispensing
press the key T1 for 5 seconds.
Select coffee types to programming with T7 and
T8 keys (table 1).
Press the key T5 and dispense coffee.
Press the key T5 again to stop dispensing.
Repeat the operation for all coffee types (table 1).
Press key T1 to exit and save.
Adjustment of grinding time
press the key T2 for 5 seconds.
Select grinding time with T7 and T8 keys
(following table).
T7 T8 Grinding time
Minimum
Medium
Maximum
Press key T2 to exit and save.
12

13
“ENERGY SAVING” mode
“Energy saving” mode start automatically after 30
minutes if the machine is not used. Leds T5 and
T6 start flashing. Press any key to restart the
normal operation. Leds T5 and T6 will start
flashing until the boiler has reached the optimal
temperature for dispensing of coffee.
Alarms
If there is no water in the tank, led T1 start
flashing and the machine is shut down.
Fill the tank to restore machine operation.
After 20 coffee dispensed led T2 start flashing and
the machine is shut down. Extract the machine
from the cabinet by sliding it all the way out on the
guides. Extract removable drawer for pods located
on the right side of the machine. Empty the
drawer and swich off the machine. Now turn the
appliance on using the main switch “N” in order to
reset the machine.
Push the machine into the cabinet.
PERIODIC MAINTENANCE
The system uses a softening filter which must be
replaced with a spare that you can purchase from
a service centre.
Instructions for replacing the component are
provided on the package of the component.
Softener filter needs to be changed every two
thousand servings.
Cleaning and maintenance
Attention: always wait for the machine to cool
before cleaning.
Ordinary cleaning
For periodical cleaning use a soft damp cloth with
warm water and a mild detergent or specific
products for stainless steel.
Do not use steel wool or blades to remove any
scaling.
Never use abrasive products.
Before performing any routine and/or special
maintenance, check that the unit has been
disconnected from the electrical power supply.
Always keep the appliance clean. Remember to
periodically clean the cup shelf and to empty the
built-in water tank.
Periodically (about once every 5 months), clean
lime from he inside of the boiler by adding to the
fill water half a lass of vinegar or citric acid.
Completely dispense the ntire contents of the tank
with no coffee or pods. When ispensing is
complete, fill the tank with water and run a ew
empty cycles to remove the last residues.
In the event of extended periods of disuse, empty
the ank by pressing the “coffee” key .
Pay special attention when using spray cleaning
products: lways avoid directing the spray towards
the air vents.
13

DISEGNI – DRAWINGS – ILUSTRACIONES
Dimensioni e forature - sizes and holes - dimensiones y perforaciones
14
/