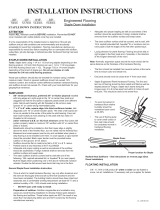
5. Carrying out the application
INSTALLATION PROCESS
1. Getting Started
• Read and fully understand these instructions BEFORE
starting the installation process.
• Make sure you have adequate quantities of adhesive,
straight moldings and corner moldings at hand, to complete
the whole project.
Check that you have all the necessary tools:
• Torpedo level
• Marker
• Toothed trowel
• Measuring tape
• Fine and straight tooth handsaw or chainsaw
• Sponge
• Bucket for preparing FOAMBOND
• Nails
• Hammer
• Sandpaper
2. Preparing the surface
• The approved surfaces for installing Premanufactured
CORAFORM Moldings are: cement based plaster, stucco,
exterior sheetrock, prestrained concrete, tilt up concrete,
insulated walls (EIFS); and in general, any approved
exterior wall systems. For surfaces not listed above,
conducting a trial installation is suggested.
• Both the surface and room temperatures shall be at a
minimum of 50°F (10°C) or higher.
• The surface shall be dry and free from dust, loose cement
or other non-cement polluting surfaces that might be
incompatible with the adhesive.
• The surface shall be level and flat and not have any
curvatures exceeding 3mm in a 1.2 m. length.
3. Draw guiding lines
a. Using a level and clay chalk draw the guiding lines where
the pieces will be aligned.
b. When dealing with Windows and doors, the moldings
may be aligned over the borders, it is also recommended
that the guiding lines are not spaced away from the border
over 3.75 cm.
4. Preparing the FOAMBOND
a. Following the instructions on the box, prepare the
FOAMBOND adhesive in sufficient quantity according to
the moldings to be installed in a period of time not to
exceed one hour. To avoid waste, start by preparing
relatively small amounts of FOAMBOND while experience
is acquired.
b. Check that FOAMBOND´s mixture obtains the
recommended “paste” type consistency, to ensure its
bonding properties at the time of placing the moldings on
the surface.
Coraform America Inc.
2306 Avenida Costa Este
San Diego, CA 92154
www.coraform.com
a. Apply FOAMBOND over the entire rear
surface of the CORAFORM molding using a
3/8” (9.5 mm) toothed trowel, being careful
that grooves are well defined and even.
b. Immediately place and press the
moulding into its final location, aligning it
over the previously drawn guiding lines,
while FOAMBOND is still uncured.
c. Measure the distance of the
trimmed pieces pending installation and cut
out the necessary units with a tungsten
carbide handsaw or circular saw with
diamond blade.
d. To avoid movements during
FOAMBOND’s curing; larger size moldings
will require a temporary support, such as
nails, same that must be installed in the
bottom border. Be careful not to puncture or
damage the molding.
e. In the joint between two pieces, leave a space
not lesser than 2 mm and not exceeding 4 mm.
Apply FOAMBOND in the seams between the
moldings and the surface and in the joints
between moldings. While FOAMBOND is still
uncured, detail the joints and remove excess
adhesive with a wet sponge.
f. If necessary, smooth the surface with No.
320 sandpaper when the material is dry.
• When applying the selected finishing
material, the same technique must be used
both in tools and in equipment to obtain
evenness in the finish.
6. Placing the finish
• After the CORAFORM moldings have been detailed and
cured, remove any temporary support used and perform the
finishing process with a material with exterior usage
specifications (paint, texture, sealer, etc.) according to the
manufacturer’s application recommendations.
• When applying the selected
finishing material, the same
technique must be used both in
tools and in equipment to
obtain evenness in the finish.
7. - Handling Precautions
Please remember: CORAFORM moldings are decorative only
and to enhance your home, and are never to be used in
structural applications, so the handling precautions are
recommended:
• Do not lift them with one hand by the thin points, do it rather
with both hands and from the robust section of the moulding.
• Once installed, do not place or hang up heavy objects. Foam
moldings that appear capable of supporting human weight by
service personnel should be structurally supported or
protected.
• Try not to damage by hitting or dropping the mouldings they
might crack or chip. If for some reason this would happen, our
FOAMBOND should be able to fix it by patching up the
damaged section.
/